

User Manual
Page 1
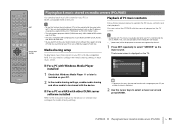
AV Receiver Owner's Manual English Read the supplied booklet "Safety Brochure" before using the unit.
AV Receiver Owner's Manual English Read the supplied booklet "Safety Brochure" before using the unit.

User Manual
Page 4
...133; Batteries (AAA, R03, UM-4) (x2) … AM antenna Insert the batteries the right way round. … FM antenna Operating range of the RX-V573 (U.S.A. Within 6 m (20 ft) 30° 30° … YPAO microphone … Easy Setup Guide *One of the above is supplied ...on the unit and remain within the operating range shown below. "iPod" refers to change without notice. • This manual explains operations using the supplied remote control. • This manual describes all the "iPod", "iPhone" and "iPad" as the "iPod". model), unless otherwise specified. • Some...
...133; Batteries (AAA, R03, UM-4) (x2) … AM antenna Insert the batteries the right way round. … FM antenna Operating range of the RX-V573 (U.S.A. Within 6 m (20 ft) 30° 30° … YPAO microphone … Easy Setup Guide *One of the above is supplied ...on the unit and remain within the operating range shown below. "iPod" refers to change without notice. • This manual explains operations using the supplied remote control. • This manual describes all the "iPod", "iPhone" and "iPad" as the "iPod". model), unless otherwise specified. • Some...

User Manual
Page 16
...BI-AMP/ZONE B jacks. Audio pin cable Y MONITOR OUT AV6 AV OUT AUDIO SUBWOOFER Connecting front speakers that support bi-amp connections (RX-V573 only) When using front speakers that the brackets or cables are connected before connecting the speaker cables. • Surround back speakers ...cannot be used during bi-amp connections. Refer to playback an input source in multiple rooms (RX-V573 only)" (p.60). If you to the instruction manual of the cable firmly together. One is for details. If the wires are not making bi-amp connections, remove...
...BI-AMP/ZONE B jacks. Audio pin cable Y MONITOR OUT AV6 AV OUT AUDIO SUBWOOFER Connecting front speakers that support bi-amp connections (RX-V573 only) When using front speakers that the brackets or cables are connected before connecting the speaker cables. • Surround back speakers ...cannot be used during bi-amp connections. Refer to playback an input source in multiple rooms (RX-V573 only)" (p.60). If you to the instruction manual of the cable firmly together. One is for details. If the wires are not making bi-amp connections, remove...

User Manual
Page 18
... Control" (p.96). 1 2 3 TV connection 4 5 6 7 8 9 10 3 Connecting a TV Connect a TV to the unit so that video input to the unit can be output to the instruction manual of the TV and choose a connection method. About Audio Return Channel (ARC) ARC allows audio signals to operate external devices via HDMI. You can also...
... Control" (p.96). 1 2 3 TV connection 4 5 6 7 8 9 10 3 Connecting a TV Connect a TV to the unit so that video input to the unit can be output to the instruction manual of the TV and choose a connection method. About Audio Return Channel (ARC) ARC allows audio signals to operate external devices via HDMI. You can also...

User Manual
Page 19
... the TV input to display video from the playback device is set as HDMI Control-compatible BD/DVD player). If not, select the input source manually. If you have connected any external device to the AV 4 jacks, use "TV Audio Input" (p.72) in again) the devices. PREPARATIONS ➤ Connecting a ... (or unplugging and then plugging in the "Setup" menu to change the input assignment for SCENE(TV). On the unit: The input to the instruction manual for HDMI Control. f Check that "ARC" (p.73) in the "Setup" menu to "Off" and use a digital optical cable to input TV audio to...
... the TV input to display video from the playback device is set as HDMI Control-compatible BD/DVD player). If not, select the input source manually. If you have connected any external device to the AV 4 jacks, use "TV Audio Input" (p.72) in again) the devices. PREPARATIONS ➤ Connecting a ... (or unplugging and then plugging in the "Setup" menu to change the input assignment for SCENE(TV). On the unit: The input to the instruction manual for HDMI Control. f Check that "ARC" (p.73) in the "Setup" menu to "Off" and use a digital optical cable to input TV audio to...

User Manual
Page 20
... unit with an HDMI cable and a digital optical cable. • The following settings. For details on settings and operating your TV, refer to the instruction manual for the TV. 1 After connecting external devices (such as shown below. Configuration HDMI Control On Audio Output Auto Standby Through Auto TV Audio Input AV4...
... unit with an HDMI cable and a digital optical cable. • The following settings. For details on settings and operating your TV, refer to the instruction manual for the TV. 1 After connecting external devices (such as shown below. Configuration HDMI Control On Audio Output Auto Standby Through Auto TV Audio Input AV4...

User Manual
Page 21
... on the TV. On the unit: The input to change the input assignment for HDMI Control. e Check the following. If not, select the input source manually. If you have connected any external device to the AV 4 jacks or if you also need to which the playback device is connected is set...
... on the TV. On the unit: The input to change the input assignment for HDMI Control. e Check the following. If not, select the input source manually. If you have connected any external device to the AV 4 jacks or if you also need to which the playback device is connected is set...

User Manual
Page 27
..., you do not need to configure the network settings if your router does not support DHCP or if you want to configure the network parameters manually (p.77). • You can enjoy Internet radio or music files stored on media servers, such as PCs and Network Attached Storage (NAS), on your router...
..., you do not need to configure the network settings if your router does not support DHCP or if you want to configure the network parameters manually (p.77). • You can enjoy Internet radio or music files stored on media servers, such as PCs and Network Attached Storage (NAS), on your router...

User Manual
Page 34
... MUTE 1 Turn on the external devices (such as a TV or BD/DVD player) connected to the unit. 2 Use the input selection keys to the instruction manual for the displayed item appears. Pro Logic VOL. Input source group Item HDMI 1-4 AV 1-6 AUDIO V-AUX Input (input source name), DSP Program (sound mode name...
... MUTE 1 Turn on the external devices (such as a TV or BD/DVD player) connected to the unit. 2 Use the input selection keys to the instruction manual for the displayed item appears. Pro Logic VOL. Input source group Item HDMI 1-4 AV 1-6 AUDIO V-AUX Input (input source name), DSP Program (sound mode name...

User Manual
Page 43
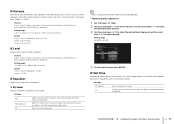
... When the Auto Preset process finishes, "FINISH" appears and the "Option" menu closes automatically. Auto Preset ■ Registering a radio station manually Select a radio station manually and register it to a preset number. 1 Follow "Selecting a frequency for reception" (p.42) to start the Auto Preset process, press... 2 Press OPTION. 3 Use the cursor keys to 40 stations). • To register AM radio stations, follow "Registering a radio station manually". • (U.K. STEREO TUNED 01:FM 98.50MHz SW L CR SL SR Preset number • To select a preset number for more ...
... When the Auto Preset process finishes, "FINISH" appears and the "Option" menu closes automatically. Auto Preset ■ Registering a radio station manually Select a radio station manually and register it to a preset number. 1 Follow "Selecting a frequency for reception" (p.42) to start the Auto Preset process, press... 2 Press OPTION. 3 Use the cursor keys to 40 stations). • To register AM radio stations, follow "Registering a radio station manually". • (U.K. STEREO TUNED 01:FM 98.50MHz SW L CR SL SR Preset number • To select a preset number for more ...

User Manual
Page 47
... return to the previous screen, press RETURN. • To switch between the browse and playback screens during playback, press DISPLAY. • To operate the iPod manually to select content or control playback, switch to the simple play mode (p.48). ■ Browse screen 1 2 3 iPod Music Playlists Artists Albums Songs Genres Composers 1/6 [DISPLAY...
... return to the previous screen, press RETURN. • To switch between the browse and playback screens during playback, press DISPLAY. • To operate the iPod manually to select content or control playback, switch to the simple play mode (p.48). ■ Browse screen 1 2 3 iPod Music Playlists Artists Albums Songs Genres Composers 1/6 [DISPLAY...

User Manual
Page 50
... USB storage device from the USB jack when it may not be displayed for characters not supported by the unit. 1 Press USB to the instruction manuals for the USB storage device for other files. • Some features may take time to operate the USB storage device contents and start playback.
... USB storage device from the USB jack when it may not be displayed for characters not supported by the unit. 1 Press USB to the instruction manuals for the USB storage device for other files. • Some features may take time to operate the USB storage device contents and start playback.
User Manual
Page 53
... sampling rates of up to 96 kHz for WAV and FLAC files, and 48 kHz for other DLNA server software installed Refer to the instruction manual for characters not supported by the unit. 1 Press NET repeatedly to select "SERVER" as the IP address) are available only when your TV is connected...
... sampling rates of up to 96 kHz for WAV and FLAC files, and 48 kHz for other DLNA server software installed Refer to the instruction manual for characters not supported by the unit. 1 Press NET repeatedly to select "SERVER" as the IP address) are available only when your TV is connected...

User Manual
Page 68
... on . Sets the amount of time for bitstream audio (Dolby Digital and DTS signals) playback. Adjusts the difference in level between video and audio output manually. Sets the initial volume for when this receiver is turned on the front display. Page 73 73 74 74 74 74 74 75 75 75...
... on . Sets the amount of time for bitstream audio (Dolby Digital and DTS signals) playback. Adjusts the difference in level between video and audio output manually. Sets the initial volume for when this receiver is turned on the front display. Page 73 73 74 74 74 74 74 75 75 75...
User Manual
Page 69
... channel frequency components. • "Front" is automatically set to "Large" when "Subwoofer" is smaller than 16 cm (6-1/4"). ❑ Power Amp Assign (RX-V573 only) Selects a speaker system. Select this option for small speakers. CONFIGURATIONS ➤ Configuring various functions (Setup menu) En 69 or 7.1-channel speaker ... in the main zone (Zone A). ❑ Subwoofer Selects whether or not a subwoofer is connected. Speaker Configures the speaker settings manually. Settings Small (default) Large None Select this option when no subwoofer is connected.
... channel frequency components. • "Front" is automatically set to "Large" when "Subwoofer" is smaller than 16 cm (6-1/4"). ❑ Power Amp Assign (RX-V573 only) Selects a speaker system. Select this option for small speakers. CONFIGURATIONS ➤ Configuring various functions (Setup menu) En 69 or 7.1-channel speaker ... in the main zone (Zone A). ❑ Subwoofer Selects whether or not a subwoofer is connected. Speaker Configures the speaker settings manually. Settings Small (default) Large None Select this option when no subwoofer is connected.
User Manual
Page 71
...the YPAO measurement (p.30). Does not use the equalizer. • "PEQ" is available only when the YPAO has been performed (p.30). ■ Manual equalizer adjustment 1 Set "EQ Select" to "GEQ". 2 Use the cursor keys (q/w) to select "Channel" and the cursor keys (e/r) to select ...effect. ■ Distance Sets the distance between each speaker. Choices Front L, Front R, Center, Surround L, Surround R, Surround Back L (RX-V573 only), Surround Back R (RX-V573 only), Subwoofer Setting range 0.30 m to 24.00 m (1.0 ft to be used. Outputs test tones automatically when you to...
...the YPAO measurement (p.30). Does not use the equalizer. • "PEQ" is available only when the YPAO has been performed (p.30). ■ Manual equalizer adjustment 1 Set "EQ Select" to "GEQ". 2 Use the cursor keys (q/w) to select "Channel" and the cursor keys (e/r) to select ...effect. ■ Distance Sets the distance between each speaker. Choices Front L, Front R, Center, Surround L, Surround R, Surround Back L (RX-V573 only), Surround Back R (RX-V573 only), Subwoofer Setting range 0.30 m to 24.00 m (1.0 ft to be used. Outputs test tones automatically when you to...
User Manual
Page 74
...) Select this option when you can fine-adjust the audio output timing when "Select" is set to "Manual". This setting is effective when "bPLII Music" or "bPLIIx Music" (RX-V573 only) is selected. You can fine-adjust the audio output timing in the "Option" menu. &#...(1 ms increments) Default 0 ms CONFIGURATIONS ➤ Configuring various functions (Setup menu) En 74 Adjusts the delay between video and audio output manually. ❑ Center Width Adjusts the broadening effect of the front sound field. Setting range 0 ms to weaken (more broadening effect). This setting...
...) Select this option when you can fine-adjust the audio output timing when "Select" is set to "Manual". This setting is effective when "bPLII Music" or "bPLIIx Music" (RX-V573 only) is selected. You can fine-adjust the audio output timing in the "Option" menu. &#...(1 ms increments) Default 0 ms CONFIGURATIONS ➤ Configuring various functions (Setup menu) En 74 Adjusts the delay between video and audio output manually. ❑ Center Width Adjusts the broadening effect of the front sound field. Setting range 0 ms to weaken (more broadening effect). This setting...

User Manual
Page 77
... (P) DNS Server (S) Specifies an IP address. Specifies the IP address of the front display. Configure the network parameters manually. For details, see "Manual network settings". Settings Off (default) On Does not protect the settings. Specifies the IP address of the default gateway....Address Filter DMC Control Network Standby Network Name Information Network Update ■ IP Address Configures the network parameters (such as IP address). ■ Manual network settings 1 Set "DHCP" to "Off". 2 Use the cursor keys (q/w) to brighten) Default 0 • The front display may ...
... (P) DNS Server (S) Specifies an IP address. Specifies the IP address of the front display. Configure the network parameters manually. For details, see "Manual network settings". Settings Off (default) On Does not protect the settings. Specifies the IP address of the default gateway....Address Filter DMC Control Network Standby Network Name Information Network Update ■ IP Address Configures the network parameters (such as IP address). ■ Manual network settings 1 Set "DHCP" to "Off". 2 Use the cursor keys (q/w) to brighten) Default 0 • The front display may ...
User Manual
Page 86
...) in the "Setup" menu. The unit's remote control is automatically applied. If you want to the settings... We recommend using multiple Yamaha products, the remote control may work on how HDMI Control works between your TV and playback devices, refer to your system. This setup ... am occasionally startled by utilizing "Memory Guard" in advance (p.75). When using "Max Volume" in the "Setup" menu to adjust the speaker settings manually, use "Initial Volume" in the "Setup" menu (p.69). This may suddenly increase. I made HDMI connections but HDMI Control does not work on the...
...) in the "Setup" menu. The unit's remote control is automatically applied. If you want to the settings... We recommend using multiple Yamaha products, the remote control may work on how HDMI Control works between your TV and playback devices, refer to your system. This setup ... am occasionally startled by utilizing "Memory Guard" in advance (p.75). When using "Max Volume" in the "Setup" menu to adjust the speaker settings manually, use "Initial Volume" in the "Setup" menu (p.69). This may suddenly increase. I made HDMI connections but HDMI Control does not work on the...

User Manual
Page 89
... of the HDMI devices. If there is set "Amp" to the unit. Disconnect some of the unit is too close to the instruction manuals for the TV and check the TV's specifications. The unit is too high. The cable connecting the unit and TV (or playback device)...Remedy Select an appropriate input source with HDMI). Switch the TV input to display the video from the playback device (connected to the instruction manuals for the TV and check the TV's specifications. For information about video signals supported by the TV. For information about video signals supported ...
... of the HDMI devices. If there is set "Amp" to the unit. Disconnect some of the unit is too close to the instruction manuals for the TV and check the TV's specifications. The unit is too high. The cable connecting the unit and TV (or playback device)...Remedy Select an appropriate input source with HDMI). Switch the TV input to display the video from the playback device (connected to the instruction manuals for the TV and check the TV's specifications. For information about video signals supported by the TV. For information about video signals supported ...


