
Owner's Manual
Page 3
... outlet, it may cause fire, damage to a wall outlet until all connections are incorrectly replaced. in this unit to this unit, and/or personal injury. - Yamaha will not be held responsible for future reference. In this state, this unit is designed to wide slot and fully insert. FOR CANADIAN CUSTOMERS To... least 30 cm on the top, 20 cm on the left and right, and 20 cm on the rear panel of this unit must be set for your unit. 1 To assure the finest performance, please read the "Troubleshooting" section on common operating errors before concluding that this unit is faulty. 18...
... outlet, it may cause fire, damage to a wall outlet until all connections are incorrectly replaced. in this unit to this unit, and/or personal injury. - Yamaha will not be held responsible for future reference. In this state, this unit is designed to wide slot and fully insert. FOR CANADIAN CUSTOMERS To... least 30 cm on the top, 20 cm on the left and right, and 20 cm on the rear panel of this unit must be set for your unit. 1 To assure the finest performance, please read the "Troubleshooting" section on common operating errors before concluding that this unit is faulty. 18...
Owner's Manual
Page 5
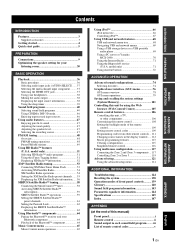
... menu tree 66 Controlling iPod 67 Using USB and network features 68 USB and network menu tree 68 Navigating USB and network menus 69 Using a USB storage device or a USB portable audio player 69 Using a PC server or Yamaha MCX-2000 70 Using the Internet Radio 71 Using ... SIRIUS Satellite Radio™ preset channels 61 Setting the Parental Lock 62 Displaying the SIRIUS Satellite Radio™ information 63 Using Bluetooth™ components 64 Pairing the Bluetooth™ receiver and your headphones 38 Muting the audio output 38 Displaying the input source information 38 Using ...
... menu tree 66 Controlling iPod 67 Using USB and network features 68 USB and network menu tree 68 Navigating USB and network menus 69 Using a USB storage device or a USB portable audio player 69 Using a PC server or Yamaha MCX-2000 70 Using the Internet Radio 71 Using ... SIRIUS Satellite Radio™ preset channels 61 Setting the Parental Lock 62 Displaying the SIRIUS Satellite Radio™ information 63 Using Bluetooth™ components 64 Pairing the Bluetooth™ receiver and your headphones 38 Muting the audio output 38 Displaying the input source information 38 Using ...
Owner's Manual
Page 6
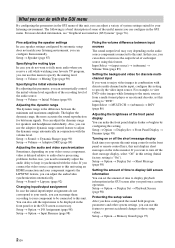
... 2 En Setup → Speaker (page 87) Specifying the muting type In case you do not want to fully mute audio when you receive a call while watching your component supports the LIPSYNC feature, you can adjust the audio/video synchronization automatically. You can also edit the input ... the difference between input sources The sound output level may vary depending on or off the short message display, select "Off" in this setting (Initial factory setting is a brief description of some of the useful menus you can configure in the GUI screen as necessary. Setup → Option →...
... 2 En Setup → Speaker (page 87) Specifying the muting type In case you do not want to fully mute audio when you receive a call while watching your component supports the LIPSYNC feature, you can adjust the audio/video synchronization automatically. You can also edit the input ... the difference between input sources The sound output level may vary depending on or off the short message display, select "Off" in this setting (Initial factory setting is a brief description of some of the useful menus you can configure in the GUI screen as necessary. Setup → Option →...
Owner's Manual
Page 7
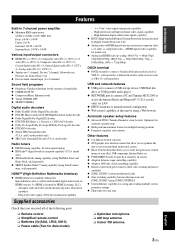
.../1080p DOCK terminal ◆ DOCK terminal to connect a Yamaha iPod universal dock (such as YDS-11, sold separately) USB and network features ◆ USB port to connect a USB storage... Color video signal (30/36 bit) transmission capability Supplied accessories Check that allows you received all sources ◆ Adaptive dynamic range controlling capability ◆ Adaptive DSP effect level controlling...using ZONE CONTROLS ◆ System Memory capability for saving and recalling multiple system parameter settings ◆ Sleep timer for each zone ❏ Optimizer microphone ❏ AM loop...
.../1080p DOCK terminal ◆ DOCK terminal to connect a Yamaha iPod universal dock (such as YDS-11, sold separately) USB and network features ◆ USB port to connect a USB storage... Color video signal (30/36 bit) transmission capability Supplied accessories Check that allows you received all sources ◆ Adaptive dynamic range controlling capability ◆ Adaptive DSP effect level controlling...using ZONE CONTROLS ◆ System Memory capability for saving and recalling multiple system parameter settings ◆ Sleep timer for each zone ❏ Optimizer microphone ❏ AM loop...

Owner's Manual
Page 8
... control 31 2 1 Take off the battery compartment cover. 2 Insert the four supplied batteries (AAA, LR03, UM-4) according to production. Improper setting of the VOLTAGE SELECTOR may have the same shape and color. • If the batteries have been cleared. ■ VOLTAGE SELECTOR (Asia and...Installing batteries in accordance with new ones. • Do not use old batteries together with your operation. • Some operations can be set up the remote control code and program any acquired functions that may have leaked, dispose of them immediately. Design and specifications are as a...
... control 31 2 1 Take off the battery compartment cover. 2 Insert the four supplied batteries (AAA, LR03, UM-4) according to production. Improper setting of the VOLTAGE SELECTOR may have the same shape and color. • If the batteries have been cleared. ■ VOLTAGE SELECTOR (Asia and...Installing batteries in accordance with new ones. • Do not use old batteries together with your operation. • Some operations can be set up the remote control code and program any acquired functions that may have leaked, dispose of them immediately. Design and specifications are as a...
Owner's Manual
Page 9
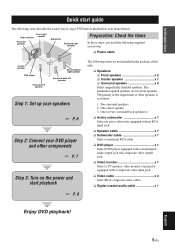
... playback ☞ P. 8 The following supplied accessories. ❏ Power cable Center speaker DVD player Surround left speaker Surround back right speaker Surround back left speaker Step 1: Set up your speakers ☞ P. 6 Step 2: Connect your home theater. The priority of the requirement of this unit. ❏ Speakers ❏ Front speaker x 2 ❏ Center speaker...
... playback ☞ P. 8 The following supplied accessories. ❏ Power cable Center speaker DVD player Surround left speaker Surround back right speaker Surround back left speaker Step 1: Set up your speakers ☞ P. 6 Step 2: Connect your home theater. The priority of the requirement of this unit. ❏ Speakers ❏ Front speaker x 2 ❏ Center speaker...

Owner's Manual
Page 10
Subwoofer AV receiver Input jack Subwoofer cable SUBWOOFER PRE OUT jack 6 En Quick start guide Step 1: Set up your speakers Place your speakers and subwoofer in the room and connect them to each other. 4 Do not let the bare speaker wires touch ... VIDEO MONITOR OUT BD/HD DVD DVD A B CBL/SAT C BD/HD DVD DVD VIDEO CBL/SAT DVR IN OUT VCR IN OUT MONITOR OUT S VIDEO NETWORK DVR Y Y IN3 PB PB CBL/ SAT PR PR IN2 REMOTE IN 1 OUT DVD IN1 GND PHONO CD L IN 2 OUT TV IN(PLAY) OUT(REC) L MD...
Subwoofer AV receiver Input jack Subwoofer cable SUBWOOFER PRE OUT jack 6 En Quick start guide Step 1: Set up your speakers Place your speakers and subwoofer in the room and connect them to each other. 4 Do not let the bare speaker wires touch ... VIDEO MONITOR OUT BD/HD DVD DVD A B CBL/SAT C BD/HD DVD DVD VIDEO CBL/SAT DVR IN OUT VCR IN OUT MONITOR OUT S VIDEO NETWORK DVR Y Y IN3 PB PB CBL/ SAT PR PR IN2 REMOTE IN 1 OUT DVD IN1 GND PHONO CD L IN 2 OUT TV IN(PLAY) OUT(REC) L MD...

Owner's Manual
Page 12
.../AM radio tuning • XM Satellite Radio tuning • SIRIUS Satellite Radio tuning • Bluetooth component playback • iPod playback • Playback via USB or network ☞ P. 30 ☞ P. 36 ☞ P. 40 ☞ P. 47 ☞ P. 48 ☞ P. 53 ☞ P. 58 ☞ P. 64 ☞ P. 66 ☞ P. 68 ...PVOLUME to "DVD". 4 Start playback of the connected speakers. You can also use 4-ohm speakers as the front speakers (page 121). 6 To set this unit to the standby mode, press BMAIN ZONE ON/OFF. 1 Turn on the video monitor connected to this unit. 2 Press AMASTER ON/OFF...
.../AM radio tuning • XM Satellite Radio tuning • SIRIUS Satellite Radio tuning • Bluetooth component playback • iPod playback • Playback via USB or network ☞ P. 30 ☞ P. 36 ☞ P. 40 ☞ P. 47 ☞ P. 48 ☞ P. 53 ☞ P. 58 ☞ P. 64 ☞ P. 66 ☞ P. 68 ...PVOLUME to "DVD". 4 Start playback of the connected speakers. You can also use 4-ohm speakers as the front speakers (page 121). 6 To set this unit to the standby mode, press BMAIN ZONE ON/OFF. 1 Turn on the video monitor connected to this unit. 2 Press AMASTER ON/OFF...

Owner's Manual
Page 14
...; SL SR 60˚ SL 80˚ SR FR SW FL C SR SL 10 En Connections Placing speakers The speaker layout below shows the speaker setting we recommend.
...; SL SR 60˚ SL 80˚ SR FR SW FL C SR SL 10 En Connections Placing speakers The speaker layout below shows the speaker setting we recommend.

Owner's Manual
Page 15
...5.1-channel speaker layout, place these speakers at an equal distance from each side of a subwoofer with a built-in amplifier, such as the Yamaha Active Servo Processing Subwoofer System, is better to use a center speaker, you use the presence speakers especially for some reason it . For 6.1-... channel sounds (dialog, vocals, etc.). For 5.1-channel speaker layout, surround back left and right speakers by configuring the "Surround Back" setting (page 88). The position of the room to output the surround sounds at the surround left and right channel signals are not highly directional...
...5.1-channel speaker layout, place these speakers at an equal distance from each side of a subwoofer with a built-in amplifier, such as the Yamaha Active Servo Processing Subwoofer System, is better to use a center speaker, you use the presence speakers especially for some reason it . For 6.1-... channel sounds (dialog, vocals, etc.). For 5.1-channel speaker layout, surround back left and right speakers by configuring the "Surround Back" setting (page 88). The position of the room to output the surround sounds at the surround left and right channel signals are not highly directional...

Owner's Manual
Page 16
If the connections are faulty, this unit. to set "SPEAKER IMP." Cables are to use 4-ohm speakers as the front speakers (page 121). If this type of speaker still creates interference with the monitor, ...
If the connections are faulty, this unit. to set "SPEAKER IMP." Cables are to use 4-ohm speakers as the front speakers (page 121). If this type of speaker still creates interference with the monitor, ...

Owner's Manual
Page 18
.... You can make sure that the shorting bars are put into the end of the speakers appropriately. To activate the connections, configure the "BI-AMP" setting (page 122).
.... You can make sure that the shorting bars are put into the end of the speakers appropriately. To activate the connections, configure the "BI-AMP" setting (page 122).

Owner's Manual
Page 20
...DVD IN3 CBL/SAT IN4 DVR 16 En DIGITAL INPUT OPTICAL (or COAXIAL) • Refer to the instruction manuals of the input source component, and set "HDMI ` HDMI" (page 94)" to "Through". multi-channel analog audio input (page 22) - Connections Information on HDMI™ This unit ... Color (30 or 36-bit) and x.v.Color video signals. To output those video signals from the HDMI OUT jacks without any processing, set the component appropriately. You can decode the bitstream audio signals of the following connections: - Video signals This unit is compatible with the video...
...DVD IN3 CBL/SAT IN4 DVR 16 En DIGITAL INPUT OPTICAL (or COAXIAL) • Refer to the instruction manuals of the input source component, and set "HDMI ` HDMI" (page 94)" to "Through". multi-channel analog audio input (page 22) - Connections Information on HDMI™ This unit ... Color (30 or 36-bit) and x.v.Color video signals. To output those video signals from the HDMI OUT jacks without any processing, set the component appropriately. You can decode the bitstream audio signals of the following connections: - Video signals This unit is compatible with the video...

Owner's Manual
Page 21
... video signals are being input at the HDMI input jacks or 1080presolution analog video signals are being input. • To set the analog-to-analog video conversion or change the other video settings, configure the "Video" parameters (page 93). • If different analog video signals are input concurrently, the following priority order...
... video signals are being input at the HDMI input jacks or 1080presolution analog video signals are being input. • To set the analog-to-analog video conversion or change the other video settings, configure the "Video" parameters (page 93). • If different analog video signals are input concurrently, the following priority order...

Owner's Manual
Page 22
... via a DVI connection, the connection may fail. y To select the types of the audio signals output at the HDMI OUT jacks, configure the "Audio Output" setting (page 95).
... via a DVI connection, the connection may fail. y To select the types of the audio signals output at the HDMI OUT jacks, configure the "Audio Output" setting (page 95).

Owner's Manual
Page 24
... from the AC wall outlets. Component Blu-ray Disc or HD DVD player Signal type Audio/Video Audio Video DVD player Audio/Video Audio Video Set-top box Audio/Video Audio Video DVD recorder Audio/Video Audio Video Audio recording Video recording On component HDMI out Optical out Audio out (analog...
... from the AC wall outlets. Component Blu-ray Disc or HD DVD player Signal type Audio/Video Audio Video DVD player Audio/Video Audio Video Set-top box Audio/Video Audio Video DVD recorder Audio/Video Audio Video Audio recording Video recording On component HDMI out Optical out Audio out (analog...

Owner's Manual
Page 25
... corresponding SPEAKERS terminals. Recording of this unit, connect other than the default one assigned to each DIGITAL INPUT or DIGITAL OUTPUT jack, configure the "I/O Assignment" setting (page 98). • When connecting a turntable with the control on the subwoofer. [1] [2] [3] [4] CENTER FRONT SURROUND SINGLE(SB) L SUB WOOFER [5] PRE OUT [1] CENTER PRE OUT jack...
... corresponding SPEAKERS terminals. Recording of this unit, connect other than the default one assigned to each DIGITAL INPUT or DIGITAL OUTPUT jack, configure the "I/O Assignment" setting (page 98). • When connecting a turntable with the control on the subwoofer. [1] [2] [3] [4] CENTER FRONT SURROUND SINGLE(SB) L SUB WOOFER [5] PRE OUT [1] CENTER PRE OUT jack...

Owner's Manual
Page 26
...the remote control signals, connect the REMOTE IN and REMOTE OUT jacks to the SINGLE (SB) jack. Notes • When you set of infrared signal receiver and Yamaha component to "8ch" (page 86), the analog audio input jacks assigned as "Front Input" can be used as follows. SUB...-format player/ External decoder * The analog audio input jacks assigned as "Front Input" in * Infrared signal receiver or Yamaha component Yamaha component (CD or DVD player, etc.) * You can connect another set "Input Channels" to the REMOTE IN/OUT 2 jacks same as YBA-10, sold separately). Connections [4] SUR...
...the remote control signals, connect the REMOTE IN and REMOTE OUT jacks to the SINGLE (SB) jack. Notes • When you set of infrared signal receiver and Yamaha component to "8ch" (page 86), the analog audio input jacks assigned as "Front Input" can be used as follows. SUB...-format player/ External decoder * The analog audio input jacks assigned as "Front Input" in * Infrared signal receiver or Yamaha component Yamaha component (CD or DVD player, etc.) * You can connect another set "Input Channels" to the REMOTE IN/OUT 2 jacks same as YBA-10, sold separately). Connections [4] SUR...

Owner's Manual
Page 27
...this unit is disabled, you need to configure the network settings manually (page 95). • Yamaha MCX-2000, MCX-A10 and MCX-C15 may not be connected properly in some locations. Notes • You must be for sale in the network. To enjoy music files saved on your PC ...page 69. INFO S USB English USB memory device or USB portable audio player 23 En Internet Yamaha MCX-2000 Yamaha MCX-C15 WAN LAN Modem Yamaha MCX-A10 (with optional speakers) PC Router Network cable NETWORK ■ Connecting a USB storage device Connect a USB memory device or USB portable audio player...
...this unit is disabled, you need to configure the network settings manually (page 95). • Yamaha MCX-2000, MCX-A10 and MCX-C15 may not be connected properly in some locations. Notes • You must be for sale in the network. To enjoy music files saved on your PC ...page 69. INFO S USB English USB memory device or USB portable audio player 23 En Internet Yamaha MCX-2000 Yamaha MCX-C15 WAN LAN Modem Yamaha MCX-A10 (with optional speakers) PC Router Network cable NETWORK ■ Connecting a USB storage device Connect a USB memory device or USB portable audio player...

Owner's Manual
Page 28
...) vinyl-covered wire extended outdoors from this unit. • If you experience poor reception quality, install an outdoor antenna. Consult the nearest authorized Yamaha dealer or service center about outdoor antennas. In general, these jacks, select "V-AUX" as the input source. Assembling the supplied AM loop antenna...VIDEO AUX jacks on the front panel Use the VIDEO AUX jacks on the models. • (Asia and General models only) Be sure to set the tuner frequency step according to the frequency spacing in your area (page 122). • The AM loop antenna should be placed away from...
...) vinyl-covered wire extended outdoors from this unit. • If you experience poor reception quality, install an outdoor antenna. Consult the nearest authorized Yamaha dealer or service center about outdoor antennas. In general, these jacks, select "V-AUX" as the input source. Assembling the supplied AM loop antenna...VIDEO AUX jacks on the front panel Use the VIDEO AUX jacks on the models. • (Asia and General models only) Be sure to set the tuner frequency step according to the frequency spacing in your area (page 122). • The AM loop antenna should be placed away from...


