

Owner's Manual
Page 6
...saver 23 Sleep timer 23 Auto standby 24 DivX® VOD registration code 24 Audio setup menu 24 Setting the analog output 24 Setting the digital output 25 Setting the HDMI audio 26 CD upsampling 26 Night mode 26 Lip synchronization 27 Video setup menu 27 TV type 27 Setting the TV... display 27 Progressive 28 Picture setting 29 Selecting the black level 30 Closed caption 30 HDMI setup 30 Preference setup menu 31 Audio...
...saver 23 Sleep timer 23 Auto standby 24 DivX® VOD registration code 24 Audio setup menu 24 Setting the analog output 24 Setting the digital output 25 Setting the HDMI audio 26 CD upsampling 26 Night mode 26 Lip synchronization 27 Video setup menu 27 TV type 27 Setting the TV... display 27 Progressive 28 Picture setting 29 Selecting the black level 30 Closed caption 30 HDMI setup 30 Preference setup menu 31 Audio...

Owner's Manual
Page 9
...jack Connect to the audio input jacks of your AV receiver. 7 VIDEO OUT - Rear panel HDMI 1 2 3 4 567 1 AC power cord Connect to a standard AC outlet. 2 HDMI output jack Connect to the HDMI input jack of your HDMI component. 3 AUDIO OUT (L, R) jacks Connect to the composite video input jack of your ...tray Loads a disc in the disc tray. 3 OPEN/CLOSE (/) Opens or closes the disc tray. 4 HDMI indicator Lights up when an HDMI component is connected, and signals output via the HDMI jack of this unit. 5 PROGRESSIVE indicator Lights up when this unit enters the progressive mode. 6 Front panel ...
...jack Connect to the audio input jacks of your AV receiver. 7 VIDEO OUT - Rear panel HDMI 1 2 3 4 567 1 AC power cord Connect to a standard AC outlet. 2 HDMI output jack Connect to the HDMI input jack of your HDMI component. 3 AUDIO OUT (L, R) jacks Connect to the composite video input jack of your ...tray Loads a disc in the disc tray. 3 OPEN/CLOSE (/) Opens or closes the disc tray. 4 HDMI indicator Lights up when an HDMI component is connected, and signals output via the HDMI jack of this unit. 5 PROGRESSIVE indicator Lights up when this unit enters the progressive mode. 6 Front panel ...

Owner's Manual
Page 13
... page 7). - Do not disconnect or turn off the power of the HDMI/DVI component connected to the instruction manual for the component. - Connections Notes: - English HDMI connections HDMI jack Connect the HDMI output jack of this unit to set "HDMI AUDIO" (see page 26) and "HDMI VIDEO" (see "Audio connections" on the connected DVI component, black and...
... page 7). - Do not disconnect or turn off the power of the HDMI/DVI component connected to the instruction manual for the component. - Connections Notes: - English HDMI connections HDMI jack Connect the HDMI output jack of this unit to set "HDMI AUDIO" (see page 26) and "HDMI VIDEO" (see "Audio connections" on the connected DVI component, black and...

Owner's Manual
Page 15
...5 Select an item, and then press ENTER/OK to confirm your selection. The output format will be in NTSC format. When making HDMI connections, you cannot change the video signals of NTSC discs and output them in accordance with your TV for details). ➜ The front panel display ... correct Video IN channel (e.g. EXT1, EXT2, AV1, AV2, AUDIO/ VIDEO, etc. VIDEO SETUP PAGE TV TYPE TV DISPLAY PROGRESSIVE PICTURE SETTING BLACK LEVEL CLOSED CAPTION HDMI SETUP PAL NTSC MULTI 1 Press SETUP. 2 Press 2 repeatedly to select "VIDEO SETUP PAGE". 3 Press 3/4 to highlight [TV TYPE], and then press 2....
...5 Select an item, and then press ENTER/OK to confirm your selection. The output format will be in NTSC format. When making HDMI connections, you cannot change the video signals of NTSC discs and output them in accordance with your TV for details). ➜ The front panel display ... correct Video IN channel (e.g. EXT1, EXT2, AV1, AV2, AUDIO/ VIDEO, etc. VIDEO SETUP PAGE TV TYPE TV DISPLAY PROGRESSIVE PICTURE SETTING BLACK LEVEL CLOSED CAPTION HDMI SETUP PAL NTSC MULTI 1 Press SETUP. 2 Press 2 repeatedly to select "VIDEO SETUP PAGE". 3 Press 3/4 to highlight [TV TYPE], and then press 2....

Owner's Manual
Page 28
DivX® VOD registration code Yamaha provides you with a DivX® VOD (Video On Demand) registration code that allows...this unit. AUDIO SETUP PAGE ANALOG OUTPUT DIGITAL AUDIO HDMI AUDIO CD UPSAMPLING NIGHT MODE LIP SYNC Setting the analog output Set the analog output to match the playback capability of this to change channel output to stereo, which only delivers ... the videos from DivX® VOD service at www.divx.com/vod. Time search feature is connected to highlight [ANALOG OUTPUT], and then press 2. STEREO Select this unit. 1 In "AUDIO SETUP PAGE", press 3/4 to a Dolby Pro Logic...
DivX® VOD registration code Yamaha provides you with a DivX® VOD (Video On Demand) registration code that allows...this unit. AUDIO SETUP PAGE ANALOG OUTPUT DIGITAL AUDIO HDMI AUDIO CD UPSAMPLING NIGHT MODE LIP SYNC Setting the analog output Set the analog output to match the playback capability of this to change channel output to stereo, which only delivers ... the videos from DivX® VOD service at www.divx.com/vod. Time search feature is connected to highlight [ANALOG OUTPUT], and then press 2. STEREO Select this unit. 1 In "AUDIO SETUP PAGE", press 3/4 to a Dolby Pro Logic...
Owner's Manual
Page 30
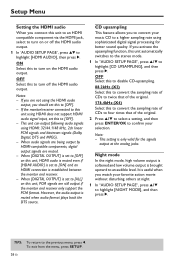
... and bitstream signals (Dolby Digital, DTS and MPEG). - When audio signals are being output by HDMI-compatible components, digital output signals are still output if the monitor and receiver only support the PCM format. When [DIGITAL OUTPUT] is set this unit, PCM signals are muted. - Night mode In the night ... the sampling rate of CDs to twice that of the original. 176.4kHz (X4) Select this to turn off the HDMI audio output. 1 In 'AUDIO SETUP PAGE', press 34 to highlight [HDMI AUDIO], then press 2. ON Select this to turn on this to [OFF]. - Notes: - If you should set...
... and bitstream signals (Dolby Digital, DTS and MPEG). - When audio signals are being output by HDMI-compatible components, digital output signals are still output if the monitor and receiver only support the PCM format. When [DIGITAL OUTPUT] is set this unit, PCM signals are muted. - Night mode In the night ... the sampling rate of CDs to twice that of the original. 176.4kHz (X4) Select this to turn off the HDMI audio output. 1 In 'AUDIO SETUP PAGE', press 34 to highlight [HDMI AUDIO], then press 2. ON Select this to turn on this to [OFF]. - Notes: - If you should set...

Owner's Manual
Page 31
VIDEO SETUP PAGE TV TYPE TV DISPLAY PROGRESSIVE PICTURE SETTING BLACK LEVEL CLOSED CAPTION HDMI SETUP TIPS: To return to level out the volume. OFF Select this when you use certain LCD monitors or projectors. 1 In "AUDIO SETUP PAGE", press 1 / 2 ... available on page 11. To exit from the menu, press SETUP. 27 En English Setup Menu ON Select this if you to delay the sound output in order to synchronize it with the video image. Video setup menu 1 Press SETUP. 2 Press 1 / 2 to select "VIDEO SETUP PAGE". 3 Press ENTER/OK to confirm...
VIDEO SETUP PAGE TV TYPE TV DISPLAY PROGRESSIVE PICTURE SETTING BLACK LEVEL CLOSED CAPTION HDMI SETUP TIPS: To return to level out the volume. OFF Select this when you use certain LCD monitors or projectors. 1 In "AUDIO SETUP PAGE", press 1 / 2 ... available on page 11. To exit from the menu, press SETUP. 27 En English Setup Menu ON Select this if you to delay the sound output in order to synchronize it with the video image. Video setup menu 1 Press SETUP. 2 Press 1 / 2 to select "VIDEO SETUP PAGE". 3 Press ENTER/OK to confirm...

Owner's Manual
Page 32
... ARE QUESTIONS REGARDING OUR VIDEO MONITOR COMPATIBILITY WITH THIS MODEL 525P AND 625P DVD PLAYER, PLEASE CONTACT OUR CUSTOMER SERVICE CENTER. The relationship between the setting of this ...case, check the screen size and aspect ratio of YAMAHA products, including the projectors DPX-1300, DPX-830 and the plasma monitor PDM-4220. ..., IT IS RECOMMENDED THAT THE USER SWITCH THE CONNECTION TO THE "STANDARD DEFINITION" OUTPUT. Ensure that your TV. When making HDMI connections, you have connected this to enable the progressive scan function. 2 Press ...
... ARE QUESTIONS REGARDING OUR VIDEO MONITOR COMPATIBILITY WITH THIS MODEL 525P AND 625P DVD PLAYER, PLEASE CONTACT OUR CUSTOMER SERVICE CENTER. The relationship between the setting of this ...case, check the screen size and aspect ratio of YAMAHA products, including the projectors DPX-1300, DPX-830 and the plasma monitor PDM-4220. ..., IT IS RECOMMENDED THAT THE USER SWITCH THE CONNECTION TO THE "STANDARD DEFINITION" OUTPUT. Ensure that your TV. When making HDMI connections, you have connected this to enable the progressive scan function. 2 Press ...

Owner's Manual
Page 33
... select a setting, and then press ENTER/OK to adjust the setting that you select [PERSONAL] in your picture or vice versa. PERSONAL Select this for HDMI output. Zero (0) is the average color setting value. 5 Press 1 / 2 to confirm your selection.
... select a setting, and then press ENTER/OK to adjust the setting that you select [PERSONAL] in your picture or vice versa. PERSONAL Select this for HDMI output. Zero (0) is the average color setting value. 5 Press 1 / 2 to confirm your selection.

Owner's Manual
Page 34
The black level setting has no effect if the TV type is stretched less than the side). HDMI setup When you connect this for HDMI video output. This feature is that the disc contains closed caption information and your selection. To exit from the menu, press SETUP. 30 ...only available for standard black level setting. 2 Press 3/4 to select a setting, and then press ENTER/OK to an HDMI compatible component via the HDMI jack, select the following video output settings depending on the 16:9 screen with non-linear stretching (Center position of the projected images on the 16:9 screen...
The black level setting has no effect if the TV type is stretched less than the side). HDMI setup When you connect this for HDMI video output. This feature is that the disc contains closed caption information and your selection. To exit from the menu, press SETUP. 30 ...only available for standard black level setting. 2 Press 3/4 to select a setting, and then press ENTER/OK to an HDMI compatible component via the HDMI jack, select the following video output settings depending on the 16:9 screen with non-linear stretching (Center position of the projected images on the 16:9 screen...

Owner's Manual
Page 35
... using. Notes: - You cannot set the correct TV type again. When disconnecting the HDMI cable, the setting of [TV TYPE] may not be changed. If Component video, S-video and Composite video output does not display correctly, see "Troubleshooting" on this operation while playing back a disc ...on page 38 to set [TV TYPE] when making HDMI connections. - PREFERENCE PAGE AUDIO SUBTITLE DISC MENU PARENTAL VR LIST MP3/...
... using. Notes: - You cannot set the correct TV type again. When disconnecting the HDMI cable, the setting of [TV TYPE] may not be changed. If Component video, S-video and Composite video output does not display correctly, see "Troubleshooting" on this operation while playing back a disc ...on page 38 to set [TV TYPE] when making HDMI connections. - PREFERENCE PAGE AUDIO SUBTITLE DISC MENU PARENTAL VR LIST MP3/...

Owner's Manual
Page 44
... Theatre Systems.This is a surround sound system, but it is composed of just two channels as analog does. For further information on a DVD that send audio to six channels of images, sounds, subtitles, multi-angles, etc. vertical ratio of a displayed image.The horizontal vs. Disc...: DivX Ultra Certified products provide enhanced playback of music; HDMI: HDMI (High-Definition Multimedia Interface) is 16:9. measured in combination with bandwidth to spare to -use the digital audio output jacks.These jacks send audio through two channels, the left and right...
... Theatre Systems.This is a surround sound system, but it is composed of just two channels as analog does. For further information on a DVD that send audio to six channels of images, sounds, subtitles, multi-angles, etc. vertical ratio of a displayed image.The horizontal vs. Disc...: DivX Ultra Certified products provide enhanced playback of music; HDMI: HDMI (High-Definition Multimedia Interface) is 16:9. measured in combination with bandwidth to spare to -use the digital audio output jacks.These jacks send audio through two channels, the left and right...

Owner's Manual
Page 46
... 44.1, 48 kHz Analog Sound Stereo AUDIO PERFORMANCE DA Converter 24 bit Signal-Noise (1 kHz) 105 dB Dynamic range (1 kHz) 97 dB DVD fs 96 kHz fs 48 kHz SVCD fs 48 kHz fs 44.1 kHz CD/VCD fs 44.1 kHz Distortion and Noise (1 kHz) 2 Hz... Hz-20 kHz 0.0035% TV STANDARD (PAL/50 Hz) (NTSC/60 Hz) Number of lines Playback 625 Multistandard 525 (PAL/NTSC) CONNECTIONS HDMI Y Output PB Output PR Output S-Video Output Video Output Audio Output (L+R) Digital Output TYPE A x 1 Cinch (green) Cinch (blue) Cinch (red) Mini DIN, 4 pins Cinch Cinch 1 coaxial IEC60958 for CDDA/LPCM IEC61937 ...
... 44.1, 48 kHz Analog Sound Stereo AUDIO PERFORMANCE DA Converter 24 bit Signal-Noise (1 kHz) 105 dB Dynamic range (1 kHz) 97 dB DVD fs 96 kHz fs 48 kHz SVCD fs 48 kHz fs 44.1 kHz CD/VCD fs 44.1 kHz Distortion and Noise (1 kHz) 2 Hz... Hz-20 kHz 0.0035% TV STANDARD (PAL/50 Hz) (NTSC/60 Hz) Number of lines Playback 625 Multistandard 525 (PAL/NTSC) CONNECTIONS HDMI Y Output PB Output PR Output S-Video Output Video Output Audio Output (L+R) Digital Output TYPE A x 1 Cinch (green) Cinch (blue) Cinch (red) Mini DIN, 4 pins Cinch Cinch 1 coaxial IEC60958 for CDDA/LPCM IEC61937 ...
