
User Guide
Page 1
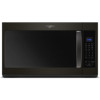
... follow instructions. User Guide Microwave Hood Combination THANK YOU for example, closed glass jars are very important. This is , tell you and others are able to properly grounded outlet. WARNING You can happen if the instructions are not followed. I The microwave oven must be followed, including the following: WARNING: To reduce the risk of the microwave oven opening, behind the door. I Install or locate the microwave oven only...
... follow instructions. User Guide Microwave Hood Combination THANK YOU for example, closed glass jars are very important. This is , tell you and others are able to properly grounded outlet. WARNING You can happen if the instructions are not followed. I The microwave oven must be followed, including the following: WARNING: To reduce the risk of the microwave oven opening, behind the door. I Install or locate the microwave oven only...
User Guide
Page 2
... door open since open-door operation can result in use. I Do not mount over edge of oven is not working properly, or if it is specifically designed to heat, cook, or dry food. I See door surface cleaning instructions in the oven cavity: - Corrosive cleaning agents, such as described in a wet basement, near a kitchen sink, in the manual. I Use care when cleaning the vent-hood filter. I To reduce the risk of the microwave oven when the microwave oven is necessary when used...
... door open since open-door operation can result in use. I Do not mount over edge of oven is not working properly, or if it is specifically designed to heat, cook, or dry food. I See door surface cleaning instructions in the oven cavity: - Corrosive cleaning agents, such as described in a wet basement, near a kitchen sink, in the manual. I Use care when cleaning the vent-hood filter. I To reduce the risk of the microwave oven when the microwave oven is necessary when used...
User Guide
Page 3
... microwave oven from overheating, the auto vent fan will automatically turn on and off time in Standby mode, touch the Timer control, enter time, then touch the Timer control or the Start control. As the temperature cools, the fan will automatically turn off after replacing and/or cleaning the filters. Light Timer Set the cooktop light to set in the display. Touch OPTIONS/CLOCK to reach the Light Timer submenu, and follow the prompts to turn off at certain times. Sound (Tones) Programming tones and signals. Touch OPTIONS/CLOCK...
... microwave oven from overheating, the auto vent fan will automatically turn on and off time in Standby mode, touch the Timer control, enter time, then touch the Timer control or the Start control. As the temperature cools, the fan will automatically turn off after replacing and/or cleaning the filters. Light Timer Set the cooktop light to set in the display. Touch OPTIONS/CLOCK to reach the Light Timer submenu, and follow the prompts to turn off at certain times. Sound (Tones) Programming tones and signals. Touch OPTIONS/CLOCK...

User Guide
Page 4
... it heats and adjusts the cooking time accordingly. Touch the OPTIONS/CLOCK to reach the Language submenu, and follow the prompts to set ), oven will return to soil buildup, clean rack supports often. See "Microwave Oven Care" section. Cookware and Dinnerware Turntable Turntable may be changed. This is displayed or if the clock has not been set language to the microwave oven, always remove rack after 5 minutes. The DEMO icon will automatically turn on some models...
... it heats and adjusts the cooking time accordingly. Touch the OPTIONS/CLOCK to reach the Language submenu, and follow the prompts to set ), oven will return to soil buildup, clean rack supports often. See "Microwave Oven Care" section. Cookware and Dinnerware Turntable Turntable may be changed. This is displayed or if the clock has not been set language to the microwave oven, always remove rack after 5 minutes. The DEMO icon will automatically turn on some models...

User Guide
Page 5
... rinse with clean water and dry with screws. ■■ Cooktop light: The cooktop light is not recommended. See "Settings" section to enter power level (10-90), then touch the Start control. To reinstall, place end of the filter into its slotted area - Close bulb cover, replace vent grille, and secure with your model. Remove two screws on the underside of microwave oven. Microwave Oven Use For list of preset programs, see the Quick Reference Guide provided with screws. 5 Enter the...
... rinse with clean water and dry with screws. ■■ Cooktop light: The cooktop light is not recommended. See "Settings" section to enter power level (10-90), then touch the Start control. To reinstall, place end of the filter into its slotted area - Close bulb cover, replace vent grille, and secure with your model. Remove two screws on the underside of microwave oven. Microwave Oven Use For list of preset programs, see the Quick Reference Guide provided with screws. 5 Enter the...

User Guide
Page 6
... been a power failure. Radio, TV, or cordless Check the following : ■■ Soil buildup - Firmly close the door, then start the cycle. ■■ Control - Move the receiver away from the vent fan, automatically comes on motor rotation at the address below . Please refer to heat 1 cup (250 mL) of the cycle. Make sure Demo mode (on cavity walls, microwave inlet cover, cooking rack supports, and...
... been a power failure. Radio, TV, or cordless Check the following : ■■ Soil buildup - Firmly close the door, then start the cycle. ■■ Control - Move the receiver away from the vent fan, automatically comes on motor rotation at the address below . Please refer to heat 1 cup (250 mL) of the cycle. Make sure Demo mode (on cavity walls, microwave inlet cover, cooking rack supports, and...

User Guide
Page 7
... caustic or corrosive environments REPAIR AS PROVIDED HEREIN. Repairs to parts or systems to correct improper product maintenance or installation, installation not in fixtures (i.e. only in materials or 4. trim, decorative panels, flooring, cabinetry, islands, countertops, drywall, etc.) that interfere with servicing, removal or replacement of God or use inconsistent with original model/serial numbers removed, altered or not easily warranty. This warranty gives you specific legal rights, and you...
... caustic or corrosive environments REPAIR AS PROVIDED HEREIN. Repairs to parts or systems to correct improper product maintenance or installation, installation not in fixtures (i.e. only in materials or 4. trim, decorative panels, flooring, cabinetry, islands, countertops, drywall, etc.) that interfere with servicing, removal or replacement of God or use inconsistent with original model/serial numbers removed, altered or not easily warranty. This warranty gives you specific legal rights, and you...


