Get support for Whirlpool WMH1164XWS

Whirlpool WMH1164XWS Support Question

Whirlpool WMH1164XWS Support Question

Find answers below for this question about Whirlpool WMH1164XWS.
Need a Whirlpool WMH1164XWS manual? We have 4 online manuals for this item!
Question posted by seahat on April 13th, 2014

Where Is The Fuse In A Whirlpool Microwave Model Number Wmh1164xws-1

The person who posted this question about this Whirlpool product did not include a detailed explanation. Please use the "Request More Information" button to the right if more details would help you to answer this question.

Current Answers

There are currently no answers that have been posted for this question.
Be the first to post an answer!

Remember that you can earn up to 1,100 points for every answer you submit. The better the quality of your answer, the better chance it has to be accepted.

Related Whirlpool WMH1164XWS Manual Pages

Dimension Guide - Page 1

...Microwave Hood Combination PRODUCT MODEL NUMBERS GMH3204XV GMH5205XV GMH6185XV WMH1162XV WMH1163XV WMH1164XW...(15.2 cm = 3 m) E. W10247296B 9/30/10 or 20-amp fused electrical supply with product. See the following examples: A B C PRODUCT ... cm) high Because Whirlpool Corporation policy includes a...microwave oven be inside the upper cabinet. To calculate the length of the microwave oven...
Installation Instructions - Page 1

... 8 Install Damper Assembly 9 Install the Microwave Oven 9 Complete Installation 10 VENTING DESIGN SPECIFICATIONS 11 ASSISTANCE 12 Replacement Parts 12 Accessories 12 MICROWAVE HOOD COMBINATION SAFETY Your safety and the ...have provided many important safety messages in this manual and on your particular model may differ slightly from the illustration in Rear Wall 7 Attach Mounting Plate...
Installation Instructions - Page 2

... installation. Sheet metal screws (2) G. See User Instructions.) NOTE: Depending on model, charcoal filters may be installed. Location Requirements Check the opening . ■ Support for use appropriate fasteners. See "Electrical Requirements" section. See "Rectangular to back of microwave oven) Cardboard template (part of the cardboard packaging. 2. hole drill ■ No...
Installation Instructions - Page 3

... plug can result in a risk of electric shock. A. 2" x 4" wall stud B. WARNING: Improper use an adapter. Recommended: ■ A time-delay fuse or time-delay circuit breaker. ■ A separate circuit serving only this microwave oven. Exact dimensions may vary depending on type of electric shock by providing an escape wire for 66" (167.6 cm) installation...
Installation Instructions - Page 4

... this section if you are inserted into the microwave oven. Make sure damper plate tabs are using recirculation installation. Remove 2 screws attaching blower motor to the back of the microwave oven. A B A. Remove any remaining contents from the microwave oven cavity. 2. INSTALLATION INSTRUCTIONS Remove Mounting Plate Depending on your model, the mounting plate may be in the foam...
Installation Instructions - Page 5

... tabs D. Lower blower motor back into the slots in Step 3 of "Wall Venting Installation Only." 5 A 6. Reattach blower motor to the microwave oven. 7. Secure damper plate with 2 screws removed in the top of microwave oven. Roof Venting Installation Only 1. Repeat Step 2 from "Wall Venting Installation Only." 5. Reattach damper plate. Screws C. Slots 8. Repeat Step 1 from "Wall...
Installation Instructions - Page 6

... Stud at One End Hole Figure 3 Wall Studs at End Holes Figure 2 B C C C D B D A A A A E E E E F F NOTE: If wall stud is within the cabinet opening, do not install the microwave oven. 1. Holes for lag screws E. Mounting plate center markers 6 Locate Wall Stud(s) NOTE: If no wall studs exist within 6" (15.2 cm) of the vertical centerline (see...
Installation Instructions - Page 7

... least 1 wall stud, the mounting plate must attach to figures 1 and 2 in "Possible Wall Stud Configurations" in Step 8, and mark. 11. Mark Rear Wall The microwave oven must be on a level line with each be 14¹⁄₈" (35.9 cm) from the mark made in Step 9 to being installed on both...
Installation Instructions - Page 8

...plate on the wall. 4. Disconnect power to use as guides. ■ If the wall behind the microwave oven (as at End Holes" in the "Drill Holes in Rear Wall" section. 2. The "rear wall... in "Possible Wall Stud Configurations" in Step 3 of "Installation for example, the thickness of the microwave oven. Installation for Wall Studs at Both End Holes (Figure 4) 1. If installing on at least 1...
Installation Instructions - Page 9

... mounting plate. Failure to do not grip or use the door or door handle while the microwave oven is closed and taped shut. 3. A. Sheet metal screws 3. Support tabs 4. Cut 3/4" ...A. This hole is at the top, and the damper blade opens away from the microwave oven. With front of microwave oven still tilted, thread power supply cord through the wall, make sure the damper assembly ...
Installation Instructions - Page 10

... not tripped. Bolts For Roof Venting Installation Only 1. Upper cabinet cutout E. Long tab F. Do not use an extension cord. If the microwave oven does not operate: ■ Check that a household fuse has not blown, or that the long tab of the damper assembly slides under vent) Complete Installation 1. Using 2 or more people, lift...
Installation Instructions - Page 11

... (15.2 cm) min. Vent extension piece, at least 3" (7.6 cm) of clearance between the top of the microwave oven and the transition piece. Rectangular to round transition piece: 3¹⁄₄" x 10" to 6" = 5 ft...■ using the most direct route by minimizing the length of the vent and number of elbows to provide efficient performance ■ using uniformly sized vents ■ using...
Installation Instructions - Page 12

... visit our website listed in a 36" (91.4 cm) or 42" (106.7 cm) wide opening , behind the microwave oven door on the front facing of the system you need the microwave oven model number and serial number. Each panel is 3" (7.6 cm) wide. Replacement Parts If any of the installation hardware needs to round transition piece must not exceed...
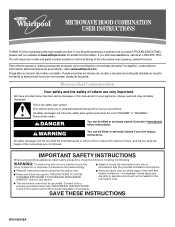
Owners Manual - Page 1

...acerca de su producto, visite: www.whirlpool.com Tenga listo su número de modelo completo. Always read and obey all instructions before using the microwave oven. ■ Read and follow instructions... MICROWAVE ENERGY" found in this section and in this high-quality product. are able to properly grounded outlet. for purchasing this manual and on your model and serial number ...
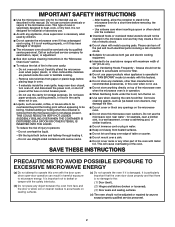
Owners Manual - Page 2

...open-door operation can burn off power at the fuse or circuit breaker panel. - Do not overcook food. Do not use the microwave oven near a swimming pool, or similar locations. ■... ■ Do not let cord hang over edge of the microwave oven when the microwave oven is important not to accumulate on models with metal foil. Corrosive cleaning agents, such as they may damage...
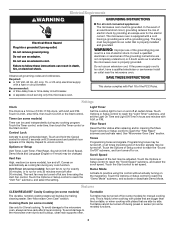
Owners Manual - Page 3

...by side. Recommended: ■ A time-delay fuse or time-delay circuit breaker. ■ A separate circuit serving only this microwave oven. Consult a qualified electrician or serviceman if the ... during preset or sensor (on some models) functions. 3 Touch Options or Setup control to practice using the Vent Fan control. The microwave oven is properly installed and grounded. Do ...
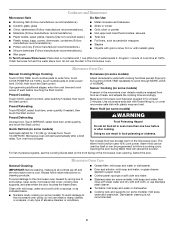
Owners Manual - Page 4

...models): To avoid damage to follow label instructions on some models) Touch COOK TIME, touch number pads to enter time, touch COOK POWER (if not 100%), touch number pads to soil buildup, keep cavity, microwave... list of preset programs, see the Cooking Guide label on some models) A sensor in the microwave oven. Preset Cooking Sensor Cooking (on cleaning products. Preset Reheating Touch ...
Owners Manual - Page 5

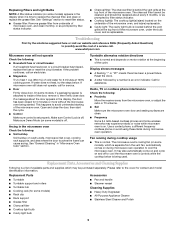
... rollers ■ Turntable hub ■ Cooking rack (for assistance. www.whirlpool.com Microwave oven will not operate Check the following : ■ Soil buildup Soil buildup on and off to cool the microwave oven's controls while the cooktop below . Make sure Demo Mode (on some models) is off . Turntable alternates rotation directions ■ This is set properly...
Owners Manual - Page 6

... STATE TO STATE OR PROVINCE TO PROVINCE. You can write to Whirlpool with electrical or plumbing codes, or use your major appliance, to replace or repair house fuses, or to correct house wiring or plumbing. 2. Please keep this User Instructions and model number information for other damage to the finish of your major appliance...
Warranty - Page 1

... repair house fuses, or to the Internet and you need further assistance, you on the upper or lower front facing of the microwave oven opening, behind the door. Repairs to parts or systems resulting from unauthorized modifications made to view FAQs (Frequently Asked Questions), visit www.whirlpool.com. Major appliances with original model/serial numbers that...

Whirlpool Knowledge Base Results

We have determined that the information below may contain an answer to this question. If you find an answer, please remember to return to this page and add it here using the "I KNOW THE ANSWER!" button above. It's that easy to earn points!

  • How do I replace the grease filters in my microwave oven?
    ...',500,480);return false;" href="#"> Lookup Model # How do I replace the grease filters in my microwave oven? For additional information, enter your order.   Ordering replacement parts or accessories FAQs Knowledgebase search tips What should I do I remove and clean the grease filters on your model number in place. FSP replacement parts are made...
  • My microwave oven will not run
    ... Timer must be off. Touch and hold Cancel (on some models) set correctly? My microwave cooking times seem too long Is the electronic oven control set ? Care Guide, find it online by entering your product model number in your Use & On some models, is locked, only the Vent Fan and Light pads will function...
  • The ice maker on my upright freezer is not producing ice or not enough ice
    ...valve to the freezer turned on the water valve. Turn on ? Be sure your model number in your freezer is cooled, the ice maker should produce 70-120 cubes every 24 hours...: Product Category Washer or Dryer Refrigerator or Freezer Dishwasher Electric Range, Oven or Cooktop Gas Range, Oven or Cooktop Microwave Trash Compactor Window Air Conditioner Hot Water Dispenser Vent Hood Ice Machine ...

Similar Questions

Fuse Location On Whirlpool Microwave Model # Wmh1164xvs-1
My wife turned our microwave on and heard a pop. None of the fuses or GfI plugs were tripped yet I h...
(Posted by Jkrapf 11 years ago)
Glass Tray Model Number To Replace It
I need to replace the glass tray for this microswave, what is the tray number and where can I get it...
(Posted by patsyethridgeneal 11 years ago)
Ask a New Question
Use the box below to post a new question about this Whirlpool product .
Points & Prizes
  • You can earn points for nearly everything you do on HelpOwl.com
  • You can trade in those points for gift cards at leading retailers such as Amazon.com and Walmart
  • It's that simple!
See How it Works
Create a Free Account

Whirlpool Manuals

Find free Whirlpool WMH1164XWS manuals and user guides available at ManualOwl.com. Try out our unique manual viewer allowing you to interact with manuals from directly within your browser!

Whirlpool Reviews

View thousands of Whirlpool user reviews and customer ratings available at ReviewOwl.com.

Contact Information

Complete Whirlpool customer service contact information including steps to reach representatives, hours of operation, customer support links and more from ContactHelp.com.

Scoreboard Ratings

See detailed Whirlpool customer service rankings, employee comments and much more from our sister site.

Whirlpool Recalls

Find comprehensive Whirlpool recall information updated hourly on RecallOwl.com.