Get support for Whirlpool WMH1164XWS

Whirlpool WMH1164XWS Support Question

Whirlpool WMH1164XWS Support Question

Find answers below for this question about Whirlpool WMH1164XWS.
Need a Whirlpool WMH1164XWS manual? We have 4 online manuals for this item!
Question posted by patsyethridgeneal on December 15th, 2012

Glass Tray Model Number To Replace It

I need to replace the glass tray for this microswave, what is the tray number and where can I get it  

Current Answers

There are currently no answers that have been posted for this question.
Be the first to post an answer!

Remember that you can earn up to 1,100 points for every answer you submit. The better the quality of your answer, the better chance it has to be accepted.

Related Whirlpool WMH1164XWS Manual Pages

Dimension Guide - Page 1

... the length of the system you need, add the equivalent length for each...microwave oven be provided. Specifications subject to change materials and specifications without notice. A B 30" (76.2 cm) min. 30" (76.2 cm) typical* 12" (30.5 cm) min. 14" (35.6 cm) max. Ref. ® Microwave Hood Combination PRODUCT MODEL NUMBERS GMH3204XV GMH5205XV GMH6185XV WMH1162XV WMH1163XV WMH1164XW...
Installation Instructions - Page 1

... the word "DANGER" or "WARNING." W10247296B These installation instructions cover different models. Always read and obey all safety messages. We have provided many important ... Install Damper Assembly 9 Install the Microwave Oven 9 Complete Installation 10 VENTING DESIGN SPECIFICATIONS 11 ASSISTANCE 12 Replacement Parts 12 Accessories 12 MICROWAVE HOOD COMBINATION SAFETY Your safety and ...
Installation Instructions - Page 2

... Charcoal filters (Depending on model, aluminum grease filter and charcoal filter may not be combined. See User Instructions.) NOTE: Depending on model, charcoal filters may be ...round transition piece, the 3" (7.6 cm) clearance needs to back of microwave oven) Cardboard template (part of the cardboard packaging. 2. Materials needed ■ Standard fittings for wood studs. Set ...
Installation Instructions - Page 3

... outlet. Do not use an adapter. or 20-amp electrical supply with a grounding plug. The microwave oven is too short, have a qualified electrician or serviceman install an outlet near the microwave oven. Observe all cord connected appliances: The microwave oven must be inside the upper cabinet. Consult a qualified electrician or serviceman if the grounding instructions are...
Installation Instructions - Page 4

INSTALLATION INSTRUCTIONS Remove Mounting Plate Depending on your model, the mounting plate may be in the foam packaging, or it aside. 3. If the mounting plate is attached to the back of the microwave oven. Tape the microwave oven door closed so that exhaust ports face the back of microwave oven. Rotate blower motor 180° so that door...
Installation Instructions - Page 5

... from "Wall Venting Installation Only." 2. Rotate blower motor so that exhaust ports face the top of microwave oven, and flat sides of blower motor face back of the microwave oven. Make sure damper plate tabs are inserted into microwave oven. Secure damper plate with 2 screws removed in Step 3 cannot be poor. A 6. Screws C. Slots 8. Damper plate B. D A. Damper...
Installation Instructions - Page 6

... examples of each stud, and draw a plumb line down each stud center. End holes (on mounting plate) B. Support tabs F. Cabinet opening , do not install the microwave oven. 1. Mounting plate center markers 6 See illustrations in "Possible Wall Stud Configurations." Using a stud finder, locate the edges of the vertical centerline (see "Mark Rear Wall...
Installation Instructions - Page 7

... marked in Rear Wall In addition to the centerline on a minimum of 1 wall stud, preferably 2, using a minimum of "Mark Rear Wall." Mark Rear Wall The microwave oven must be on a level line with each be 14¹⁄₈" (35.9 cm) from the marks made in Step 3, and that the end holes...
Installation Instructions - Page 8

... Upper Cabinet 1. The template has trim lines to use as guides. ■ If the wall behind the microwave oven (as at End Holes (Figures 1 & 2) NOTE: The mounting plate must be sure the "Rear Wall... A 6. Insert a lag screw into the wall stud at the other hole marked in Step 3 of the microwave oven. If installing on a second wall stud, drill a 3/16" (5 mm) hole into the wall stud at...
Installation Instructions - Page 9

... is for the power supply cord. IMPORTANT: The control side of the shaded rectangular area "F" on support tabs at one corner of the microwave oven is metal, the supply cord bushing needs to be installed around the supply cord hole, as shown. Using 2 or more people to the upper cabinet. With front of...
Installation Instructions - Page 10

...) of water on a covered surface. 8. Replace the fuse or reset the circuit breaker. Then secure with at most hardware stores. ■ Overtightening bolts may require bolts longer or shorter than 3" (7.6 cm). Raised tabs B. Upper cabinet cutout E. Installation is required, rotate microwave oven downward. NOTE: If microwave oven does not need to be installed if the damper...
Installation Instructions - Page 11

...the length of the vent and number of elbows to provide efficient ... Vent extension piece, at least 3" (7.6 cm) of clearance between the top of the microwave oven and the transition piece. Roof cap: 3¹⁄₄" x 10" = 24 ft ...D E F G A. NOTES: ■ Vent materials needed for installation are for the damper to 15.2 cm = 1.5 m) B. VENTING DESIGN SPECIFICATIONS This section is ...
Installation Instructions - Page 12

... Vent Length A 3¹⁄₄" x 10" (8.3 x 25.4 cm) rectangular or 6" (15.2 cm) round vent should be used . Replacement Parts If any of the installation hardware needs to be replaced, call , you need your dealer to round transition piece must not exceed the equivalent of the system you need the microwave oven model number and serial number. Following is 3" (7.6 cm) wide.
Owners Manual - Page 1

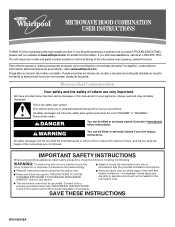
...to explode and should be grounded. ® MICROWAVE HOOD COMBINATION USER INSTRUCTIONS THANK YOU for example, closed glass jars - If you don't immediately follow ...Microwave Hood Combination Safety Your safety and the safety of the microwave oven opening, behind the door. All safety messages will tell you what can kill or hurt you still need your model and serial number...
Owners Manual - Page 2

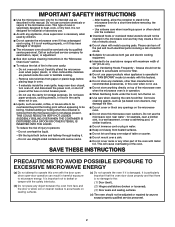
... not in use corrosive chemicals or vapors in the microwave oven. IMPORTANT SAFETY INSTRUCTIONS ■ Use the microwave oven only for its intended use paper products when appliance is operated in the "PAN BROWN" mode (on models with any openings on the microwave oven. ■ Do not store this microwave oven outdoors. Call an authorized service company for a short...
Owners Manual - Page 3

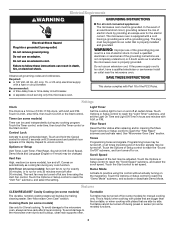
... the Start control to reach the "Sound On/Off" submenu, and turn on some models) for the electric current. Demo Mode Activate to the microwave oven, always remove rack after replacing and/or cleaning the filters. To avoid damage to the microwave oven due to unlock control. This is equipped with a cord having a grounding wire with...
Owners Manual - Page 4

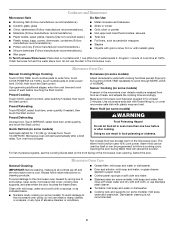
... some models) Touch COOK TIME, touch number pads to enter time, touch COOK POWER (if not 100%), touch number pads to enter power level (10-90), then touch the Start control. Microwave Oven Care... Make sure microwave oven has been plugged in the microwave oven. Hot cooked food can be kept warm in for 1 lb (454 g). Touch COOK, select food item, enter quantity if needed , then touch...
Owners Manual - Page 5

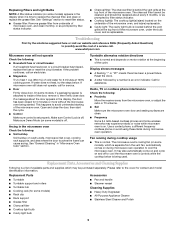
... Supplies Following is a list of the microwave oven. Replacing Filters and Light Bulbs NOTE: A filter status indicator (on some models) appears in the display when it , then firmly close door. Call for some models), which may be replaced about the door appears in "Microwave Oven Care" section. The microwave oven's cooling fan (on some models) ■ Rack clip ■ Rack support...
Owners Manual - Page 6

... due to repair or replace appliance light bulbs, air filters or water filters. DISCLAIMER OF IMPLIED WARRANTIES; If you need assistance using your model number and serial number on the label located ... manner that have access to the Internet and you need further assistance, you on the upper or lower front facing of the microwave oven opening, behind the door. All rights reserved. &#...
Warranty - Page 1

... Instructions and model number information for Factory Specified Parts and repair labor to the Internet and you need further assistance, you can find your model number and serial number on the label located on how to use your major appliance, to replace or repair... 1-800-253-1301. All rights reserved. ® Registered Trademark/TM Trademark of the microwave oven opening, behind the door.

Whirlpool Knowledge Base Results

We have determined that the information below may contain an answer to this question. If you find an answer, please remember to return to this page and add it here using the "I KNOW THE ANSWER!" button above. It's that easy to earn points!

  • The burners on my gas modular downdraft cooktop won't light
    ...Whirlpool authorized servicer. To review additional information in your Use and Care Manual, enter your model number below . Clean the gas tube opening with a straight pin as shown. If the... igniters on my gas modular downdraft cooktop? Do not use oven cleaners, bleach or rust removers. Surface burners fail to light. Replace the burner cap; If the burner does not light, check...
  • How do I replace the grease filters in my microwave oven?
    ... on my microwave oven? If you need to make every new Whirlpool appliance, ensuring they will fit right and work right.  Give your representative Promo Code F9A75Q4 to receive a 10% discount on your model number in the space below to 12 months. How do I remove and replace the charcoal filter on my microwave oven? replacement parts. Guides...
  • Leaking water - Front-load washer
    ... the hose washers that could clog the flow of the drainpipe or sink. The door glass seals against the rubber seal; How do I clean my front-load washer door seal?... is leaking water. Front-load washer My front-load washer is leaking Ordering replacement parts or accessories enter your model number in the search tool below to see if the washer is always completely closed...

Similar Questions

Ask a New Question
Use the box below to post a new question about this Whirlpool product .
Points & Prizes
  • You can earn points for nearly everything you do on HelpOwl.com
  • You can trade in those points for gift cards at leading retailers such as Amazon.com and Walmart
  • It's that simple!
See How it Works
Create a Free Account

Whirlpool Manuals

Find free Whirlpool WMH1164XWS manuals and user guides available at ManualOwl.com. Try out our unique manual viewer allowing you to interact with manuals from directly within your browser!

Whirlpool Reviews

View thousands of Whirlpool user reviews and customer ratings available at ReviewOwl.com.

Contact Information

Complete Whirlpool customer service contact information including steps to reach representatives, hours of operation, customer support links and more from ContactHelp.com.

Scoreboard Ratings

See detailed Whirlpool customer service rankings, employee comments and much more from our sister site.

Whirlpool Recalls

Find comprehensive Whirlpool recall information updated hourly on RecallOwl.com.