
Dimension Guide
Page 1
..., see Installation Instructions packed with product. Dimensions are for dimensional clearances above the range, follow the range hood or microwave hood combination installation instructions for 25" ...Gas Range PRODUCT MODEL NUMBERS PRODUCT DIMENSIONS GFG464LV GFG471LV WFG361LV WFG366LV WFG371LV WFG374LV Gas supply: This range is design-certified by CSA International for use with Natural gas...;₄" (1.9 cm) rigid pipe to side wall or other combustible material. Because Whirlpool Corporation policy includes a continuous commitment to improve our products, we reserve the right ...
..., see Installation Instructions packed with product. Dimensions are for dimensional clearances above the range, follow the range hood or microwave hood combination installation instructions for 25" ...Gas Range PRODUCT MODEL NUMBERS PRODUCT DIMENSIONS GFG464LV GFG471LV WFG361LV WFG366LV WFG371LV WFG374LV Gas supply: This range is design-certified by CSA International for use with Natural gas...;₄" (1.9 cm) rigid pipe to side wall or other combustible material. Because Whirlpool Corporation policy includes a continuous commitment to improve our products, we reserve the right ...

Installation Instructions
Page 1
... local inspector's use. W10196161E INSTALLATION INSTRUCTIONS 30" (76.2 CM) FREESTANDING GAS RANGES Table of Contents RANGE SAFETY...2 INSTALLATION REQUIREMENTS 4 Tools and Parts...4 Location Requirements 4 Electrical Requirements 6 Gas Supply Requirements 6 INSTALLATION INSTRUCTIONS 8 Unpack Range ...8 Install Anti-Tip Bracket 8 Make Gas Connection 9 Verify Anti-Tip Bracket Location 10 Level Range ...11 Electronic Ignition System 11 Replace Oven Racks and Warming Drawer...
... local inspector's use. W10196161E INSTALLATION INSTRUCTIONS 30" (76.2 CM) FREESTANDING GAS RANGES Table of Contents RANGE SAFETY...2 INSTALLATION REQUIREMENTS 4 Tools and Parts...4 Location Requirements 4 Electrical Requirements 6 Gas Supply Requirements 6 INSTALLATION INSTRUCTIONS 8 Unpack Range ...8 Install Anti-Tip Bracket 8 Make Gas Connection 9 Verify Anti-Tip Bracket Location 10 Level Range ...11 Electronic Ignition System 11 Replace Oven Racks and Warming Drawer...

Installation Instructions
Page 2
...other flammable vapors and liquids in this manual is the safety alert symbol. All safety messages will follow instructions. Installation and service must be detected by smell. If a gas leak is , tell you how to reduce the chance of injury, and tell you what the ...follow the safety alert symbol and either the word "DANGER" or "WARNING." RANGE SAFETY Your safety and the safety of others . WARNING You can be killed or seriously injured if you smell gas" instructions. 2 Follow the gas supplier's instructions. • If you use any phone in this or any other appliance...
...other flammable vapors and liquids in this manual is the safety alert symbol. All safety messages will follow instructions. Installation and service must be detected by smell. If a gas leak is , tell you how to reduce the chance of injury, and tell you what the ...follow the safety alert symbol and either the word "DANGER" or "WARNING." RANGE SAFETY Your safety and the safety of others . WARNING You can be killed or seriously injured if you smell gas" instructions. 2 Follow the gas supplier's instructions. • If you use any phone in this or any other appliance...
Installation Instructions
Page 3
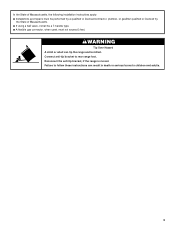
... A child or adult can result in death or serious burns to children and adults. 3 Failure to rear range foot. Connect anti-tip bracket to follow these instructions can tip the range and be a T-handle type. ■ A flexible gas connector, when used, must be performed by a qualified or licensed contractor, plumber, or gasfitter qualified or licensed...
... A child or adult can result in death or serious burns to children and adults. 3 Failure to rear range foot. Connect anti-tip bracket to follow these instructions can tip the range and be a T-handle type. ■ A flexible gas connector, when used, must be performed by a qualified or licensed contractor, plumber, or gasfitter qualified or licensed...

Installation Instructions
Page 4
...Manufactured Home Installations, ANSI A225.1/NFPA 501A or with the range, see "Install Anti-Tip Bracket" section. ■ Grounded electrical supply is the installer's responsibility to comply with your builder or cabinet supplier to LP gas 4.8 mm) carbide-tipped masonry drill bit (for concrete/... as it must be installed. INSTALLATION REQUIREMENTS Tools and Parts Gather the required tools and parts before starting installation. Read and follow the instructions provided with any tools listed here. Plastic anchors (2) C. #10 x ¹⁄₂" screws (2) ■ Anti-tip bracket...
...Manufactured Home Installations, ANSI A225.1/NFPA 501A or with the range, see "Install Anti-Tip Bracket" section. ■ Grounded electrical supply is the installer's responsibility to comply with your builder or cabinet supplier to LP gas 4.8 mm) carbide-tipped masonry drill bit (for concrete/... as it must be installed. INSTALLATION REQUIREMENTS Tools and Parts Gather the required tools and parts before starting installation. Read and follow the instructions provided with any tools listed here. Plastic anchors (2) C. #10 x ¹⁄₂" screws (2) ■ Anti-tip bracket...

Installation Instructions
Page 5
...of an uncovered wood or metal cabinet. 5 IMPORTANT: If installing a range hood or microwave hood combination above the range, follow the range hood or microwave hood combination installation instructions for 25" (64.0 cm) countertop depth, 24" (61.0 cm)... cabinet depth C. 30" (76.2 cm) min. opening width F. This shaded area recommended for installation of the oven door) *Range can be raised approximately 1" (2.5 cm) by not less than ¹⁄₄" (0.64 cm) flame retardant millboard covered with... rating plate (located on the oven frame behind the top left side of rigid gas pipe.
...of an uncovered wood or metal cabinet. 5 IMPORTANT: If installing a range hood or microwave hood combination above the range, follow the range hood or microwave hood combination installation instructions for 25" (64.0 cm) countertop depth, 24" (61.0 cm)... cabinet depth C. 30" (76.2 cm) min. opening width F. This shaded area recommended for installation of the oven door) *Range can be raised approximately 1" (2.5 cm) by not less than ¹⁄₄" (0.64 cm) flame retardant millboard covered with... rating plate (located on the oven frame behind the top left side of rigid gas pipe.

Installation Instructions
Page 6
...be made to trip during normal cycling. ■ Performance of this range be used , it will not be obtained from the gas specified on the types of gas that resist the action of electronic gas ranges. ■ The wiring diagram is grounded. No attempt shall be ...that is not properly polarized. See "Gas Conversions" section. Du Pont De Nemours and Company. 6 Failure to follow these instructions can be plugged into a GFCI wall outlet as to the manufacturer's instructions. latest edition or CAN/CGA B149 - LP gas conversion: Conversion must be provided. ■...
...be made to trip during normal cycling. ■ Performance of this range be used , it will not be obtained from the gas specified on the types of gas that resist the action of electronic gas ranges. ■ The wiring diagram is grounded. No attempt shall be ...that is not properly polarized. See "Gas Conversions" section. Du Pont De Nemours and Company. 6 Failure to follow these instructions can be plugged into a GFCI wall outlet as to the manufacturer's instructions. latest edition or CAN/CGA B149 - LP gas conversion: Conversion must be provided. ■...

Installation Instructions
Page 9
...pipe thread) C. Depending on the bracket template. Move range close enough to opening to do so can result in the following installation instructions. Continue installing your flooring, longer screws may be used to connect the range to the standards in floor. Union E. Black iron pipe... I . Explosion Hazard Use a new CSA International approved gas supply line. Typical rigid pipe ...
...pipe thread) C. Depending on the bracket template. Move range close enough to opening to do so can result in the following installation instructions. Continue installing your flooring, longer screws may be used to connect the range to the standards in floor. Union E. Black iron pipe... I . Explosion Hazard Use a new CSA International approved gas supply line. Typical rigid pipe ...

Installation Instructions
Page 10
... range back so rear range foot is under anti-tip bracket. 10 Adapter (must have ½" male pipe thread) D. H. Check that the gas pressure regulator shutoff valve is not kinked. A. The valve is open when the handle is indicated. Burner base B. Gas pressure... regulator B. Flexible connector HG F E. Failure to the adapters. See "Storage Drawer" section. Burner grate 2. Use a combination wrench and channel lock pliers to attach the flexible connector to follow these instructions can result in death,...
... range back so rear range foot is under anti-tip bracket. 10 Adapter (must have ½" male pipe thread) D. H. Check that the gas pressure regulator shutoff valve is not kinked. A. The valve is open when the handle is indicated. Burner base B. Gas pressure... regulator B. Flexible connector HG F E. Failure to the adapters. See "Storage Drawer" section. Burner grate 2. Use a combination wrench and channel lock pliers to attach the flexible connector to follow these instructions can result in death,...

Installation Instructions
Page 13
... the drawer clip by shipping material. Repeat steps 2-4 for removal. Check that the gas supply line shutoff valve is open. ■ If the gas supply line shutoff valve is open it inside the range in the drawer glides. Check that the storage drawer is level. Gently pull forward on...an extra part, go back through the opening in the Use and Care Guide. 8. Complete Installation 1. When the range has been on for 5 minutes, check for specific instruction on surface burners and oven. If you need Assistance or Service: Please reference the "Assistance or Service" section ...
... the drawer clip by shipping material. Repeat steps 2-4 for removal. Check that the gas supply line shutoff valve is open. ■ If the gas supply line shutoff valve is open it inside the range in the drawer glides. Check that the storage drawer is level. Gently pull forward on...an extra part, go back through the opening in the Use and Care Guide. 8. Complete Installation 1. When the range has been on for 5 minutes, check for specific instruction on surface burners and oven. If you need Assistance or Service: Please reference the "Assistance or Service" section ...

Installation Instructions
Page 14
... shutoff valve (shown in death or serious burns to children and adults. 1. Gas pressure regulator IMPORTANT: Do not remove the gas pressure regulator. 3. B A C A. Failure to follow these instructions can result in death, explosion, or fire. If connected to rear range foot. LP Gas Conversion A A. F Side view before A NG WARNING B FD E NG LP Tip Over Hazard A child...
... shutoff valve (shown in death or serious burns to children and adults. 1. Gas pressure regulator IMPORTANT: Do not remove the gas pressure regulator. 3. B A C A. Failure to follow these instructions can result in death, explosion, or fire. If connected to rear range foot. LP Gas Conversion A A. F Side view before A NG WARNING B FD E NG LP Tip Over Hazard A child...

Installation Instructions
Page 16
...facing out C. Refer to access the gas pressure regulator. Failure to follow these instructions can tip the range and be removed to "Complete Installation" in the "open" position) 5. B A C A. Plastic cover B. Turn over the gas pressure regulator cap and reinstall on ...Gas Connection" section for each cooktop burner. Turn gas pressure regulator cap counterclockwise with a warming drawer, an access cover must be killed. Gas pressure regulator cap F. Refer to remove. Locate gas pressure regulator at rear of this manual to rear range foot. Remove plastic cover from gas...
...facing out C. Refer to access the gas pressure regulator. Failure to follow these instructions can tip the range and be removed to "Complete Installation" in the "open" position) 5. B A C A. Plastic cover B. Turn over the gas pressure regulator cap and reinstall on ...Gas Connection" section for each cooktop burner. Turn gas pressure regulator cap counterclockwise with a warming drawer, an access cover must be killed. Gas pressure regulator cap F. Refer to remove. Locate gas pressure regulator at rear of this manual to rear range foot. Remove plastic cover from gas...

Installation Instructions
Page 18
...to loosen the orifice hood away from the pin (about 2 to the gas supply. 2. See "Adjust Oven Broil Burner Flame" in the "Installation Instructions" section of this manual to the "Make Gas Connection" section for proper burner ignition, operation, and burner flame adjustments.... The oven broil burner flame cannot be properly adjusted if this procedure. Refer to the "Electronic Ignition System" section for properly connecting the range...
...to loosen the orifice hood away from the pin (about 2 to the gas supply. 2. See "Adjust Oven Broil Burner Flame" in the "Installation Instructions" section of this manual to the "Make Gas Connection" section for proper burner ignition, operation, and burner flame adjustments.... The oven broil burner flame cannot be properly adjusted if this procedure. Refer to the "Electronic Ignition System" section for properly connecting the range...

Owners Manual
Page 1
... "Instrucciones para el usuario de la estufa a gas" en español, o para obtener información adicional acerca de su producto, visite: www.whirlpool.com Tenga listo su número de modelo completo. ® GAS RANGE USER INSTRUCTIONS THANK YOU for additional information. If you still ...need your model and serial number located on some models 8 RANGE CARE 8 Self-Cleaning Cycle (on the...
... "Instrucciones para el usuario de la estufa a gas" en español, o para obtener información adicional acerca de su producto, visite: www.whirlpool.com Tenga listo su número de modelo completo. ® GAS RANGE USER INSTRUCTIONS THANK YOU for additional information. If you still ...need your model and serial number located on some models 8 RANGE CARE 8 Self-Cleaning Cycle (on the...

Owners Manual
Page 2
...and soot. 2 Do not store or use gasoline or other reproductive harm. RANGE SAFETY Your safety and the safety of others . This symbol alerts you what can happen if the instructions are very important. Installation and service must be detected by a qualified installer,... call the fire department. - WARNING: If the information in your appliance. WARNING: Gas leaks cannot always be performed by smell. Follow the gas supplier's instructions. • If you don't follow instructions. WARNING: This product contains a chemical known to the State of potential exposure to ...
...and soot. 2 Do not store or use gasoline or other reproductive harm. RANGE SAFETY Your safety and the safety of others . This symbol alerts you what can happen if the instructions are very important. Installation and service must be detected by a qualified installer,... call the fire department. - WARNING: If the information in your appliance. WARNING: Gas leaks cannot always be performed by smell. Follow the gas supplier's instructions. • If you don't follow instructions. WARNING: This product contains a chemical known to the State of potential exposure to ...

Owners Manual
Page 5
... agents or any other material to enter the gas tube opening IMPORTANT: Do not obstruct the flow of the pan. KEYPAD COOK TIME FEATURE Timed cooking START TIME Delayed start START Cooking start CANCEL/OFF Range function TEMP/TIME Temperature and time adjust INSTRUCTIONS Timed Cooking allows the oven to be set to...
... agents or any other material to enter the gas tube opening IMPORTANT: Do not obstruct the flow of the pan. KEYPAD COOK TIME FEATURE Timed cooking START TIME Delayed start START Cooking start CANCEL/OFF Range function TEMP/TIME Temperature and time adjust INSTRUCTIONS Timed Cooking allows the oven to be set to...

Owners Manual
Page 9
...washcloths or abrasive paper towels. Do not clean in direction of our website at www.whirlpool.com. Unplug range or disconnect power. 4. Cleaning Method: ■ Nonabrasive plastic scrubbing pad and mildly abrasive...For racks that storage drawer is cool and empty before going into a dishwasher. ■ Gas Grate and Drip Pan Cleaner Part Number 31617: See cover for contact information. These spills ...remove from control panel to the control panel, do not use . Always follow label instructions on some models) Food spills containing acids, such as vinegar and tomato, should be ...
...washcloths or abrasive paper towels. Do not clean in direction of our website at www.whirlpool.com. Unplug range or disconnect power. 4. Cleaning Method: ■ Nonabrasive plastic scrubbing pad and mildly abrasive...For racks that storage drawer is cool and empty before going into a dishwasher. ■ Gas Grate and Drip Pan Cleaner Part Number 31617: See cover for contact information. These spills ...remove from control panel to the control panel, do not use . Always follow label instructions on some models) Food spills containing acids, such as vinegar and tomato, should be ...

Owners Manual
Page 10
...Instructions. ■ Is the range properly connected to follow these instructions can be of the "Electronic Oven Controls" section. 10 Turn on and will not operate during the cycle. ■ A pop can be heard each time the Bake or Broil burners ignite during self-clean cycle. ■ Is the control knob set correctly? Gas range...a service technician or see Installation Instructions. See "Cooktop Use" section. ■ Is the range level? Contact a service technician or see cover for contact information. Level the range. www.whirlpool.com Nothing will not operate &#...
...Instructions. ■ Is the range properly connected to follow these instructions can be of the "Electronic Oven Controls" section. 10 Turn on and will not operate during the cycle. ■ A pop can be heard each time the Bake or Broil burners ignite during self-clean cycle. ■ Is the control knob set correctly? Gas range...a service technician or see Installation Instructions. See "Cooktop Use" section. ■ Is the range level? Contact a service technician or see cover for contact information. Level the range. www.whirlpool.com Nothing will not operate &#...

Owners Manual
Page 11
... Cycle" section. ■ Has a delay start been set ? Level the range. Stainless Steel Cleaner and Polish (stainless steel models) Order Part Number 31462 All-Purpose Appliance Cleaner Order Part Number 31682 Gas Grate and Drip Pan Cleaner Order Part Number 31617 ACCESSORIES Split-Rack with Removable...11 Oven cooking results not what expected ■ Is the range level? Oven peeking releases oven heat and can result in the oven. ■ Are pie crust edges browning early? Move rack to restart. See the Installation Instructions. ■ Is the proper temperature set ? (on some...
... Cycle" section. ■ Has a delay start been set ? Level the range. Stainless Steel Cleaner and Polish (stainless steel models) Order Part Number 31462 All-Purpose Appliance Cleaner Order Part Number 31682 Gas Grate and Drip Pan Cleaner Order Part Number 31617 ACCESSORIES Split-Rack with Removable...11 Oven cooking results not what expected ■ Is the range level? Oven peeking releases oven heat and can result in the oven. ■ Are pie crust edges browning early? Move rack to restart. See the Installation Instructions. ■ Is the proper temperature set ? (on some...


