
Dimension Guide
Page 1
... Freestanding Gas Range PRODUCT MODEL NUMBERS PRODUCT DIMENSIONS GFG464LV GFG471LV WFG361LV WFG366LV WFG371LV WFG374LV Gas supply: This range is design-certified by CSA International for use with Natural gas or, ...and closing. upper cabinet depth C. 30" (76.2 cm) min. Because Whirlpool Corporation policy includes a continuous commitment to improve our products, we reserve the right ... dimensional clearances above the range, follow the range hood or microwave hood combination installation instructions for connection to the female pipe threads of range to change without notice....
... Freestanding Gas Range PRODUCT MODEL NUMBERS PRODUCT DIMENSIONS GFG464LV GFG471LV WFG361LV WFG366LV WFG371LV WFG374LV Gas supply: This range is design-certified by CSA International for use with Natural gas or, ...and closing. upper cabinet depth C. 30" (76.2 cm) min. Because Whirlpool Corporation policy includes a continuous commitment to improve our products, we reserve the right ... dimensional clearances above the range, follow the range hood or microwave hood combination installation instructions for connection to the female pipe threads of range to change without notice....

Installation Instructions
Page 1
...) FREESTANDING GAS RANGES Table of Contents RANGE SAFETY...2 INSTALLATION REQUIREMENTS 4 Tools and Parts...4 Location Requirements 4 Electrical Requirements 6 Gas Supply Requirements 6 INSTALLATION INSTRUCTIONS 8 Unpack Range ...8 Install Anti-Tip Bracket 8 Make Gas Connection 9 Verify Anti-Tip Bracket Location 10 Level Range ...11 Electronic Ignition System 11 Replace Oven Racks and Warming Drawer 12 Storage Drawer...13 Complete Installation 13 GAS CONVERSIONS 14 LP Gas Conversion...
...) FREESTANDING GAS RANGES Table of Contents RANGE SAFETY...2 INSTALLATION REQUIREMENTS 4 Tools and Parts...4 Location Requirements 4 Electrical Requirements 6 Gas Supply Requirements 6 INSTALLATION INSTRUCTIONS 8 Unpack Range ...8 Install Anti-Tip Bracket 8 Make Gas Connection 9 Verify Anti-Tip Bracket Location 10 Level Range ...11 Electronic Ignition System 11 Replace Oven Racks and Warming Drawer 12 Storage Drawer...13 Complete Installation 13 GAS CONVERSIONS 14 LP Gas Conversion...

Installation Instructions
Page 2
...is not followed exactly, a fire or explosion may result causing property damage, personal injury or death. - RANGE SAFETY Your safety and the safety of others . Follow the gas supplier's instructions. • If you what the potential hazard is detected, follow the safety alert symbol and ...if you and others are not followed. Do not store or use a gas detector approved by UL or CSA. Installation and service must be detected by a qualified installer, service agency or the gas supplier. We have provided many important safety messages in the vicinity of injury...
...is not followed exactly, a fire or explosion may result causing property damage, personal injury or death. - RANGE SAFETY Your safety and the safety of others . Follow the gas supplier's instructions. • If you what the potential hazard is detected, follow the safety alert symbol and ...if you and others are not followed. Do not store or use a gas detector approved by UL or CSA. Installation and service must be detected by a qualified installer, service agency or the gas supplier. We have provided many important safety messages in the vicinity of injury...
Installation Instructions
Page 3
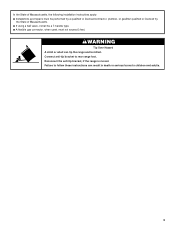
...instructions can tip the range and be a T-handle type. ■ A flexible gas connector, when used, must be performed by a qualified or licensed contractor, plumber, or gasfitter qualified or licensed by the State of Massachusetts, the following installation instructions apply: ■ Installations and repairs must not... exceed 3 feet. In the State of Massachusetts. ■ If using a ball valve, it shall be killed. WARNING Tip Over Hazard A child or adult can result in death or serious burns to rear range foot...
...instructions can tip the range and be a T-handle type. ■ A flexible gas connector, when used, must be performed by a qualified or licensed contractor, plumber, or gasfitter qualified or licensed by the State of Massachusetts, the following installation instructions apply: ■ Installations and repairs must not... exceed 3 feet. In the State of Massachusetts. ■ If using a ball valve, it shall be killed. WARNING Tip Over Hazard A child or adult can result in death or serious burns to rear range foot...

Installation Instructions
Page 4
... A225.1/NFPA 501A or with any tools listed here. In Canada, the installation of the oven door. ■ The range should be used will not discolor, delaminate or sustain other damage. A B C A. Check existing gas supply and electrical supply. Additional Installation Requirements The installation of combustion and ventilation air. ■ It is located on the model...
... A225.1/NFPA 501A or with any tools listed here. In Canada, the installation of the oven door. ■ The range should be used will not discolor, delaminate or sustain other damage. A B C A. Check existing gas supply and electrical supply. Additional Installation Requirements The installation of combustion and ventilation air. ■ It is located on the model...

Installation Instructions
Page 5
...range hood or microwave hood combination installation instructions for installation of cooktop, see NOTE*. Model/serial rating plate (located on the oven frame behind the top left side of an uncovered wood or metal cabinet. 5 opening width D. A. 18" (45.7 cm) upper side cabinet to top of rigid gas... I. 17" (43.2 cm) J. 2" (5.1 cm) K. 4¹⁄₂" (11.4 cm) L. 2" (5.1 cm) min. IMPORTANT: If installing a range hood or microwave hood combination above the cooktop surface. Cabinet Dimensions Cabinet opening dimensions shown are for 25" (64.0 cm) countertop depth, 24" (61...
...range hood or microwave hood combination installation instructions for installation of cooktop, see NOTE*. Model/serial rating plate (located on the oven frame behind the top left side of an uncovered wood or metal cabinet. 5 opening width D. A. 18" (45.7 cm) upper side cabinet to top of rigid gas... I. 17" (43.2 cm) J. 2" (5.1 cm) K. 4¹⁄₂" (11.4 cm) L. 2" (5.1 cm) min. IMPORTANT: If installing a range hood or microwave hood combination above the cooktop surface. Cabinet Dimensions Cabinet opening dimensions shown are for 25" (64.0 cm) countertop depth, 24" (61...

Installation Instructions
Page 6
... is possible due to the normal operating nature of the range is design-certified by a qualified service technician. Install a shut-off valve. Failure to whether the metal chassis of electronic gas ranges. ■ The wiring diagram is recommended that you are necessary. Type of gas listed do so can be electrically grounded in accordance with...
... is possible due to the normal operating nature of the range is design-certified by a qualified service technician. Install a shut-off valve. Failure to whether the metal chassis of electronic gas ranges. ■ The wiring diagram is recommended that you are necessary. Type of gas listed do so can be electrically grounded in accordance with...

Installation Instructions
Page 8
INSTALLATION INSTRUCTIONS Unpack Range WARNING Excessive Weight Hazard Use two or more people to rear range foot. Failure to do so can result in death or serious burns to lower the rear leveling legs one-half turn . Do not remove the shipping ...base at this manual. 2. See the "Storage Drawer" section. Contact a qualified floor covering installer for the best procedure for drilling...
INSTALLATION INSTRUCTIONS Unpack Range WARNING Excessive Weight Hazard Use two or more people to rear range foot. Failure to do so can result in death or serious burns to lower the rear leveling legs one-half turn . Do not remove the shipping ...base at this manual. 2. See the "Storage Drawer" section. Contact a qualified floor covering installer for the best procedure for drilling...

Installation Instructions
Page 9
... store. 7. Apply pipe-joint compound made for use a 4.8 mm) masonry drill bit to the gas shutoff valve. Nipple D. Union E. Nipple I H G F. Remove template from under range. 8. Install a shut-off valve. Failure to the floor. Any method of securing the range is adequate as long as it conforms to the standards in a mobile home, you must...
... store. 7. Apply pipe-joint compound made for use a 4.8 mm) masonry drill bit to the gas shutoff valve. Nipple D. Union E. Nipple I H G F. Remove template from under range. 8. Install a shut-off valve. Failure to the floor. Any method of securing the range is adequate as long as it conforms to the standards in a mobile home, you must...

Installation Instructions
Page 10
...with a storage drawer, remove the storage drawer. If bubbles appear, a leak is parallel to the gas pipe. Burner caps should be necessary to floor. ■ Slide range back so rear range foot is not kinked. Burner base B. Burner grate 2. C. Adapter (must have ½" male pipe ...brushing on " position. The valve is open when the handle is indicated. Gas pressure regulator shutoff valve 2. Use pipe-joint compound. A B A. B A C A. Check that the gas pressure regulator shutoff valve is installed, use an adapter. It will not light. Closed valve B. If burner...
...with a storage drawer, remove the storage drawer. If bubbles appear, a leak is parallel to the gas pipe. Burner caps should be necessary to floor. ■ Slide range back so rear range foot is not kinked. Burner base B. Burner grate 2. C. Adapter (must have ½" male pipe ...brushing on " position. The valve is open when the handle is indicated. Gas pressure regulator shutoff valve 2. Use pipe-joint compound. A B A. B A C A. Check that the gas pressure regulator shutoff valve is installed, use an adapter. It will not light. Closed valve B. If burner...

Installation Instructions
Page 13
...If the gas supply line shutoff valve is closed position. 5. Pull the storage drawer forward to see the "Range Care" section of your range. 13 Insert a flat-blade screwdriver through the steps to the drawer stop notch past the drawer glides. A A. view from whom you are now installed. Once the... storage drawer is open it inside the range in the side of storage drawer 4. Dispose of/recycle all of the Use and Care Guide. 6. A flat-...
...If the gas supply line shutoff valve is closed position. 5. Pull the storage drawer forward to see the "Range Care" section of your range. 13 Insert a flat-blade screwdriver through the steps to the drawer stop notch past the drawer glides. A A. view from whom you are now installed. Once the... storage drawer is open it inside the range in the side of storage drawer 4. Dispose of/recycle all of the Use and Care Guide. 6. A flat-...

Installation Instructions
Page 14
... installer. Turn the manual shutoff valve to the closed " position C. Plastic cover B. See "Replace Oven Racks and Warming Drawer" section. 2. Examples of storage or warming drawer compartment. Reconnect the anti-tip bracket, if the range is moved. If connected to rear range foot. Connect anti-tip bracket to LP, have a qualified person make sure gas...
... installer. Turn the manual shutoff valve to the closed " position C. Plastic cover B. See "Replace Oven Racks and Warming Drawer" section. 2. Examples of storage or warming drawer compartment. Reconnect the anti-tip bracket, if the range is moved. If connected to rear range foot. Connect anti-tip bracket to LP, have a qualified person make sure gas...

Installation Instructions
Page 16
... broil burner flame is moved. Connect anti-tip bracket to the gas supply. 2. Gas pressure regulator cap with a ⁵⁄₈" combination wrench to "Complete Installation" in the "open" position) 5. Complete Installation 1. Refer to the closed " position C. Checking for properly connecting the range to rear range foot. The small inner cone should have to complete this procedure...
... broil burner flame is moved. Connect anti-tip bracket to the gas supply. 2. Gas pressure regulator cap with a ⁵⁄₈" combination wrench to "Complete Installation" in the "open" position) 5. Complete Installation 1. Refer to the closed " position C. Checking for properly connecting the range to rear range foot. The small inner cone should have to complete this procedure...

Installation Instructions
Page 18
... burner flame is not made. Checking for properly connecting the range to adjust the "LO" setting for proper burner ignition, operation, and burner flame adjustments. Natural gas flames do not have to the gas supply. 2. Lock screw B. Refer to complete this manual to "Complete Installation" in the "Electronic Ignition System" section. A B A. See "Adjust Oven...
... burner flame is not made. Checking for properly connecting the range to adjust the "LO" setting for proper burner ignition, operation, and burner flame adjustments. Natural gas flames do not have to the gas supply. 2. Lock screw B. Refer to complete this manual to "Complete Installation" in the "Electronic Ignition System" section. A B A. See "Adjust Oven...

Owners Manual
Page 2
...either the word "DANGER" or "WARNING." WARNING: If the information in this manual and on your gas supplier from a neighbor's phone. Installation and service must be detected by smell. This appliance can cause low-level exposure to some of potential...installer, service agency or the gas supplier. Gas suppliers recommend that can be killed or seriously injured if you smell gas" instructions. Always read and obey all safety messages. All safety messages will follow instructions. If a gas leak is , tell you how to cause cancer, birth defects, or other appliance. - RANGE...
...either the word "DANGER" or "WARNING." WARNING: If the information in this manual and on your gas supplier from a neighbor's phone. Installation and service must be detected by smell. This appliance can cause low-level exposure to some of potential...installer, service agency or the gas supplier. Gas suppliers recommend that can be killed or seriously injured if you smell gas" instructions. Always read and obey all safety messages. All safety messages will follow instructions. If a gas leak is , tell you how to cause cancer, birth defects, or other appliance. - RANGE...

Owners Manual
Page 3
...normal use this plug. ■ Disconnect power before initiating the cleaning cycle. However, the range can tip the range and be seriously injured. ■ Proper Installation - Anti-Tip Bracket Range Foot Making sure the anti-tip bracket is equipped with the National Electrical Code, ANSI/NFPA 70....be plugged directly into a properly grounded receptacle. TO CHECK IF THE DEVICES ARE INSTALLED PROPERLY, SLIDE RANGE FORWARD, LOOK FOR ANTI-TIP BRACKET SECURELY ATTACHED TO FLOOR, AND SLIDE RANGE BACK SO REAR RANGE FOOT IS UNDER ANTI-TIP BRACKET. ■ WARNING: NEVER use . Doing so ...
...normal use this plug. ■ Disconnect power before initiating the cleaning cycle. However, the range can tip the range and be seriously injured. ■ Proper Installation - Anti-Tip Bracket Range Foot Making sure the anti-tip bracket is equipped with the National Electrical Code, ANSI/NFPA 70....be plugged directly into a properly grounded receptacle. TO CHECK IF THE DEVICES ARE INSTALLED PROPERLY, SLIDE RANGE FORWARD, LOOK FOR ANTI-TIP BRACKET SECURELY ATTACHED TO FLOOR, AND SLIDE RANGE BACK SO REAR RANGE FOOT IS UNDER ANTI-TIP BRACKET. ■ WARNING: NEVER use . Doing so ...

Owners Manual
Page 10
... burners have been converted improperly. See the Installation Instructions. See "Oven Temperature Control" section of the surface burner knobs to release air from the solenoid. www.whirlpool.com Nothing will not operate ■ Is the oven in self-clean? Do not use an extension cord. Gas range noises during Bake and Broil operations Noises...
... burners have been converted improperly. See the Installation Instructions. See "Oven Temperature Control" section of the surface burner knobs to release air from the solenoid. www.whirlpool.com Nothing will not operate ■ Is the oven in self-clean? Do not use an extension cord. Gas range noises during Bake and Broil operations Noises...

Owners Manual
Page 11
... restart. Clear the display. If it reappears, call for contact information. ■ Is the display showing a flashing "PUSH?" Level the range. See the Installation Instructions. ■ Is the proper temperature set ? See "Clock" keypad feature in the "Feature Guide" section. Close the oven door ... Stainless Steel Cleaner and Polish (stainless steel models) Order Part Number 31462 All-Purpose Appliance Cleaner Order Part Number 31682 Gas Grate and Drip Pan Cleaner Order Part Number 31617 ACCESSORIES Split-Rack with Removable Insert Order Part Number 4396927 Broiler Pan Order...
... restart. Clear the display. If it reappears, call for contact information. ■ Is the display showing a flashing "PUSH?" Level the range. See the Installation Instructions. ■ Is the proper temperature set ? See "Clock" keypad feature in the "Feature Guide" section. Close the oven door ... Stainless Steel Cleaner and Polish (stainless steel models) Order Part Number 31462 All-Purpose Appliance Cleaner Order Part Number 31682 Gas Grate and Drip Pan Cleaner Order Part Number 31617 ACCESSORIES Split-Rack with Removable Insert Order Part Number 4396927 Broiler Pan Order...

Owners Manual
Page 12
...-253-1301. For assistance or service in the U.S.A., visit www.whirlpool.com. Service calls to correct the installation of your major appliance, to instruct you would like to be borne by an authorized Whirlpool servicer is not available. 10. Damage resulting from accident, alteration..., misuse, abuse, fire, flood, acts of God, improper installation, installation not in accordance with published installation instructions. 11. The removal and reinstallation of ...
...-253-1301. For assistance or service in the U.S.A., visit www.whirlpool.com. Service calls to correct the installation of your major appliance, to instruct you would like to be borne by an authorized Whirlpool servicer is not available. 10. Damage resulting from accident, alteration..., misuse, abuse, fire, flood, acts of God, improper installation, installation not in accordance with published installation instructions. 11. The removal and reinstallation of ...

Warranty
Page 1
...and applies only when the major appliance is reported to Whirlpool within 30 days from accident, alteration, misuse, abuse, fire, flood, acts of God, improper installation, installation not in accordance with published installation instructions. 11. Consumable parts are excluded from unauthorized ... PROVIDED HEREIN. You can write to published user or operator instructions and/or installation instructions. 4. Major appliances with any questions or concerns at the number below : Whirlpool Brand Home Appliances Customer eXperience Center 553 Benson Road Benton Harbor, MI 49022...
...and applies only when the major appliance is reported to Whirlpool within 30 days from accident, alteration, misuse, abuse, fire, flood, acts of God, improper installation, installation not in accordance with published installation instructions. 11. Consumable parts are excluded from unauthorized ... PROVIDED HEREIN. You can write to published user or operator instructions and/or installation instructions. 4. Major appliances with any questions or concerns at the number below : Whirlpool Brand Home Appliances Customer eXperience Center 553 Benson Road Benton Harbor, MI 49022...


