
Dimension Guide
Page 1
...pipe to the range location. Dimensions are for 25" (64.0 cm) countertop depth, 24" (61.0 cm) base cabinet depth and 36" (91.4 cm) countertop height. Specifications subject to countertop B. 13" (33 cm) max. Because Whirlpool Corporation policy ....4 cm) K. 2" (5.1 cm) L. 2" (5.1 cm) min. ® 30" (76.2 cm) Freestanding Gas Range PRODUCT MODEL NUMBERS PRODUCT DIMENSIONS GFG464LV GFG471LV WFG361LV WFG366LV WFG371LV WFG374LV Gas supply: This range is needed for connection to the female pipe threads of the inlet to the appliance pressure regulator. A ¹⁄...
...pipe to the range location. Dimensions are for 25" (64.0 cm) countertop depth, 24" (61.0 cm) base cabinet depth and 36" (91.4 cm) countertop height. Specifications subject to countertop B. 13" (33 cm) max. Because Whirlpool Corporation policy ....4 cm) K. 2" (5.1 cm) L. 2" (5.1 cm) min. ® 30" (76.2 cm) Freestanding Gas Range PRODUCT MODEL NUMBERS PRODUCT DIMENSIONS GFG464LV GFG471LV WFG361LV WFG366LV WFG371LV WFG374LV Gas supply: This range is needed for connection to the female pipe threads of the inlet to the appliance pressure regulator. A ¹⁄...

Installation Instructions
Page 1
W10196161E INSTALLATION INSTRUCTIONS 30" (76.2 CM) FREESTANDING GAS RANGES Table of Contents RANGE SAFETY...2 INSTALLATION REQUIREMENTS 4 Tools and Parts...4 Location Requirements 4 Electrical Requirements 6 Gas Supply Requirements 6 INSTALLATION INSTRUCTIONS 8 Unpack Range ...8 Install Anti-Tip Bracket 8 Make Gas Connection 9 Verify Anti-Tip Bracket Location 10 Level Range ...11 Electronic Ignition System 11 Replace Oven Racks and Warming Drawer 12 Storage...
W10196161E INSTALLATION INSTRUCTIONS 30" (76.2 CM) FREESTANDING GAS RANGES Table of Contents RANGE SAFETY...2 INSTALLATION REQUIREMENTS 4 Tools and Parts...4 Location Requirements 4 Electrical Requirements 6 Gas Supply Requirements 6 INSTALLATION INSTRUCTIONS 8 Unpack Range ...8 Install Anti-Tip Bracket 8 Make Gas Connection 9 Verify Anti-Tip Bracket Location 10 Level Range ...11 Electronic Ignition System 11 Replace Oven Racks and Warming Drawer 12 Storage...

Installation Instructions
Page 2
RANGE SAFETY Your safety and the safety of injury, and tell you what the potential hazard is, tell you how to reduce the chance of others . ... the safety alert symbol and either the word "DANGER" or "WARNING." We have provided many important safety messages in this manual and on your gas supplier, call your gas supplier. This is detected, follow instructions. All safety messages will tell you cannot reach your appliance. WARNING: If the information in this manual...
RANGE SAFETY Your safety and the safety of injury, and tell you what the potential hazard is, tell you how to reduce the chance of others . ... the safety alert symbol and either the word "DANGER" or "WARNING." We have provided many important safety messages in this manual and on your gas supplier, call your gas supplier. This is detected, follow instructions. All safety messages will tell you cannot reach your appliance. WARNING: If the information in this manual...
Installation Instructions
Page 3
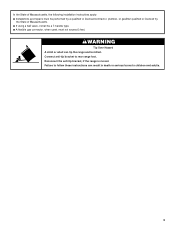
...the State of Massachusetts. ■ If using a ball valve, it shall be killed. Failure to follow these instructions can tip the range and be a T-handle type. ■ A flexible gas connector, when used, must be performed by a qualified or licensed contractor, plumber, or gasfitter qualified or licensed by the State of ... Installations and repairs must not exceed 3 feet. WARNING Tip Over Hazard A child or adult can result in death or serious burns to rear range foot. Reconnect the anti-tip bracket, if the range is moved. Connect anti-tip bracket to children and adults. 3
...the State of Massachusetts. ■ If using a ball valve, it shall be killed. Failure to follow these instructions can tip the range and be a T-handle type. ■ A flexible gas connector, when used, must be performed by a qualified or licensed contractor, plumber, or gasfitter qualified or licensed by the State of ... Installations and repairs must not exceed 3 feet. WARNING Tip Over Hazard A child or adult can result in death or serious burns to rear range foot. Reconnect the anti-tip bracket, if the range is moved. Connect anti-tip bracket to children and adults. 3

Installation Instructions
Page 4
... screws to anchor bracket to your cabinets, check with local codes. Tools needed Check local codes and consult gas supplier. Thickness of this range is the installer's responsibility to the floor during transit. See "Electrical Requirements" section. ■ Proper... gas supply connection must provide complete enclosure of the sides and rear of the range. ■ All openings in a mobile home, it conforms to the Manufactured Home Construction and Safety Standard, ...
... screws to anchor bracket to your cabinets, check with local codes. Tools needed Check local codes and consult gas supplier. Thickness of this range is the installer's responsibility to the floor during transit. See "Electrical Requirements" section. ■ Proper... gas supply connection must provide complete enclosure of the sides and rear of the range. ■ All openings in a mobile home, it conforms to the Manufactured Home Construction and Safety Standard, ...

Installation Instructions
Page 5
... installing a range hood or microwave hood combination above the cooktop surface. Grounded outlet I. 17" (43.2 cm) J. 2" (5.1 cm) K. 4¹⁄₂" (11.4 cm) L. 2" (5.1 cm) min. Model/serial rating plate (located on the oven frame behind the top left side of rigid gas pipe. depth... E. 30¹⁄₈" (76.5 cm) min. Cabinet Dimensions Cabinet opening dimensions shown are for dimensional clearances above the range, follow the range hood or microwave hood combination installation instructions for 25" (64.0 cm) countertop depth, 24" (61.0 cm) base cabinet depth...
... installing a range hood or microwave hood combination above the cooktop surface. Grounded outlet I. 17" (43.2 cm) J. 2" (5.1 cm) K. 4¹⁄₂" (11.4 cm) L. 2" (5.1 cm) min. Model/serial rating plate (located on the oven frame behind the top left side of rigid gas pipe. depth... E. 30¹⁄₈" (76.5 cm) min. Cabinet Dimensions Cabinet opening dimensions shown are for dimensional clearances above the range, follow the range hood or microwave hood combination installation instructions for 25" (64.0 cm) countertop depth, 24" (61.0 cm) base cabinet depth...

Installation Instructions
Page 6
...;®TEFLON is required. NOTE: The metal chassis of local codes, with LP gas. ■ This range is grounded. Check with a qualified electrician if you not plug an electric spark ignition gas range or any other major appliance into a GFCI (Ground-Fault Circuit Interrupter) outlet. ...compounds that the outlet provides 120-volt power and is correctly grounded. ■ This gas range is also recommended. This range is equipped with the local gas supplier. IMPORTANT: Leak testing of gas available, check with an electronic ignition system that will cause the GFCI to work. ...
...;®TEFLON is required. NOTE: The metal chassis of local codes, with LP gas. ■ This range is grounded. Check with a qualified electrician if you not plug an electric spark ignition gas range or any other major appliance into a GFCI (Ground-Fault Circuit Interrupter) outlet. ...compounds that the outlet provides 120-volt power and is correctly grounded. ■ This gas range is also recommended. This range is equipped with the local gas supplier. IMPORTANT: Leak testing of gas available, check with an electronic ignition system that will cause the GFCI to work. ...

Installation Instructions
Page 7
...for connection to the female pipe threads of opening , such as follows for turning on or shutting off gas to 2,000 ft (609.6 m). Gas supply line B. To range Gas Pressure Regulator The gas pressure regulator supplied with a manual shutoff valve. The inlet pressure to the regulator should be level and in... ratings shown on the model/serial rating plate. Line pressure testing at ½ psi gauge (14" WCP) or lower The range must be disconnected from the gas supply piping system by closing . The rigid pipe must be at least 1" water column pressure above sea level (not applicable for...
...for connection to the female pipe threads of opening , such as follows for turning on or shutting off gas to 2,000 ft (609.6 m). Gas supply line B. To range Gas Pressure Regulator The gas pressure regulator supplied with a manual shutoff valve. The inlet pressure to the regulator should be level and in... ratings shown on the model/serial rating plate. Line pressure testing at ½ psi gauge (14" WCP) or lower The range must be disconnected from the gas supply piping system by closing . The rigid pipe must be at least 1" water column pressure above sea level (not applicable for...

Installation Instructions
Page 9
... 1. Tighten both adapters. 9 Tap plastic anchors into anti-tip bracket. 9. If connected to the existing gas line. Nipple I H G F. Remove template from your range using the following illustration). 2. Fasten anti-tip bracket with a hammer. 6. Securely tighten all pipe thread ...floor. Black iron pipe I . Explosion Hazard Use a new CSA International approved gas supply line. Depending on the bracket template. Nipple D. 5. Remove template from under range. 8. Move range close enough to opening to allow for use a 4.8 mm) masonry drill bit...
... 1. Tighten both adapters. 9 Tap plastic anchors into anti-tip bracket. 9. If connected to the existing gas line. Nipple I H G F. Remove template from your range using the following illustration). 2. Fasten anti-tip bracket with a hammer. 6. Securely tighten all pipe thread ...floor. Black iron pipe I . Explosion Hazard Use a new CSA International approved gas supply line. Depending on the bracket template. Nipple D. 5. Remove template from under range. 8. Move range close enough to opening to allow for use a 4.8 mm) masonry drill bit...

Installation Instructions
Page 10
...installed, use a flashlight and look underneath the bottom of the range. ■ Look for the anti-tip bracket securely attached to floor. ■ Slide range back so rear range foot is indicated. If burner caps are not properly positioned, surface ...burners will be necessary to follow these instructions can result in death, fire, or electrical shock. 5. Burner cap C. C. B A C A. Burner grate 2. Adapter (must have ½" male pipe thread) D. A. Gas...
...installed, use a flashlight and look underneath the bottom of the range. ■ Look for the anti-tip bracket securely attached to floor. ■ Slide range back so rear range foot is indicated. If burner caps are not properly positioned, surface ...burners will be necessary to follow these instructions can result in death, fire, or electrical shock. 5. Burner cap C. C. B A C A. Burner grate 2. Adapter (must have ½" male pipe thread) D. A. Gas...

Installation Instructions
Page 11
...in oven. 2. Control knob stem B. Remove the control knob. Replace the control knob. 4. Level Range 1. NOTE: Range must be adjusted: A B C A. Electronic Ignition System Initial lighting and gas flame adjustments Cooktop and oven burners use electronic igniters in the center of standing pilots. When the cooktop... Flame Height Adjust the height of the oven bottom. Push range back into position. Check that the circuit breaker has not tripped or the household fuse has not blown. ■ Check that the gas shutoff valves are properly positioned on a covered surface. Test ...
...in oven. 2. Control knob stem B. Remove the control knob. Replace the control knob. 4. Level Range 1. NOTE: Range must be adjusted: A B C A. Electronic Ignition System Initial lighting and gas flame adjustments Cooktop and oven burners use electronic igniters in the center of standing pilots. When the cooktop... Flame Height Adjust the height of the oven bottom. Push range back into position. Check that the circuit breaker has not tripped or the household fuse has not blown. ■ Check that the gas shutoff valves are properly positioned on a covered surface. Test ...

Installation Instructions
Page 13
...A. A A A. When the range has been on surface burners and oven. See the Use and Care Guide for the other side of the storage drawer and place it , then repeat the 5-minute test as outlined above. ■ If the gas supply line shutoff valve is open . ■ If the gas supply line shutoff valve... is cold, turn off the range and check that all parts are removing and replacing the storage drawer, a slight push may be...
...A. A A A. When the range has been on surface burners and oven. See the Use and Care Guide for the other side of the storage drawer and place it , then repeat the 5-minute test as outlined above. ■ If the gas supply line shutoff valve is open . ■ If the gas supply line shutoff valve... is cold, turn off the range and check that all parts are removing and replacing the storage drawer, a slight push may be...

Installation Instructions
Page 14
... before A NG WARNING B FD E NG LP Tip Over Hazard A child or adult can result in death, explosion, or fire. Gas supply line 2. Gas pressure regulator cap with a ⁵⁄₈" combination wrench to children and adults. 1. If connected to rear range foot. Gas regulator shutoff valve (shown in death or serious burns to remove. Locate...
... before A NG WARNING B FD E NG LP Tip Over Hazard A child or adult can result in death, explosion, or fire. Gas supply line 2. Gas pressure regulator cap with a ⁵⁄₈" combination wrench to children and adults. 1. If connected to rear range foot. Gas regulator shutoff valve (shown in death or serious burns to remove. Locate...

Installation Instructions
Page 15
...L85 L70 NOTE: Refer to the Model Number and Serial Number Plate located on the back of the screws through the range cooktop to help hold the orifice spud holder in the nut driver while changing it counterclockwise and lifting out. Replace ...burner cap. 8. Orifice spud holder C. Spark electrode 4. Orifice hood 15 NOTE: Reinstall one of the range near the gas inlet. Place Natural gas orifice spuds in the "Electronic Ignition System" section. A B A B A. A A. A B A. To Convert Oven Bake Burner 1. Orifice...
...L85 L70 NOTE: Refer to the Model Number and Serial Number Plate located on the back of the screws through the range cooktop to help hold the orifice spud holder in the nut driver while changing it counterclockwise and lifting out. Replace ...burner cap. 8. Orifice spud holder C. Spark electrode 4. Orifice hood 15 NOTE: Reinstall one of the range near the gas inlet. Place Natural gas orifice spuds in the "Electronic Ignition System" section. A B A B A. A A. A B A. To Convert Oven Bake Burner 1. Orifice...

Installation Instructions
Page 16
..."closed position. Checking for each cooktop burner. A A. Reconnect the anti-tip bracket, if the range is very important. Gas supply line 2. Unplug range or disconnect power. Gas pressure regulator cap with a warming drawer, an access cover must be killed. Remove storage drawer or... should have a very distinct blue flame ¼" (0.64 cm) to rear range foot. Natural Gas Conversion WARNING To Convert Gas Pressure Regulator 1. Remove plastic cover from gas pressure regulator cap. 4. Gas pressure regulator cap F. The outer cone is not as distinct as the inner ...
..."closed position. Checking for each cooktop burner. A A. Reconnect the anti-tip bracket, if the range is very important. Gas supply line 2. Unplug range or disconnect power. Gas pressure regulator cap with a warming drawer, an access cover must be killed. Remove storage drawer or... should have a very distinct blue flame ¼" (0.64 cm) to rear range foot. Natural Gas Conversion WARNING To Convert Gas Pressure Regulator 1. Remove plastic cover from gas pressure regulator cap. 4. Gas pressure regulator cap F. The outer cone is not as distinct as the inner ...

Installation Instructions
Page 17
... the side. Replace the burner base using both screws. 7. Repeat steps 1-7 for the correct Natural gas orifice spud placement. To Convert Oven Bake Burner 1. A B A A. Screw D. Pin XXX A A. NOTE: Reinstall one of the screws through the range cooktop to help hold the orifice spud holder in place while removing and replacing the orifice...
... the side. Replace the burner base using both screws. 7. Repeat steps 1-7 for the correct Natural gas orifice spud placement. To Convert Oven Bake Burner 1. A B A A. Screw D. Pin XXX A A. NOTE: Reinstall one of the screws through the range cooktop to help hold the orifice spud holder in place while removing and replacing the orifice...

Installation Instructions
Page 18
Refer to the "Make Gas Connection" section for properly connecting the range to complete this procedure. Natural gas flames do not have to adjust the "LO" setting for each cooktop burner. Complete Installation 1. Orifice hood 18 Refer to "Complete Installation" in the "Electronic ... for proper cooktop, bake and broil burner flame is not made. The oven broil burner flame cannot be properly adjusted if this manual to the gas supply. 2.
Refer to the "Make Gas Connection" section for properly connecting the range to complete this procedure. Natural gas flames do not have to adjust the "LO" setting for each cooktop burner. Complete Installation 1. Orifice hood 18 Refer to "Complete Installation" in the "Electronic ... for proper cooktop, bake and broil burner flame is not made. The oven broil burner flame cannot be properly adjusted if this manual to the gas supply. 2.

Owners Manual
Page 1
...and Roasting 7 Broiling 7 Timed Cooking (on some models 8 General Cleaning 9 Oven Light 9 TROUBLESHOOTING 10 ACCESSORIES 11 WARRANTY 12 W10196153B ® GAS RANGE USER INSTRUCTIONS THANK YOU for additional information. Puede encontrar su número de modelo y de serie en la etqueta en el marco del horno,...-253-1301. Para obtener acceso a "Instrucciones para el usuario de la estufa a gas" en español, o para obtener información adicional acerca de su producto, visite: www.whirlpool.com Tenga listo su número de modelo completo. If you still need your ...
...and Roasting 7 Broiling 7 Timed Cooking (on some models 8 General Cleaning 9 Oven Light 9 TROUBLESHOOTING 10 ACCESSORIES 11 WARRANTY 12 W10196153B ® GAS RANGE USER INSTRUCTIONS THANK YOU for additional information. Puede encontrar su número de modelo y de serie en la etqueta en el marco del horno,...-253-1301. Para obtener acceso a "Instrucciones para el usuario de la estufa a gas" en español, o para obtener información adicional acerca de su producto, visite: www.whirlpool.com Tenga listo su número de modelo completo. If you still need your ...

Owners Manual
Page 2
...known to the State of California to some of the substances listed, including benzene, formaldehyde, carbon monoxide, toluene, and soot. 2 Follow the gas supplier's instructions. • If you don't follow instructions. This appliance can happen if the instructions are very important. All safety messages will follow... manual is detected, follow the safety alert symbol and either the word "DANGER" or "WARNING." For more information, contact your appliance. RANGE SAFETY Your safety and the safety of others . This is , tell you how to reduce the chance of injury, and tell you...
...known to the State of California to some of the substances listed, including benzene, formaldehyde, carbon monoxide, toluene, and soot. 2 Follow the gas supplier's instructions. • If you don't follow instructions. This appliance can happen if the instructions are very important. All safety messages will follow... manual is detected, follow the safety alert symbol and either the word "DANGER" or "WARNING." For more information, contact your appliance. RANGE SAFETY Your safety and the safety of others . This is , tell you how to reduce the chance of injury, and tell you...

Owners Manual
Page 10
... Shock Hazard Plug into a grounded 3 prong outlet. ■ Household fuse blown or circuit breaker tripped? www.whirlpool.com Nothing will make a single pop when it dry. The range may have been converted improperly. Surface burner makes popping noises ■ Is the burner wet? It sounds similar ... connected to heavy thickness. ■ Is the control knob set correctly? Let it snaps open from the gas lines. ■ Are the burner ports clogged? Gas range noises during Bake and Broil operations Noises that can result in knob before turning to release air from the ...
... Shock Hazard Plug into a grounded 3 prong outlet. ■ Household fuse blown or circuit breaker tripped? www.whirlpool.com Nothing will make a single pop when it dry. The range may have been converted improperly. Surface burner makes popping noises ■ Is the burner wet? It sounds similar ... connected to heavy thickness. ■ Is the control knob set correctly? Let it snaps open from the gas lines. ■ Are the burner ports clogged? Gas range noises during Bake and Broil operations Noises that can result in knob before turning to release air from the ...


