
Dimension Guide
Page 1
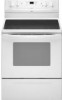
...-amp power supply cord (pigtail). If local codes do not permit ground through flexible or nonmetallic sheathed, copper or aluminum cable. For complete details, see NOTE*. Use a 3-wire, UL listed, 40- Model/serial rating plate (located on the model/serial number rating plate. 30" (76 cm) Freestanding Electric Range PRODUCT MODEL NUMBERS GFE461LV GFE471LV WFE301LV WFE361LV WFE364LV WFE366LV WFE371LV WFE374LV WFE381LV WFE114LW WFE115LX RF110AXS RF111PXS RF114PXS RF212PXS RF263LXT RF264LXS Electrical: Range must be connected directly to...
...-amp power supply cord (pigtail). If local codes do not permit ground through flexible or nonmetallic sheathed, copper or aluminum cable. For complete details, see NOTE*. Use a 3-wire, UL listed, 40- Model/serial rating plate (located on the model/serial number rating plate. 30" (76 cm) Freestanding Electric Range PRODUCT MODEL NUMBERS GFE461LV GFE471LV WFE301LV WFE361LV WFE364LV WFE366LV WFE371LV WFE374LV WFE381LV WFE114LW WFE115LX RF110AXS RF111PXS RF114PXS RF212PXS RF263LXT RF264LXS Electrical: Range must be connected directly to...

Installation Instructions
Page 1
W10252706B Only 7 Verify Anti-Tip Bracket Location 12 Level Range 12 Storage Drawer 12 Complete Installation 13 Moving the Range 14 ANTI-TIP BRACKET TEMPLATE 15 IMPORTANT: Save for local electrical inspector's use. U.S.A. U.S.A. Only 4 INSTALLATION INSTRUCTIONS 6 Unpack Range 6 Install Anti-Tip Bracket 6 Electrical Connection - INSTALLATION INSTRUCTIONS 30" (76 CM) FREESTANDING ELECTRIC RANGES Table of Contents RANGE SAFETY 2 INSTALLATION REQUIREMENTS 3 Tools and Parts 3 Location Requirements 3 Electrical Requirements -
W10252706B Only 7 Verify Anti-Tip Bracket Location 12 Level Range 12 Storage Drawer 12 Complete Installation 13 Moving the Range 14 ANTI-TIP BRACKET TEMPLATE 15 IMPORTANT: Save for local electrical inspector's use. U.S.A. U.S.A. Only 4 INSTALLATION INSTRUCTIONS 6 Unpack Range 6 Install Anti-Tip Bracket 6 Electrical Connection - INSTALLATION INSTRUCTIONS 30" (76 CM) FREESTANDING ELECTRIC RANGES Table of Contents RANGE SAFETY 2 INSTALLATION REQUIREMENTS 3 Tools and Parts 3 Location Requirements 3 Electrical Requirements -

Installation Instructions
Page 3
... floor anti-tip bracket must be avoided. Location Requirements IMPORTANT: Observe all electrical connections be used in a mobile home installation. To install the antitip bracket shipped with any tools listed here. Tools needed If using a power supply cord kit: ■ A UL listed power supply cord kit marked for use the Standard for convenient use with nominal 1³⁄₈" (3.5 cm) diameter connection opening dimensions that all governing codes and ordinances. ■ It is to subfloor. Check local codes. The model/serial rating...
... floor anti-tip bracket must be avoided. Location Requirements IMPORTANT: Observe all electrical connections be used in a mobile home installation. To install the antitip bracket shipped with any tools listed here. Tools needed If using a power supply cord kit: ■ A UL listed power supply cord kit marked for use the Standard for convenient use with nominal 1³⁄₈" (3.5 cm) diameter connection opening dimensions that all governing codes and ordinances. ■ It is to subfloor. Check local codes. The model/serial rating...

Installation Instructions
Page 4
... millboard covered with leveling legs screwed all local codes and ordinances. required between the top of the cooking platform and the bottom of wood or metal cabinet is recommended that a qualified electrical installer determine that the electrical connection and wire size are adequate and in accordance with a qualified electrician or service technician if you are for dimensional clearances above the range, follow the range hood...
... millboard covered with leveling legs screwed all local codes and ordinances. required between the top of the cooking platform and the bottom of wood or metal cabinet is recommended that a qualified electrical installer determine that the electrical connection and wire size are adequate and in accordance with a qualified electrician or service technician if you are for dimensional clearances above the range, follow the range hood...

Installation Instructions
Page 5
... listed, 4-wire, 250-volt, 40- If connecting to 91.4 cm) of slack in the line so that specify use with upturned ends, terminating in a NEMA Type 14-50P plug on the oven frame behind the control panel or on the supply end. Grounding through the neutral, use a 4-wire power supply cord rated at least 4 ft (1.22 m) long. 4-wire receptacle (14-50R) The minimum conductor sized for use of a UL listed, 3-wire...
... listed, 4-wire, 250-volt, 40- If connecting to 91.4 cm) of slack in the line so that specify use with upturned ends, terminating in a NEMA Type 14-50P plug on the oven frame behind the control panel or on the supply end. Grounding through the neutral, use a 4-wire power supply cord rated at least 4 ft (1.22 m) long. 4-wire receptacle (14-50R) The minimum conductor sized for use of a UL listed, 3-wire...

Installation Instructions
Page 6
..., adjust template so range will be centered in back or other injury. 1. Use wrench or pliers to lower front leveling legs one -half turn . Rear leveling leg B. Front leveling leg C. See the "Storage Drawer" section. Remove oven racks and parts package from range. 2. Connect anti-tip bracket to move and install range. Before moving range, slide range onto shipping base, cardboard or hardboard. 1. Rear leveling leg C. Front leveling leg On Ranges Equipped with Warming Drawers: On ranges equipped with cabinet opening...
..., adjust template so range will be centered in back or other injury. 1. Use wrench or pliers to lower front leveling legs one -half turn . Rear leveling leg B. Front leveling leg C. See the "Storage Drawer" section. Remove oven racks and parts package from range. 2. Connect anti-tip bracket to move and install range. Before moving range, slide range onto shipping base, cardboard or hardboard. 1. Rear leveling leg C. Front leveling leg On Ranges Equipped with Warming Drawers: On ranges equipped with cabinet opening...

Installation Instructions
Page 12
... the opening in oven. 2. A Level Range 1. then front to the drawer stop. On Ranges Equipped with Storage Drawers: Use a ¼" drive ratchet, wrench or pliers to adjust leveling legs up or down until the range is under anti-tip bracket. Verify Anti-Tip Bracket Location 1. It will be seen by pressing the screwdriver handle toward the side of the storage drawer. 6. A flat-blade screwdriver will be removed. Place level on some models). Check...
... the opening in oven. 2. A Level Range 1. then front to the drawer stop. On Ranges Equipped with Storage Drawers: Use a ¼" drive ratchet, wrench or pliers to adjust leveling legs up or down until the range is under anti-tip bracket. Verify Anti-Tip Bracket Location 1. It will be seen by pressing the screwdriver handle toward the side of the storage drawer. 6. A flat-blade screwdriver will be removed. Place level on some models). Check...

Installation Instructions
Page 13
... of the Use and Care Guide. 6. If range is fully engaged on both sides, slide the drawer back into an outlet. ■ Electrical supply is an extra part, go back through the steps to remove waxy residue caused by shipping material. A A. Read "Range Use" in the drawer glides. Turn power on for 5 minutes, check for specific instruction on surface burners and oven. or circuit breaker has not tripped. ■ Range is plugged into...
... of the Use and Care Guide. 6. If range is fully engaged on both sides, slide the drawer back into an outlet. ■ Electrical supply is an extra part, go back through the steps to remove waxy residue caused by shipping material. A A. Read "Range Use" in the drawer glides. Turn power on for 5 minutes, check for specific instruction on surface burners and oven. or circuit breaker has not tripped. ■ Range is plugged into...

Owners Manual
Page 1
..., call us at www.whirlpool.com for purchasing this high-quality product. Table of Contents RANGE SAFETY 2 The Anti-Tip Bracket 2 FEATURE GUIDE 4 COOKTOP USE 5 OVEN USE 6 Electronic Oven Controls 6 Aluminum Foil 6 Positioning Racks and Bakeware 7 Oven Vent 7 Baking and Roasting 7 Broiling 7 Convection Baking and Roasting 8 Timed Cooking (on some models 8 RANGE CARE 8 Self-Cleaning Cycle (on some models 9 General Cleaning 9 Oven Light 10 TROUBLESHOOTING 10 ACCESSORIES 11 WARRANTY 12 W10200357B ® ELECTRIC RANGE USER INSTRUCTIONS THANK YOU for additional...
..., call us at www.whirlpool.com for purchasing this high-quality product. Table of Contents RANGE SAFETY 2 The Anti-Tip Bracket 2 FEATURE GUIDE 4 COOKTOP USE 5 OVEN USE 6 Electronic Oven Controls 6 Aluminum Foil 6 Positioning Racks and Bakeware 7 Oven Vent 7 Baking and Roasting 7 Broiling 7 Convection Baking and Roasting 8 Timed Cooking (on some models 8 RANGE CARE 8 Self-Cleaning Cycle (on some models 9 General Cleaning 9 Oven Light 10 TROUBLESHOOTING 10 ACCESSORIES 11 WARRANTY 12 W10200357B ® ELECTRIC RANGE USER INSTRUCTIONS THANK YOU for additional...

Owners Manual
Page 3
... foods under the hood, turn the fan on Broken Cooktop - Interior surfaces of an oven become hot enough to persons, or damage when using the range. ■ User Servicing - For units with one or more surface units of different size. TO CHECK IF THE DEVICES ARE INSTALLED PROPERLY, SLIDE RANGE FORWARD, LOOK FOR ANTI-TIP BRACKET SECURELY ATTACHED TO FLOOR, AND SLIDE RANGE BACK SO REAR RANGE FOOT IS UNDER ANTI-TIP BRACKET. ■ CAUTION: Do...
... foods under the hood, turn the fan on Broken Cooktop - Interior surfaces of an oven become hot enough to persons, or damage when using the range. ■ User Servicing - For units with one or more surface units of different size. TO CHECK IF THE DEVICES ARE INSTALLED PROPERLY, SLIDE RANGE FORWARD, LOOK FOR ANTI-TIP BRACKET SECURELY ATTACHED TO FLOOR, AND SLIDE RANGE BACK SO REAR RANGE FOOT IS UNDER ANTI-TIP BRACKET. ■ CAUTION: Do...

Owners Manual
Page 4
... the oven control panel or a manual switch located on some or all racks and accessories from the oven cavity. 2. Press CANCEL/OFF to set a temperature other than one hour before or after cooking. or p.m. 4. Press STEAM CLEAN. Press TEMP/TIME "+" or "-" arrow pads to clear the display. 7. FEATURE GUIDE This manual covers several models. Only the CLOCK, OVEN LIGHT, and TIMER keypads will not come on and off . 2. To change to turn off . 2. Press TIMER. 2. Press START. 4. CLOCK Clock The Clock uses a 12...
... the oven control panel or a manual switch located on some or all racks and accessories from the oven cavity. 2. Press CANCEL/OFF to set a temperature other than one hour before or after cooking. or p.m. 4. Press STEAM CLEAN. Press TEMP/TIME "+" or "-" arrow pads to clear the display. 7. FEATURE GUIDE This manual covers several models. Only the CLOCK, OVEN LIGHT, and TIMER keypads will not come on and off . 2. To change to turn off . 2. Press TIMER. 2. Press START. 4. CLOCK Clock The Clock uses a 12...

Owners Manual
Page 5
.... 5. The hot surface indicator light will glow red when an element is on some models) START TIME START CANCEL/OFF TEMP/TIME FEATURE Broiling Convection baking and roasting Hold warm Timed cooking Delayed start Cooking start is too hot to setting. To set to broil stop position. If start Range function Temperature and time adjust INSTRUCTIONS 1. Push in death or fire. Ceramic Glass The surface cooking area will glow as long as the surface cooking area. Cleaning off all controls when done cooking. KEYPAD BROIL CONVECT BAKE (on some models) WARM COOK TIME (on...
.... 5. The hot surface indicator light will glow red when an element is on some models) START TIME START CANCEL/OFF TEMP/TIME FEATURE Broiling Convection baking and roasting Hold warm Timed cooking Delayed start Cooking start is too hot to setting. To set to broil stop position. If start Range function Temperature and time adjust INSTRUCTIONS 1. Push in death or fire. Ceramic Glass The surface cooking area will glow as long as the surface cooking area. Cleaning off all controls when done cooking. KEYPAD BROIL CONVECT BAKE (on some models) WARM COOK TIME (on...

Owners Manual
Page 6
... can be set between 30°F (15°C) and -30°F (-15°C). 3. Press START. Press the TEMP/TIME "+" or "-" arrow pads to increase or to clear. If "LOFF" is displayed, the oven light will appear on the size of foil, liners or cookware. Doing so can be adjusted. The Warm Zone element area will automatically shut off . Oven Temperature Control IMPORTANT: Do not use . Press TIMER to toggle...
... can be set between 30°F (15°C) and -30°F (-15°C). 3. Press START. Press the TEMP/TIME "+" or "-" arrow pads to increase or to clear. If "LOFF" is displayed, the oven light will appear on the size of foil, liners or cookware. Doing so can be adjusted. The Warm Zone element area will automatically shut off . Oven Temperature Control IMPORTANT: Do not use . Press TIMER to toggle...

Owners Manual
Page 7
... foods. Bakeware To cook food evenly, hot air must be ordered. Blocking or covering the vent will glow red when cycling on some models) The ACCUBAKE® system electronically regulates the oven heat levels during preheat and bake to maintain a precise temperature range for baking. If you would like to purchase a broiler pan, one may cook better at lower broiling temperatures. ■ For best results, use a broiler pan and grid. Oven vent (ceramic glass model) Baking and Roasting ACCUBAKE®...
... foods. Bakeware To cook food evenly, hot air must be ordered. Blocking or covering the vent will glow red when cycling on some models) The ACCUBAKE® system electronically regulates the oven heat levels during preheat and bake to maintain a precise temperature range for baking. If you would like to purchase a broiler pan, one may cook better at lower broiling temperatures. ■ For best results, use a broiler pan and grid. Oven vent (ceramic glass model) Baking and Roasting ACCUBAKE®...

Owners Manual
Page 8
..., the bake and broil elements or burners cycle on the display. 8. Food Poisoning Hazard 1. Press OFF/CANCEL to clear the display. The display will appear on and off in the "Feature Guide" section. RANGE CARE Self-Cleaning Cycle (on some models, the temperature probe from oven during the self-cleaning cycle. 8 If the oven door is reached, the oven will automatically turn off automatically and "End" will turn on some models) WARNING Prepare Range ■ Remove the broiler pan...
..., the bake and broil elements or burners cycle on the display. 8. Food Poisoning Hazard 1. Press OFF/CANCEL to clear the display. The display will appear on and off in the "Feature Guide" section. RANGE CARE Self-Cleaning Cycle (on some models, the temperature probe from oven during the self-cleaning cycle. 8 If the oven door is reached, the oven will automatically turn off automatically and "End" will turn on some models) WARNING Prepare Range ■ Remove the broiler pan...

Owners Manual
Page 9
... cover for stubborn soils. Do not use the Self-Clean cycle. Press SELF CLEAN. 2. The DOOR LOCKED and CLEAN indicator lights will sound at any time to stainless steel surfaces, do not open the oven door during the SteamClean cycle. The Cooktop Scraper uses razor blades. Scrape off . 5. Electronic Oven Control with a damp cloth. When the oven is also recommended for contact information. IMPORTANT: Since the water in the display and the SteamClean feature...
... cover for stubborn soils. Do not use the Self-Clean cycle. Press SELF CLEAN. 2. The DOOR LOCKED and CLEAN indicator lights will sound at any time to stainless steel surfaces, do not open the oven door during the SteamClean cycle. The Cooktop Scraper uses razor blades. Scrape off . 5. Electronic Oven Control with a damp cloth. When the oven is also recommended for contact information. IMPORTANT: Since the water in the display and the SteamClean feature...

Owners Manual
Page 10
... operate during a self-clean cycle. See the control lock keypad feature in range or reconnect power. See the Installation Instructions. Cleaning Method: ■ Soap and water: Pull knobs straight away from socket. CONTROL PANEL AND OVEN DOOR EXTERIOR To avoid damage to the rack guides will not operate ■ Is the electronic oven control set correctly? Push in the back of the "Electronic Oven Controls" section. See "Timed Cooking" section. ■ On some ceramic glass models, the cooktop will become less noticeable. Oven indicator lights...
... operate during a self-clean cycle. See the control lock keypad feature in range or reconnect power. See the Installation Instructions. Cleaning Method: ■ Soap and water: Pull knobs straight away from socket. CONTROL PANEL AND OVEN DOOR EXTERIOR To avoid damage to the rack guides will not operate ■ Is the electronic oven control set correctly? Push in the back of the "Electronic Oven Controls" section. See "Timed Cooking" section. ■ On some ceramic glass models, the cooktop will become less noticeable. Oven indicator lights...

Owners Manual
Page 11
... the "Electronic Oven Controls" section. ■ Was the oven preheated? See "Baking and Roasting" section. ■ Are the racks positioned properly? See "Positioning Racks and Bakeware" section. ■ Is the batter evenly distributed in a reliable cookbook. ■ Is the proper oven temperature calibration set? Adjust cooking time. ■ Has the oven door been opened while cooking? Move rack to cover the edge of time being used? Canning Unit Kit (coil element models) Order Part Number 242905 Cooktop Care Kit (includes...
... the "Electronic Oven Controls" section. ■ Was the oven preheated? See "Baking and Roasting" section. ■ Are the racks positioned properly? See "Positioning Racks and Bakeware" section. ■ Is the batter evenly distributed in a reliable cookbook. ■ Is the proper oven temperature calibration set? Adjust cooking time. ■ Has the oven door been opened while cooking? Move rack to cover the edge of time being used? Canning Unit Kit (coil element models) Order Part Number 242905 Cooktop Care Kit (includes...

Owners Manual
Page 12
... workmanship and is contrary to use of consumables or cleaning products not approved by Whirlpool. 5. Expenses for travel and transportation for product service if your major appliance is covered by the customer. If outside the 50 United States and Canada, contact your model number and serial number on the label, located on how to published user or operator instructions and/or installation instructions. 4. Please keep this major...
... workmanship and is contrary to use of consumables or cleaning products not approved by Whirlpool. 5. Expenses for travel and transportation for product service if your major appliance is covered by the customer. If outside the 50 United States and Canada, contact your model number and serial number on the label, located on how to published user or operator instructions and/or installation instructions. 4. Please keep this major...

Warranty
Page 1
... not have been removed, altered or cannot be repaired in the home and only in your model number and serial number on the label, located on how to use of consumables or cleaning products not approved by the customer. Consumable parts are excluded from your home of your major appliance, to replace or repair house fuses, or to correct house wiring or plumbing. 2. This limited warranty is valid...
... not have been removed, altered or cannot be repaired in the home and only in your model number and serial number on the label, located on how to use of consumables or cleaning products not approved by the customer. Consumable parts are excluded from your home of your major appliance, to replace or repair house fuses, or to correct house wiring or plumbing. 2. This limited warranty is valid...


