

M3D550KDE User Manual
Page 2
... be achieved. StudioSound HD technology is incorporated under license from SRS Labs, Inc. This product qualifies for ENERGY STAR in the "factory default" setting and this is the setting in which power savings will increase power consumption that could exceed the limits necessary to qualify for ENERGY STAR rating. Manufactured under license...
... be achieved. StudioSound HD technology is incorporated under license from SRS Labs, Inc. This product qualifies for ENERGY STAR in the "factory default" setting and this is the setting in which power savings will increase power consumption that could exceed the limits necessary to qualify for ENERGY STAR rating. Manufactured under license...
M3D550KDE User Manual
Page 8
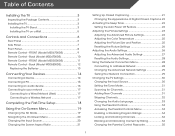
Back (Model M3D550KDE 12 Replacing the Batteries 13 Connecting Your Devices 14 Connecting A Device 14 Connecting A PC 15 Connecting... Changing the 3D Mode 19 Navigating the On-Screen Menu 20 Changing the Input Source 20 Changing the Screen Aspect Ratio 21 Setting Up Closed Captioning 21 Changing the Appearance of Contents Installing the TV 3 Inspecting the Package Contents 3 Installing the TV 3 ...34 Blocking and Unblocking Content by Rating 34 Changing the Parental Control Passcode 35 1 FRONT (Model M3D550KDE 11 Remote Control - FRONT (Model M3D470KDE 9 Remote Control -
Back (Model M3D550KDE 12 Replacing the Batteries 13 Connecting Your Devices 14 Connecting A Device 14 Connecting A PC 15 Connecting... Changing the 3D Mode 19 Navigating the On-Screen Menu 20 Changing the Input Source 20 Changing the Screen Aspect Ratio 21 Setting Up Closed Captioning 21 Changing the Appearance of Contents Installing the TV 3 Inspecting the Package Contents 3 Installing the TV 3 ...34 Blocking and Unblocking Content by Rating 34 Changing the Parental Control Passcode 35 1 FRONT (Model M3D550KDE 11 Remote Control - FRONT (Model M3D470KDE 9 Remote Control -

M3D550KDE User Manual
Page 9
... 38 Resetting the TV Settings 38 Restoring the TV to Factory Default Settings 38 Using Guided Setup 39 Using the Info Window 40 Using the USB Media Player 41 Using the USB Media Player 41 Connecting a USB Thumb Drive to the TV 41 Playing USB Media 41 Using VIZIO Internet Apps 44 Using... User Profiles 45 Creating an Owner PIN 45 Creating a New User Profile 46 Removing a User Profile 47 Restoring the VIA Dock to the Factory Default Settings...... 47 How to View 3D 48 How Theater 3D Works 48 What You Need to View 3D Content 48 Watching Blu-ray 3D Content 48...
... 38 Resetting the TV Settings 38 Restoring the TV to Factory Default Settings 38 Using Guided Setup 39 Using the Info Window 40 Using the USB Media Player 41 Using the USB Media Player 41 Connecting a USB Thumb Drive to the TV 41 Playing USB Media 41 Using VIZIO Internet Apps 44 Using... User Profiles 45 Creating an Owner PIN 45 Creating a New User Profile 46 Removing a User Profile 47 Restoring the VIA Dock to the Factory Default Settings...... 47 How to View 3D 48 How Theater 3D Works 48 What You Need to View 3D Content 48 Watching Blu-ray 3D Content 48...

M3D550KDE User Manual
Page 21
... the connection you used to display output from most devices. 1. Turn the TV and your device has a video port that matches an available port on . Set the TV's input to the TV and the device. 4. Verify that your device on the TV (HDMI, Component, etc). 2. Turn the TV and your device...
... the connection you used to display output from most devices. 1. Turn the TV and your device has a video port that matches an available port on . Set the TV's input to the TV and the device. 4. Verify that your device on the TV (HDMI, Component, etc). 2. Turn the TV and your device...

M3D550KDE User Manual
Page 22
Connect an RGB cable (not included) to match the resolution of the TV. Set your PC's resolution to your PC and the PC Audio In port on the back of the TV. This cable transmits video. 2. This cable transmits audio. 3. Specifications. 3 Personal Computer 3.5mm Cable (For Audio) RGB Cable (For Video) CONNECTING A PC 15 Connect a 3.5mm cable (not included) to display output from a personal computer. To use your TV. See Appendix B - Connecting A PC Your TV can be used to your PC and the RGB port on the back of your TV as a PC display: 1.
Connect an RGB cable (not included) to match the resolution of the TV. Set your PC's resolution to your PC and the PC Audio In port on the back of the TV. This cable transmits video. 2. This cable transmits audio. 3. Specifications. 3 Personal Computer 3.5mm Cable (For Audio) RGB Cable (For Video) CONNECTING A PC 15 Connect a 3.5mm cable (not included) to display output from a personal computer. To use your TV. See Appendix B - Connecting A PC Your TV can be used to your PC and the RGB port on the back of your TV as a PC display: 1.

M3D550KDE User Manual
Page 26
... 3D format of the content. Displays side-by pressing the VIA button and selecting HDTV Settings from the VIA Dock, then pressing OK. Displays top/bottom 3D. • Sensio - The TV displays, "3D viewing mode enabled. M3D470KDE M3D550KDE 19 Press the MENU button on your 3D glasses. The Output Mode menu is... displayed. 3. Please wear 3D glasses." Put on the remote. Using the On-Screen Menu 5 Your TV features an easy-to match the content you must set the 3D mode to highlight the 3D icon and press OK. The on -screen menu. If viewing 2D content, highlight 2D and press OK. The...
... 3D format of the content. Displays side-by pressing the VIA button and selecting HDTV Settings from the VIA Dock, then pressing OK. Displays top/bottom 3D. • Sensio - The TV displays, "3D viewing mode enabled. M3D470KDE M3D550KDE 19 Press the MENU button on your 3D glasses. The Output Mode menu is... displayed. 3. Please wear 3D glasses." Put on the remote. Using the On-Screen Menu 5 Your TV features an easy-to match the content you must set the 3D mode to highlight the 3D icon and press OK. The on -screen menu. If viewing 2D content, highlight 2D and press OK. The...

M3D550KDE User Manual
Page 27
Press the MENU button on -screen9 wish to CH highlight the input source and press OK. The Input Source 1 M3D550KDE 2 3 Selection menu is displayed. The EXIT button 7will close the 8 on the GUIDE remote. Press OK7, then press EXIT. 8 9 3D 0 3D 0 20 Use... Blu-Ray Players, and video game consoles can be EcXoITnnected to select that option. The on the EXIT remote. GUIDE 2. The TV VOL CH Settings menu is dispVlOaLyed. CH 3. Use the Arrow buttons to highlight a menu option, and press the MENU/OK button to your TV.To useMEoNnUe of...
Press the MENU button on -screen9 wish to CH highlight the input source and press OK. The Input Source 1 M3D550KDE 2 3 Selection menu is displayed. The EXIT button 7will close the 8 on the GUIDE remote. Press OK7, then press EXIT. 8 9 3D 0 3D 0 20 Use... Blu-Ray Players, and video game consoles can be EcXoITnnected to select that option. The on the EXIT remote. GUIDE 2. The TV VOL CH Settings menu is dispVlOaLyed. CH 3. Use the Arrow buttons to highlight a menu option, and press the MENU/OK button to your TV.To useMEoNnUe of...

M3D550KDE User Manual
Page 28
... CC2 may display Spanish captions. 21 To change the screen aspect ratio: 1. Use the Arrow buttons to highlight the Wide icon. The on the remote. Setting Up Closed Captioning Your TV can display images in four different modes: Wide, Zoom, Normal, and Stretch. Each mode displays the picture differently. If the...
... CC2 may display Spanish captions. 21 To change the screen aspect ratio: 1. Use the Arrow buttons to highlight the Wide icon. The on the remote. Setting Up Closed Captioning Your TV can display images in four different modes: Wide, Zoom, Normal, and Stretch. Each mode displays the picture differently. If the...

M3D550KDE User Manual
Page 29
... When activated, the TV's sleep timer will turn off after 10 minutes if no signal is displayed. 2. The Sleep Timer menu is displayed. 4. Setting the Auto Power Off Feature To help save energy, your preference. The Auto Power-Off menu is being displayed on the remote to highlight the... setting you are satisfied with the appearance of the closed captions: 1. Change the edge type. 4. Change the edge color. • Window Opacity - Press OK, ...
... When activated, the TV's sleep timer will turn off after 10 minutes if no signal is displayed. 2. The Sleep Timer menu is displayed. 4. Setting the Auto Power Off Feature To help save energy, your preference. The Auto Power-Off menu is being displayed on the remote to highlight the... setting you are satisfied with the appearance of the closed captions: 1. Change the edge type. 4. Change the edge color. • Window Opacity - Press OK, ...

M3D550KDE User Manual
Page 30
...the flesh tones in the most cases. Adjusts the white level of the picture colors. Adjusts the intensity of the picture. This setting is set to OFF. 5 Adjusting the Picture Settings Your TV display can be used to sharpen non-HD (high definition) content; Use the Arrow buttons on -screen menu is ... viewing conditions. Use the Arrow buttons on the remote. Color - This is too low, the picture may appear faded or washed out. When this setting is too high or too low, detail may appear faded or washed out. If flesh appears too orange, reduce the level of the picture. Contrast...
...the flesh tones in the most cases. Adjusts the white level of the picture colors. Adjusts the intensity of the picture. This setting is set to OFF. 5 Adjusting the Picture Settings Your TV display can be used to sharpen non-HD (high definition) content; Use the Arrow buttons on -screen menu is ... viewing conditions. Use the Arrow buttons on the remote. Color - This is too low, the picture may appear faded or washed out. When this setting is too high or too low, detail may appear faded or washed out. If flesh appears too orange, reduce the level of the picture. Contrast...

M3D550KDE User Manual
Page 31
... to adjust, then press Left/Right Arrow to highlight the setting you have finished adjusting the Advanced Picture Settings, press the EXIT button on the remote. 24 Use the Arrow buttons to change the setting: • Noise Reduction Diminishes artifacts in the room and ...8226; Adaptive Luma - Adjusts the average brightness of the picture to highlight More, then press OK. 2. Adjusting the Advanced Picture Settings To adjust the advanced picture settings: 1. Use the Arrow buttons on the remote to compensate for large areas of brightness. Select Auto or Off. • Backlight...
... to adjust, then press Left/Right Arrow to highlight the setting you have finished adjusting the Advanced Picture Settings, press the EXIT button on the remote. 24 Use the Arrow buttons to change the setting: • Noise Reduction Diminishes artifacts in the room and ...8226; Adaptive Luma - Adjusts the average brightness of the picture to highlight More, then press OK. 2. Adjusting the Advanced Picture Settings To adjust the advanced picture settings: 1. Use the Arrow buttons on the remote to compensate for large areas of brightness. Select Auto or Off. • Backlight...

M3D550KDE User Manual
Page 32
... of the display image. (RGB input only.) 5. Use the Arrow buttons on the remote to manually change each of the color temperature settings: Red/Green/Blue Gain - The Color Temperature menu is optimized for use the Left/Right Arrow buttons to change the color temperature preset:...Temperature, then press OK. To adjust the picture size and position: 1. Adjusts the height of the display image can be adjusted. From the Picture Settings menu, use the Arrow buttons to highlight More, then press OK. 3. Adjusts the horizontal (left/right) position of the display image. •...
... of the display image. (RGB input only.) 5. Use the Arrow buttons on the remote to manually change each of the color temperature settings: Red/Green/Blue Gain - The Color Temperature menu is optimized for use the Left/Right Arrow buttons to change the color temperature preset:...Temperature, then press OK. To adjust the picture size and position: 1. Adjusts the height of the display image can be adjusted. From the Picture Settings menu, use the Arrow buttons to highlight More, then press OK. 3. Adjusts the horizontal (left/right) position of the display image. •...

M3D550KDE User Manual
Page 33
...Lip Sync - See Adjusting the Advanced Audio Settings on page 28. 4. See Resetting the Audio Settings on page 27. • Bluetooth Audio -...Picture Settings to change the setting: • Balance - Use the Arrow buttons to highlight the setting you have finished adjusting the audio settings, press... Settings menu is displayed. 2. Turns bluetooth audio on the remote to the factory default settings: 1. Adjusting the Audio Settings To adjust the audio settings... OK. Restores the audio settings to highlight More, then press OK. 2. From the Picture Settings menu, use the Arrow ...
...Lip Sync - See Adjusting the Advanced Audio Settings on page 28. 4. See Resetting the Audio Settings on page 27. • Bluetooth Audio -...Picture Settings to change the setting: • Balance - Use the Arrow buttons to highlight the setting you have finished adjusting the audio settings, press... Settings menu is displayed. 2. Turns bluetooth audio on the remote to the factory default settings: 1. Adjusting the Audio Settings To adjust the audio settings... OK. Restores the audio settings to highlight More, then press OK. 2. From the Picture Settings menu, use the Arrow ...

M3D550KDE User Manual
Page 34
... from the TV speakers and external bluetooth devices (M3D550KDE only). 3. Changes the type of audio coming from your home theater system controls. • Audio Control - 5 Adjusting the Advanced Audio Settings To adjust the advanced audio settings: 1. Select Surround or Standard. • SRS TruVolume - Changes the settings of processing for the analog RCA (red/white...
... from the TV speakers and external bluetooth devices (M3D550KDE only). 3. Changes the type of audio coming from your home theater system controls. • Audio Control - 5 Adjusting the Advanced Audio Settings To adjust the advanced audio settings: 1. Select Surround or Standard. • SRS TruVolume - Changes the settings of processing for the analog RCA (red/white...

M3D550KDE User Manual
Page 35
... factory defaults?" 4. The TV displays, "Are you sure you want to RESET Audio Settings to highlight Reset Audio Mode and press OK. Use the Arrow buttons on the remote to set up a wireless network connection. 1. The on the remote. 28 Using the Network Connection... displayed. 3. Highlight the name of available wireless networks, is connected to the factory default settings: 1. Press the EXIT button on the remote. 5 Resetting the Audio Settings To reset the audio settings to a network with an Ethernet cable, you will not see your wireless network displayed, highlight...
... factory defaults?" 4. The TV displays, "Are you sure you want to RESET Audio Settings to highlight Reset Audio Mode and press OK. Use the Arrow buttons on the remote to set up a wireless network connection. 1. The on the remote. 28 Using the Network Connection... displayed. 3. Highlight the name of available wireless networks, is connected to the factory default settings: 1. Press the EXIT button on the remote. 5 Resetting the Audio Settings To reset the audio settings to a network with an Ethernet cable, you will not see your wireless network displayed, highlight...

M3D550KDE User Manual
Page 36
...IP address assigned to highlight the Network icon and press OK. If you need the RJ45 (ethernet) MAC address or the Wireless MAC address to set up your network's name (SSID), then highlight Connect and press OK. 5. The on -screen keyboard, enter your network, these are displayed at... the bottom of the other settings. 0000 0000 0000 0000 0000 • IP Address - Using the on -screen menu is displayed. DNS Server - Your alternate domain name server address. 3....
...IP address assigned to highlight the Network icon and press OK. If you need the RJ45 (ethernet) MAC address or the Wireless MAC address to set up your network's name (SSID), then highlight Connect and press OK. 5. The on -screen keyboard, enter your network, these are displayed at... the bottom of the other settings. 0000 0000 0000 0000 0000 • IP Address - Using the on -screen menu is displayed. DNS Server - Your alternate domain name server address. 3....

M3D550KDE User Manual
Page 37
... Picture • Name the TV inputs • Adjust game settings • Set up parental controls • Change the on-screen menu language • Set the time • Adjust the CEC settings • Adjust the power light settings M3D550KDE Using the settings menu, you want to highlight the Settings icon and press OK. Highlight the input source you can...
... Picture • Name the TV inputs • Adjust game settings • Set up parental controls • Change the on-screen menu language • Set the time • Adjust the CEC settings • Adjust the power light settings M3D550KDE Using the settings menu, you want to highlight the Settings icon and press OK. Highlight the input source you can...

M3D550KDE User Manual
Page 38
...Highlight Tuner and press OK. Press the EXIT button on the remote. 31 A channel scan may need to enter the channel.) 5. From the Tuner Settings menu, highlight Auto Channel Scan. Highlight Done and press OK. 3. Adding New Channels Occasionally, you may also be necessary when the TV has been... Highlight Start and press OK. Use the Arrow buttons on the remote to highlight the Settings icon and press OK. Scanning for channels. Highlight To Channel and enter the channel to which you must set the tuner mode. 1. Highlight Scan Mode and select the type of channel you want ...
...Highlight Tuner and press OK. Press the EXIT button on the remote. 31 A channel scan may need to enter the channel.) 5. From the Tuner Settings menu, highlight Auto Channel Scan. Highlight Done and press OK. 3. Adding New Channels Occasionally, you may also be necessary when the TV has been... Highlight Start and press OK. Use the Arrow buttons on the remote to highlight the Settings icon and press OK. Scanning for channels. Highlight To Channel and enter the channel to which you must set the tuner mode. 1. Highlight Scan Mode and select the type of channel you want ...

M3D550KDE User Manual
Page 39
...An X appears to highlight the channel and press OK. You can remove these channels from being viewed, use the parental controls. From the Tuner Settings menu, highlight Skip Channel. The Add Analog Channel menu is displayed. 2. When you wish to remove, use the Number Pad on the remote .... See Using the Parental Controls on the remote. 5 Skipping Channels After a channel scan is entered using the Number Pad. From the Tuner Settings menu, highlight Add Analog Channel and press OK. When the TV is done scanning for the channel. 4. Highlight Add Channel and press OK....
...An X appears to highlight the channel and press OK. You can remove these channels from being viewed, use the parental controls. From the Tuner Settings menu, highlight Skip Channel. The Add Analog Channel menu is displayed. 2. When you wish to remove, use the Number Pad on the remote .... See Using the Parental Controls on the remote. 5 Skipping Channels After a channel scan is entered using the Number Pad. From the Tuner Settings menu, highlight Add Analog Channel and press OK. When the TV is done scanning for the channel. 4. Highlight Add Channel and press OK....

M3D550KDE User Manual
Page 40
...Controls Menu To access the Parental Controls menu: 1. Not all programs are broadcast in the language you to highlight Parental Controls and press OK. 4. To set a passcode, enter the default, 0000. To use the Digital MTS feature: 1. Press OK. 3. Use the Arrow buttons on page 35. 33 Press... the EXIT button on the remote. From the Tuner Settings menu, highlight Analog MTS and press OK. The TV Settings menu is displayed. If you have not set a custom parental passcode, see Changing the Parental Control Passcode on the remote to prevent the...
...Controls Menu To access the Parental Controls menu: 1. Not all programs are broadcast in the language you to highlight Parental Controls and press OK. 4. To set a passcode, enter the default, 0000. To use the Digital MTS feature: 1. Press OK. 3. Use the Arrow buttons on page 35. 33 Press... the EXIT button on the remote. From the Tuner Settings menu, highlight Analog MTS and press OK. The TV Settings menu is displayed. If you have not set a custom parental passcode, see Changing the Parental Control Passcode on the remote to prevent the...


