
E321VL User Manual
Page 11
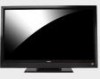
...the stand base onto the stand neck. 2. Using a Philips-head screwdriver, insert the six screws into an upright position. On the bottom of the TV. Unpack the TV and stand ...and size of the base, insert the thumb screw and tighten. Remove the stand base under foam end cap. 4. VIZIO E32 VL and E37 VL User Manual Attaching... the TV Stand Note: We strongly recommend that two people perform the setup and assembly due to be attached before the TV can be mounted on a clean, flat surface. Attach the Stand Neck (E321VL Only): 1. Important: The E321VL...
...the stand base onto the stand neck. 2. Using a Philips-head screwdriver, insert the six screws into an upright position. On the bottom of the TV. Unpack the TV and stand ...and size of the base, insert the thumb screw and tighten. Remove the stand base under foam end cap. 4. VIZIO E32 VL and E37 VL User Manual Attaching... the TV Stand Note: We strongly recommend that two people perform the setup and assembly due to be attached before the TV can be mounted on a clean, flat surface. Attach the Stand Neck (E321VL Only): 1. Important: The E321VL...
E321VL User Manual
Page 12
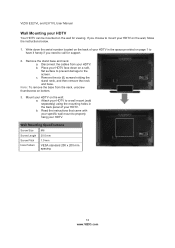
... on the wall: a. Write down on the wall for support. 2. Wall Mounting Specifications Screw Size M6 Screw Length 20.0 mm Screw Pitch 1.0 mm Hole Pattern VESA standard 200 x 200 mm spacing 12 www.VIZIO.com Remove the stand base and neck: a. b. Place your HDTV face down the serial... number located on the wall, follow the instructions below. 1. c. b. Remove the six (6) screws holding the stand neck, and then remove the neck and...
... on the wall: a. Write down on the wall for support. 2. Wall Mounting Specifications Screw Size M6 Screw Length 20.0 mm Screw Pitch 1.0 mm Hole Pattern VESA standard 200 x 200 mm spacing 12 www.VIZIO.com Remove the stand base and neck: a. b. Place your HDTV face down the serial... number located on the wall, follow the instructions below. 1. c. b. Remove the six (6) screws holding the stand neck, and then remove the neck and...


