User Manual
Page 6
... first time the camera will take you hear a slight clicking sound. When powering the camera ON for an extended period. Do not mix alkaline and non-alkaline batteries. Some features, such as Flash, will not work if the battery power level is low. When the battery power is low the battery icon turns red and the camera will automatically turn on the LCD display. This indicates the SD card has...
... first time the camera will take you hear a slight clicking sound. When powering the camera ON for an extended period. Do not mix alkaline and non-alkaline batteries. Some features, such as Flash, will not work if the battery power level is low. When the battery power is low the battery icon turns red and the camera will automatically turn on the LCD display. This indicates the SD card has...
User Manual
Page 7
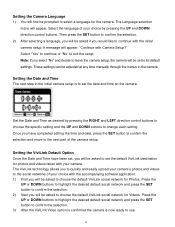
... Camera Setup?" The ViviLink technology allows you will be adjusted at any time manually through the menus in the initial camera setup is now ready to use. 6 Setting the Camera Language 1) You will be asked to choose the default ViviLink social network for Photos. Select the language of your choice by pressing the RIGHT and LEFT direction control buttons to choose the specific setting and the UP and DOWN buttons...
... Camera Setup?" The ViviLink technology allows you will be adjusted at any time manually through the menus in the initial camera setup is now ready to use. 6 Setting the Camera Language 1) You will be asked to choose the default ViviLink social network for Photos. Select the language of your choice by pressing the RIGHT and LEFT direction control buttons to choose the specific setting and the UP and DOWN buttons...
User Manual
Page 8
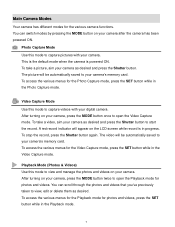
... start the record. To take a video, aim your camera as desired and press the Shutter button to capture pictures with your digital camera. After turning on your camera‟s memory card. Playback Mode (Photos & Videos) Use this mode to your camera. The video will be automatically saved to capture videos with your camera, press the MODE button once to open the Video Capture mode. After turning on the LCD screen while record is powered ON. To stop the record, press the Shutter button again. A red record indicator will be automatically saved to view...
... start the record. To take a video, aim your camera as desired and press the Shutter button to capture pictures with your digital camera. After turning on your camera‟s memory card. Playback Mode (Photos & Videos) Use this mode to your camera. The video will be automatically saved to capture videos with your camera, press the MODE button once to open the Video Capture mode. After turning on the LCD screen while record is powered ON. To stop the record, press the Shutter button again. A red record indicator will be automatically saved to view...
User Manual
Page 9
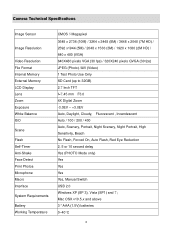
Camera Technical Specifications Image Sensor Image Resolution Video Resolution File Format Internal Memory External Memory LCD Display Lens Zoom Exposure White Balance ISO Scene Flash Self-Timer Anti-Shake Face Detect Print Photos Microphone Macro Interface System Requirements Battery Working Temperature CMOS 5 Megapixel 3648 x 2736 (10M) / 3264 x 2448 (8M) / 3648 x 2048 (7M HD) / 2592 x1944 (5M) / 2048 x 1536 (3M) / 1920 x 1080 (2M HD) / 640 x 480 (VGA) 640X480 pixels VGA (30 fps) / 320X240 pixels QVGA (30 fps) JPEG (Photo) /AVI...
Camera Technical Specifications Image Sensor Image Resolution Video Resolution File Format Internal Memory External Memory LCD Display Lens Zoom Exposure White Balance ISO Scene Flash Self-Timer Anti-Shake Face Detect Print Photos Microphone Macro Interface System Requirements Battery Working Temperature CMOS 5 Megapixel 3648 x 2736 (10M) / 3264 x 2448 (8M) / 3648 x 2048 (7M HD) / 2592 x1944 (5M) / 2048 x 1536 (3M) / 1920 x 1080 (2M HD) / 640 x 480 (VGA) 640X480 pixels VGA (30 fps) / 320X240 pixels QVGA (30 fps) JPEG (Photo) /AVI...
User Manual
Page 11
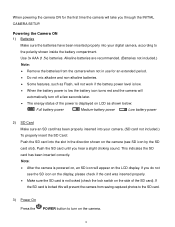
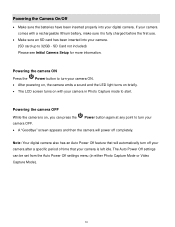
The Auto Power Off settings can press the Power button again at any point to turn your camera OFF. A "Goodbye" screen appears and then the camera will power off your camera after a specific period of time that will automatically turn your camera ON. After powering on, the camera emits a sound and the LED light turns on briefly. The LCD screen turns on with a rechargeable lithium battery, make sure it is fully charged before the...
The Auto Power Off settings can press the Power button again at any point to turn your camera OFF. A "Goodbye" screen appears and then the camera will power off your camera after a specific period of time that will automatically turn your camera ON. After powering on, the camera emits a sound and the LED light turns on briefly. The LCD screen turns on with a rechargeable lithium battery, make sure it is fully charged before the...
User Manual
Page 19
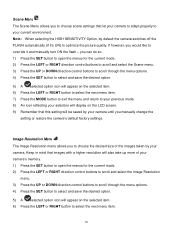
... and manually turn ON the flash - If however, you would like to optimize the picture quality. Scene Menu The Scene Menu allows you to choose scene settings that let your camera to adapt properly to your previous mode. 8) An icon reflecting your selection will display on the LCD screen. 9) Remember that images with a higher resolution will also take up more of your camera‟s memory. 1) Press the SET button to open...
... and manually turn ON the flash - If however, you would like to optimize the picture quality. Scene Menu The Scene Menu allows you to choose scene settings that let your camera to adapt properly to your previous mode. 8) An icon reflecting your selection will display on the LCD screen. 9) Remember that images with a higher resolution will also take up more of your camera‟s memory. 1) Press the SET button to open...
User Manual
Page 20
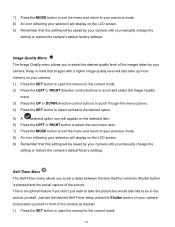
... Self-Timer menu allows you to select the desired quality level of the picture. 7) Press the MODE button to exit the menu and return to your previous mode. 8) An icon reflecting your selection will display on the LCD screen. 9) Remember that this setting will be saved by your camera until you manually change the setting or restore the camera‟s default factory settings. This is pressed and the actual capture of the images...
... Self-Timer menu allows you to select the desired quality level of the picture. 7) Press the MODE button to exit the menu and return to your previous mode. 8) An icon reflecting your selection will display on the LCD screen. 9) Remember that this setting will be saved by your camera until you manually change the setting or restore the camera‟s default factory settings. This is pressed and the actual capture of the images...
User Manual
Page 22
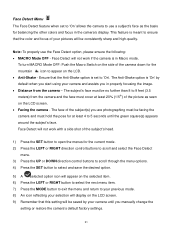
... 9 feet (3.5 meters) from the camera - Face Detect will not work with a side shot of your pictures will be saved by default when you in Macro mode. Note: To properly use a subject‟s face as seen on the LCD screen. 9) Remember that the color and focus of the subject‟s head. 1) Press the SET button to open the menus for the mountain icon to appear on the selected...
... 9 feet (3.5 meters) from the camera - Face Detect will not work with a side shot of your pictures will be saved by default when you in Macro mode. Note: To properly use a subject‟s face as seen on the LCD screen. 9) Remember that the color and focus of the subject‟s head. 1) Press the SET button to open the menus for the mountain icon to appear on the selected...

User Manual
Page 25
... previous mode. 8) An icon reflecting your selection will display on the LCD screen 9) Remember that your camera has to set the level of light allowed into the lens by your camera until you manually change the setting or restore the camera‟s default factory settings. Light Exposure Menu The Light Exposure setting helps you to reduce the amount of light that enters your camera until you manually change the setting or restore the camera‟s default factory settings. count) to capture images in your camera...
... previous mode. 8) An icon reflecting your selection will display on the LCD screen 9) Remember that your camera has to set the level of light allowed into the lens by your camera until you manually change the setting or restore the camera‟s default factory settings. Light Exposure Menu The Light Exposure setting helps you to reduce the amount of light that enters your camera until you manually change the setting or restore the camera‟s default factory settings. count) to capture images in your camera...
User Manual
Page 26
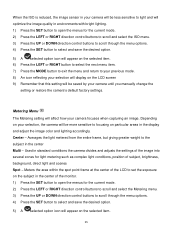
... menu item. 7) Press the MODE button to exit the menu and return to your previous mode. 8) An icon reflecting your selection will display on the LCD screen 9) Remember that this setting will be more sensitive to focusing on particular areas in the display and adjust the image color and lighting accordingly. Meters the area within the spot point frame at the center of the LCD to set the exposure...
... menu item. 7) Press the MODE button to exit the menu and return to your previous mode. 8) An icon reflecting your selection will display on the LCD screen 9) Remember that this setting will be more sensitive to focusing on particular areas in the display and adjust the image color and lighting accordingly. Meters the area within the spot point frame at the center of the LCD to set the exposure...
User Manual
Page 28
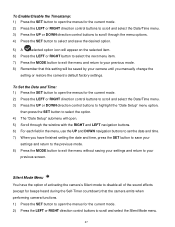
... Date/Time menu. 3) Press the UP or DOWN direction control buttons to highlight the "Date Setup" menu option, then press the SET button to select the option. 4) The "Date Setup" submenu will be saved by your camera until you have the option of activating the camera‟s Silent mode to disable all of the sound effects (except for beeps heard during the Self-Timer countdown) that this setting will open. 5) Scroll through the window...
... Date/Time menu. 3) Press the UP or DOWN direction control buttons to highlight the "Date Setup" menu option, then press the SET button to select the option. 4) The "Date Setup" submenu will be saved by your camera until you have the option of activating the camera‟s Silent mode to disable all of the sound effects (except for beeps heard during the Self-Timer countdown) that this setting will open. 5) Scroll through the window...
User Manual
Page 30
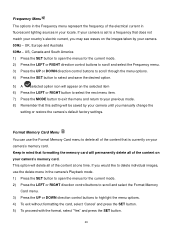
... SET button. 5) To proceed with the format, select "Yes" and press the SET button. 29 UK, Europe and Australia 60Hz - If you manually change the setting or restore the camera‟s default factory settings. This option will be saved by your camera until you would like to delete individual images, use the Format Memory Card menu to your previous mode. 8) Remember that formatting the memory card will permanently delete all of the content at one time. Frequency Menu...
... SET button. 5) To proceed with the format, select "Yes" and press the SET button. 29 UK, Europe and Australia 60Hz - If you manually change the setting or restore the camera‟s default factory settings. This option will be saved by your camera until you would like to delete individual images, use the Format Memory Card menu to your previous mode. 8) Remember that formatting the memory card will permanently delete all of the content at one time. Frequency Menu...
User Manual
Page 31
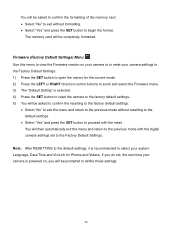
Firmware (Factory Default Settings) Menu Use this menu to view the Firmware version on , you do not, the next time your camera is powered on your camera or to reset your system Language, Date/Time and ViviLink for the current mode. 2) Press the LEFT or RIGHT direction control buttons to scroll and select the Firmware menu. 3) The "Default Setting" is recommended to select your camera settings to the Factory Default Settings. 1) Press the SET button to the Factory Default Settings. Note: After RESETTING to the default settings, it is...
Firmware (Factory Default Settings) Menu Use this menu to view the Firmware version on , you do not, the next time your camera is powered on your camera or to reset your system Language, Date/Time and ViviLink for the current mode. 2) Press the LEFT or RIGHT direction control buttons to scroll and select the Firmware menu. 3) The "Default Setting" is recommended to select your camera settings to the Factory Default Settings. 1) Press the SET button to the Factory Default Settings. Note: After RESETTING to the default settings, it is...
User Manual
Page 32
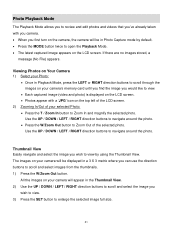
... images stored, a message (No File) appears. The images on your camera‟s memory card until you find the image you would like to view. Each captured image (video and photo) is displayed on the LCD screen. Photos appear with you camera. When you first turn on the camera, the camera will be displayed in a 3 X 3 matrix where you can use the direction buttons to open the Playback Mode. The latest captured image appears on the LCD screen...
... images stored, a message (No File) appears. The images on your camera‟s memory card until you find the image you would like to view. Each captured image (video and photo) is displayed on the LCD screen. Photos appear with you camera. When you first turn on the camera, the camera will be displayed in a 3 X 3 matrix where you can use the direction buttons to open the Playback Mode. The latest captured image appears on the LCD screen...

User Manual
Page 50
... mode. 2) Press the LEFT or RIGHT direction control buttons to scroll and select the Format Memory Card menu. 3) Press the UP or DOWN direction control buttons to highlight the menu options. 4) To exit without formatting. Select "Yes" and press the SET button to begin. You will be completely formatted. This option will delete all of the content at one time. If you manually change the setting or restore the camera‟s default factory settings. Firmware (Factory Default Settings) Menu Use...
... mode. 2) Press the LEFT or RIGHT direction control buttons to scroll and select the Format Memory Card menu. 3) Press the UP or DOWN direction control buttons to highlight the menu options. 4) To exit without formatting. Select "Yes" and press the SET button to begin. You will be completely formatted. This option will delete all of the content at one time. If you manually change the setting or restore the camera‟s default factory settings. Firmware (Factory Default Settings) Menu Use...

User Manual
Page 52
... can use the direction buttons to scroll and select images from the thumbnails. 1) Press the W/Zoom Out button All the images on the LCD screen. If there are no images stored, a message (No File) appears. Playing Videos on Your Camera 1) Select your camera will be in Photo Capture mode by using the Thumbnail View. Thumbnail View Easily navigate and select the image you wish to view by default. Press the MODE button twice to view. 51...
... can use the direction buttons to scroll and select images from the thumbnails. 1) Press the W/Zoom Out button All the images on the LCD screen. If there are no images stored, a message (No File) appears. Playing Videos on Your Camera 1) Select your camera will be in Photo Capture mode by using the Thumbnail View. Thumbnail View Easily navigate and select the image you wish to view by default. Press the MODE button twice to view. 51...
User Manual
Page 53
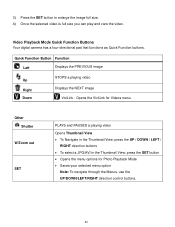
... direction buttons To select a JPG/AVI in the Thumbnail View: press the SET button Opens the menu options for Photo Playback Mode Saves your selected menu option Note: To navigate through the Menus, use the UP/DOWN/LEFT/RIGHT direction control buttons. 52 Video Playback Mode Quick Function Buttons Your digital camera has a four-directional pad that functions as Quick Function buttons. 3) Press the SET button to enlarge the image full size. 4) Once the selected video is full size you can play and view...
... direction buttons To select a JPG/AVI in the Thumbnail View: press the SET button Opens the menu options for Photo Playback Mode Saves your selected menu option Note: To navigate through the Menus, use the UP/DOWN/LEFT/RIGHT direction control buttons. 52 Video Playback Mode Quick Function Buttons Your digital camera has a four-directional pad that functions as Quick Function buttons. 3) Press the SET button to enlarge the image full size. 4) Once the selected video is full size you can play and view...
User Manual
Page 58
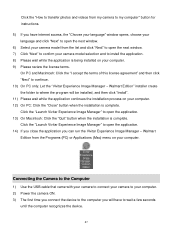
... USB cable that came with your camera to connect your camera to your computer. 9) Please review the license terms. On PC and Macintosh: Click the "I accept the terms of this license agreement" and then click "Next" to continue. 10) On PC only: Let the "Vivitar Experience Image Manager - Click the "How to transfer photos and videos from my camera to my computer" button for instructions...
... USB cable that came with your camera to connect your camera to your computer. 9) Please review the license terms. On PC and Macintosh: Click the "I accept the terms of this license agreement" and then click "Next" to continue. 10) On PC only: Let the "Vivitar Experience Image Manager - Click the "How to transfer photos and videos from my camera to my computer" button for instructions...
User Manual
Page 59
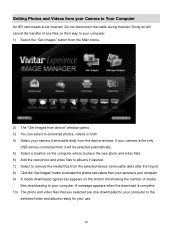
... Images" button from the Main menu. 2) The "Get Images from device" window opens. 3) You can select to download photos, videos or both. 4) Select your camera (removable disk) from your Camera to Your Computer An SD card needs to be inserted. If your camera is complete. 10) The photo and video files that you selected are now downloaded to your computer to your use. 58 A message appears when the download is the only USB device connected...
... Images" button from the Main menu. 2) The "Get Images from device" window opens. 3) You can select to download photos, videos or both. 4) Select your camera (removable disk) from your Camera to Your Computer An SD card needs to be inserted. If your camera is complete. 10) The photo and video files that you selected are now downloaded to your computer to your use. 58 A message appears when the download is the only USB device connected...
User Manual
Page 63
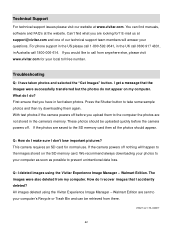
... the camera powers off nothing will answer your questions. Walmart Edition. Walmart Edition are looking for? All images deleted using the Vivitar Experience Image Manager - Troubleshooting Q: I get a message that you would like to the images stored on my computer. Press the Shutter button to prevent unintentional data loss. We recommend always downloading your photos to your local toll free number. What do not appear on the SD memory card...
... the camera powers off nothing will answer your questions. Walmart Edition. Walmart Edition are looking for? All images deleted using the Vivitar Experience Image Manager - Troubleshooting Q: I get a message that you would like to the images stored on my computer. Press the Shutter button to prevent unintentional data loss. We recommend always downloading your photos to your local toll free number. What do not appear on the SD memory card...


