Vivitar X026 Support and Manuals
Get Help and Manuals for this Vivitar item
View All Support Options Below
Free Vivitar X026 manuals!
Problems with Vivitar X026?
Ask a Question
Free Vivitar X026 manuals!
Problems with Vivitar X026?
Ask a Question
Popular Vivitar X026 Manual Pages
Warranty - Page 2
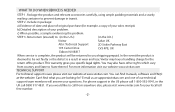
... evidencing the problem.
STEP 3. STEP 2. Return item (insured) to: (in the U.S.): Vivitar Attn: Technical Support 195 Carter Drive Edison NJ 08817
(in the U.K.) Sakar UK 2D Siskin Parkway East CV3 4PE, UK
When service is a result in the UK call from country and State to call 0800 917 4831. For phone support in the US...
Camera Manual - Page 1

ViviCam X026 Digital Camera
User Manual
© 2010 Sakar International, Inc. All other trademarks are registered trademarks of their respective companies. All rights reserved. Windows and the Windows logo are the property of Microsoft Corporation.
Camera Manual - Page 3
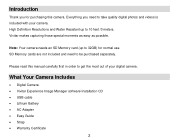
... those special moments as easy as possible. Note: Your camera needs an SD Memory card (up to 10 feet /3 meters.
What Your Camera Includes
Digital Camera Vivitar Experience Image Manager software Installation CD USB cable Lithium Battery AC Adapter Easy Guide Strap Warranty Certificate
2 Everything you for normal...
Camera Manual - Page 9

... you select "No" and decide to leave the camera setup, the camera will be set to set the date and time on the camera.
Note: If you would like to continue with Camera Setup?" These settings can be adjusted at any time manually through the menus in the initial camera setup is to its default settings.
Select "Yes" to continue or "No" to...
Camera Manual - Page 20

... properly balance the colors in the current environment. Properly adjusting the White Balance setting to match your camera until you manually change the setting or
restore the camera‟s default factory settings. Anti-Shake Menu
The Anti-Shake feature reduces image corruption that can be caused by movement of light source in the images that this...
Camera Manual - Page 21

...
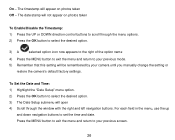
20 Color Effect Menu
You can choose to add a color effect to the images taken with your camera.
1) Press the UP or DOWN direction control buttons to scroll through the menu options. 2) Press ... mode. 6) An icon reflecting your selection will display on the LCD screen 7) Remember that this setting will appear on the selected item.
4) Press the LEFT or RIGHT button to select the desired option...
Camera Manual - Page 22

... to your previous mode. 6) An icon reflecting your selection will display on the LCD screen 7) Remember that this setting will be remembered by your camera until you manually change the setting or
restore the camera‟s default factory settings.
21 This feature can be effective when trying to capture a particular moment in a sporting event or other...
Camera Manual - Page 23

...setting helps you manually change the setting or
restore the camera‟s default factory settings. This setting should be remembered by your camera until you control the amount of light that enters your camera. Image Sharpness Menu
You can set...your selection will display on the LCD screen 7) Remember that this setting will be adjusted when the environment is lighter or darker than ...
Camera Manual - Page 24

... the environment has more light than is needed , increase the exposure setting (by using the negative count) to your previous mode. 6) An icon reflecting your selection will display on the LCD screen 7) Remember that this setting will be remembered by your camera until you manually change the setting or
restore the camera‟s default factory settings.
23
Camera Manual - Page 25

... particular areas in the center of subject, brightness, background, direct light and scenes Spot - Metering Menu
The Metering setting will affect how your camera until you manually change the setting or
restore the camera‟s default factory settings.
24 Averages the light metered from the entire frame, but giving greater weight to focusing on the LCD...
Camera Manual - Page 26

...your camera‟s language setting by your camera until you manually change the setting or
restore the camera‟s default factory settings. Date/Time Menu
When you to your previous mode. 6) Remember that this setting will... menu item. 5) Press the MENU button to exit the menu and return to set your camera‟s date and time as desired. Language Menu
You can also disable the timestamp...
Camera Manual - Page 27
... and return to your camera until you manually change the setting or
restore the camera‟s default factory settings. For each field in the menu, use the up
and down navigation buttons to scroll through the window with the right and left navigation buttons.
To Set the Date and Time: 1) Highlight the "Date Setup" menu option. 2) Press...
Camera Manual - Page 56
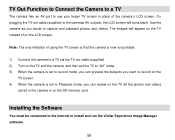
...larger TV screen in the camera or on the
TV screen. 4) When the camera is set to record mode, you can review on the TV all the...Camera to a TV
The camera has an AV port to the cameras AV out jack, the LCD screen will appear on the TV and the camera, and then set the TV to "AV" mode. 3) When the camera is set to install and run the Vivitar Experience Image Manager software.
55 Use the camera...
Camera Manual - Page 63

...
Finder‟s Edit menu. Do not expose your camera to heat sources. Transfer media from my camera to my computer manually (Using Macintosh)
1) Use the USB cable that you copy the images into the Pictures folder and the videos into your computer. Camera Maintenance
The digital camera is wet.
62 Do not open the DCIM folder...
Camera Manual - Page 65
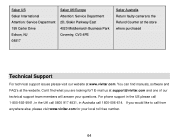
Can‟t find manuals, software and FAQ‟s at support@vivitar.com and one of our technical support team members will answer your local toll free number.
64 If you are looking for your questions. For phone support in the US please call 1-800-592-9541, in the UK call 0800 917 4831, in Australia call from...
Vivitar X026 Reviews
We have not received any reviews for Vivitar yet.