
Camera Manual
Page 2
... Requirements for Macintosh 5 A Quick Look at your Digital Video Camera 6 Preparing Your Camera for Use 7 Inserting an SD Memory Card 8 DVR Function Control ...10 Install the Vivitar Experience Image Manager Software 35 Connect your camera to the computer 39 Get photos and videos from your camera to your computer 39 Get started! ...41 Transfer media from...
... Requirements for Macintosh 5 A Quick Look at your Digital Video Camera 6 Preparing Your Camera for Use 7 Inserting an SD Memory Card 8 DVR Function Control ...10 Install the Vivitar Experience Image Manager Software 35 Connect your camera to the computer 39 Get photos and videos from your camera to your computer 39 Get started! ...41 Transfer media from...
Camera Manual
Page 3
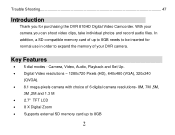
... to expand the memory of up to be inserted for purchasing the DVR 810HD Digital Video Camcorder. Camera, Video, Audio, Playback and Set Up. Digital Video resolutions - 1280x720 Pixels (HD), 640x480 (VGA), 320x240 (QVGA). 8.1 mega-pixels camera with choice of 6 digital camera resolutions- 8M, 7M ,5M, 3M ,2M and 1.3 M 2.7" TFT LCD ...
... to expand the memory of up to be inserted for purchasing the DVR 810HD Digital Video Camcorder. Camera, Video, Audio, Playback and Set Up. Digital Video resolutions - 1280x720 Pixels (HD), 640x480 (VGA), 320x240 (QVGA). 8.1 mega-pixels camera with choice of 6 digital camera resolutions- 8M, 7M ,5M, 3M ,2M and 1.3 M 2.7" TFT LCD ...
Camera Manual
Page 4
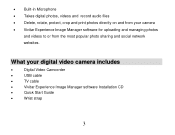
Built-in Microphone Takes digital photos, videos and record audio files Delete, rotate, protect, crop and print photos directly on and from the most popular photo sharing and social network websites. What your camera Vivitar Experience Image Manager software for uploading and managing photos and videos to or from your digital video camera includes Digital Video Camcorder USB cable TV cable Vivitar Experience Image Manager software Installation CD Quick Start Guide Wrist strap 3
Built-in Microphone Takes digital photos, videos and record audio files Delete, rotate, protect, crop and print photos directly on and from the most popular photo sharing and social network websites. What your camera Vivitar Experience Image Manager software for uploading and managing photos and videos to or from your digital video camera includes Digital Video Camcorder USB cable TV cable Vivitar Experience Image Manager software Installation CD Quick Start Guide Wrist strap 3

Camera Manual
Page 8
Return and close the battery cover. 7 Insert the batteries in accordance with the polarity indicated in the battery compartment. 3. Open the battery compartment on the side of the camera. 2. It is recommended that alkaline batteries be used. 1. Preparing Your Camera for Use Battery Installation Your DVR camcorder requires 4 "AAA" batteries (not included).
Return and close the battery cover. 7 Insert the batteries in accordance with the polarity indicated in the battery compartment. 3. Open the battery compartment on the side of the camera. 2. It is recommended that alkaline batteries be used. 1. Preparing Your Camera for Use Battery Installation Your DVR camcorder requires 4 "AAA" batteries (not included).

Camera Manual
Page 9
... Card An SD compatible memory card of movies, photos and audio that can be inserted into your computer. Remove the batteries from the camera all photos and videos clips in limited built-in memory will be lost . Limited internal memory is provided in order to test photos...-in memory will be lost if no SD Memory Card has been inserted in the DVR when you change your batteries. We strongly recommend downloading your photos and videos regularly to a computer. 8 Note: On removing the batteries from the DVR camera when not in use for an extended period.
... Card An SD compatible memory card of movies, photos and audio that can be inserted into your computer. Remove the batteries from the camera all photos and videos clips in limited built-in memory will be lost . Limited internal memory is provided in order to test photos...-in memory will be lost if no SD Memory Card has been inserted in the DVR when you change your batteries. We strongly recommend downloading your photos and videos regularly to a computer. 8 Note: On removing the batteries from the DVR camera when not in use for an extended period.

Camera Manual
Page 10
... you insert an SD memory card, the icon will appear on the LCD, indicating that your camera's power runs low or on replacing the batteries. 1. Locate the SD card slot on the bottom of the camera. 2. Insert an SD memory card correctly in the limited internal memory. 9 Press the memory card until... the memory card is not lost when your SD memory card has been installed successfully, and the media you capture will sit flush with the camera.
... you insert an SD memory card, the icon will appear on the LCD, indicating that your camera's power runs low or on replacing the batteries. 1. Locate the SD card slot on the bottom of the camera. 2. Insert an SD memory card correctly in the limited internal memory. 9 Press the memory card until... the memory card is not lost when your SD memory card has been installed successfully, and the media you capture will sit flush with the camera.

Camera Manual
Page 11
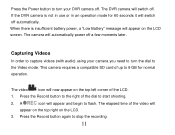
... need to format the card with the camera. The LCD monitor will delete all data on the inside of up to 8GB. Formatting will light up indicating that your DVR. This product supports SD cards of the camera. The Power button is ready for use. Power on Press the Power... button to turn on your DVR is situated on the SD Memory Card including protected data. Do...
... need to format the card with the camera. The LCD monitor will delete all data on the inside of up to 8GB. Formatting will light up indicating that your DVR. This product supports SD cards of the camera. The Power button is ready for use. Power on Press the Power... button to turn on your DVR is situated on the SD Memory Card including protected data. Do...
Camera Manual
Page 12
... begin to 8 GB for 60 seconds it will appear on the top right on the LCD screen. This camera requires a compatible SD card of the video will switch off a few moments later. The DVR camera will now appear on the top left corner of the dial to stop the recording. 11 Capturing Videos... In order to capture videos (with audio) using your camera you need to turn the dial to turn your DVR camera off . The video icon will switch off . Press the Power button to the Video mode. Press the Record button to...
... begin to 8 GB for 60 seconds it will appear on the top right on the LCD screen. This camera requires a compatible SD card of the video will switch off a few moments later. The DVR camera will now appear on the top left corner of the dial to stop the recording. 11 Capturing Videos... In order to capture videos (with audio) using your camera you need to turn the dial to turn your DVR camera off . The video icon will switch off . Press the Power button to the Video mode. Press the Record button to...

Camera Manual
Page 13
... limited it should be saved in playback mode. 3. You can adjust the zoom to 8 GB for test files only. 5. As the internal memory of the camera is full, a "Disk Full" message will be used for normal use up to focus in detail below. 12 Once they are explained in on the...
... limited it should be saved in playback mode. 3. You can adjust the zoom to 8 GB for test files only. 5. As the internal memory of the camera is full, a "Disk Full" message will be used for normal use up to focus in detail below. 12 Once they are explained in on the...
Camera Manual
Page 17
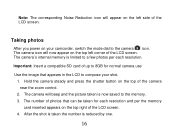
... per each resolution and per the memory card inserted appears on the top left side of the LCD screen. The camera`s internal memory is limited to the camera icon. Hold the camera steady and press the shutter button on the left corner of the LCD screen. Note: The corresponding Noise Reduction icon... will appear on the top of the camera near the zoom control. 2. Important: Insert a compatible SD card of up to the memory. 3. After the shot is taken the number is now saved ...
... per each resolution and per the memory card inserted appears on the top left side of the LCD screen. The camera`s internal memory is limited to the camera icon. Hold the camera steady and press the shutter button on the left corner of the LCD screen. Note: The corresponding Noise Reduction icon... will appear on the top of the camera near the zoom control. 2. Important: Insert a compatible SD card of up to the memory. 3. After the shot is taken the number is now saved ...

Camera Manual
Page 18
... them from your SD card or insert another SD card to take up more photos and videos 6. Use the Right/Left joystick button to the camera mode. 17 Either download the photo to your choice and revert to select either "Yes" or "No". 4. Press the OK button to confirm and ...save your computer using the Vivitar Experience Image Manager software as described below in camera mode, you attempt to press the Shutter button to continue taking more memory on the LCD screen when you can be...
... them from your SD card or insert another SD card to take up more photos and videos 6. Use the Right/Left joystick button to the camera mode. 17 Either download the photo to your choice and revert to select either "Yes" or "No". 4. Press the OK button to confirm and ...save your computer using the Vivitar Experience Image Manager software as described below in camera mode, you attempt to press the Shutter button to continue taking more memory on the LCD screen when you can be...
Camera Manual
Page 19
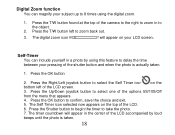
The digital zoom icon will appear in the center of the camera to the right to zoom in a photo by loud beeps until the photo is actually taken. 1. Press the T/W button left of the shutter button and ...
The digital zoom icon will appear in the center of the camera to the right to zoom in a photo by loud beeps until the photo is actually taken. 1. Press the T/W button left of the shutter button and ...
Camera Manual
Page 20
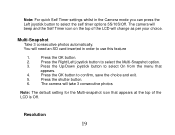
... settings whilst in order to use this feature 1. You will beep and the Self Timer icon on the top of the LCD is Off. The camera will take 3 consecutive photos Note: The default setting for the Multi-snapshot icon that appears. 4. Press the OK button to select the self timer options... Right/Left joystick button to select On from the menu that appears at the top of the LCD will change as per your choice. The camera will need an SD card inserted in the Camera mode you can press the Left joystick button to confirm, save the choice and exit. 5.
... settings whilst in order to use this feature 1. You will beep and the Self Timer icon on the top of the LCD is Off. The camera will take 3 consecutive photos Note: The default setting for the Multi-snapshot icon that appears. 4. Press the OK button to select the self timer options... Right/Left joystick button to select On from the menu that appears at the top of the LCD will change as per your choice. The camera will need an SD card inserted in the Camera mode you can press the Left joystick button to confirm, save the choice and exit. 5.
Camera Manual
Page 21
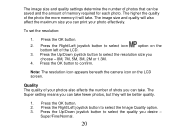
... affects the number of shots you can take fewer photos, but they will take . Press the OK button. 2. Note: The resolution icon appears beneath the camera icon on the bottom left of the LCD. 3. Quality The quality of your photo effectively. The image size and quality settings determine the number of...
... affects the number of shots you can take fewer photos, but they will take . Press the OK button. 2. Note: The resolution icon appears beneath the camera icon on the bottom left of the LCD. 3. Quality The quality of your photo effectively. The image size and quality settings determine the number of...
Camera Manual
Page 28
... the option to confirm, save and exit. 27 Press the OK button to edit these photos - Select a still photo (an icon will show on the camera 1.
... the option to confirm, save and exit. 27 Press the OK button to edit these photos - Select a still photo (an icon will show on the camera 1.
Camera Manual
Page 29
... Delete option. 3. Press the Up/Down joystick button to select either This Image/This Video (to print. 2. Press the OK button to confirm, save your camera to a compatible printer with PictBridge Your camcorder allows you want to delete the currently selected image) or ALL (delete all the unprotected photos and videos...
... Delete option. 3. Press the Up/Down joystick button to select either This Image/This Video (to print. 2. Press the OK button to confirm, save your camera to a compatible printer with PictBridge Your camcorder allows you want to delete the currently selected image) or ALL (delete all the unprotected photos and videos...
Camera Manual
Page 30
... joystick button to start printing. Press the Up/Down joystick button and select PictBridge to print another photo, select "Select Image" option. 10. Connect your camera 1. If you are not connected to a printer the following message will appear on your camcorder to a compatible printer with the provided USB cable to device...
... joystick button to start printing. Press the Up/Down joystick button and select PictBridge to print another photo, select "Select Image" option. 10. Connect your camera 1. If you are not connected to a printer the following message will appear on your camcorder to a compatible printer with the provided USB cable to device...
Camera Manual
Page 32
... exit to confirm, save and begin the format. Press the Right/Left joystick button and select the Date Format option. 3. feature as in both the camera mode and video mode. This process is irreversible. 1. Press the Right/Left joystick button to select one of the photo. 1. Press the OK button. 5. Date...
... exit to confirm, save and begin the format. Press the Right/Left joystick button and select the Date Format option. 3. feature as in both the camera mode and video mode. This process is irreversible. 1. Press the Right/Left joystick button to select one of the photo. 1. Press the OK button. 5. Date...
Camera Manual
Page 33
... either a 12 hour or 24 hour format. 1. Press the OK button. 2. Press the Up/Down joystick button to set the time up in both the camera mode and video mode. Press the Right/Left joystick button and select the Time Format option. 3. Time Format You can select and highlight the Time...
... either a 12 hour or 24 hour format. 1. Press the OK button. 2. Press the Up/Down joystick button to set the time up in both the camera mode and video mode. Press the Right/Left joystick button and select the Time Format option. 3. Time Format You can select and highlight the Time...
Camera Manual
Page 34
... the Left/Right joystick button to confirm, save and exit. Note: the Date/Time format will be displayed on the LCD screen in both the camera mode and video mode. 7. Press the Right/Left joystick button to select 50/60Hz from the menu. 4. Press the Up/Down joystick button to select...
... the Left/Right joystick button to confirm, save and exit. Note: the Date/Time format will be displayed on the LCD screen in both the camera mode and video mode. 7. Press the Right/Left joystick button to select 50/60Hz from the menu. 4. Press the Up/Down joystick button to select...


