8018 User Manual
Page 2
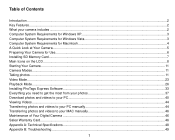
... Your Camera for Use...6 Installing SD Memory Card...7 Main Icons on the LCD...8 Starting Your Camera ...11 Camera Modes...11 Taking photos ...11 Video Mode ...23 Playback Mode...26 Installing PhoTags Express Software...33 Everything you need to get the most from your photos 37 Download photos and videos to your PC ...40 Viewing Videos...44 Transferring photos and videos to your PC manually 44 Transferring photos and videos to your MAC manually 46 Maintenance of Your Digital Camera ...46 Sakar Warranty Card...46 Appendix A: Technical Specifications...48 Appendix B: Troubleshooting...
... Your Camera for Use...6 Installing SD Memory Card...7 Main Icons on the LCD...8 Starting Your Camera ...11 Camera Modes...11 Taking photos ...11 Video Mode ...23 Playback Mode...26 Installing PhoTags Express Software...33 Everything you need to get the most from your photos 37 Download photos and videos to your PC ...40 Viewing Videos...44 Transferring photos and videos to your PC manually 44 Transferring photos and videos to your MAC manually 46 Maintenance of Your Digital Camera ...46 Sakar Warranty Card...46 Appendix A: Technical Specifications...48 Appendix B: Troubleshooting...
8018 User Manual
Page 3
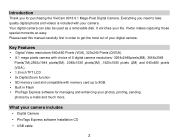
... ViviCam 8018 8.1 Mega-Pixel Digital Camera. Key Features Digital Video resolutions-640x480 Pixels (VGA), 320x240 Pixels (QVGA). 8.1 mega pixels camera with choice of your digital camera. It enriches your camera includes Digital Camera PhoTags Express software Installation CD USB cable 2 Your digital camera can also be used as a removable disk. Vivitar makes capturing those special moments so easy. Introduction Thank you need to take quality digital photos and videos is included with memory card up...
... ViviCam 8018 8.1 Mega-Pixel Digital Camera. Key Features Digital Video resolutions-640x480 Pixels (VGA), 320x240 Pixels (QVGA). 8.1 mega pixels camera with choice of your digital camera. It enriches your camera includes Digital Camera PhoTags Express software Installation CD USB cable 2 Your digital camera can also be used as a removable disk. Vivitar makes capturing those special moments so easy. Introduction Thank you need to take quality digital photos and videos is included with memory card up...

8018 User Manual
Page 5
Computer System Requirements for Macintosh Power Macintosh G3 500 MHz or higher Mac OS X version 10.2.6 or later 128 MB or more available system RAM (256 MB recommended), 150 MB free disk space 800 x 600 or higher-resolution monitor displaying millions of colors Note: This hardware is plug and play compatible when used on a Mac, however, the included software can be used on Windows operating systems only. 4
Computer System Requirements for Macintosh Power Macintosh G3 500 MHz or higher Mac OS X version 10.2.6 or later 128 MB or more available system RAM (256 MB recommended), 150 MB free disk space 800 x 600 or higher-resolution monitor displaying millions of colors Note: This hardware is plug and play compatible when used on a Mac, however, the included software can be used on Windows operating systems only. 4

8018 User Manual
Page 9
... power off . An external memory card is full, download the media on the SD card to your card. 4. Once the external memory card is required for test images. If there is turned off .SD memory card is inserted into your camera, a "Move to your PC and delete the photos and videos from it unusable. 6. An icon will be stored on the SD memory card including protected data. 5. The image will be copied to card" message...
... power off . An external memory card is full, download the media on the SD card to your card. 4. Once the external memory card is required for test images. If there is turned off .SD memory card is inserted into your camera, a "Move to your PC and delete the photos and videos from it unusable. 6. An icon will be stored on the SD memory card including protected data. 5. The image will be copied to card" message...

8018 User Manual
Page 11
Battery power level Full battery power Medium battery power Low battery power Photo quality Normal quality Fine quality Super quality Flash Force Flash Auto Red eye reduction No Flash Scenes Auto Portrait Party Night Portrait Scenery Beach Self-timer On(10 seconds) Self-timer On(2 seconds) Digital Zoom Protect Protect On \White Balance Auto Fluorescent Daylight Incandescent Cloudy Anti-Shake Anti-Shake on Anti-Shake off Macro/Far function Night Scenery Sport High Sensitivity 10 Macro capture Far capture
Battery power level Full battery power Medium battery power Low battery power Photo quality Normal quality Fine quality Super quality Flash Force Flash Auto Red eye reduction No Flash Scenes Auto Portrait Party Night Portrait Scenery Beach Self-timer On(10 seconds) Self-timer On(2 seconds) Digital Zoom Protect Protect On \White Balance Auto Fluorescent Daylight Incandescent Cloudy Anti-Shake Anti-Shake on Anti-Shake off Macro/Far function Night Scenery Sport High Sensitivity 10 Macro capture Far capture

8018 User Manual
Page 12
To switch between modes press the MODE button. • Camera Mode to take still photos • Video Mode to turn on your camera. To power off your camera. The LCD screen will light up indicating that your camera is Camera mode. Starting Your Camera Press and hold the Power button to capture video files • Playback Mode: Preview, print, edit photos and view videos Taking photos Power on your camera, the default mode is on and ready for use. A camera icon appears in the top left corner of the 11 Camera Modes There are 3 modes on your camera, press the Power button once.
To switch between modes press the MODE button. • Camera Mode to take still photos • Video Mode to turn on your camera. To power off your camera. The LCD screen will light up indicating that your camera is Camera mode. Starting Your Camera Press and hold the Power button to capture video files • Playback Mode: Preview, print, edit photos and view videos Taking photos Power on your camera, the default mode is on and ready for use. A camera icon appears in the top left corner of the 11 Camera Modes There are 3 modes on your camera, press the Power button once.

8018 User Manual
Page 13
... saved to adjust the zoom. 2. The setting is full, the LCD screen will appear on the top right of the 12 The icon will display "Memory Full! Press the T button to shoot at this resolution is displayed on the LCD screen. 3. Note: When the memory is found on your subject using the digital zoom. 1. Digital Zoom function You can magnify your subject. 4. LCD screen. 1. After each photo is shot and the camera returns to icon mode, the numbers of photos...
... saved to adjust the zoom. 2. The setting is full, the LCD screen will appear on the top right of the 12 The icon will display "Memory Full! Press the T button to shoot at this resolution is displayed on the LCD screen. 3. Note: When the memory is found on your subject using the digital zoom. 1. Digital Zoom function You can magnify your subject. 4. LCD screen. 1. After each photo is shot and the camera returns to icon mode, the numbers of photos...
8018 User Manual
Page 14
... the LCD indicating that the auto flash is displayed on . 3. Press the Up button again to change to 5. The icon activated. This indicates that the red eye reduction function has been 7. The icon use. Press the Up button. 2. Press the Up button again to change from the auto flash to take photos when the light condition is forced on the LCD. will appear on the LCD screen. You now can possibly get with the lens you...
... the LCD indicating that the auto flash is displayed on . 3. Press the Up button again to change to 5. The icon activated. This indicates that the red eye reduction function has been 7. The icon use. Press the Up button. 2. Press the Up button again to change from the auto flash to take photos when the light condition is forced on the LCD. will appear on the LCD screen. You now can possibly get with the lens you...

8018 User Manual
Page 15
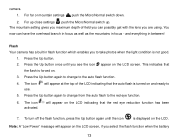
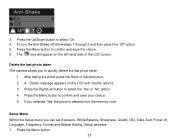
... take photos in scenes for 2 or 10 seconds. 1. Press the Down or Timer button. 2. power is recommended that you use the self-timer. It is insufficient. The scenes included with the flash, please change new batteries. You can include yourself in a photo by using the camera with your light and environmental conditions. 1. Scene Your camera has many built in almost any environment. Press the Menu button. 14 The icon...
... take photos in scenes for 2 or 10 seconds. 1. Press the Down or Timer button. 2. power is recommended that you use the self-timer. It is insufficient. The scenes included with the flash, please change new batteries. You can include yourself in a photo by using the camera with your light and environmental conditions. 1. Scene Your camera has many built in almost any environment. Press the Menu button. 14 The icon...
8018 User Manual
Page 18
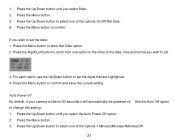
... the Menu button. 17 A Delete message appears on the left hand side of the LCD screen. Delete the last photo taken The camera allows you selected 'Yes' the photo is deleted from the memory card. Press the Right/Left button to select 'On'. 4. If you to quickly delete the last photo taken 1. 3. The icon will appear on the LCD with Yes/No options 3. Setup Menu Within the Setup menu you can set Exposure, White Balance, Sharpness, Quality, ISO, Date, Auto Power...
... the Menu button. 17 A Delete message appears on the left hand side of the LCD screen. Delete the last photo taken The camera allows you selected 'Yes' the photo is deleted from the memory card. Press the Right/Left button to select 'On'. 4. If you to quickly delete the last photo taken 1. 3. The icon will appear on the LCD with Yes/No options 3. Setup Menu Within the Setup menu you can set Exposure, White Balance, Sharpness, Quality, ISO, Date, Auto Power...
8018 User Manual
Page 22
... to the other of the date, time and format you select the Auto Power Off option. 2. Press the Menu button to change this setting: 1. For each option use the Up/Down button to set the date: 1. Use the Auto Off option to confirm. Auto Power off By default, if your camera is idle for 60 seconds it will automatically be powered off. Press the Up/Down button to select one of...
... to the other of the date, time and format you select the Auto Power Off option. 2. Press the Menu button to change this setting: 1. For each option use the Up/Down button to set the date: 1. Use the Auto Off option to confirm. Auto Power off By default, if your camera is idle for 60 seconds it will automatically be powered off. Press the Up/Down button to select one of...

8018 User Manual
Page 23
... the Menu button to select one of your videos. 4. The default setting is 60HZ: 1. Press the Menu button. 3. and 50HZ for the U.S. Press the Up/Down button until you select Format. 2. Press the Up/Down button to confirm. Press the Menu button to confirm, save and exit to the camera mode. Press Menu button to confirm, save and exit to standby mode. Format This function will format the memory card and will erase all the images...
... the Menu button to select one of your videos. 4. The default setting is 60HZ: 1. Press the Menu button. 3. and 50HZ for the U.S. Press the Up/Down button until you select Format. 2. Press the Up/Down button to confirm. Press the Menu button to confirm, save and exit to the camera mode. Press Menu button to confirm, save and exit to standby mode. Format This function will format the memory card and will erase all the images...

8018 User Manual
Page 24
... the Menu button to the original settings from factory. 1. Default Setting You can restore your camera to confirm. 7. Press the Menu button to confirm, save and exit to select one of the options OK/Cancel. 4. Press the Up/Down button to the camera standby mode. This process in order use and capture videos. 23 Video Mode Press the MODE button to Format the SD Memory card. All images stored on the LCD screen as soon...
... the Menu button to the original settings from factory. 1. Default Setting You can restore your camera to confirm. 7. Press the Menu button to confirm, save and exit to select one of the options OK/Cancel. 4. Press the Up/Down button to the camera standby mode. This process in order use and capture videos. 23 Video Mode Press the MODE button to Format the SD Memory card. All images stored on the LCD screen as soon...

8018 User Manual
Page 25
... computer using Quick Time and Windows Media Player. Note: You can play this file to record as per the capacity of the memory card appears on the top left corner of the LCD screen. 1. The video icon will flash on your memory card in playback mode on the camera or on the LCD screen. 3. Press the Shutter button again to start shooting videos. 2. White Balance 24 Press the Shutter button to stop and save this AVI file in AVI format. The elapsed time will...
... computer using Quick Time and Windows Media Player. Note: You can play this file to record as per the capacity of the memory card appears on the top left corner of the LCD screen. 1. The video icon will flash on your memory card in playback mode on the camera or on the LCD screen. 3. Press the Shutter button again to start shooting videos. 2. White Balance 24 Press the Shutter button to stop and save this AVI file in AVI format. The elapsed time will...

8018 User Manual
Page 27
... Image Size option VGA/QVGA. 4. NOTE: The message, "NO FILE" will be displayed on the LCD screen if there are no images either on your camera or on the SD Memory card inserted in your camera using PictBridge technology. Press the Up/Down button to the video standby mode. Thumbnail display 26 3. In this mode you can preview the photos and videos you can also print photos directly from your camera. You can rotate, protect, delete...
... Image Size option VGA/QVGA. 4. NOTE: The message, "NO FILE" will be displayed on the LCD screen if there are no images either on your camera or on the SD Memory card inserted in your camera using PictBridge technology. Press the Up/Down button to the video standby mode. Thumbnail display 26 3. In this mode you can preview the photos and videos you can also print photos directly from your camera. You can rotate, protect, delete...

8018 User Manual
Page 33
A message will appear on the LCD screen "Please connect to play the current AVI file. 3. Playing the AVI video file 1. Select an AVI video file you wish to device". 6. Press the Shutter button again to play . 2. Press the Shutter button to pause. 4. Press the Menu button to begin the printing process. Connect your camera and press OK button to the compatible printer with the USB cable to confirm. Press Up button to select the PictBridge option. 5. 4. Press the Up/Down to stop. 32
A message will appear on the LCD screen "Please connect to play the current AVI file. 3. Playing the AVI video file 1. Select an AVI video file you wish to device". 6. Press the Shutter button again to play . 2. Press the Shutter button to pause. 4. Press the Menu button to begin the printing process. Connect your camera and press OK button to the compatible printer with the USB cable to confirm. Press Up button to select the PictBridge option. 5. 4. Press the Up/Down to stop. 32
8018 User Manual
Page 34
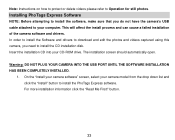
... to install the Software and drivers to download and edit the photos and videos captured using this camera, you do not have the camera's USB cable attached to install the CD installation disk. For more installation information click the "Read Me First!" On the "Install your camera software" screen, select your camera model from the drop down list and click the "Install" button to Operation for still photos. button. 33 Note: Instructions on how to protect or delete videos please...
... to install the Software and drivers to download and edit the photos and videos captured using this camera, you do not have the camera's USB cable attached to install the CD installation disk. For more installation information click the "Read Me First!" On the "Install your camera software" screen, select your camera model from the drop down list and click the "Install" button to Operation for still photos. button. 33 Note: Instructions on how to protect or delete videos please...

8018 User Manual
Page 45
... the images transferred. Videos are saved in the C:\My Documents\My Pictures\{date} folder. Transferring photos and videos to your PC manually Turn on a video with USB cable, the screen will enable you will begin to the computer correctly with the avi extension. To replay the video, use the media controls. In this mode you to view video files (for example Windows Media Player). Double click on your camera, Change your camera mode to Playback and connect your camera to play automatically. Viewing Videos Make...
... the images transferred. Videos are saved in the C:\My Documents\My Pictures\{date} folder. Transferring photos and videos to your PC manually Turn on a video with USB cable, the screen will enable you will begin to the computer correctly with the avi extension. To replay the video, use the media controls. In this mode you to view video files (for example Windows Media Player). Double click on your camera, Change your camera mode to Playback and connect your camera to play automatically. Viewing Videos Make...
8018 User Manual
Page 47
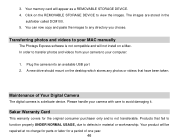
...Your memory card will be repaired at no charge for parts or labor for the original consumer purchaser only and is a delicate device. Transferring photos and videos to your MAC manually The Photags Express software is not compatible and will not install on the REMOVABLE STORAGE DEVICE to view the images.... Card This warranty covers for a period of Your Digital Camera The digital camera is not transferable. 3. Click on a Mac. Products that have been taken. Plug the camera into an available USB port 2. You can now copy and paste the images to any photos or videos that fail to function ...
...Your memory card will be repaired at no charge for parts or labor for the original consumer purchaser only and is a delicate device. Transferring photos and videos to your MAC manually The Photags Express software is not compatible and will not install on the REMOVABLE STORAGE DEVICE to view the images.... Card This warranty covers for a period of Your Digital Camera The digital camera is not transferable. 3. Click on a Mac. Products that have been taken. Plug the camera into an available USB port 2. You can now copy and paste the images to any photos or videos that fail to function ...

8018 User Manual
Page 51
... you still get a "no photos" error this may not meet the minimum system requirements. Software Re-installation 1. Q: I do? What do I have pictures in your computer's specifications can be found in the General Computer Information section. Press the Shutter/OK button a few times to reinstall the software. After removing, restart your camera. If your camera is back up, plug the camera into your computer may mean...
... you still get a "no photos" error this may not meet the minimum system requirements. Software Re-installation 1. Q: I do? What do I have pictures in your computer's specifications can be found in the General Computer Information section. Press the Shutter/OK button a few times to reinstall the software. After removing, restart your camera. If your camera is back up, plug the camera into your computer may mean...


