
English Owners Manual
Page 1
If you have any questions about the information in this document, please call our Customer Service Department at 1-800-648-4921 or visit us on the web at http://bcs.uniden.com. UIP200 User's Manual Revision 1.0 © Uniden America Corp., May, 2004 This manual contains instructions for installing and operating your UIP200 SIP IP phone. It provides a description of the telephone's hardware, features, LCD displays, and explains setup, configuration, and basic operation.
If you have any questions about the information in this document, please call our Customer Service Department at 1-800-648-4921 or visit us on the web at http://bcs.uniden.com. UIP200 User's Manual Revision 1.0 © Uniden America Corp., May, 2004 This manual contains instructions for installing and operating your UIP200 SIP IP phone. It provides a description of the telephone's hardware, features, LCD displays, and explains setup, configuration, and basic operation.

English Owners Manual
Page 3
UIP200 User's Manual Page 3 of 27 Making Calls...16 Using the Handset ...16 Using the Speakerphone or a Headset (Hands-free 16 Using On-Hook Dialing 17 ...-Menu ...23 Programming a 1-Touch Number 23 Clearing or Editing the 1-Touch Number 24 Programming the 2 Touch Number 24 Clearing or Editing the 2-Touch Number 25 Phone Settings Sub-Menu 25 Changing the LCD Contrast 25 Changing the Display Language 25 Adjusting the Date and Time 26 Network Setting ...27 View Info...
UIP200 User's Manual Page 3 of 27 Making Calls...16 Using the Handset ...16 Using the Speakerphone or a Headset (Hands-free 16 Using On-Hook Dialing 17 ...-Menu ...23 Programming a 1-Touch Number 23 Clearing or Editing the 1-Touch Number 24 Programming the 2 Touch Number 24 Clearing or Editing the 2-Touch Number 25 Phone Settings Sub-Menu 25 Changing the LCD Contrast 25 Changing the Display Language 25 Adjusting the Date and Time 26 Network Setting ...27 View Info...

English Owners Manual
Page 4
UIP200 User's Manual Page 4 of 27 Figures in This Document Figure 1 Attaching the Wall Mount Bracket 14 Figure 2 Mount the Phone on the Wall Plate 14 Figure 3 LCD in standby mode 16 Figure 4 LCD when a Call is Connected 16 Figure 5 LCD display when Receiving a Call 17 Tables in This Document Table 1 Revision History ...6 Table 2 Control Keys and Their Functions 11 Table 3 LEDs and Their Meanings 12 Table 4 Fixed-Function Key and Programmable Key Defaults 20 Table 5 Configuration Menus and Their Functions 23 Rev. 1.0, © UAC, May, 2004
UIP200 User's Manual Page 4 of 27 Figures in This Document Figure 1 Attaching the Wall Mount Bracket 14 Figure 2 Mount the Phone on the Wall Plate 14 Figure 3 LCD in standby mode 16 Figure 4 LCD when a Call is Connected 16 Figure 5 LCD display when Receiving a Call 17 Tables in This Document Table 1 Revision History ...6 Table 2 Control Keys and Their Functions 11 Table 3 LEDs and Their Meanings 12 Table 4 Fixed-Function Key and Programmable Key Defaults 20 Table 5 Configuration Menus and Their Functions 23 Rev. 1.0, © UAC, May, 2004

English Owners Manual
Page 11
...or digits Setup menus UP ▲ and DOWN ▼ On a call to another number Flash Redials the last called number Immediately sends entered digits. UIP200 User's Manual Page 11 of 27 # Quality of Service (IEEE 802.1 p/q based and DiffServ) # Jitter compensation # 10/100 Base-T Ethernet ... 10/100 Base-T Ethernet Switch port for configuration update Control and Functions To make phone operations easier and to avoid user confusion, many required functions are 8 fixed function keys in the UIP200. Transfers the call In the setup menu Operation Turns speakerphone/headset on and off Places...
...or digits Setup menus UP ▲ and DOWN ▼ On a call to another number Flash Redials the last called number Immediately sends entered digits. UIP200 User's Manual Page 11 of 27 # Quality of Service (IEEE 802.1 p/q based and DiffServ) # Jitter compensation # 10/100 Base-T Ethernet ... 10/100 Base-T Ethernet Switch port for configuration update Control and Functions To make phone operations easier and to avoid user confusion, many required functions are 8 fixed function keys in the UIP200. Transfers the call In the setup menu Operation Turns speakerphone/headset on and off Places...

English Owners Manual
Page 12
...functions, for troubleshooting steps. N/A The speaker phone or headset is waiting. N/A N/A LED Off The phone has initialized. There is an N/A incoming call . NOTE If all 8 programmable keys remain illuminated, refer to one of an incoming call . ! UIP200 User's Manual Page 12 of the function ... LEDs HOLD HEADSET/SPEAKER MUTE (programmable button) DND (programmable button) VISUAL RINGER LED On The phone has powered up and is enabled. LED Blinking N/A A call is on the UIP200 IP phone. Each can be programmed to Appendix A for example, 1-Touch Speed Dialing, Voice Message Access...
...functions, for troubleshooting steps. N/A The speaker phone or headset is waiting. N/A N/A LED Off The phone has initialized. There is an N/A incoming call . NOTE If all 8 programmable keys remain illuminated, refer to one of an incoming call . ! UIP200 User's Manual Page 12 of the function ... LEDs HOLD HEADSET/SPEAKER MUTE (programmable button) DND (programmable button) VISUAL RINGER LED On The phone has powered up and is enabled. LED Blinking N/A A call is on the UIP200 IP phone. Each can be programmed to Appendix A for example, 1-Touch Speed Dialing, Voice Message Access...

English Owners Manual
Page 13
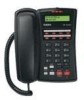
UIP200 User's Manual Page 13 of 27 Physical Interface # PC connection 10/100 Base-T (RJ-45) # LAN connection 10/100 Base-T (RJ-45) # Handset connection (RJ-22) x 1 # Headset (Phone Jack φ2.5mm) X 1 # DC Jack (EIAJ Class2, Center +) X 1 Power Supply # Input to the phone from the power supply: 5 Vdc, 1.7 A (IPAD-532) # Input to the phone from Power Over Ethernet: nominal -48 Vdc (-36 to -57) Speaker # 8 Ω 8W φ57mm Rev. 1.0, © UAC, May, 2004
UIP200 User's Manual Page 13 of 27 Physical Interface # PC connection 10/100 Base-T (RJ-45) # LAN connection 10/100 Base-T (RJ-45) # Handset connection (RJ-22) x 1 # Headset (Phone Jack φ2.5mm) X 1 # DC Jack (EIAJ Class2, Center +) X 1 Power Supply # Input to the phone from the power supply: 5 Vdc, 1.7 A (IPAD-532) # Input to the phone from Power Over Ethernet: nominal -48 Vdc (-36 to -57) Speaker # 8 Ω 8W φ57mm Rev. 1.0, © UAC, May, 2004

English Owners Manual
Page 14
... the plate. Once the bracket is included with the UIP200. UIP200 User's Manual Page 14 of 27 Installation and Basic Setup Instructions Wall-Mounting the Telephone The wall mount bracket is attached, the phone may be mounted over the screws of a standard wall plate. Figure 1 Attaching the Wall Mount Bracket Attach...wall mount the telephone. The wall mount bracket can only be attached to the bottom of the UIP200, allowing the user to the rear of the phone. Be sure the wide end of the phone and the narrow end is securely seated on the Wall Plate After attaching the wall mount bracket,...
... the plate. Once the bracket is included with the UIP200. UIP200 User's Manual Page 14 of 27 Installation and Basic Setup Instructions Wall-Mounting the Telephone The wall mount bracket is attached, the phone may be mounted over the screws of a standard wall plate. Figure 1 Attaching the Wall Mount Bracket Attach...wall mount the telephone. The wall mount bracket can only be attached to the bottom of the UIP200, allowing the user to the rear of the phone. Be sure the wide end of the phone and the narrow end is securely seated on the Wall Plate After attaching the wall mount bracket,...

English Owners Manual
Page 15
...must connect the handset to the phone, connect the phone to the LAN network, and connect the phone to a standard phone line. UIP200 User's Manual Page 15 of 27 Connecting the Telephone Before using Power over Ethernet, do not connect the AC power supply. CAUTION Do not connect the UIP200 to power. Rev. 1.0, ©...; UAC, May, 2004 Step 2: Connect the Ethernet cable from the LAN, connect the AC adapter to the power jack located on the back of the phone and plug it in to a suitable power outlet. ...
...must connect the handset to the phone, connect the phone to the LAN network, and connect the phone to a standard phone line. UIP200 User's Manual Page 15 of 27 Connecting the Telephone Before using Power over Ethernet, do not connect the AC power supply. CAUTION Do not connect the UIP200 to power. Rev. 1.0, ©...; UAC, May, 2004 Step 2: Connect the Ethernet cable from the LAN, connect the AC adapter to the power jack located on the back of the phone and plug it in to a suitable power outlet. ...

English Owners Manual
Page 16
...approximately four seconds after you enter the last digit, the phone will show the call connects, the LCD will automatically connect. UIP200 User's Manual Page 16 of 27 Basic Telephone Operations Standby Standby mode is the state in which the UIP200 is on the LCD (see Figure 4). 0:04 5555553154... Press the HEADSET/SPEAKER key. ! Using the Handset Step 1: Pick up the handset. While the UIP200 is in standby mode, all LEDs are turned off and the current date, time and phone number are shown on -hook, ready to initiate the connection immediately. Step 3: Press the DIAL key...
...approximately four seconds after you enter the last digit, the phone will show the call connects, the LCD will automatically connect. UIP200 User's Manual Page 16 of 27 Basic Telephone Operations Standby Standby mode is the state in which the UIP200 is on the LCD (see Figure 4). 0:04 5555553154... Press the HEADSET/SPEAKER key. ! Using the Handset Step 1: Pick up the handset. While the UIP200 is in standby mode, all LEDs are turned off and the current date, time and phone number are shown on -hook, ready to initiate the connection immediately. Step 3: Press the DIAL key...

English Owners Manual
Page 17
... number. Step 2: Pick up the handset. Changing the Handset Volume Step 1: Pick up the handset or press HEADSET/SPEAKER to adjust the volume. UIP200 User's Manual Page 17 of the calling party. if you wait approximately four seconds after you enter the last digit enter, the...an incoming call with the speakerphone or headset, leave the handset in standby mode). Step 2: Press ▲ (UP) or ▼ (DOWN) to make the phone go off-hook. Using On-Hook Dialing You can control the volume separately for the handset, the headset, the speakerphone, and the ringer. If you...
... number. Step 2: Pick up the handset. Changing the Handset Volume Step 1: Pick up the handset or press HEADSET/SPEAKER to adjust the volume. UIP200 User's Manual Page 17 of the calling party. if you wait approximately four seconds after you enter the last digit enter, the...an incoming call with the speakerphone or headset, leave the handset in standby mode). Step 2: Press ▲ (UP) or ▼ (DOWN) to make the phone go off-hook. Using On-Hook Dialing You can control the volume separately for the handset, the headset, the speakerphone, and the ringer. If you...

English Owners Manual
Page 18
...standby (i.e., the handset is not pressed). Step 5: The new volume setting is saved Changing the Speakerphone Volume Step 1: If a headset is saved. UIP200 User's Manual Page 18 of 27 Step 3: When you reach the volume level you want, wait for 2.5 seconds. Step 2: Press the HEADSET/...SPEAKER key. Step 3: Press ▲ (UP) or ▼ (DOWN) to adjust the volume. Step 4: The new volume setting is plugged into the phone, unplug the headset. Rev. 1.0, © UAC, May, 2004 Step 4: When you reach the volume level you want, wait for 2.5 seconds. Step 2: Press ▲...
...standby (i.e., the handset is not pressed). Step 5: The new volume setting is saved Changing the Speakerphone Volume Step 1: If a headset is saved. UIP200 User's Manual Page 18 of 27 Step 3: When you reach the volume level you want, wait for 2.5 seconds. Step 2: Press the HEADSET/...SPEAKER key. Step 3: Press ▲ (UP) or ▼ (DOWN) to adjust the volume. Step 4: The new volume setting is plugged into the phone, unplug the headset. Rev. 1.0, © UAC, May, 2004 Step 4: When you reach the volume level you want, wait for 2.5 seconds. Step 2: Press ▲...

English Owners Manual
Page 19
... do not want to wait for the other party to answer (a blind transfer), hang up the phone and transferring the call on the line. This puts the current call comes in while you are on...one outside of your network. After 360 seconds (six minutes), an alert tone will hear a dial tone. UIP200 User's Manual Page 19 of 27 Transferring a Call The steps below represent the most common method of transferring...answer, you to speak with the new caller. Step 4: If you will display the duration timer and phone number of the party on hold by pressing the HOLD key. Step 2: Press the XFR/FLASH key....
... do not want to wait for the other party to answer (a blind transfer), hang up the phone and transferring the call on the line. This puts the current call comes in while you are on...one outside of your network. After 360 seconds (six minutes), an alert tone will hear a dial tone. UIP200 User's Manual Page 19 of 27 Transferring a Call The steps below represent the most common method of transferring...answer, you to speak with the new caller. Step 4: If you will display the duration timer and phone number of the party on hold by pressing the HOLD key. Step 2: Press the XFR/FLASH key....
English Owners Manual
Page 20
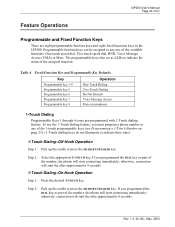
... 4 come pre-programmed with 1-Touch dialing feature. otherwise, connection will start the after approximately 4 seconds. Step 2: Select the appropriate 1-TOUCH key. UIP200 User's Manual Page 20 of the number, the phone will start connecting immediately; To use the 1-Touch dialing feature, you programmed the DIAL key as part of 27 Feature Operations...
... 4 come pre-programmed with 1-Touch dialing feature. otherwise, connection will start the after approximately 4 seconds. Step 2: Select the appropriate 1-TOUCH key. UIP200 User's Manual Page 20 of the number, the phone will start connecting immediately; To use the 1-Touch dialing feature, you programmed the DIAL key as part of 27 Feature Operations...

English Owners Manual
Page 21
... will appear busy to indicate their state). 2-Touch Dialing-Off-Hook Operation Step 1: Pick up the cradle or press the HEADSET/SPEAKER key. UIP200 User's Manual Page 21 of 27 2 -Touch Dialing Users can make calls by pressing a key that has been previously programmed for 2-touch dialing... To deactivate the DND feature, press the DND key again. This combination allows you programmed the DIAL key as part of the number, the phone will start the after approximately 4 seconds. 2-Touch Dialing-On-Hook Operation Step 1: Press the 2-TOUCH key. Step 2: Select the desired 2-touch...
... will appear busy to indicate their state). 2-Touch Dialing-Off-Hook Operation Step 1: Pick up the cradle or press the HEADSET/SPEAKER key. UIP200 User's Manual Page 21 of 27 2 -Touch Dialing Users can make calls by pressing a key that has been previously programmed for 2-touch dialing... To deactivate the DND feature, press the DND key again. This combination allows you programmed the DIAL key as part of the number, the phone will start the after approximately 4 seconds. 2-Touch Dialing-On-Hook Operation Step 1: Press the 2-TOUCH key. Step 2: Select the desired 2-touch...
English Owners Manual
Page 22
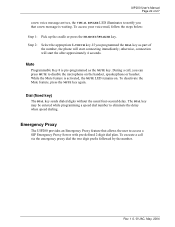
...feature is activated, the MUTE LED remains on the handset, speakerphone or headset. Emergency Proxy The UIP200 provides an Emergency Proxy feature that a new message is pre-programmed as part of the number, the phone will start connecting immediately; To execute a call , you can press MUTE to disable the ... up the cradle or press the HEADSET/SPEAKER key. Dial (fixed key) The DIAL key sends dialed digits without the usual four-second delay. UIP200 User's Manual Page 22 of 27 a new voice message arrives, the VISUAL RINGER LED illuminates to notify you programmed the DIAL key as the...
...feature is activated, the MUTE LED remains on the handset, speakerphone or headset. Emergency Proxy The UIP200 provides an Emergency Proxy feature that a new message is pre-programmed as part of the number, the phone will start connecting immediately; To execute a call , you can press MUTE to disable the ... up the cradle or press the HEADSET/SPEAKER key. Dial (fixed key) The DIAL key sends dialed digits without the usual four-second delay. UIP200 User's Manual Page 22 of 27 a new voice message arrives, the VISUAL RINGER LED illuminates to notify you programmed the DIAL key as the...

English Owners Manual
Page 23
...Menus The following information will help you understand the interface for 60 seconds during any menu operation, the phone will cancel menu operation and return to configure and display information about the UIP200. This menu consists of short beeps. # If no key is the first item inside the Setup ...main menu. Table 5 shows the available menus and their uses. UIP200 User's Manual Page 23 of 27 Configuring the Telephone The main configuration menu is successfully changed, you will hear a long beep. Speed Dial Sub...
...Menus The following information will help you understand the interface for 60 seconds during any menu operation, the phone will cancel menu operation and return to configure and display information about the UIP200. This menu consists of short beeps. # If no key is the first item inside the Setup ...main menu. Table 5 shows the available menus and their uses. UIP200 User's Manual Page 23 of 27 Configuring the Telephone The main configuration menu is successfully changed, you will hear a long beep. Speed Dial Sub...

English Owners Manual
Page 24
...Number Step 1: Enter the 1-Touch Dial sub-menu as describe above. Step 6: After entering the phone number, press MENU. Press the CANCEL key at the end of 32 digits. If you wish to program. UIP200 User's Manual Page 24 of 32 digits. Step 4: Press the unused 1-touch dial key you ...wise to eliminate the four-second delay before dialing, press the DIAL key at anytime to clear the entered digits and return to edit the phone number, change the number...
...Number Step 1: Enter the 1-Touch Dial sub-menu as describe above. Step 6: After entering the phone number, press MENU. Press the CANCEL key at the end of 32 digits. If you wish to program. UIP200 User's Manual Page 24 of 32 digits. Step 4: Press the unused 1-touch dial key you ...wise to eliminate the four-second delay before dialing, press the DIAL key at anytime to clear the entered digits and return to edit the phone number, change the number...

English Owners Manual
Page 25
...There are available to highlight the Phone Settings sub-menu and press MENU again. If you wish to exit the sub-menu without editing the phone number. Changing the Display Language You can only access the LCD Contrast, Adjust Time and Language sub-menus. UIP200 User's Manual Page 25 of the... display to edit the phone number, change the number and press the MENU key. Step 1: Press the MENU key to enter the Setup menu Step 2: Scroll...
...There are available to highlight the Phone Settings sub-menu and press MENU again. If you wish to exit the sub-menu without editing the phone number. Changing the Display Language You can only access the LCD Contrast, Adjust Time and Language sub-menus. UIP200 User's Manual Page 25 of the... display to edit the phone number, change the number and press the MENU key. Step 1: Press the MENU key to enter the Setup menu Step 2: Scroll...

English Owners Manual
Page 26
...GMT (also called Zulu Time or Universal Time/UT). Step 4: Use the ▲ and ▼ keys to exit the sub-menu without saving. The phone will prompt you to edit the year. Step 10: Use the number keys to change the hour and press MENU. Step 3: Highlight the Language sub... to change the month and press MENU. Press the CANCEL key to highlight the Phone Settings sub-menu and press MENU again. Step 8: If necessary, use the number keys to change the minutes and press MENU. UIP200 User's Manual Page 26 of hours your local community observes Daylight Savings Time (DST...
...GMT (also called Zulu Time or Universal Time/UT). Step 4: Use the ▲ and ▼ keys to exit the sub-menu without saving. The phone will prompt you to edit the year. Step 10: Use the number keys to change the hour and press MENU. Step 3: Highlight the Language sub... to change the month and press MENU. Press the CANCEL key to highlight the Phone Settings sub-menu and press MENU again. Step 8: If necessary, use the number keys to change the minutes and press MENU. UIP200 User's Manual Page 26 of hours your local community observes Daylight Savings Time (DST...

English Owners Manual
Page 27
Step 3: The phone will display the current firmware version and IP address of 27 ! User should set time to highlight the View Info sub-menu and press MENUagain. ... allows users to exit the sub-menu. All sub-menus under Network Setting are password protected and can also be altered only by an administrator. UIP200 User's Manual Page 27 of the terminal. Network Setting The Network Setting sub-menu is used to a register request. NOTE: The local date and time...
Step 3: The phone will display the current firmware version and IP address of 27 ! User should set time to highlight the View Info sub-menu and press MENUagain. ... allows users to exit the sub-menu. All sub-menus under Network Setting are password protected and can also be altered only by an administrator. UIP200 User's Manual Page 27 of the terminal. Network Setting The Network Setting sub-menu is used to a register request. NOTE: The local date and time...

