
User Guide
Page 5
... let them to provide you to make changes in advance that temporary discontinuance of service may request that you in their equipment, operations or procedures. If the equipment is necessary. Contact the state public utility commission, public service commission or corporation commission for repair or limited warranty information, please contact Toshiba Corporation, Toshiba America Information Systems, Inc. 5 decimal point...
... let them to provide you to make changes in advance that temporary discontinuance of service may request that you in their equipment, operations or procedures. If the equipment is necessary. Contact the state public utility commission, public service commission or corporation commission for repair or limited warranty information, please contact Toshiba Corporation, Toshiba America Information Systems, Inc. 5 decimal point...
User Guide
Page 62
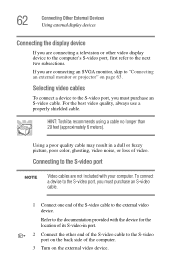
... cable. 62 Connecting Other External Devices Using external display devices Connecting the display device If you are not included with the device for the location of its S-video-in a dull or fuzzy picture, poor color, ghosting, video noise, or loss of video. Selecting video cables To connect a device to the S-video port, you must purchase an S-video cable. 1 Connect one end of the S-video cable to "Connecting an external monitor or projector" on the external video device. If you must purchase an S-video cable. To connect a device...
... cable. 62 Connecting Other External Devices Using external display devices Connecting the display device If you are not included with the device for the location of its S-video-in a dull or fuzzy picture, poor color, ghosting, video noise, or loss of video. Selecting video cables To connect a device to the S-video port, you must purchase an S-video cable. 1 Connect one end of the S-video cable to "Connecting an external monitor or projector" on the external video device. If you must purchase an S-video cable. To connect a device...
User Guide
Page 72
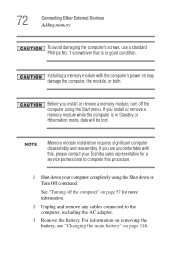
... using the Start menu. NOTE Memory module installation requires significant computer disassembly and reassembly. If you are uncomfortable with the computer's power on may damage the computer, the module, or both. See "Turning off the computer using the Shut down or Turn Off command. If you install or remove a memory module while the computer is in Standby or Hibernation mode, data will be lost. 72 Connecting Other External Devices Adding memory...
... using the Start menu. NOTE Memory module installation requires significant computer disassembly and reassembly. If you are uncomfortable with the computer's power on may damage the computer, the module, or both. See "Turning off the computer using the Shut down or Turn Off command. If you install or remove a memory module while the computer is in Standby or Hibernation mode, data will be lost. 72 Connecting Other External Devices Adding memory...
User Guide
Page 80
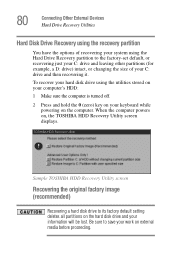
...) Recovering a hard disk drive to save your information will be lost. Be sure to its factory default setting deletes all partitions on the hard disk drive and your work on external media before proceeding. When the computer powers on, the TOSHIBA HDD Recovery Utility screen displays. 80 Connecting Other External Devices Hard Drive Recovery Utilities Hard Disk Drive Recovery using the recovery partition You have the options of recovering your system using the utilities stored on your computer's HDD: 1 Make sure the computer is turned off. 2 Press and hold the 0 (zero) key on...
...) Recovering a hard disk drive to save your information will be lost. Be sure to its factory default setting deletes all partitions on the hard disk drive and your work on external media before proceeding. When the computer powers on, the TOSHIBA HDD Recovery Utility screen displays. 80 Connecting Other External Devices Hard Drive Recovery Utilities Hard Disk Drive Recovery using the recovery partition You have the options of recovering your system using the utilities stored on your computer's HDD: 1 Make sure the computer is turned off. 2 Press and hold the 0 (zero) key on...
User Guide
Page 81
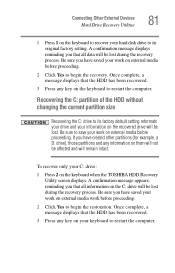
... keyboard when the TOSHIBA HDD Recovery Utility screen displays. To recover only your work on external media before proceeding. Connecting Other External Devices Hard Drive Recovery Utilities 81 1 Press 1 on the keyboard to recover your keyboard to restart the computer. Recovering the C: partition of the HDD without changing the current partition size Recovering the C: drive to begin the restoration. Be sure you have saved your work before proceeding. 2 Click Yes to its original factory setting. Be sure you have saved your work on external media work...
... keyboard when the TOSHIBA HDD Recovery Utility screen displays. To recover only your work on external media before proceeding. Connecting Other External Devices Hard Drive Recovery Utilities 81 1 Press 1 on the keyboard to recover your keyboard to restart the computer. Recovering the C: partition of the HDD without changing the current partition size Recovering the C: drive to begin the restoration. Be sure you have saved your work before proceeding. 2 Click Yes to its original factory setting. Be sure you have saved your work on external media work...
User Guide
Page 83
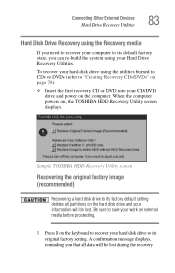
... TOSHIBA HDD Recovery Utility screen displays. Be sure to save your work on external media before proceeding. 1 Press 1 on the keyboard to recover your hard disk drive to "Creating Recovery CDs/DVDs" on page 78): ❖ Insert the first recovery CD or DVD into your CD/DVD drive and power on the computer. To recover your hard disk drive using the utilities burned to CDs or DVDs (refer to its original factory setting. A confirmation message displays, reminding you that all partitions on the hard disk drive...
... TOSHIBA HDD Recovery Utility screen displays. Be sure to save your work on external media before proceeding. 1 Press 1 on the keyboard to recover your hard disk drive to "Creating Recovery CDs/DVDs" on page 78): ❖ Insert the first recovery CD or DVD into your CD/DVD drive and power on the computer. To recover your hard disk drive using the utilities burned to CDs or DVDs (refer to its original factory setting. A confirmation message displays, reminding you that all partitions on the hard disk drive...
User Guide
Page 176
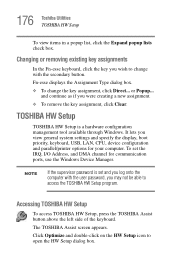
... the display, boot priority, keyboard, USB, LAN, CPU, device configuration and parallel/printer options for communication ports, use the Windows Device Manager. TOSHIBA HW Setup TOSHIBA HW Setup is set the IRQ, I/O Address, and DMA channel for your computer. or Popup... To set and you log onto the computer with the secondary button. Accessing TOSHIBA HW Setup To access TOSHIBA HW Setup, press the TOSHIBA Assist button above the left side of the keyboard. The TOSHIBA Assist screen appears. Changing or removing existing key assignments...
... the display, boot priority, keyboard, USB, LAN, CPU, device configuration and parallel/printer options for communication ports, use the Windows Device Manager. TOSHIBA HW Setup TOSHIBA HW Setup is set the IRQ, I/O Address, and DMA channel for your computer. or Popup... To set and you log onto the computer with the secondary button. Accessing TOSHIBA HW Setup To access TOSHIBA HW Setup, press the TOSHIBA Assist button above the left side of the keyboard. The TOSHIBA Assist screen appears. Changing or removing existing key assignments...
User Guide
Page 183
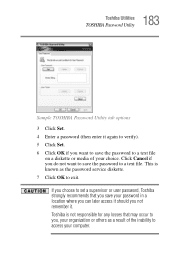
... the password service diskette. 7 Click OK to exit. Toshiba is known as a result of your computer. Click Cancel if you want to save the password to a text file. 183 Toshiba Utilities TOSHIBA Password Utility Sample TOSHIBA Password Utility tab options 3 Click Set. 4 Enter a password (then enter it again to verify). 5 Click Set. 6 Click OK if you do not want to save the password to a text file on a diskette or media...
... the password service diskette. 7 Click OK to exit. Toshiba is known as a result of your computer. Click Cancel if you want to save the password to a text file. 183 Toshiba Utilities TOSHIBA Password Utility Sample TOSHIBA Password Utility tab options 3 Click Set. 4 Enter a password (then enter it again to verify). 5 Click Set. 6 Click OK if you do not want to save the password to a text file on a diskette or media...
User Guide
Page 195
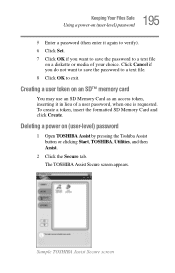
... password to exit. Sample TOSHIBA Assist Secure screen Creating a user token on an SD™ memory card You may use an SD Memory Card as an access token, inserting it again to verify). 6 Click Set. 7 Click OK if you do not want to save the password to a text file. 8 Click OK to a text file on (user-level) password 1 Open TOSHIBA Assist by pressing the Toshiba Assist button or clicking Start, TOSHIBA, Utilities...
... password to exit. Sample TOSHIBA Assist Secure screen Creating a user token on an SD™ memory card You may use an SD Memory Card as an access token, inserting it again to verify). 6 Click Set. 7 Click OK if you do not want to save the password to a text file. 8 Click OK to a text file on (user-level) password 1 Open TOSHIBA Assist by pressing the Toshiba Assist button or clicking Start, TOSHIBA, Utilities...
User Guide
Page 196
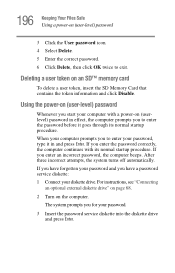
... you start your diskette drive. 196 Keeping Your Files Safe Using a power-on (user-level) password 3 Click the User password icon. 4 Select Delete. 5 Enter the correct password. 6 Click Delete, then click OK twice to enter the password before it goes through its normal startup procedure. Using the power-on (userlevel) password in and press Enter. For instructions, see "Connecting an optional external diskette drive" on page 68. 2 Turn on an SD™ memory card To delete a user...
... you start your diskette drive. 196 Keeping Your Files Safe Using a power-on (user-level) password 3 Click the User password icon. 4 Select Delete. 5 Enter the correct password. 6 Click Delete, then click OK twice to enter the password before it goes through its normal startup procedure. Using the power-on (userlevel) password in and press Enter. For instructions, see "Connecting an optional external diskette drive" on page 68. 2 Turn on an SD™ memory card To delete a user...
User Guide
Page 199
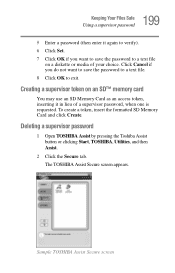
Deleting a supervisor password 1 Open TOSHIBA Assist by pressing the Toshiba Assist button or clicking Start, TOSHIBA, Utilities, and then Assist. 2 Click the Secure tab. Sample TOSHIBA Assist Secure screen Click Cancel if you want to save the password to a text file on an SD™ memory card You may use an SD Memory Card as an access token, inserting it again to verify). 6 Click Set. 7 Click OK if you...
Deleting a supervisor password 1 Open TOSHIBA Assist by pressing the Toshiba Assist button or clicking Start, TOSHIBA, Utilities, and then Assist. 2 Click the Secure tab. Sample TOSHIBA Assist Secure screen Click Cancel if you want to save the password to a text file on an SD™ memory card You may use an SD Memory Card as an access token, inserting it again to verify). 6 Click Set. 7 Click OK if you...
User Guide
Page 211
...; The screen does not look right. The Windows® operating system is not working correctly. Unless a hardware device has failed, problems usually occur when you change the system in the optional external diskette drive. For more information see "Charging batteries" on page 136. If pressing any of time. Make sure there is no diskette in some way such as installing a new program or adding a device. To charge the battery...
...; The screen does not look right. The Windows® operating system is not working correctly. Unless a hardware device has failed, problems usually occur when you change the system in the optional external diskette drive. For more information see "Charging batteries" on page 136. If pressing any of time. Make sure there is no diskette in some way such as installing a new program or adding a device. To charge the battery...
User Guide
Page 237
... 24-bit color, there may be disabling the Windows XP wireless management facility, in a format that the drive supports. 2 Ensure that the Display properties are using an external Wi-Fi adapter (a PC Card, USB adapter, or other variety), check if the adapter comes with its own management utility. If it is properly inserted in the drive tray. 3 Ensure that the disc is set to High Color (16-bit). ❖ If...
... 24-bit color, there may be disabling the Windows XP wireless management facility, in a format that the drive supports. 2 Ensure that the Display properties are using an external Wi-Fi adapter (a PC Card, USB adapter, or other variety), check if the adapter comes with its own management utility. If it is properly inserted in the drive tray. 3 Ensure that the disc is set to High Color (16-bit). ❖ If...

User Guide
Page 257
... off switch is in the off position. (No message appears when the Wi-Fi antenna on and off . For more information on using the TouchPad, see "Disabling or enabling the Dual Pointing Device" on and off . Fn + Fn + [Spacebar] This hot key turns the scroll lock feature on -off . Sample disable and enable TouchPad windows Keyboard hot keys Fn + This hot key turns the cursor control overlay on page 109. This hot key switches screen or video modes.
... off switch is in the off position. (No message appears when the Wi-Fi antenna on and off . For more information on using the TouchPad, see "Disabling or enabling the Dual Pointing Device" on and off . Fn + Fn + [Spacebar] This hot key turns the scroll lock feature on -off . Sample disable and enable TouchPad windows Keyboard hot keys Fn + This hot key turns the cursor control overlay on page 109. This hot key switches screen or video modes.
User Guide
Page 261
... how to access the screen saver option. on the Connectivity Doctor screen to start ConfigFree, be sure the computer has a wired or wireless connection. 261 Using ConfigFree™ with other ConfigFree users for file sharing. For more information, see "ConfigFree SUMMIT" on the taskbar. ❖ Press the TOSHIBA Assist button (if applicable to your Toshiba Computer Getting Started ❖ Profile Settings-The Profiles utility lets you...
... how to access the screen saver option. on the Connectivity Doctor screen to start ConfigFree, be sure the computer has a wired or wireless connection. 261 Using ConfigFree™ with other ConfigFree users for file sharing. For more information, see "ConfigFree SUMMIT" on the taskbar. ❖ Press the TOSHIBA Assist button (if applicable to your Toshiba Computer Getting Started ❖ Profile Settings-The Profiles utility lets you...
User Guide
Page 292
... turned off . When you turn on the computer again, your work is usually fixed, but some computers have the operating system automatically recognize the change. high-density diskette-A 3.5-inch diskette that can set system options or control system parameters, such as drive C. hot key-(1) A feature in which all open files and programs, when you turn the computer off . hot swapping-The ability to add or remove devices...
... turned off . When you turn on the computer again, your work is usually fixed, but some computers have the operating system automatically recognize the change. high-density diskette-A 3.5-inch diskette that can set system options or control system parameters, such as drive C. hot key-(1) A feature in which all open files and programs, when you turn the computer off . hot swapping-The ability to add or remove devices...
User Guide
Page 300
... accessing disk drives 210 setting up 46 turning off 57 warning resume failure message 210 configuring hard drive passwords 200 password 190 PC Cards 93 connecting headphones 69 memory module 71 modem to telephone line 98 monitor 62, 63 PC Cards 93 speakers 69 television 62 video projector 62 connection set up 164 control buttons 109 critical applications 3 D desktop major features 154 desktop icons 154 Device Manager 216 checking properties 217 disabling a device 217 devices external display 61 disc...
... accessing disk drives 210 setting up 46 turning off 57 warning resume failure message 210 configuring hard drive passwords 200 password 190 PC Cards 93 connecting headphones 69 memory module 71 modem to telephone line 98 monitor 62, 63 PC Cards 93 speakers 69 television 62 video projector 62 connection set up 164 control buttons 109 critical applications 3 D desktop major features 154 desktop icons 154 Device Manager 216 checking properties 217 disabling a device 217 devices external display 61 disc...
User Guide
Page 302
... popup 175 removing 176 key assignment viewing existing 175 key assignments changing or removing existing 176 keyboard character keys 103 connecting to Advanced Port Replicator 65, 66 emulating Fn keys 66 function keys 104 hot keys 257 not working 210 overlays 105 troubleshooting 221 Windows special keys 105 L LCD power-saver 58 lights battery 52 line-in jack 158 Lithium-Ion 133 Locking the computer 59 M main battery removing 146 Master password 200 memory adding 71 problem solving 218
... popup 175 removing 176 key assignment viewing existing 175 key assignments changing or removing existing 176 keyboard character keys 103 connecting to Advanced Port Replicator 65, 66 emulating Fn keys 66 function keys 104 hot keys 257 not working 210 overlays 105 troubleshooting 221 Windows special keys 105 L LCD power-saver 58 lights battery 52 line-in jack 158 Lithium-Ion 133 Locking the computer 59 M main battery removing 146 Master password 200 memory adding 71 problem solving 218
User Guide
Page 303
... jack 70, 158 modem connecting to telephone line 98 determining COM port 162 problem solving 233 resetting port to default settings 162 sending or receiving a fax 98 upgrading 162 warning 99 monitor connecting 62, 63 not working 222 mouse connecting to Advanced Port Replicator 66 MP3 159 playing 159 recording 159 N network accessing 164 Dial-Up Networking Wizard 164 networking wireless 165 O other documentation 40 P password 190 creating 192 deleting a supervisor 200 hard disk drive...
... jack 70, 158 modem connecting to telephone line 98 determining COM port 162 problem solving 233 resetting port to default settings 162 sending or receiving a fax 98 upgrading 162 warning 99 monitor connecting 62, 63 not working 222 mouse connecting to Advanced Port Replicator 66 MP3 159 playing 159 recording 159 N network accessing 164 Dial-Up Networking Wizard 164 networking wireless 165 O other documentation 40 P password 190 creating 192 deleting a supervisor 200 hard disk drive...
User Guide
Page 306
... problems 237 DVD-ROM drive 227 external keyboard 221 keyboard 221 keypad overlay 221 turning off the computer 57, 124 U Universal Resource Locator (URL) 157 USB attaching a keyboard 65, 66 diskette drive 68 port connection 68 user password 200 using the Toshiba Dual Pointing Device 107 utilities HW Setup 176 V video projector adjusting display 64 connecting 62 W warranty limited warranty 41 Web sites 248 Toshiba 249 Wi-Fi wireless networking 165 Windows Explorer 112 Windows Media Player 161 Windows Stand By 57 Windows Start menu...
... problems 237 DVD-ROM drive 227 external keyboard 221 keyboard 221 keypad overlay 221 turning off the computer 57, 124 U Universal Resource Locator (URL) 157 USB attaching a keyboard 65, 66 diskette drive 68 port connection 68 user password 200 using the Toshiba Dual Pointing Device 107 utilities HW Setup 176 V video projector adjusting display 64 connecting 62 W warranty limited warranty 41 Web sites 248 Toshiba 249 Wi-Fi wireless networking 165 Windows Explorer 112 Windows Media Player 161 Windows Stand By 57 Windows Start menu...


