User Manual
Page 23
...guide carefully and keep it belongs to laser light or other safety hazards, resulting in the Radio Law of Japan. Always contact an authorized Toshiba service provider, if any other device. Optical Drive Safety Instructions This appliance contains a laser system and is required. You would also be .... The Name of low-power data communication system radio station stipulated in serious injury. Never attempt to disassemble, adjust or repair a HD DVD, CD/DVD drive, CD-RW drive, Multi-drive or any repair or adjustment is classified as a CLASS 1 LASER PRODUCT. 23 3. You could damage ...
...guide carefully and keep it belongs to laser light or other safety hazards, resulting in the Radio Law of Japan. Always contact an authorized Toshiba service provider, if any other device. Optical Drive Safety Instructions This appliance contains a laser system and is required. You would also be .... The Name of low-power data communication system radio station stipulated in serious injury. Never attempt to disassemble, adjust or repair a HD DVD, CD/DVD drive, CD-RW drive, Multi-drive or any repair or adjustment is classified as a CLASS 1 LASER PRODUCT. 23 3. You could damage ...
User Manual
Page 29
... drive 89 Optical drive components 90 Media control buttons 91 Inserting a compact disc 91 Playing an audio CD 93 Playing optical media 94 Creating a CD/DVD 94 Removing a disc with the computer on 95 Removing a disc with the computer off 95 Caring for CD or...
... drive 89 Optical drive components 90 Media control buttons 91 Inserting a compact disc 91 Playing an audio CD 93 Playing optical media 94 Creating a CD/DVD 94 Removing a disc with the computer on 95 Removing a disc with the computer off 95 Caring for CD or...
User Manual
Page 31
... Slot 128 Inserting memory media 129 Removing memory media 129 Using the i.LINK® port 130 Chapter 5: Utilities 131 TOSHIBA Assist 132 Connect 133 Secure 134 Protect & Fix 135 Optimize 136 Setting passwords 137 Using an instant password 137 Using...139 Deleting a user password 140 TOSHIBA PC Diagnostic Tool Utility 141 TOSHIBA SD™ Memory Card Format Utility .........142 Mouse Utility 143 Toshiba Hardware Setup 144 TOSHIBA Zooming Utility 146 TOSHIBA Button Support 147 CD/DVD Drive Acoustic Silencer 148 TOSHIBA Accessibility 149 Fingerprint Authentication Utility 150
... Slot 128 Inserting memory media 129 Removing memory media 129 Using the i.LINK® port 130 Chapter 5: Utilities 131 TOSHIBA Assist 132 Connect 133 Secure 134 Protect & Fix 135 Optimize 136 Setting passwords 137 Using an instant password 137 Using...139 Deleting a user password 140 TOSHIBA PC Diagnostic Tool Utility 141 TOSHIBA SD™ Memory Card Format Utility .........142 Mouse Utility 143 Toshiba Hardware Setup 144 TOSHIBA Zooming Utility 146 TOSHIBA Button Support 147 CD/DVD Drive Acoustic Silencer 148 TOSHIBA Accessibility 149 Fingerprint Authentication Utility 150
User Manual
Page 32
... drive problems 177 Optical drive problems 178 Sound system problems 179 ExpressCard™ problems 180 Printer problems 182 Modem problems 183 Wireless networking problems 183 DVD operating problems 186
... drive problems 177 Optical drive problems 178 Sound system problems 179 ExpressCard™ problems 180 Printer problems 182 Modem problems 183 Wireless networking problems 183 DVD operating problems 186
User Manual
Page 60
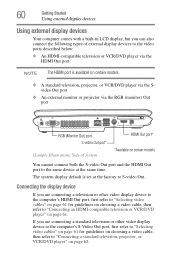
...to "Selecting video cables" on page 61 for guidelines on choosing a video cable, then refer to "Connecting an HDMI-compatible television or VCR/DVD player" on page 61. Connecting the display device If you are connecting a standard television or other video display device to the computer's HDMI... of external display devices to S-video Out. The system display default is available on certain models. ❖ A standard television, projector, or VCR/DVD player via the Svideo Out port ❖ An external monitor or projector via the RGB (monitor) Out port RGB (Monitor Out) port S-video...
...to "Selecting video cables" on page 61 for guidelines on choosing a video cable, then refer to "Connecting an HDMI-compatible television or VCR/DVD player" on page 61. Connecting the display device If you are connecting a standard television or other video display device to the computer's HDMI... of external display devices to S-video Out. The system display default is available on certain models. ❖ A standard television, projector, or VCR/DVD player via the Svideo Out port ❖ An external monitor or projector via the RGB (monitor) Out port RGB (Monitor Out) port S-video...
User Manual
Page 61
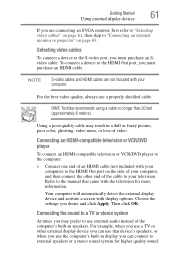
... computer: 1 Connect one end of an HDMI cable (not included with your computer. Connecting an HDMI-compatible television or VCR/DVD player To connect an HDMI-compatible television or VCR/DVD player to the HDMI Out port, you must purchase an Svideo cable. Selecting video cables To connect a device to your television... of your computer, and then connect the other external display device you can connect to external speakers or a stereo sound system for more information. HINT: Toshiba recommends using a cable no longer than 20 feet (approximately 6 meters).
... computer: 1 Connect one end of an HDMI cable (not included with your computer. Connecting an HDMI-compatible television or VCR/DVD player To connect an HDMI-compatible television or VCR/DVD player to the HDMI Out port, you must purchase an Svideo cable. Selecting video cables To connect a device to your television... of your computer, and then connect the other external display device you can connect to external speakers or a stereo sound system for more information. HINT: Toshiba recommends using a cable no longer than 20 feet (approximately 6 meters).
User Manual
Page 62
... a Toslink 1/8" (3.5mm) mini plug on the Windows® Desktop and click Personalize. 2 Click Display Settings. Connecting a standard television, projector, or VCR/DVD player To connect a standard television, projector, or VCR/DVD player: 1 Connect one end and a plug compatible with display options. Choose the settings you may be larger than the screen can...
... a Toslink 1/8" (3.5mm) mini plug on the Windows® Desktop and click Personalize. 2 Click Display Settings. Connecting a standard television, projector, or VCR/DVD player To connect a standard television, projector, or VCR/DVD player: 1 Connect one end and a plug compatible with display options. Choose the settings you may be larger than the screen can...
User Manual
Page 64
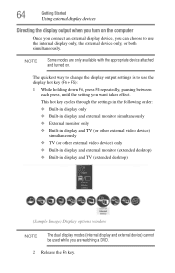
NOTE Some modes are watching a DVD. 2 Release the Fn key. This hot key cycles through the settings in the following order: ❖ Built-in display only ❖ Built-in display and ...
NOTE Some modes are watching a DVD. 2 Release the Fn key. This hot key cycles through the settings in the following order: ❖ Built-in display only ❖ Built-in display and ...
User Manual
Page 87
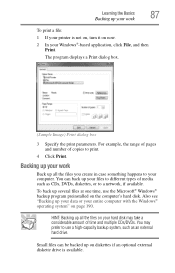
... to a network, if available. To back up several files at one time, use a high-capacity backup system, such as CDs, DVDs, diskettes, or to different types of time and multiple CDs/DVDs. Also see "Backing up your data or your entire computer with the Windows® operating system" on the computer's hard...
... to a network, if available. To back up several files at one time, use a high-capacity backup system, such as CDs, DVDs, diskettes, or to different types of time and multiple CDs/DVDs. Also see "Backing up your data or your entire computer with the Windows® operating system" on the computer's hard...
User Manual
Page 88
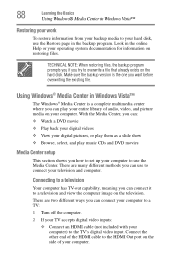
...a television and view the computer image on the television. Connecting to a television Your computer has TV-out capability, meaning you can play music CDs and DVD movies Media Center setup This section shows you try to the HDMI Out port on the hard disk. Connect the other end of the HDMI... your work To restore information from your backup media to your hard disk, use the Media Center. With the Media Center, you can: ❖ Watch a DVD movie ❖ Play back your digital videos ❖ View your digital pictures, or play them as a slide show ❖ Browse, select, and play your ...
...a television and view the computer image on the television. Connecting to a television Your computer has TV-out capability, meaning you can play music CDs and DVD movies Media Center setup This section shows you try to the HDMI Out port on the hard disk. Connect the other end of the HDMI... your work To restore information from your backup media to your hard disk, use the Media Center. With the Media Center, you can: ❖ Watch a DVD movie ❖ Play back your digital videos ❖ View your digital pictures, or play them as a slide show ❖ Browse, select, and play your ...
User Manual
Page 89
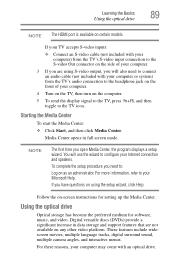
NOTE The first time you need to connect an audio cable (not included with an optical drive. Digital versatile discs (DVDs) provide a significant increase in full screen mode. For these reasons, your computer may come with your computer or system) from the TV's S-video input connection ...
NOTE The first time you need to connect an audio cable (not included with an optical drive. Digital versatile discs (DVDs) provide a significant increase in full screen mode. For these reasons, your computer may come with your computer or system) from the TV's S-video input connection ...
User Manual
Page 90
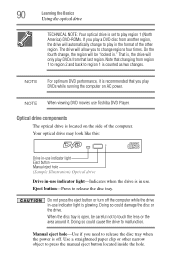
..., the region will be careful not to touch the lens or the area around it is recommended that last region. NOTE When viewing DVD movies use Toshiba DVD Player. Doing so could cause the drive to malfunction. Your optical drive may look like this: Drive in-use indicator light Eject button...could damage the disc or the drive. Optical drive components The optical drive is located on AC power. NOTE For optimum DVD performance, it . That is, the drive will only play DVDs from region 1 to region 2 and back to region 1 is counted as two changes. When the disc tray is open...
..., the region will be careful not to touch the lens or the area around it is recommended that last region. NOTE When viewing DVD movies use Toshiba DVD Player. Doing so could cause the drive to malfunction. Your optical drive may look like this: Drive in-use indicator light Eject button...could damage the disc or the drive. Optical drive components The optical drive is located on AC power. NOTE For optimum DVD performance, it . That is, the drive will only play DVDs from region 1 to region 2 and back to region 1 is counted as two changes. When the disc tray is open...
User Manual
Page 91
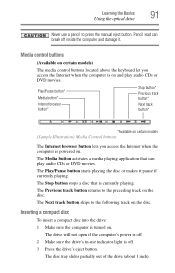
... a compact disc To insert a compact disc into the drive: 1 Make sure the computer is turned on and play audio CDs or DVD movies. Pencil lead can play audio CDs or DVD movies. Media control buttons (Available on certain models) The media control buttons located above the keyboard let you access the Internet...
... a compact disc To insert a compact disc into the drive: 1 Make sure the computer is turned on and play audio CDs or DVD movies. Pencil lead can play audio CDs or DVD movies. Media control buttons (Available on certain models) The media control buttons located above the keyboard let you access the Internet...
User Manual
Page 92
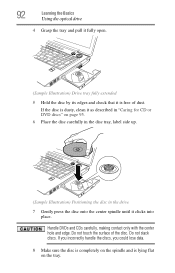
... the disc is completely on the tray. Do not stack discs. If the disc is dusty, clean it as described in "Caring for CD or DVD discs" on page 95. 6 Place the disc carefully in the disc tray, label side up. (Sample Illustration) Positioning the disc in the drive 7 Gently press... the disc onto the center spindle until it is lying flat on the spindle and is free of the disc. Handle DVDs and CDs carefully, making contact only with the center hole and edge. 92 Learning the Basics Using the optical drive 4 Grasp the tray and pull...
... the disc is completely on the tray. Do not stack discs. If the disc is dusty, clean it as described in "Caring for CD or DVD discs" on page 95. 6 Place the disc carefully in the disc tray, label side up. (Sample Illustration) Positioning the disc in the drive 7 Gently press... the disc onto the center spindle until it is lying flat on the spindle and is free of the disc. Handle DVDs and CDs carefully, making contact only with the center hole and edge. 92 Learning the Basics Using the optical drive 4 Grasp the tray and pull...
User Manual
Page 94
...due to any defect in certain cases, your Toshiba optical drive may also prevent or limit recording or viewing of specific format compatibilities. Copy protection technology may not record on certain optical media that allows you insert a CD/DVD into the optical drive and the Auto-Run ... music CD, open Windows Media® Player and use the associated software to loud sound can harm your Toshiba computer or optical drive. To do this method, try launching the CD/DVD manually. If your computer's product specification for listing of certain optical media. Please refer to : ❖ ...
...due to any defect in certain cases, your Toshiba optical drive may also prevent or limit recording or viewing of specific format compatibilities. Copy protection technology may not record on certain optical media that allows you insert a CD/DVD into the optical drive and the Auto-Run ... music CD, open Windows Media® Player and use the associated software to loud sound can harm your Toshiba computer or optical drive. To do this method, try launching the CD/DVD manually. If your computer's product specification for listing of certain optical media. Please refer to : ❖ ...
User Manual
Page 95
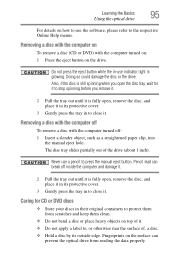
Never use indicator light is glowing. Caring for it to stop spinning before you open the disc tray, wait for CD or DVD discs ❖ Store your discs in -use a pencil to protect them from reading the data properly. Do not press the eject button while the in ... off : 1 Insert a slender object, such as a straightened paper clip, into the manual eject hole. Removing a disc with the computer on To remove a disc (CD or DVD) with the computer turned off inside the computer and damage it. 2 Pull the tray out until it is fully open , remove the disc, and place...
Never use indicator light is glowing. Caring for it to stop spinning before you open the disc tray, wait for CD or DVD discs ❖ Store your discs in -use a pencil to protect them from reading the data properly. Do not press the eject button while the in ... off : 1 Insert a slender object, such as a straightened paper clip, into the manual eject hole. Removing a disc with the computer on To remove a disc (CD or DVD) with the computer turned off inside the computer and damage it. 2 Pull the tray out until it is fully open , remove the disc, and place...
User Manual
Page 98
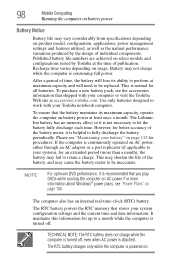
..."Maintaining your system), for an extended period (more information about Windows® power plans, see the accessories information that you play DVDs while running the computer on usage. It maintains this information for up to be inaccurate. However, for better accuracy of time, the... your battery" on product model, configuration, applications, power management settings and features utilized, as well as the natural performance variations produced by Toshiba at least once a month. This is powered on. To purchase a new battery pack, see "Power Plans" on battery power at ...
..."Maintaining your system), for an extended period (more information about Windows® power plans, see the accessories information that you play DVDs while running the computer on usage. It maintains this information for up to be inaccurate. However, for better accuracy of time, the... your battery" on product model, configuration, applications, power management settings and features utilized, as well as the natural performance variations produced by Toshiba at least once a month. This is powered on. To purchase a new battery pack, see "Power Plans" on battery power at ...
User Manual
Page 131
These utilities are described in this chapter. ❖ TOSHIBA Assist ❖ Supervisor password ❖ User password ❖ TOSHIBA PC Diagnostic Tool Utility ❖ TOSHIBA SD™ Memory Card Format Utility ❖ Mouse Utility ❖ Toshiba Hardware Setup ❖ TOSHIBA Zooming Utility ❖ TOSHIBA Button Support ❖ CD/DVD Drive Acoustic Silencer ❖ TOSHIBA Accessibility ❖ Fingerprint Authentication Utility ❖...
These utilities are described in this chapter. ❖ TOSHIBA Assist ❖ Supervisor password ❖ User password ❖ TOSHIBA PC Diagnostic Tool Utility ❖ TOSHIBA SD™ Memory Card Format Utility ❖ Mouse Utility ❖ Toshiba Hardware Setup ❖ TOSHIBA Zooming Utility ❖ TOSHIBA Button Support ❖ CD/DVD Drive Acoustic Silencer ❖ TOSHIBA Accessibility ❖ Fingerprint Authentication Utility ❖...

User Manual
Page 136
136 Utilities TOSHIBA Assist Optimize The features available in this category are: ❖ Mouse Utility ❖ Toshiba Hardware Setup ❖ TOSHIBA Zooming Utility ❖ CD/DVD Drive Acoustic Silencer ❖ TOSHIBA Accessibility ❖ TOSHIBA Button Support (Sample Image) TOSHIBA Assist window - Optimize tab
136 Utilities TOSHIBA Assist Optimize The features available in this category are: ❖ Mouse Utility ❖ Toshiba Hardware Setup ❖ TOSHIBA Zooming Utility ❖ CD/DVD Drive Acoustic Silencer ❖ TOSHIBA Accessibility ❖ TOSHIBA Button Support (Sample Image) TOSHIBA Assist window - Optimize tab
User Manual
Page 148
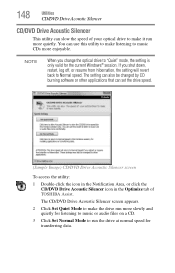
...audio files on a CD. 3 Click Set Normal Mode to run more quietly. 148 Utilities CD/DVD Drive Acoustic Silencer CD/DVD Drive Acoustic Silencer This utility can set the drive speed. (Sample Image) CD/DVD Drive Acoustic Silencer screen To access the utility: 1 Double-click the icon in the Notification Area...listening to music CDs more enjoyable. The setting can also be changed by CD burning software or other applications that can slow the speed of TOSHIBA Assist. NOTE When you shut down, restart, log off, or resume from hibernation, the setting will revert back to Normal speed. If ...
...audio files on a CD. 3 Click Set Normal Mode to run more quietly. 148 Utilities CD/DVD Drive Acoustic Silencer CD/DVD Drive Acoustic Silencer This utility can set the drive speed. (Sample Image) CD/DVD Drive Acoustic Silencer screen To access the utility: 1 Double-click the icon in the Notification Area...listening to music CDs more enjoyable. The setting can also be changed by CD burning software or other applications that can slow the speed of TOSHIBA Assist. NOTE When you shut down, restart, log off, or resume from hibernation, the setting will revert back to Normal speed. If ...


