
User Manual
Page 9
Equipment (or its operation in accordance with and/or damage this product to be operated indoors and away from windows to the following Standards: Supplementary *The product complies with the Information: requirements of the Low Voltage Directive 73/23/EEC, the EMC Directive 89/336/... is intended to be used indoors for frequency range 5.15 GHz to 5.25 GHz to reduce the potential for harmful interference to co-channel Mobile Satellite systems. High power radars are allocated as primary users of Conformity TOSHIBA declares that the Industry Canada technical specifications were met.
Equipment (or its operation in accordance with and/or damage this product to be operated indoors and away from windows to the following Standards: Supplementary *The product complies with the Information: requirements of the Low Voltage Directive 73/23/EEC, the EMC Directive 89/336/... is intended to be used indoors for frequency range 5.15 GHz to 5.25 GHz to reduce the potential for harmful interference to co-channel Mobile Satellite systems. High power radars are allocated as primary users of Conformity TOSHIBA declares that the Industry Canada technical specifications were met.
User Manual
Page 26
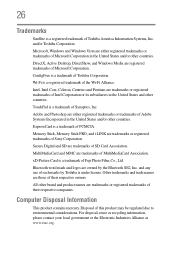
...please contact your local government or the Electronic Industries Alliance at www.eiae.org. DirectX, Active Desktop, DirectShow, and Windows Media are trademarks of Microsoft Corporation. Intel, Intel Core, Celeron, Centrino and Pentium are trademarks of Intel Corporation or ...of Synaptics, Inc. ExpressCard is a trademark of Toshiba America Information Systems, Inc. Other trademarks and trade names are owned by Toshiba is under license. 26 Trademarks Satellite is a registered trademark of PCMCIA. and/or Toshiba Corporation. TouchPad is a trademark of their respective companies...
...please contact your local government or the Electronic Industries Alliance at www.eiae.org. DirectX, Active Desktop, DirectShow, and Windows Media are trademarks of Microsoft Corporation. Intel, Intel Core, Celeron, Centrino and Pentium are trademarks of Intel Corporation or ...of Synaptics, Inc. ExpressCard is a trademark of Toshiba America Information Systems, Inc. Other trademarks and trade names are owned by Toshiba is under license. 26 Trademarks Satellite is a registered trademark of PCMCIA. and/or Toshiba Corporation. TouchPad is a trademark of their respective companies...
User Manual
Page 29
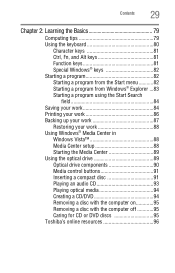
... the Start Search field 84 Saving your work 84 Printing your work 86 Backing up your work 87 Restoring your work 88 Using Windows® Media Center in Windows Vista 88 Media Center setup 88 Starting the Media Center 89 Using the optical drive 89 Optical drive components 90 Media control buttons... Creating a CD/DVD 94 Removing a disc with the computer on 95 Removing a disc with the computer off 95 Caring for CD or DVD discs 95 Toshiba's online resources 96
... the Start Search field 84 Saving your work 84 Printing your work 86 Backing up your work 87 Restoring your work 88 Using Windows® Media Center in Windows Vista 88 Media Center setup 88 Starting the Media Center 89 Using the optical drive 89 Optical drive components 90 Media control buttons... Creating a CD/DVD 94 Removing a disc with the computer on 95 Removing a disc with the computer off 95 Caring for CD or DVD discs 95 Toshiba's online resources 96
User Manual
Page 32
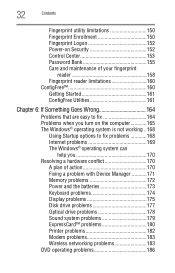
... Problems that are easy to fix 164 Problems when you turn on the computer............165 The Windows® operating system is not working ..168 Using Startup options to fix problems 168 Internet problems 169 The Windows® operating system can help you 170 Resolving a hardware conflict 170 A plan of action 170 Fixing...
... Problems that are easy to fix 164 Problems when you turn on the computer............165 The Windows® operating system is not working ..168 Using Startup options to fix problems 168 Internet problems 169 The Windows® operating system can help you 170 Resolving a hardware conflict 170 A plan of action 170 Fixing...
User Manual
Page 33
... Develop good computing habits 187 Data and system configuration backup in the Windows® operating system 188 If you need further assistance 192 Before you contact Toshiba 192 Contacting Toshiba 193 Other Toshiba Internet Web sites 193 Toshiba's worldwide offices 194 Appendix A: Hot Keys/TOSHIBA Cards 196 Hot Key Cards 196 Using the Hot Key Cards...
... Develop good computing habits 187 Data and system configuration backup in the Windows® operating system 188 If you need further assistance 192 Before you contact Toshiba 192 Contacting Toshiba 193 Other Toshiba Internet Web sites 193 Toshiba's worldwide offices 194 Appendix A: Hot Keys/TOSHIBA Cards 196 Hot Key Cards 196 Using the Hot Key Cards...
User Manual
Page 41
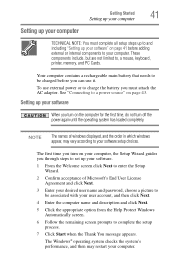
...Next. 3 Enter your desired user name and password, choose a picture to enter the Setup Wizard. 2 Confirm acceptance of windows displayed, and the order in which windows appear, may restart your computer. Setting up your software" on the computer for the first time, do not turn on page..., and then click Next. 4 Enter the computer name and description and click Next. 5 Click the appropriate option from the Help Protect Windows Automatically screen. 6 Follow the remaining screen prompts to your software When you turn off the power again until the operating system has loaded completely...
...Next. 3 Enter your desired user name and password, choose a picture to enter the Setup Wizard. 2 Confirm acceptance of windows displayed, and the order in which windows appear, may restart your computer. Setting up your software" on the computer for the first time, do not turn on page..., and then click Next. 4 Enter the computer name and description and click Next. 5 Click the appropriate option from the Help Protect Windows Automatically screen. 6 Follow the remaining screen prompts to your software When you turn off the power again until the operating system has loaded completely...
User Manual
Page 54
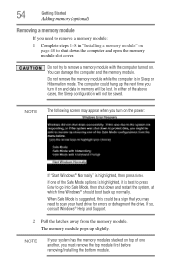
...may need to remove a memory module: 1 Complete steps 1-8 in "Installing a memory module" on page 48 to shut down and restart the system, at which time Windows® should boot back up normally. The memory module pops up the next time you turn on and data in Sleep or Hibernation mode. Do... scan your hard drive for errors or defragment the drive. In either of the Safe Mode options is highlighted, it on the power: If "Start Windows® Normally" is suggested, this could hang up slightly. NOTE If your system has the memory modules stacked on . You can damage the computer ...
...may need to remove a memory module: 1 Complete steps 1-8 in "Installing a memory module" on page 48 to shut down and restart the system, at which time Windows® should boot back up normally. The memory module pops up the next time you turn on and data in Sleep or Hibernation mode. Do... scan your hard drive for errors or defragment the drive. In either of the Safe Mode options is highlighted, it on the power: If "Start Windows® Normally" is suggested, this could hang up slightly. NOTE If your system has the memory modules stacked on . You can damage the computer ...

User Manual
Page 55
... slot cover and secure it using the screw. 5 Re-insert the main battery. To do this: 1 Click Start, Control Panel, and then System. The System window appears. 2 The total memory is displayed below the System heading under Memory (RAM). Back of the slot. Getting Started Adding memory (optional) 55 3 Gently lift...
... slot cover and secure it using the screw. 5 Re-insert the main battery. To do this: 1 Click Start, Control Panel, and then System. The System window appears. 2 The total memory is displayed below the System heading under Memory (RAM). Back of the slot. Getting Started Adding memory (optional) 55 3 Gently lift...

User Manual
Page 56
...or people from doing things on your computer without your permission. Once you have positioned your cursor, you to continue." NOTE From time to time, Windows® will display a pop-up squarely with the stroke of a finger. NOTE Because the TouchPad is a security feature to left to right. ... and remove the memory module slot cover (complete steps 1-8 in "Installing a memory module" on page 48), and then check that says, "Windows® needs your permission to move the cursor with the socket latches. This is much smaller than the display screen, moving your cursor across the...
...or people from doing things on your computer without your permission. Once you have positioned your cursor, you to continue." NOTE From time to time, Windows® will display a pop-up squarely with the stroke of a finger. NOTE Because the TouchPad is a security feature to left to right. ... and remove the memory module slot cover (complete steps 1-8 in "Installing a memory module" on page 48), and then check that says, "Windows® needs your permission to move the cursor with the socket latches. This is much smaller than the display screen, moving your cursor across the...

User Manual
Page 58
... the following default settings: ❖ Left button: Opens the assigned email application ❖ Middle button: Opens the ConfigFree utility (see the Toshiba online Help for more information) ❖ Right button: Opens the Windows® Photo Gallery The other three virtual buttons have no default settings. The volume control bar is tapped again.
... the following default settings: ❖ Left button: Opens the assigned email application ❖ Middle button: Opens the ConfigFree utility (see the Toshiba online Help for more information) ❖ Right button: Opens the Windows® Photo Gallery The other three virtual buttons have no default settings. The volume control bar is tapped again.

User Manual
Page 59
... button you wish to configure. 3 Select the desired options, and then click OK. 4 Click OK. 5 Click OK to close the Mouse Properties window. Getting Started Using the Dual Mode Pad 59 The virtual buttons and Dual Mode can assign different functions to use Button Mode only whenever an...1 Click Start, and then Control Panel. You can be enabled or changed in the Properties for Synaptics LuxPad window) are preconfigured for Synaptics LuxPad window appears. 4 In the left side of the window, select Tapping. 5 Select Dual Mode. 6 Select Switch to use one of these buttons if you must ...
... button you wish to configure. 3 Select the desired options, and then click OK. 4 Click OK. 5 Click OK to close the Mouse Properties window. Getting Started Using the Dual Mode Pad 59 The virtual buttons and Dual Mode can assign different functions to use Button Mode only whenever an...1 Click Start, and then Control Panel. You can be enabled or changed in the Properties for Synaptics LuxPad window) are preconfigured for Synaptics LuxPad window appears. 4 In the left side of the window, select Tapping. 5 Select Dual Mode. 6 Select Switch to use one of these buttons if you must ...
User Manual
Page 62
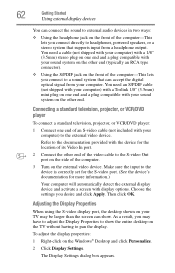
... with the device for more information.) Your computer will automatically detect the external display device and activate a screen with a Toslink 1/8" (3.5mm) mini plug on the Windows® Desktop and click Personalize. 2 Click Display Settings. S 2 Connect the other end (typically an RCA type connector). ❖ Using the S/PDIF jack on the front...
... with the device for more information.) Your computer will automatically detect the external display device and activate a screen with a Toslink 1/8" (3.5mm) mini plug on the Windows® Desktop and click Personalize. 2 Click Display Settings. S 2 Connect the other end (typically an RCA type connector). ❖ Using the S/PDIF jack on the front...
User Manual
Page 63
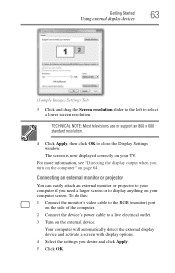
... Started Using external display devices 63 (Sample Image) Settings Tab 3 Click and drag the Screen resolution slider to the left to close the Display Settings window. For more information, see "Directing the display output when you need a larger screen or to your computer if you turn on the computer" on your...
... Started Using external display devices 63 (Sample Image) Settings Tab 3 Click and drag the Screen resolution slider to the left to close the Display Settings window. For more information, see "Directing the display output when you need a larger screen or to your computer if you turn on the computer" on your...
User Manual
Page 64
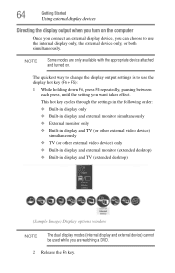
... external video device) only ❖ Built-in display and external monitor (extended desktop) ❖ Built-in display and TV (extended desktop) (Sample Image) Display options window NOTE The dual display modes (internal display and external device) cannot be used while you want takes effect. NOTE Some modes are watching a DVD. 2 Release...
... external video device) only ❖ Built-in display and external monitor (extended desktop) ❖ Built-in display and TV (extended desktop) (Sample Image) Display options window NOTE The dual display modes (internal display and external device) cannot be used while you want takes effect. NOTE Some modes are watching a DVD. 2 Release...
User Manual
Page 67
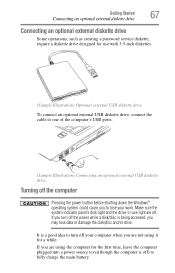
... the computer's USB ports. (Sample Illustration) Connecting an optional external USB diskette drive Turning off the computer Pressing the power button before shutting down the Windows® operating system could cause you to fully charge the main battery.
... the computer's USB ports. (Sample Illustration) Connecting an optional external USB diskette drive Turning off the computer Pressing the power button before shutting down the Windows® operating system could cause you to fully charge the main battery.
User Manual
Page 69
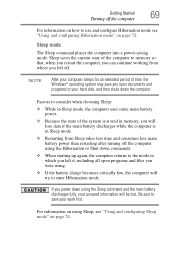
... working from Sleep takes less time and consumes less main battery power than restarting after turning off . Sleep saves the current state of time, the Windows® operating system may save your hard disk, and then shuts down commands. ❖ When starting up again, the computer returns to the mode in...
... working from Sleep takes less time and consumes less main battery power than restarting after turning off . Sleep saves the current state of time, the Windows® operating system may save your hard disk, and then shuts down commands. ❖ When starting up again, the computer returns to the mode in...
User Manual
Page 70
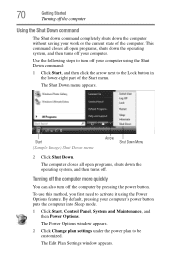
Turning off the computer more quickly You can also turn off your computer using the Power Options feature. The Power Options window appears. 2 Click Change plan settings under the power plan to the Lock button in the lower-right part of the computer. Use the following ...down the operating system, and then turns off. Start (Sample Image) Shut Down menu Arrow Shut Down Menu 2 Click Shut Down. The Edit Plan Settings window appears. 70 Getting Started Turning off the computer Using the Shut Down command The Shut down command completely shuts down the computer without saving your...
Turning off the computer more quickly You can also turn off your computer using the Power Options feature. The Power Options window appears. 2 Click Change plan settings under the power plan to the Lock button in the lower-right part of the computer. Use the following ...down the operating system, and then turns off. Start (Sample Image) Shut Down menu Arrow Shut Down Menu 2 Click Shut Down. The Edit Plan Settings window appears. 70 Getting Started Turning off the computer Using the Shut Down command The Shut down command completely shuts down the computer without saving your...
User Manual
Page 71
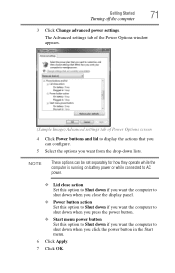
... configure. 5 Select the options you click the power button in the Start menu. 6 Click Apply. 7 Click OK. The Advanced settings tab of the Power Options window appears. (Sample Image) Advanced settings tab of Power Options screen 4 Click Power buttons and lid to display the actions that you can be set separately...
... configure. 5 Select the options you click the power button in the Start menu. 6 Click Apply. 7 Click OK. The Advanced settings tab of the Power Options window appears. (Sample Image) Advanced settings tab of Power Options screen 4 Click Power buttons and lid to display the actions that you can be set separately...
User Manual
Page 73
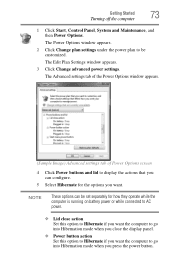
... ❖ Power button action Set this option to display the actions that you can be customized. The Advanced settings tab of the Power Options window appears. (Sample Image) Advanced settings tab of Power Options screen 4 Click Power buttons and lid to Hibernate if you press the power button.... The Power Options window appears. 2 Click Change plan settings under the power plan to be set separately for the options you want the computer to go into Hibernation...
... ❖ Power button action Set this option to display the actions that you can be customized. The Advanced settings tab of the Power Options window appears. (Sample Image) Advanced settings tab of Power Options screen 4 Click Power buttons and lid to Hibernate if you press the power button.... The Power Options window appears. 2 Click Change plan settings under the power plan to be set separately for the options you want the computer to go into Hibernation...
User Manual
Page 75
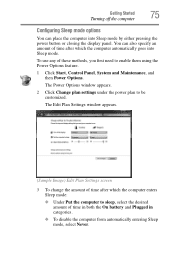
... power plan to enable them using the Power Options feature. 1 Click Start, Control Panel, System and Maintenance, and then Power Options. The Edit Plan Settings window appears. (Sample Image) Edit Plan Settings screen 3 To change the amount of time after which the computer enters Sleep mode: ❖ Under Put the computer...
... power plan to enable them using the Power Options feature. 1 Click Start, Control Panel, System and Maintenance, and then Power Options. The Edit Plan Settings window appears. (Sample Image) Edit Plan Settings screen 3 To change the amount of time after which the computer enters Sleep mode: ❖ Under Put the computer...


