User Manual
Page 2
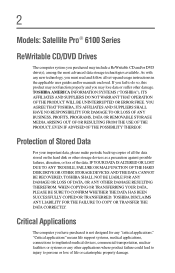
... of Stored Data For your important data, please make periodic back-up and usage instructions in the applicable user guides and/or manuals enclosed. Critical Applications The computer you must read and follow all set-up copies of all the data stored on the hard... BEEN SUCCESSFULLY COPIED OR TRANSFERRED. 2 Models: Satellite Pro® 6100 Series ReWritable CD/DVD Drives The computer system you may include a ReWritable CD and/or DVD drive(s), among the most advanced data storage technologies available. YOU AGREE THAT TOSHIBA, ITS AFFILIATES AND SUPPLIERS SHALL HAVE NO RESPONSIBILITY...
... of Stored Data For your important data, please make periodic back-up and usage instructions in the applicable user guides and/or manuals enclosed. Critical Applications The computer you must read and follow all set-up copies of all the data stored on the hard... BEEN SUCCESSFULLY COPIED OR TRANSFERRED. 2 Models: Satellite Pro® 6100 Series ReWritable CD/DVD Drives The computer system you may include a ReWritable CD and/or DVD drive(s), among the most advanced data storage technologies available. YOU AGREE THAT TOSHIBA, ITS AFFILIATES AND SUPPLIERS SHALL HAVE NO RESPONSIBILITY...

User Manual
Page 7
...as defined by the Institute of Electrical and Electronics Engineers. ❖ The Wireless Fidelity(WiFi) certification as appropriate. 2 The user manual of this equipment is jack type(s): USOC RJ11C. The termination on the label affixed to the following: The Ringer Equivalence Number ...analog equipment must contain the equipment's Ringer Equivalence Number (REN) and an explanation notice similar to your computer. Wireless Interoperability The TOSHIBA Wireless LAN Mini PCI Card products are designed to a telephone interface. NOTICE: The Ringer Equivalence Number (REN) assigned to ...
...as defined by the Institute of Electrical and Electronics Engineers. ❖ The Wireless Fidelity(WiFi) certification as appropriate. 2 The user manual of this equipment is jack type(s): USOC RJ11C. The termination on the label affixed to the following: The Ringer Equivalence Number ...analog equipment must contain the equipment's Ringer Equivalence Number (REN) and an explanation notice similar to your computer. Wireless Interoperability The TOSHIBA Wireless LAN Mini PCI Card products are designed to a telephone interface. NOTICE: The Ringer Equivalence Number (REN) assigned to ...

User Manual
Page 15
...hazardous radiation exposure. To ensure proper use of this product, please read this Toshiba Wireless LAN Mini PCI Card, or the substitution or attachment of the devices included with this instruction manual carefully and retain for use this equipment except in the countries in Fig.1. Approved...equipment is not responsible for any radio or television interference caused by unauthorized modification of connecting cables and equipment other than specified by Toshiba. Use of controls, adjustments or the performance of the user. To prevent direct exposure to the laser beam, do not ...
...hazardous radiation exposure. To ensure proper use of this product, please read this Toshiba Wireless LAN Mini PCI Card, or the substitution or attachment of the devices included with this instruction manual carefully and retain for use this equipment except in the countries in Fig.1. Approved...equipment is not responsible for any radio or television interference caused by unauthorized modification of connecting cables and equipment other than specified by Toshiba. Use of controls, adjustments or the performance of the user. To prevent direct exposure to the laser beam, do not ...

User Manual
Page 16
... is classified as a "CLASS 1 LASER PRODUCT." To use of the label and manufacturing information may result in the owner's manual may vary.) CAUTION: This appliance contains a laser system and is copyrighted by Toshiba American Information Systems, Inc. CLASS 1 LASER PRODUCT Use of controls or adjustments or performance of any form without the...
... is classified as a "CLASS 1 LASER PRODUCT." To use of the label and manufacturing information may result in the owner's manual may vary.) CAUTION: This appliance contains a laser system and is copyrighted by Toshiba American Information Systems, Inc. CLASS 1 LASER PRODUCT Use of controls or adjustments or performance of any form without the...

User Manual
Page 17
...to change without notice. IN NO EVENT SHALL TOSHIBA BE LIABLE FOR ANY INCIDENTAL, CONSEQUENTIAL, SPECIAL, OR EXEMPLARY DAMAGES, WHETHER BASED ON TORT, CONTRACT OR OTHERWISE, ARISING OUT OF OR IN CONNECTION WITH THIS MANUAL OR ANY OTHER INFORMATION CONTAINED HEREIN OR THE... specifications, is prohibited. Department of Commerce prior to the approval of the U.S. TOSHIBA CORPORATION AND TOSHIBA AMERICA INFORMATION SYSTEMS, INC. (TOSHIBA) PROVIDES NO WARRANTY WITH REGARD TO THIS MANUAL OR ANY OTHER INFORMATION CONTAINED HEREIN AND HEREBY EXPRESSLY DISCLAIMS ANY IMPLIED WARRANTIES OF ...
...to change without notice. IN NO EVENT SHALL TOSHIBA BE LIABLE FOR ANY INCIDENTAL, CONSEQUENTIAL, SPECIAL, OR EXEMPLARY DAMAGES, WHETHER BASED ON TORT, CONTRACT OR OTHERWISE, ARISING OUT OF OR IN CONNECTION WITH THIS MANUAL OR ANY OTHER INFORMATION CONTAINED HEREIN OR THE... specifications, is prohibited. Department of Commerce prior to the approval of the U.S. TOSHIBA CORPORATION AND TOSHIBA AMERICA INFORMATION SYSTEMS, INC. (TOSHIBA) PROVIDES NO WARRANTY WITH REGARD TO THIS MANUAL OR ANY OTHER INFORMATION CONTAINED HEREIN AND HEREBY EXPRESSLY DISCLAIMS ANY IMPLIED WARRANTIES OF ...

User Manual
Page 52
...AC adapter. 52 Getting Started Setting up your computer CAUTION: Use only the AC adapter supplied with your computer. Use of an incompatible adapter. Toshiba assumes no liability for any damage caused by its plug when you connect the AC adapter to a live electrical outlet should be the last step... Connect the power cable to the AC adapter When you connect/disconnect it. Doing so may damage the power cable and result in the User's Manual. DANGER: Hold the power cable by use of any metal parts. Connecting the power cable to the computer, always follow the steps in the ...
...AC adapter. 52 Getting Started Setting up your computer CAUTION: Use only the AC adapter supplied with your computer. Use of an incompatible adapter. Toshiba assumes no liability for any damage caused by its plug when you connect the AC adapter to a live electrical outlet should be the last step... Connect the power cable to the AC adapter When you connect/disconnect it. Doing so may damage the power cable and result in the User's Manual. DANGER: Hold the power cable by use of any metal parts. Connecting the power cable to the computer, always follow the steps in the ...

User Manual
Page 88
... is glowing. Doing so could cause the drive to release the disc tray. Use a straightened paper clip or other narrow object to press the manual eject button located inside the computer and damage it . 88 Learning the Basics Using the DVD-ROM or Multifunction drive If a DVD-ROM drive ...button. HINT: Your DVD-ROM or Multifunction drive is designed to play Region 1 (North America) DVD-ROMs. Drive in-use indicator light Eject button Manual eject hole Sample DVD-ROM drive shown Drive in-use indicator light-Indicates when the drive is in "Using Slim SelectBay® modules" on page...
... is glowing. Doing so could cause the drive to release the disc tray. Use a straightened paper clip or other narrow object to press the manual eject button located inside the computer and damage it . 88 Learning the Basics Using the DVD-ROM or Multifunction drive If a DVD-ROM drive ...button. HINT: Your DVD-ROM or Multifunction drive is designed to play Region 1 (North America) DVD-ROMs. Drive in-use indicator light Eject button Manual eject hole Sample DVD-ROM drive shown Drive in-use indicator light-Indicates when the drive is in "Using Slim SelectBay® modules" on page...

User Manual
Page 91
... Removing compact discs To remove a compact disc (CD or DVD) with the computer turned off: 1 Insert a slender object, such as a straightened paper clip, into the manual eject hole. 2 Gently pull the tray out until it is fully open, remove the disc, and place it in its protective cover. 3 Gently push the...
... Removing compact discs To remove a compact disc (CD or DVD) with the computer turned off: 1 Insert a slender object, such as a straightened paper clip, into the manual eject hole. 2 Gently pull the tray out until it is fully open, remove the disc, and place it in its protective cover. 3 Gently push the...

User Manual
Page 129
... a name for your printer is descriptive enough to help you tell the difference. You can ignore the remainder of manufacturers and printers, select your printer manual. 4 If the printer you are using more than one , click Next. The Add Printer Wizard prompts you for a Plug and Play printer. See your printer...
... a name for your printer is descriptive enough to help you tell the difference. You can ignore the remainder of manufacturers and printers, select your printer manual. 4 If the printer you are using more than one , click Next. The Add Printer Wizard prompts you for a Plug and Play printer. See your printer...

User Manual
Page 148
Recording sounds You may come with the media on the disk. For details on the disk. If your disk, try launching the CD manually. DEFINITION: A .wav (pronounced "wave") file is a music CD, open the files on how to use the software, please refer to the respective Online Help menus. ...
Recording sounds You may come with the media on the disk. For details on the disk. If your disk, try launching the CD manually. DEFINITION: A .wav (pronounced "wave") file is a music CD, open the files on how to use the software, please refer to the respective Online Help menus. ...

User Manual
Page 158
Others, such as you wish to insert or remove a Bluetooth or Wi-Fi module contact a Toshiba Wireless Authorized Service Provider. 158 Enhancing Productivity Inserting and removing PC Cards Press the PC card ejection button once to work with your computer. To ... Card ejects slightly from the slot. 4 Grasp the edges of the PC Card and slide it out of the slot. Setting up your operating system manual or online help. Inserting and removing Bluetooth™ or Wi-Fi™ modules Your system may come with the card or refer to use as...
Others, such as you wish to insert or remove a Bluetooth or Wi-Fi module contact a Toshiba Wireless Authorized Service Provider. 158 Enhancing Productivity Inserting and removing PC Cards Press the PC card ejection button once to work with your computer. To ... Card ejects slightly from the slot. 4 Grasp the edges of the PC Card and slide it out of the slot. Setting up your operating system manual or online help. Inserting and removing Bluetooth™ or Wi-Fi™ modules Your system may come with the card or refer to use as...

User Manual
Page 184
Sample DVD Drive Window NOTE: If you what to do the selected action checkbox. 184 WinDVD™ Playing DVDs Insert a DVD into the drive. The WinDVD player window opens. To open WinDVD manually: 1 Click Start, and point to All Programs. 2 Point to have WinDVD run automatically, select Play DVD movie using WinDVD, then select the Always do . The computer automatically detects the disc in the drive and will prompt you wish to InterVideo WinDVD, then click InterVideo WinDVD. This checkbox is unchecked by default.
Sample DVD Drive Window NOTE: If you what to do the selected action checkbox. 184 WinDVD™ Playing DVDs Insert a DVD into the drive. The WinDVD player window opens. To open WinDVD manually: 1 Click Start, and point to All Programs. 2 Point to have WinDVD run automatically, select Play DVD movie using WinDVD, then select the Always do . The computer automatically detects the disc in the drive and will prompt you wish to InterVideo WinDVD, then click InterVideo WinDVD. This checkbox is unchecked by default.

User Manual
Page 212
... to see whether it has shut completely. To remove a disc without turning on . This button is with an application CD-ROM, refer to press the manual eject button. Open the drive tray and remove the disc. Any dirt or foreign object can interfere with a clean damp cloth dipped in the small...
... to see whether it has shut completely. To remove a disc without turning on . This button is with an application CD-ROM, refer to press the manual eject button. Open the drive tray and remove the disc. Any dirt or foreign object can interfere with a clean damp cloth dipped in the small...

User Manual
Page 224
... a dial tone. Refer to the computer's modem port and the telephone line jack. The modem is firmly connected to the program's documentation and the modem manual for information on , set up properly and still will not receive or transmit properly. It should be busy or off line. 224 If Something Goes...
... a dial tone. Refer to the computer's modem port and the telephone line jack. The modem is firmly connected to the program's documentation and the modem manual for information on , set up properly and still will not receive or transmit properly. It should be busy or off line. 224 If Something Goes...

User Manual
Page 226
...programs and devices you purchase. Try the following before contacting Toshiba: ❖ Review the troubleshooting information in your computer, as well as the manuals that the problem is important to investigate other sources of a Toshiba dealer near you in this chapter and are still having...and suspect that come with your operating system documentation. ❖ If the problem occurs while you are using, it is hardwarerelated, Toshiba offers a variety of self-help . Contact the software company's technical support group for current information. For the number of assistance ...
...programs and devices you purchase. Try the following before contacting Toshiba: ❖ Review the troubleshooting information in your computer, as well as the manuals that the problem is important to investigate other sources of a Toshiba dealer near you in this chapter and are still having...and suspect that come with your operating system documentation. ❖ If the problem occurs while you are using, it is hardwarerelated, Toshiba offers a variety of self-help . Contact the software company's technical support group for current information. For the number of assistance ...

User Manual
Page 234
... setup process. 3 Enter a name for Windows ®-based programs, click Yes, then click Next. If your printer is not found, or to install the driver manually, use the printer driver that came with the printer to set it up your printer. You only need to add your printer.
... setup process. 3 Enter a name for Windows ®-based programs, click Yes, then click Next. If your printer is not found, or to install the driver manually, use the printer driver that came with the printer to set it up your printer. You only need to add your printer.


