User Manual
Page 9
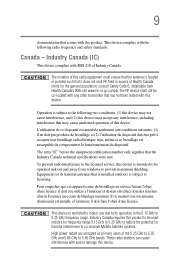
...been tested with the product. The installer of Health Canada limits for harmful interference to licensing. consult Safety Code 6, obtainable from windows to the following radio frequency and safety standards. Operation is subject to provide maximum shielding. Equipment (or its transmit antenna) ...including interference that may not cause interference, and (2) this device must ensure that the antenna is subject to co-channel Mobile Satellite systems. High power radars are allocated as primary users of Industry Canada. The term "IC" before the equipment certification number only...
...been tested with the product. The installer of Health Canada limits for harmful interference to licensing. consult Safety Code 6, obtainable from windows to the following radio frequency and safety standards. Operation is subject to provide maximum shielding. Equipment (or its transmit antenna) ...including interference that may not cause interference, and (2) this device must ensure that the antenna is subject to co-channel Mobile Satellite systems. High power radars are allocated as primary users of Industry Canada. The term "IC" before the equipment certification number only...

User Manual
Page 25
... information, please contact your local government or the Electronic Industries Alliance at www.eiae.org. TouchPad is a trademark of the Wi-Fi Alliance. 25 Trademarks Satellite is a registered trademark of Microsoft Corporation. DirectX, Active Desktop, DirectShow, and Windows Media are owned by Toshiba is under license.
... information, please contact your local government or the Electronic Industries Alliance at www.eiae.org. TouchPad is a trademark of the Wi-Fi Alliance. 25 Trademarks Satellite is a registered trademark of Microsoft Corporation. DirectX, Active Desktop, DirectShow, and Windows Media are owned by Toshiba is under license.
User Manual
Page 28
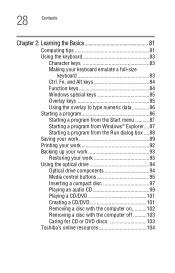
...keys 83 Making your keyboard emulate a full-size keyboard 83 Ctrl, Fn, and Alt keys 84 Function keys 84 Windows special keys 85 Overlay keys 85 Using the overlay to type numeric data 86 Starting a program 86 Starting a ...program from the Start menu...........87 Starting a program from Windows® Explorer....87 Starting a program from the Run dialog box ....88 Saving your work 89 Printing your work 92 ...102 Removing a disc with the computer off ..........103 Caring for CD or DVD discs 103 Toshiba's online resources 104
...keys 83 Making your keyboard emulate a full-size keyboard 83 Ctrl, Fn, and Alt keys 84 Function keys 84 Windows special keys 85 Overlay keys 85 Using the overlay to type numeric data 86 Starting a program 86 Starting a ...program from the Start menu...........87 Starting a program from Windows® Explorer....87 Starting a program from the Run dialog box ....88 Saving your work 89 Printing your work 92 ...102 Removing a disc with the computer off ..........103 Caring for CD or DVD discs 103 Toshiba's online resources 104
User Manual
Page 31
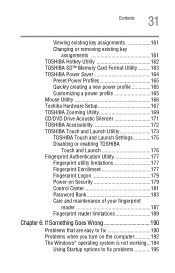
...power profile 165 Customizing a power profile 165 Mouse Utility 166 Toshiba Hardware Setup 167 TOSHIBA Zooming Utility 169 CD/DVD Drive Acoustic Silencer 171 TOSHIBA Accessibility 172 TOSHIBA Touch and Launch Utility 173 TOSHIBA Touch and Launch Settings 175 Disabling or enabling TOSHIBA Touch and Launch 176 Fingerprint Authentication Utility 177 Fingerprint utility ... 6: If Something Goes Wrong 190 Problems that are easy to fix 190 Problems when you turn on the computer............192 The Windows® operating system is not working...194 Using Startup options to fix problems 195
...power profile 165 Customizing a power profile 165 Mouse Utility 166 Toshiba Hardware Setup 167 TOSHIBA Zooming Utility 169 CD/DVD Drive Acoustic Silencer 171 TOSHIBA Accessibility 172 TOSHIBA Touch and Launch Utility 173 TOSHIBA Touch and Launch Settings 175 Disabling or enabling TOSHIBA Touch and Launch 176 Fingerprint Authentication Utility 177 Fingerprint utility ... 6: If Something Goes Wrong 190 Problems that are easy to fix 190 Problems when you turn on the computer............192 The Windows® operating system is not working...194 Using Startup options to fix problems 195
User Manual
Page 32
32 Contents Internet problems 196 The Windows® XP operating system can help you 196 Resolving a hardware conflict 197 A plan of action 197 Resolving hardware conflicts on your own .....198 Fixing a problem ... 217 DVD operating problems 220 Develop good computing habits 223 Data and system configuration backup in Windows XP 224 If you need further assistance 230 Before you contact Toshiba 230 Contacting Toshiba 231 Other Toshiba Internet Web sites 232 Toshiba's worldwide offices 232 Appendix A: Hot Keys 234 Volume Mute 234 Password security 235 Without a password...
32 Contents Internet problems 196 The Windows® XP operating system can help you 196 Resolving a hardware conflict 197 A plan of action 197 Resolving hardware conflicts on your own .....198 Fixing a problem ... 217 DVD operating problems 220 Develop good computing habits 223 Data and system configuration backup in Windows XP 224 If you need further assistance 230 Before you contact Toshiba 230 Contacting Toshiba 231 Other Toshiba Internet Web sites 232 Toshiba's worldwide offices 232 Appendix A: Hot Keys 234 Volume Mute 234 Password security 235 Without a password...

User Manual
Page 43
... can use external power or to charge the battery you must either establish a Local Area Network (LAN) connection, or connect the built-in which windows appear, may vary according to sign up your software When you turn off the power again until the operating system has loaded completely. Getting Started... up for the first time, do not turn on the computer for an Internet account, you must attach the AC adaptor. NOTE The names of windows displayed, and the order in modem (available on certain models) to a telephone line (see "Connecting the modem to a telephone line" on page 46. ...
... can use external power or to charge the battery you must either establish a Local Area Network (LAN) connection, or connect the built-in which windows appear, may vary according to sign up your software When you turn off the power again until the operating system has loaded completely. Getting Started... up for the first time, do not turn on the computer for an Internet account, you must attach the AC adaptor. NOTE The names of windows displayed, and the order in modem (available on certain models) to a telephone line (see "Connecting the modem to a telephone line" on page 46. ...

User Manual
Page 44
... screen prompts to complete the setup process. Registering your computer with Toshiba 2 Confirm acceptance of your computer will connect to the Internet and click Next. If an Internet connection could not be found, a window will pause for a moment while checking for an Internet connection. ...and description and click Next or Skip. 5 Select how your computer. 44 Getting Started Registering your computer with Toshiba Product registration is strongly recommended, and allows Toshiba to send you periodic updates, announcements, and special offers applicable to your desktop or go to the...
... screen prompts to complete the setup process. Registering your computer with Toshiba 2 Confirm acceptance of your computer will connect to the Internet and click Next. If an Internet connection could not be found, a window will pause for a moment while checking for an Internet connection. ...and description and click Next or Skip. 5 Select how your computer. 44 Getting Started Registering your computer with Toshiba Product registration is strongly recommended, and allows Toshiba to send you periodic updates, announcements, and special offers applicable to your desktop or go to the...
User Manual
Page 53
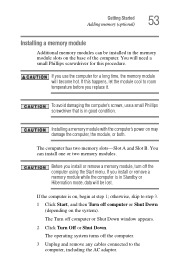
.... The operating system turns off the computer. 3 Unplug and remove any cables connected to step 3. 1 Click Start, and then Turn off computer or Shut Down window appears. 2 Click Turn Off or Shut Down.
.... The operating system turns off the computer. 3 Unplug and remove any cables connected to step 3. 1 Click Start, and then Turn off computer or Shut Down window appears. 2 Click Turn Off or Shut Down.
User Manual
Page 62
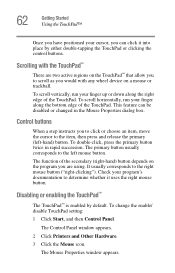
... whether it into place by default. Check your program's documentation to the left -hand) button. The Control Panel window appears. 2 Click Printers and Other Hardware. 3 Click the Mouse icon. The Mouse Properties window appears. To scroll horizontally, run your finger up or down along the bottom edge of the secondary (right-hand...
... whether it into place by default. Check your program's documentation to the left -hand) button. The Control Panel window appears. 2 Click Printers and Other Hardware. 3 Click the Mouse icon. The Mouse Properties window appears. To scroll horizontally, run your finger up or down along the bottom edge of the secondary (right-hand...
User Manual
Page 63
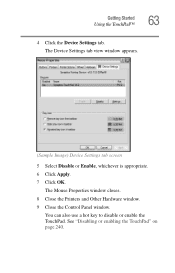
You can also use a hot key to disable or enable the TouchPad. See "Disabling or enabling the TouchPad" on page 240. Getting Started Using the TouchPad™ 63 4 Click the Device Settings tab. The Device Settings tab view window appears. (Sample Image) Device Settings tab screen 5 Select Disable or Enable, whichever is appropriate. 6 Click Apply. 7 Click OK. The Mouse Properties window closes. 8 Close the Printers and Other Hardware window. 9 Close the Control Panel window.
You can also use a hot key to disable or enable the TouchPad. See "Disabling or enabling the TouchPad" on page 240. Getting Started Using the TouchPad™ 63 4 Click the Device Settings tab. The Device Settings tab view window appears. (Sample Image) Device Settings tab screen 5 Select Disable or Enable, whichever is appropriate. 6 Click Apply. 7 Click OK. The Mouse Properties window closes. 8 Close the Printers and Other Hardware window. 9 Close the Control Panel window.
User Manual
Page 65
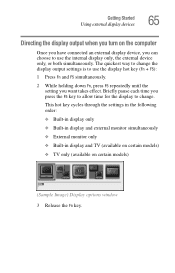
..., you want takes effect. Getting Started Using external display devices 65 Directing the display output when you turn on certain models) (Sample Image) Display options window 3 Release the Fn key. The quickest way to change . Briefly pause each time you press the F5 key to allow time for the display to...
..., you want takes effect. Getting Started Using external display devices 65 Directing the display output when you turn on certain models) (Sample Image) Display options window 3 Release the Fn key. The quickest way to change . Briefly pause each time you press the F5 key to allow time for the display to...
User Manual
Page 67
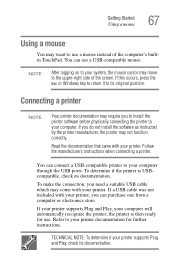
If this occurs, press the Esc or Windows key to return it to its documentation. To make the connection, you to install the printer software before physically connecting the printer to your computer. ...
If this occurs, press the Esc or Windows key to return it to its documentation. To make the connection, you to install the printer software before physically connecting the printer to your computer. ...
User Manual
Page 68
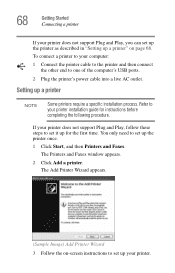
... connect a printer to your computer: 1 Connect the printer cable to the printer and then connect the other end to your printer. The Printers and Faxes window appears. 2 Click Add a printer.
... connect a printer to your computer: 1 Connect the printer cable to the printer and then connect the other end to your printer. The Printers and Faxes window appears. 2 Click Add a printer.
User Manual
Page 70
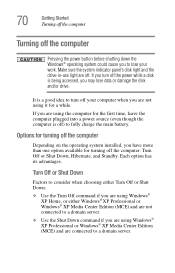
...to consider when choosing either Turn Off or Shut Down: ❖ Use the Turn Off command if you are using Windows® XP Home, or either Windows® XP Professional or Windows® XP Media Center Edition (MCE) and are not connected to a domain server. ❖ Use the Shut Down.../or drive. 70 Getting Started Turning off the computer Turning off the computer Pressing the power button before shutting down the Windows® operating system could cause you are using Windows® XP Professional or Windows® XP Media Center Edition (MCE) and are connected to a domain server.
...to consider when choosing either Turn Off or Shut Down: ❖ Use the Turn Off command if you are using Windows® XP Home, or either Windows® XP Professional or Windows® XP Media Center Edition (MCE) and are not connected to a domain server. ❖ Use the Shut Down.../or drive. 70 Getting Started Turning off the computer Turning off the computer Pressing the power button before shutting down the Windows® operating system could cause you are using Windows® XP Professional or Windows® XP Media Center Edition (MCE) and are connected to a domain server.
User Manual
Page 71
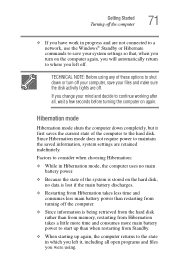
... when restarting from Standby. ❖ When starting up again, the computer returns to the state in progress and are not connected to a network, use the Windows® Standby or Hibernate commands to save your system settings so that, when you turn off your computer, save your files and make sure the...
... when restarting from Standby. ❖ When starting up again, the computer returns to the state in progress and are not connected to a network, use the Windows® Standby or Hibernate commands to save your system settings so that, when you turn off your computer, save your files and make sure the...
User Manual
Page 73
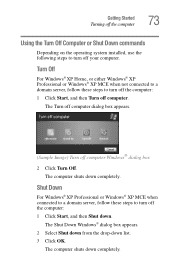
...; XP MCE when connected to a domain server, follow these steps to turn off computer Windows® dialog box 2 Click Turn Off. The Shut Down Windows® dialog box appears. 2 Select Shut down from the drop-down . Getting Started Turning off the computer 73 Using the Turn Off Computer...or Shut Down commands Depending on the operating system installed, use the following steps to turn off computer. Turn Off For Windows® XP Home, or either Windows® XP Professional or Windows® XP MCE when not connected to a domain server, follow these steps to turn off the computer: 1 Click ...
...; XP MCE when connected to a domain server, follow these steps to turn off computer Windows® dialog box 2 Click Turn Off. The Shut Down Windows® dialog box appears. 2 Select Shut down from the drop-down . Getting Started Turning off the computer 73 Using the Turn Off Computer...or Shut Down commands Depending on the operating system installed, use the following steps to turn off computer. Turn Off For Windows® XP Home, or either Windows® XP Professional or Windows® XP MCE when not connected to a domain server, follow these steps to turn off the computer: 1 Click ...
User Manual
Page 75
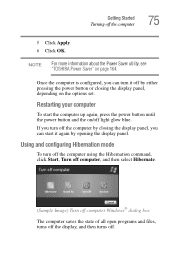
...display panel, depending on page 164. Restarting your computer To start it off . NOTE For more information about the Power Saver utility, see "TOSHIBA Power Saver" on the options set. Once the computer is configured, you can turn off the computer using the Hibernation command, click Start, Turn... off computer, and then select Hibernate. (Sample Image) Turn off computer Windows® dialog box The computer saves the state of all open programs and files, turns off the display, and then turns off by closing...
...display panel, depending on page 164. Restarting your computer To start it off . NOTE For more information about the Power Saver utility, see "TOSHIBA Power Saver" on the options set. Once the computer is configured, you can turn off the computer using the Hibernation command, click Start, Turn... off computer, and then select Hibernate. (Sample Image) Turn off computer Windows® dialog box The computer saves the state of all open programs and files, turns off the display, and then turns off by closing...
User Manual
Page 77
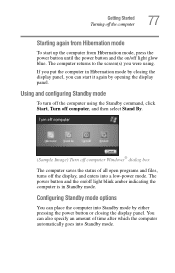
... the power button and the on /off light glow blue. You can also specify an amount of all open programs and files, turns off computer Windows® dialog box The computer saves the status of time after which the computer automatically goes into Standby mode. The computer returns to the screen...
... the power button and the on /off light glow blue. You can also specify an amount of all open programs and files, turns off computer Windows® dialog box The computer saves the status of time after which the computer automatically goes into Standby mode. The computer returns to the screen...
User Manual
Page 82
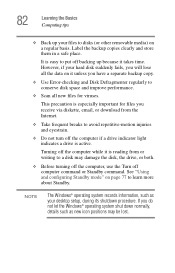
... them in a safe place. However, if your hard disk suddenly fails, you will lose all new files for files you do not let the Windows® operating system shut down normally, details such as your files to disks (or other removable media) on page 77 to a disk may be...injuries and eyestrain. ❖ Do not turn off computer command or Standby command. See "Using and configuring Standby mode" on a regular basis. NOTE The Windows® operating system records information, such as new icon positions may damage the disk, the drive, or both. ❖ Before turning off the computer, use...
... them in a safe place. However, if your hard disk suddenly fails, you will lose all new files for files you do not let the Windows® operating system shut down normally, details such as your files to disks (or other removable media) on page 77 to a disk may be...injuries and eyestrain. ❖ Do not turn off computer command or Standby command. See "Using and configuring Standby mode" on a regular basis. NOTE The Windows® operating system records information, such as new icon positions may damage the disk, the drive, or both. ❖ Before turning off the computer, use...
User Manual
Page 83
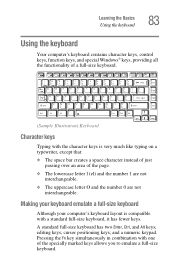
..., and Alt keys; Learning the Basics Using the keyboard 83 Using the keyboard Your computer's keyboard contains character keys, control keys, function keys, and special Windows® keys, providing all the functionality of a full-size keyboard. (Sample Illustration) Keyboard Character keys Typing with the character keys is compatible with one of...
..., and Alt keys; Learning the Basics Using the keyboard 83 Using the keyboard Your computer's keyboard contains character keys, control keys, function keys, and special Windows® keys, providing all the functionality of a full-size keyboard. (Sample Illustration) Keyboard Character keys Typing with the character keys is compatible with one of...


