User Manual
Page 5
... or such business, other electronic device, including Fax machines, to send any changes necessary to use a computer or other entity, or individual. (The telephone number Also, you will give you notice, in advance that you disconnect the equipment until the problem is resolved. If trouble is experienced with the best service it is sent and an identification...
... or such business, other electronic device, including Fax machines, to send any changes necessary to use a computer or other entity, or individual. (The telephone number Also, you will give you notice, in advance that you disconnect the equipment until the problem is resolved. If trouble is experienced with the best service it is sent and an identification...

User Manual
Page 27
... Opening the display panel 51 Your computer's features and specifications ....52 Turning on the power 52 Adding memory (optional 53 Installing a memory module 54 Removing a memory module 59 Using the TouchPad 61 Scrolling with the TouchPad 62 Control buttons 62 Disabling or enabling the TouchPad 62 Using external display devices 64 Directing the display output when you turn on the computer 64 Adjusting the quality of the external display......66 Using an external keyboard 66 Using a mouse 66 Connecting a printer 67 Setting up a printer 68 Connecting an optional external diskette...
... Opening the display panel 51 Your computer's features and specifications ....52 Turning on the power 52 Adding memory (optional 53 Installing a memory module 54 Removing a memory module 59 Using the TouchPad 61 Scrolling with the TouchPad 62 Control buttons 62 Disabling or enabling the TouchPad 62 Using external display devices 64 Directing the display output when you turn on the computer 64 Adjusting the quality of the external display......66 Using an external keyboard 66 Using a mouse 66 Connecting a printer 67 Setting up a printer 68 Connecting an optional external diskette...

User Manual
Page 54
... module, or both. Installing a memory module The computer has two memory module slots. An additional memory module can be lost. NOTE Before adding external devices or memory, Toshiba recommends setting up your software" on page 44. To avoid damaging the computer's screws, use the computer for this happens, let the module cool to room temperature before you install or remove a memory module, turn off the computer using the Start menu. Installing a memory module with your software. If you install or remove a memory module...
... module, or both. Installing a memory module The computer has two memory module slots. An additional memory module can be lost. NOTE Before adding external devices or memory, Toshiba recommends setting up your software" on page 44. To avoid damaging the computer's screws, use the computer for this happens, let the module cool to room temperature before you install or remove a memory module, turn off the computer using the Start menu. Installing a memory module with your software. If you install or remove a memory module...
User Manual
Page 56
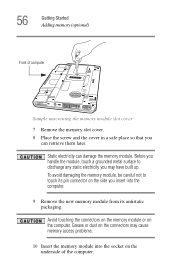
56 Getting Started Adding memory (optional) Front of computer Sample unscrewing the memory module slot cover 7 Remove the memory slot cover. 8 Place the screw and the cover in a safe place so that you insert into the socket on the underside of the computer. To avoid damaging the memory module, be careful not to discharge any static electricity you handle the module, touch a grounded metal surface to touch its pin...
56 Getting Started Adding memory (optional) Front of computer Sample unscrewing the memory module slot cover 7 Remove the memory slot cover. 8 Place the screw and the cover in a safe place so that you insert into the socket on the underside of the computer. To avoid damaging the memory module, be careful not to discharge any static electricity you handle the module, touch a grounded metal surface to touch its pin...
User Manual
Page 58
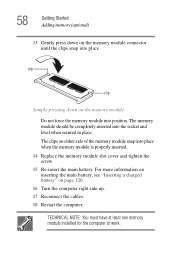
... least one memory module installed for the computer to work. The memory module should be completely inserted into place when the memory module is properly inserted. 14 Replace the memory module slot cover and tighten the screw. 15 Re-insert the main battery. For more information on inserting the main battery, see "Inserting a charged battery" on the memory module Do not force the memory module into place. 58 Getting Started Adding memory (optional) 13...
... least one memory module installed for the computer to work. The memory module should be completely inserted into place when the memory module is properly inserted. 14 Replace the memory module slot cover and tighten the screw. 15 Re-insert the main battery. For more information on inserting the main battery, see "Inserting a charged battery" on the memory module Do not force the memory module into place. 58 Getting Started Adding memory (optional) 13...

User Manual
Page 60
... main battery, see "Inserting a charged battery" on page 120. 6 Turn the computer right side up slightly. 3 Gently lift the memory module to work. TECHNICAL NOTE: You must have at least one memory module installed for the computer to a 45 degree angle and slide it out of computer Sample removing the memory module 4 Replace the memory module slot cover and tighten the screw. 5 Re-insert the main battery. The memory module pops...
... main battery, see "Inserting a charged battery" on page 120. 6 Turn the computer right side up slightly. 3 Gently lift the memory module to work. TECHNICAL NOTE: You must have at least one memory module installed for the computer to a 45 degree angle and slide it out of computer Sample removing the memory module 4 Replace the memory module slot cover and tighten the screw. 5 Re-insert the main battery. The memory module pops...

User Manual
Page 64
... display mode by pressing Fn + F5, or by configuring the Display Properties settings. To do this : 1 Connect the monitor's video cable to the RGB (monitor) port on the left side of device you are connecting. The quickest way to change the display output settings is to use the internal display only, the external device only, or both simultaneously. To do this , refer to the documentation for the type of the computer. 2 Connect the device's power cable...
... display mode by pressing Fn + F5, or by configuring the Display Properties settings. To do this : 1 Connect the monitor's video cable to the RGB (monitor) port on the left side of device you are connecting. The quickest way to change the display output settings is to use the internal display only, the external device only, or both simultaneously. To do this , refer to the documentation for the type of the computer. 2 Connect the device's power cable...

User Manual
Page 136
... using the Internet The Internet The Internet is an association of thousands of networks and millions of interlinked documents (located on computers connected to the Internet) that has the equipment and the telecommunication lines necessary to a particular network address and send and receive information. The World Wide Web offers information as Digital Subscriber Lines (DSL), cable, and satellite links. Internet Service Providers To connect...
... using the Internet The Internet The Internet is an association of thousands of networks and millions of interlinked documents (located on computers connected to the Internet) that has the equipment and the telecommunication lines necessary to a particular network address and send and receive information. The World Wide Web offers information as Digital Subscriber Lines (DSL), cable, and satellite links. Internet Service Providers To connect...
User Manual
Page 149
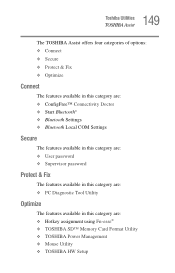
...; Connectivity Doctor ❖ Start Bluetooth® ❖ Bluetooth Settings ❖ Bluetooth Local COM Settings Secure The features available in this category are: ❖ User password ❖ Supervisor password Protect & Fix The features available in this category are: ❖ PC Diagnostic Tool Utility Optimize The features available in this category are: ❖ Hotkey assignment using Fn-esse® ❖ TOSHIBA SD™ Memory Card Format Utility ❖ TOSHIBA Power Management ❖ Mouse Utility ❖ TOSHIBA HW Setup
...; Connectivity Doctor ❖ Start Bluetooth® ❖ Bluetooth Settings ❖ Bluetooth Local COM Settings Secure The features available in this category are: ❖ User password ❖ Supervisor password Protect & Fix The features available in this category are: ❖ PC Diagnostic Tool Utility Optimize The features available in this category are: ❖ Hotkey assignment using Fn-esse® ❖ TOSHIBA SD™ Memory Card Format Utility ❖ TOSHIBA Power Management ❖ Mouse Utility ❖ TOSHIBA HW Setup
User Manual
Page 166
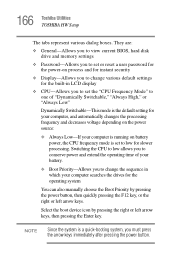
... to change various default settings for the built-in LCD display ❖ CPU-Allows you must press the arrow keys immediately after pressing the power button. They are: ❖ General-Allows you to view current BIOS, hard disk drive and memory settings ❖ Password-Allows you to set to conserve power and extend the operating time of "Dynamically Switchable," "Always High," or "Always Low" Dynamically Switchable-This mode is set or reset a user password...
... to change various default settings for the built-in LCD display ❖ CPU-Allows you must press the arrow keys immediately after pressing the power button. They are: ❖ General-Allows you to view current BIOS, hard disk drive and memory settings ❖ Password-Allows you to set to conserve power and extend the operating time of "Dynamically Switchable," "Always High," or "Always Low" Dynamically Switchable-This mode is set or reset a user password...
User Manual
Page 187
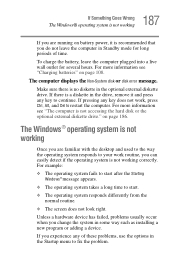
... change the system in the optional external diskette drive. If you experience any key does not work routine, you can easily detect if the operating system is no diskette in some way such as installing a new program or adding a device. For more information see "Charging batteries" on page 186. The computer displays the Non-System disk or disk error message. If there is a diskette in the Startup menu...
... change the system in the optional external diskette drive. If you experience any key does not work routine, you can easily detect if the operating system is no diskette in some way such as installing a new program or adding a device. For more information see "Charging batteries" on page 186. The computer displays the Non-System disk or disk error message. If there is a diskette in the Startup menu...

User Manual
Page 198
... a working . If you are using an external monitor: ❖ Check that the cable connecting the external monitor to the computer is firmly attached. If you are some typical display problems and their solutions: The screen is not set for an external monitor. Press any key. The computer will advance you through the display options. Display Auto Off may have registered a password, press any key, type the password and press Enter. You may have activated...
... a working . If you are using an external monitor: ❖ Check that the cable connecting the external monitor to the computer is firmly attached. If you are some typical display problems and their solutions: The screen is not set for an external monitor. Press any key. The computer will advance you through the display options. Display Auto Off may have registered a password, press any key, type the password and press Enter. You may have activated...
User Manual
Page 213
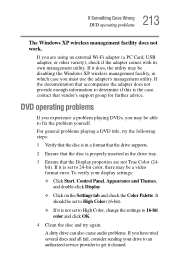
... Wrong DVD operating problems The Windows XP wireless management facility does not work. DVD operating problems If you experience a problem playing DVDs, you have tried several discs and all fail, consider sending your display settings: ❖ Click Start, Control Panel, Appearance and Themes, and double-click Display. ❖ Click on the Settings tab and check the Color Palette. It should be able to 24-bit color, there may be a video format error. If...
... Wrong DVD operating problems The Windows XP wireless management facility does not work. DVD operating problems If you experience a problem playing DVDs, you have tried several discs and all fail, consider sending your display settings: ❖ Click Start, Control Panel, Appearance and Themes, and double-click Display. ❖ Click on the Settings tab and check the Color Palette. It should be able to 24-bit color, there may be a video format error. If...
User Manual
Page 238
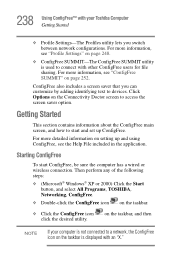
... a screen saver that you switch between network configurations. Starting ConfigFree To start and set up and using ConfigFree, see "Profile Settings" on the Connectivity Doctor screen to devices. Then perform any of the following steps: ❖ (Microsoft® Windows® XP or 2000) Click the Start button, and select All Programs, TOSHIBA, Networking, ConfigFree. ❖ Double-click the ConfigFree icon on the taskbar is displayed with other ConfigFree users...
... a screen saver that you switch between network configurations. Starting ConfigFree To start and set up and using ConfigFree, see "Profile Settings" on the Connectivity Doctor screen to devices. Then perform any of the following steps: ❖ (Microsoft® Windows® XP or 2000) Click the Start button, and select All Programs, TOSHIBA, Networking, ConfigFree. ❖ Double-click the ConfigFree icon on the taskbar is displayed with other ConfigFree users...
User Manual
Page 276
... Auto-Run 101 B backing up files 82 battery changing 118 276 charge indicator light 49, 110 charge not lasting 196 charging 47, 50 conserving power 115 disposal 124 low charge 114 monitoring power 49, 110 not charging 195 power profile hot key 117 power usage mode 230 real-time clock (RTC) 107 removing 119 BIOS see Toshiba Hardware Setup Bridge Media slot 144 button power 53 start 128 C CD creating 101 playing an audio 99 playing using Auto-Run 101
... Auto-Run 101 B backing up files 82 battery changing 118 276 charge indicator light 49, 110 charge not lasting 196 charging 47, 50 conserving power 115 disposal 124 low charge 114 monitoring power 49, 110 not charging 195 power profile hot key 117 power usage mode 230 real-time clock (RTC) 107 removing 119 BIOS see Toshiba Hardware Setup Bridge Media slot 144 button power 53 start 128 C CD creating 101 playing an audio 99 playing using Auto-Run 101

User Manual
Page 277
... disk or disk error message 187 not accessing disk drives 186 running on battery power 105 setting up 43, 55 turning off 70 warning resume failure message 186 computing tips 81 connecting to a power source 47 connection set up 133 control buttons 62 critical applications 3 Ctrl keys 84 D desktop creating new icon 127 major features 127 desktop exploration 126 desktop icons 127 Device Manager 192 checking properties 193 disabling a device 193 devices keyboard 66 mouse 66 Disk...
... disk or disk error message 187 not accessing disk drives 186 running on battery power 105 setting up 43, 55 turning off 70 warning resume failure message 186 computing tips 81 connecting to a power source 47 connection set up 133 control buttons 62 critical applications 3 Ctrl keys 84 D desktop creating new icon 127 major features 127 desktop exploration 126 desktop icons 127 Device Manager 192 checking properties 193 disabling a device 193 devices keyboard 66 mouse 66 Disk...
User Manual
Page 278
...-esse change/remove key assignments 159 starting 156 Fn-esse program 155 assigning a key 155 using drag-and-drop 157 function keys 85 H hardware conflicts 190 resolving 192 headphones using 141 Help and Support Windows 189 Hibernation mode 71 configuring 75 starting again from 76 hot key display brightness 233 display modes 233 Hibernation mode 232 instant password security 228 keyboard 234 keyboard overlays 235 password security 228 power usage mode 230 Standby mode 231 volume mute 227 hot key power profile mode 117 hot key utility...
...-esse change/remove key assignments 159 starting 156 Fn-esse program 155 assigning a key 155 using drag-and-drop 157 function keys 85 H hardware conflicts 190 resolving 192 headphones using 141 Help and Support Windows 189 Hibernation mode 71 configuring 75 starting again from 76 hot key display brightness 233 display modes 233 Hibernation mode 232 instant password security 228 keyboard 234 keyboard overlays 235 password security 228 power usage mode 230 Standby mode 231 volume mute 227 hot key power profile mode 117 hot key utility...
User Manual
Page 279
... changing or removing existing 159 keyboard character keys 83 function keys 85 hot keys 235 not working 186 overlay keys 85 troubleshooting 197 Windows special keys 85 keyboard, external 66 keyboard, full-size 84 keyboard, PS/2-compatible 66 M main battery removing 119 memory adding 53 problem solving 194 removing expansion slot cover 56 memory module inserting 57 installation 54 removing 60 microphone 139 modem determining COM port 130 problem solving 209 resetting port to default settings 130 upgrading 130 monitor 64 connecting 64 not working 198 mouse installing 66 serial 66 N network
... changing or removing existing 159 keyboard character keys 83 function keys 85 hot keys 235 not working 186 overlay keys 85 troubleshooting 197 Windows special keys 85 keyboard, external 66 keyboard, full-size 84 keyboard, PS/2-compatible 66 M main battery removing 119 memory adding 53 problem solving 194 removing expansion slot cover 56 memory module inserting 57 installation 54 removing 60 microphone 139 modem determining COM port 130 problem solving 209 resetting port to default settings 130 upgrading 130 monitor 64 connecting 64 not working 198 mouse installing 66 serial 66 N network

User Manual
Page 280
... accessing 133 Dial-Up Networking Wizard 133 networking wireless 134 O opening the display panel 51 other documentation 37 overlay keys 85 P password deleting a supervisor 152 disabling a user 153 supervisor set up 151 types 150 passwords instant, using 150 setting 150 PC Card checklist 205 CIS (Card Information Structure) 205 computer stops working 206 configuring 144 errors 207 hot swapping fails 207 inserting 143 modem default 130 not recognized 207 problem solving 204, 206 removing 143 setting...
... accessing 133 Dial-Up Networking Wizard 133 networking wireless 134 O opening the display panel 51 other documentation 37 overlay keys 85 P password deleting a supervisor 152 disabling a user 153 supervisor set up 151 types 150 passwords instant, using 150 setting 150 PC Card checklist 205 CIS (Card Information Structure) 205 computer stops working 206 configuring 144 errors 207 hot swapping fails 207 inserting 143 modem default 130 not recognized 207 problem solving 204, 206 removing 143 setting...

User Manual
Page 281
... Device Manager 192 disabling a device 193 disk drive is slow 201 display is blank 198 external display not working 200 external monitor 198 faulty memory 194 hardware conflict 190, 191 high-pitched noise 204 illegal operation 184 Internet bookmarked site not found 189 Internet connection is slow 189 keyboard not responding 186 missing files/trouble accessing a disk 200 modem not receiving or transmitting 209 no sound 204 non-system disk or disk error 187, 202 PC Card...
... Device Manager 192 disabling a device 193 disk drive is slow 201 display is blank 198 external display not working 200 external monitor 198 faulty memory 194 hardware conflict 190, 191 high-pitched noise 204 illegal operation 184 Internet bookmarked site not found 189 Internet connection is slow 189 keyboard not responding 186 missing files/trouble accessing a disk 200 modem not receiving or transmitting 209 no sound 204 non-system disk or disk error 187, 202 PC Card...


