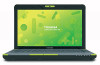

User Guide
Page 27
..., Memory Stick PRO, Memory Stick PRO Duo, Memory Stick Duo, and are registered trademarks of MultiMediaCard Association. Intel, Intel Core, Celeron, Centrino and Pentium are either registered trademarks or trademarks of Adobe Systems Incorporated in the United States and/or other countries. and/or Toshiba Corporation. 27 Trademarks Satellite and eco Utility are trademarks or...
..., Memory Stick PRO, Memory Stick PRO Duo, Memory Stick Duo, and are registered trademarks of MultiMediaCard Association. Intel, Intel Core, Celeron, Centrino and Pentium are either registered trademarks or trademarks of Adobe Systems Incorporated in the United States and/or other countries. and/or Toshiba Corporation. 27 Trademarks Satellite and eco Utility are trademarks or...
User Guide
Page 29
Contents 29 Setting up your software 47 Registering your computer with Toshiba 48 Adding optional external devices 48 Adding memory (optional 48 Installing a memory module 49 Removing a memory module 54 Checking total memory 57 Recovering the Internal Storage Drive 57 Recovering to out-of-box state (recommended recovery method 59 Recovering to a custom size partition 61...
Contents 29 Setting up your software 47 Registering your computer with Toshiba 48 Adding optional external devices 48 Adding memory (optional 48 Installing a memory module 49 Removing a memory module 54 Checking total memory 57 Recovering the Internal Storage Drive 57 Recovering to out-of-box state (recommended recovery method 59 Recovering to a custom size partition 61...

User Guide
Page 31
...power 113 What to do when the main battery runs low ...113 Setting battery notifications 114 Conserving battery power 114 Power Plans 115 Using the TOSHIBA eco power plan 116 Changing the main battery 117 Removing the battery from the computer .......117 Inserting a charged battery 118 Taking care of your... to a network .........128 Exploring audio features 129 Recording sounds 129 Using external speakers or headphones..........129 Using the Web Camera 130 Using the Memory card reader 131 Inserting memory media 131 Removing memory media 132 Using the eSATA/USB combo port 133
...power 113 What to do when the main battery runs low ...113 Setting battery notifications 114 Conserving battery power 114 Power Plans 115 Using the TOSHIBA eco power plan 116 Changing the main battery 117 Removing the battery from the computer .......117 Inserting a charged battery 118 Taking care of your... to a network .........128 Exploring audio features 129 Recording sounds 129 Using external speakers or headphones..........129 Using the Web Camera 130 Using the Memory card reader 131 Inserting memory media 131 Removing memory media 132 Using the eSATA/USB combo port 133
User Guide
Page 32
... 140 Using a user password 142 Deleting a user password 142 TOSHIBA Face Recognition Utility 143 TOSHIBA PC Diagnostic Tool Utility 144 TOSHIBA HDD Protection Utility 145 Mouse Utility 146 TOSHIBA Hardware Setup 147 TOSHIBA Accessibility 149 TOSHIBA eco Utility 150 TOSHIBA Service Station 151 TOSHIBA PC Health Monitor 151 Chapter 6: If Something Goes Wrong 153...158 The Windows® operating system can help you 158 Fixing a problem with Device Manager 159 Checking device properties 159 Memory problems 160 Power and the batteries 160 Keyboard problems 162 Display problems 162
... 140 Using a user password 142 Deleting a user password 142 TOSHIBA Face Recognition Utility 143 TOSHIBA PC Diagnostic Tool Utility 144 TOSHIBA HDD Protection Utility 145 Mouse Utility 146 TOSHIBA Hardware Setup 147 TOSHIBA Accessibility 149 TOSHIBA eco Utility 150 TOSHIBA Service Station 151 TOSHIBA PC Health Monitor 151 Chapter 6: If Something Goes Wrong 153...158 The Windows® operating system can help you 158 Fixing a problem with Device Manager 159 Checking device properties 159 Memory problems 160 Power and the batteries 160 Keyboard problems 162 Display problems 162
User Guide
Page 42
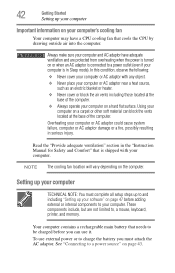
.... NOTE The cooling fan location will vary depending on a hard flat surface. Your computer contains a rechargeable main battery that needs to , a mouse, keyboard, printer, and memory. To use it. Using your computer on a carpet or other soft material can use external power or to a power source" on page 43. Read the...
.... NOTE The cooling fan location will vary depending on a hard flat surface. Your computer contains a rechargeable main battery that needs to , a mouse, keyboard, printer, and memory. To use it. Using your computer on a carpet or other soft material can use external power or to a power source" on page 43. Read the...
User Guide
Page 48
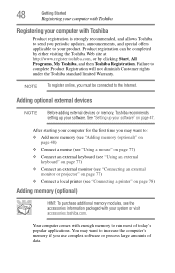
... applicable to your product. Adding optional external devices NOTE Before adding external devices or memory, Toshiba recommends setting up your software" on page 78) Adding memory (optional) HINT: To purchase additional memory modules, see the accessories information packaged with enough memory to run most of data. Product registration can be connected to the Internet. 48...
... applicable to your product. Adding optional external devices NOTE Before adding external devices or memory, Toshiba recommends setting up your software" on page 78) Adding memory (optional) HINT: To purchase additional memory modules, see the accessories information packaged with enough memory to run most of data. Product registration can be connected to the Internet. 48...

User Guide
Page 49
...memory module Memory modules can install one memory module is to follow these directions could result in good condition. NOTE For this procedure. The surrounding area may damage the computer, the module, or both. Getting Started 49 Adding memory (optional) NOTE Before adding external devices or memory, Toshiba... recommends setting up your software. Installing a memory module with the computer's power on page 47.
...memory module Memory modules can install one memory module is to follow these directions could result in good condition. NOTE For this procedure. The surrounding area may damage the computer, the module, or both. Getting Started 49 Adding memory (optional) NOTE Before adding external devices or memory, Toshiba... recommends setting up your software. Installing a memory module with the computer's power on page 47.
User Guide
Page 50
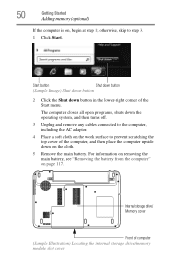
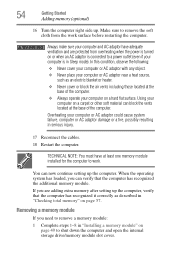
otherwise, skip to prevent scratching the top cover of computer (Sample Illustration) Locating the internal storage drive/memory module slot cover The computer closes all open programs, shuts down the operating system, and then turns off. 3 Unplug and remove any cables connected ..., including the AC adaptor. 4 Place a soft cloth on the cloth. 5 Remove the main battery. 50 Getting Started Adding memory (optional) If the computer is on page 117. Internal storage drive/ Memory cover Front of the computer, and then place the computer upside down button in the lower-right corner of the...
otherwise, skip to prevent scratching the top cover of computer (Sample Illustration) Locating the internal storage drive/memory module slot cover The computer closes all open programs, shuts down the operating system, and then turns off. 3 Unplug and remove any cables connected ..., including the AC adaptor. 4 Place a soft cloth on the cloth. 5 Remove the main battery. 50 Getting Started Adding memory (optional) If the computer is on page 117. Internal storage drive/ Memory cover Front of the computer, and then place the computer upside down button in the lower-right corner of the...

User Guide
Page 51
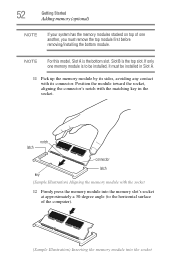
...) 6 Using a small Phillips screwdriver, loosen the captive screws that you may cause memory access problems. 9 Carefully remove the new memory module from its antistatic packaging, without touching its connector. 10 Locate an empty memory module slot on the underside of the computer. Before you handle the module, touch a grounded metal surface to discharge...
...) 6 Using a small Phillips screwdriver, loosen the captive screws that you may cause memory access problems. 9 Carefully remove the new memory module from its antistatic packaging, without touching its connector. 10 Locate an empty memory module slot on the underside of the computer. Before you handle the module, touch a grounded metal surface to discharge...
User Guide
Page 52
...top slot. 52 Getting Started Adding memory (optional) NOTE If your system has the memory modules stacked on top of the computer). (Sample Illustration) Inserting the memory module into the memory slot's socket at approximately a 30-degree angle (to the horizontal surface of one memory module is to be installed in... the socket. Position the module toward the socket, aligning the connector's notch with the matching key in Slot A. 11 Pick up the memory module by its connector. Slot B is the bottom slot. If only one another, you must be installed, it must remove the top...
...top slot. 52 Getting Started Adding memory (optional) NOTE If your system has the memory modules stacked on top of the computer). (Sample Illustration) Inserting the memory module into the memory slot's socket at approximately a 30-degree angle (to the horizontal surface of one memory module is to be installed in... the socket. Position the module toward the socket, aligning the connector's notch with the matching key in Slot A. 11 Pick up the memory module by its connector. Slot B is the bottom slot. If only one another, you must be installed, it must remove the top...
User Guide
Page 53
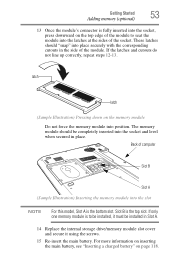
...the latches and cutouts do not line up correctly, repeat steps 12-13. The memory module should "snap" into place securely with the corresponding cutouts in Slot A. 14 Replace the internal storage drive/memory module slot cover and secure it using the screws. 15 Re-insert the main ...should be installed in the side of computer Slot B Slot A (Sample Illustration) Inserting the memory module into the slot NOTE For this model, Slot A is the bottom slot. Getting Started 53 Adding memory (optional) 13 Once the module's connector is fully inserted into the socket, press downward on ...
...the latches and cutouts do not line up correctly, repeat steps 12-13. The memory module should "snap" into place securely with the corresponding cutouts in Slot A. 14 Replace the internal storage drive/memory module slot cover and secure it using the screws. 15 Re-insert the main ...should be installed in the side of computer Slot B Slot A (Sample Illustration) Inserting the memory module into the slot NOTE For this model, Slot A is the bottom slot. Getting Started 53 Adding memory (optional) 13 Once the module's connector is fully inserted into the socket, press downward on ...
User Guide
Page 54
...computer or AC adaptor with any object. ❖ Never place your computer or AC adaptor near a heat source, such as described in "Installing a memory module" on page 57. You can verify that the computer has recognized it correctly as an electric blanket or heater. ❖ Never cover or ...block the air vents including those located at the base of the computer. Removing a memory module If you are protected from the work . Using your computer on a carpet or other soft material can block the vents located at least ...
...computer or AC adaptor with any object. ❖ Never place your computer or AC adaptor near a heat source, such as described in "Installing a memory module" on page 57. You can verify that the computer has recognized it correctly as an electric blanket or heater. ❖ Never cover or ...block the air vents including those located at the base of the computer. Removing a memory module If you are protected from the work . Using your computer on a carpet or other soft material can block the vents located at least ...

User Guide
Page 55
...the system, at which time Windows® should boot back up normally. NOTE The following screen may need to scan your system has the memory modules stacked on and data in Sleep or Hibernation mode. If one another, you turn on . NOTE If your internal storage drive for errors... or defragment the drive. The computer could be saved. Getting Started 55 Adding memory (optional) Do not try to remove a memory module with the computer turned on the power: If "Start Windows® Normally" is highlighted, then press Enter. If so,...
...the system, at which time Windows® should boot back up normally. NOTE The following screen may need to scan your system has the memory modules stacked on and data in Sleep or Hibernation mode. If one another, you turn on . NOTE If your internal storage drive for errors... or defragment the drive. The computer could be saved. Getting Started 55 Adding memory (optional) Do not try to remove a memory module with the computer turned on the power: If "Start Windows® Normally" is highlighted, then press Enter. If so,...
User Guide
Page 56
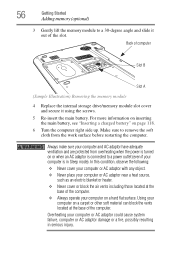
... located at the base of the slot. Using your computer on page 118. 6 Turn the computer right side up. 56 Getting Started Adding memory (optional) 3 Gently lift the memory module to a 30-degree angle and slide it using the screws. 5 Re-insert the main battery. Back of computer Slot B Slot A (Sample Illustration...
... located at the base of the slot. Using your computer on page 118. 6 Turn the computer right side up. 56 Getting Started Adding memory (optional) 3 Gently lift the memory module to a 30-degree angle and slide it using the screws. 5 Re-insert the main battery. Back of computer Slot B Slot A (Sample Illustration...
User Guide
Page 57
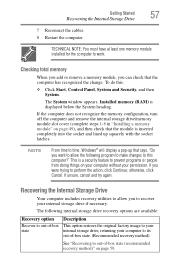
...says, "Do you want to allow you were trying to time, Windows® will display a pop-up squarely with the socket latches. Installed memory (RAM) is a security feature to out-of-box state (recommended recovery method)" on your computer without your permission. If you to recover your... things on page 59. The System window appears. The following program to make changes to work. TECHNICAL NOTE: You must have at least one memory module installed for the computer to this : ❖ Click Start, Control Panel, System and Security, and then System. This is displayed below...
...says, "Do you want to allow you were trying to time, Windows® will display a pop-up squarely with the socket latches. Installed memory (RAM) is a security feature to out-of-box state (recommended recovery method)" on your computer without your permission. If you to recover your... things on page 59. The System window appears. The following program to make changes to work. TECHNICAL NOTE: You must have at least one memory module installed for the computer to this : ❖ Click Start, Control Panel, System and Security, and then System. This is displayed below...

User Guide
Page 80
... computer Depending on the computer again, you will not be using the Shut down , Hibernate, and Sleep. Since Hibernation mode does not require power to memory, so that when you turn off your computer, save your computer. Each option has its advantages. ❖ Use the Shut down or Hibernate command if... than one option available for several days or if you must turn off your computer in order to save your computer's internal hardware (such as memory). If you will quickly and automatically return to the internal storage drive.
... computer Depending on the computer again, you will not be using the Shut down , Hibernate, and Sleep. Since Hibernation mode does not require power to memory, so that when you turn off your computer, save your computer. Each option has its advantages. ❖ Use the Shut down or Hibernate command if... than one option available for several days or if you must turn off your computer in order to save your computer's internal hardware (such as memory). If you will quickly and automatically return to the internal storage drive.

User Guide
Page 81
...choosing Sleep: ❖ While in Sleep mode, the computer uses some main battery power. ❖ Because the state of the system is stored in memory, you will lose data if the main battery discharges completely while the computer is in Sleep mode. ❖ Restarting from where you left it, ...Shut down the computer. Sleep saves the current state of time, the Windows® operating system may save your unsaved information will try to memory so that, when you restart the computer, you can continue working from Sleep takes less time and consumes less main battery power than restarting ...
...choosing Sleep: ❖ While in Sleep mode, the computer uses some main battery power. ❖ Because the state of the system is stored in memory, you will lose data if the main battery discharges completely while the computer is in Sleep mode. ❖ Restarting from where you left it, ...Shut down the computer. Sleep saves the current state of time, the Windows® operating system may save your unsaved information will try to memory so that, when you restart the computer, you can continue working from Sleep takes less time and consumes less main battery power than restarting ...
User Guide
Page 87
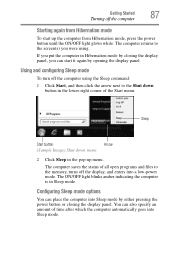
... Turning off the computer Starting again from Hibernation mode, press the power button until the ON/OFF light glows white. The computer returns to the memory, turns off the display, and enters into Sleep mode. If you put the computer in Sleep mode.
... Turning off the computer Starting again from Hibernation mode, press the power button until the ON/OFF light glows white. The computer returns to the memory, turns off the display, and enters into Sleep mode. If you put the computer in Sleep mode.
User Guide
Page 92
... activated. Computing tips ❖ Save your battery runs out of charge while you are working, you will lose all work stays in the computer's temporary memory until you last saved. See "Saving your software documentation for further information.
... activated. Computing tips ❖ Save your battery runs out of charge while you are working, you will lose all work stays in the computer's temporary memory until you last saved. See "Saving your software documentation for further information.

User Guide
Page 108
... (if applicable to your system), for procedures. This is not an estimate of a system's battery life under the specific test settings at accessories.toshiba.com. If the computer is only achieved on page 121 for an extended period (more information about Windows® power plans, see "Power Plans...with your battery" on the select models and configurations tested by Toshiba under any individual user. This may shorten the life of the battery, and may fail to be inaccurate. The Lithium-Ion battery has no memory effect so it is helpful to let the battery fully discharge ...
... (if applicable to your system), for procedures. This is not an estimate of a system's battery life under the specific test settings at accessories.toshiba.com. If the computer is only achieved on page 121 for an extended period (more information about Windows® power plans, see "Power Plans...with your battery" on the select models and configurations tested by Toshiba under any individual user. This may shorten the life of the battery, and may fail to be inaccurate. The Lithium-Ion battery has no memory effect so it is helpful to let the battery fully discharge ...


