User Manual
Page 5
... to the fax software instructions installed on the first page of the transmission, the date and time it unlawful for any person to use a computer or other electronic device, including Fax machines, to send any message unless such message clearly contains in writing, to allow you to make changes in advance that you in their equipment, operations or procedures...
... to the fax software instructions installed on the first page of the transmission, the date and time it unlawful for any person to use a computer or other electronic device, including Fax machines, to send any message unless such message clearly contains in writing, to allow you to make changes in advance that you in their equipment, operations or procedures...
User Manual
Page 31
... without changing the internal storage drive partitions 66 Creating recovery DVDs/media 68 Restoring from recovery DVDs/media 69 Erasing the Internal Storage Drive 71 Checking the internal storage drive operating status 72 Installing drivers and applications 73 Using the TouchPad 73 Adjusting TouchPad™ settings 75 Disabling or enabling the TouchPad 76 Using external display devices 76 Connecting the display device 77 Directing the display output when you turn on the computer 78 Adjusting the quality of the external display......79 Using an external keyboard 79 Using a mouse...
... without changing the internal storage drive partitions 66 Creating recovery DVDs/media 68 Restoring from recovery DVDs/media 69 Erasing the Internal Storage Drive 71 Checking the internal storage drive operating status 72 Installing drivers and applications 73 Using the TouchPad 73 Adjusting TouchPad™ settings 75 Disabling or enabling the TouchPad 76 Using external display devices 76 Connecting the display device 77 Directing the display output when you turn on the computer 78 Adjusting the quality of the external display......79 Using an external keyboard 79 Using a mouse...
User Manual
Page 34
...134 Using the Web Camera 135 Using the Memory card reader 136 Inserting memory media 136 Removing memory media 137 Chapter 5: Utilities 138 TOSHIBA Assist 139 Connect 140 Secure 141 Protect & Fix 142 Optimize 143 TOSHIBA Application Installer 144 Setting passwords 145 Using an instant password 145 Using a supervisor password 146 Using a user password 147 Deleting a user password 148 TOSHIBA Face Recognition Utility 149 TOSHIBA PC Diagnostic Tool Utility 150 Mouse Utility 151 TOSHIBA Hardware Setup 152 TOSHIBA Zooming Utility 154 TOSHIBA Accessibility 155 TOSHIBA Service...
...134 Using the Web Camera 135 Using the Memory card reader 136 Inserting memory media 136 Removing memory media 137 Chapter 5: Utilities 138 TOSHIBA Assist 139 Connect 140 Secure 141 Protect & Fix 142 Optimize 143 TOSHIBA Application Installer 144 Setting passwords 145 Using an instant password 145 Using a supervisor password 146 Using a user password 147 Deleting a user password 148 TOSHIBA Face Recognition Utility 149 TOSHIBA PC Diagnostic Tool Utility 150 Mouse Utility 151 TOSHIBA Hardware Setup 152 TOSHIBA Zooming Utility 154 TOSHIBA Accessibility 155 TOSHIBA Service...
User Manual
Page 52
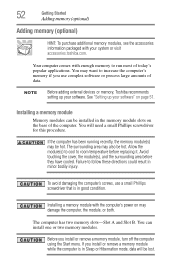
... remove a memory module, turn off the computer using the Start menu. Installing a memory module with the computer's power on page 51. If you install or remove a memory module while the computer is in Sleep or Hibernation mode, data will need a small Phillips screwdriver for this procedure. See "Setting up your software. To avoid damaging the computer's screws, use complex software or process large amounts of today's popular applications. The computer has two memory slots-Slot...
... remove a memory module, turn off the computer using the Start menu. Installing a memory module with the computer's power on page 51. If you install or remove a memory module while the computer is in Sleep or Hibernation mode, data will need a small Phillips screwdriver for this procedure. See "Setting up your software. To avoid damaging the computer's screws, use complex software or process large amounts of today's popular applications. The computer has two memory slots-Slot...

User Manual
Page 54
... cause memory access problems. 9 Carefully remove the new memory module from its antistatic packaging, without touching its connector. 10 Locate an empty memory module slot on top of "Removing a memory module" on the computer. 54 Getting Started Adding memory (optional) 6 Using a small Phillips screwdriver, loosen the screw that you can damage the memory module. NOTE If your system has the memory modules stacked on the underside of computer (Sample Illustration) Removing the memory module slot cover 7 Remove the memory module slot cover. 8 Place...
... cause memory access problems. 9 Carefully remove the new memory module from its antistatic packaging, without touching its connector. 10 Locate an empty memory module slot on top of "Removing a memory module" on the computer. 54 Getting Started Adding memory (optional) 6 Using a small Phillips screwdriver, loosen the screw that you can damage the memory module. NOTE If your system has the memory modules stacked on the underside of computer (Sample Illustration) Removing the memory module slot cover 7 Remove the memory module slot cover. 8 Place...

User Manual
Page 57
Make sure to remove the soft cloth from overheating when the power is in "Installing a memory module" on a hard flat surface. Using your computer on or when an AC adaptor is connected to shut down the computer and open the memory module slot cover. When the operating system has loaded, you can now continue setting up the computer. Always make sure your computer on page 52 to a power outlet...
Make sure to remove the soft cloth from overheating when the power is in "Installing a memory module" on a hard flat surface. Using your computer on or when an AC adaptor is connected to shut down the computer and open the memory module slot cover. When the operating system has loaded, you can now continue setting up the computer. Always make sure your computer on page 52 to a power outlet...
User Manual
Page 59
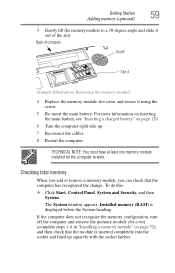
... cables. 8 Restart the computer. Getting Started 59 Adding memory (optional) 3 Gently lift the memory module to work. TECHNICAL NOTE: You must have at least one memory module installed for the computer to a 30-degree angle and slide it out of computer Slot B Slot A (Sample Illustration) Removing the memory module 4 Replace the memory module slot cover and secure it using the screw. 5 Re-insert the main battery. The System window appears. Back of the slot...
... cables. 8 Restart the computer. Getting Started 59 Adding memory (optional) 3 Gently lift the memory module to work. TECHNICAL NOTE: You must have at least one memory module installed for the computer to a 30-degree angle and slide it out of computer Slot B Slot A (Sample Illustration) Removing the memory module 4 Replace the memory module slot cover and secure it using the screw. 5 Re-insert the main battery. The System window appears. Back of the slot...

User Manual
Page 77
... the external device. Connecting an external monitor or projector You can change the display settings by pressing Fn+F5, or by configuring the display properties settings. Getting Started 77 Using external display devices Connecting the display device If you are connecting a television or other end of the cable to your television. Selecting video cables To connect a device to the HDMI™ Out port, you can easily attach an external monitor or projector to your computer if you need to install new software. 2 Connect the monitor's video cable...
... the external device. Connecting an external monitor or projector You can change the display settings by pressing Fn+F5, or by configuring the display properties settings. Getting Started 77 Using external display devices Connecting the display device If you are connecting a television or other end of the cable to your television. Selecting video cables To connect a device to the HDMI™ Out port, you can easily attach an external monitor or projector to your computer if you need to install new software. 2 Connect the monitor's video cable...
User Manual
Page 148
... on-screen instructions to exit. The TOSHIBA Assist window appears. 2 On the left side, click the Secure tab. 3 Click the User Password icon. 4 Click Registered. 5 Enter your password, and then enter it again to verify. 6 Click OK. 7 Click OK to remove the user password. Deleting a user password To cancel the power-on password functions: 1 Click Start, All Programs, TOSHIBA, Utilities, and then TOSHIBA Assist. 148 Utilities Setting passwords To register a password for the power-on password function: 1 Click Start...
... on-screen instructions to exit. The TOSHIBA Assist window appears. 2 On the left side, click the Secure tab. 3 Click the User Password icon. 4 Click Registered. 5 Enter your password, and then enter it again to verify. 6 Click OK. 7 Click OK to remove the user password. Deleting a user password To cancel the power-on password functions: 1 Click Start, All Programs, TOSHIBA, Utilities, and then TOSHIBA Assist. 148 Utilities Setting passwords To register a password for the power-on password function: 1 Click Start...
User Manual
Page 156
... wireless connection. For more information on using ConfigFree, see "Profile Settings" on page 157. ❖ Profile Settings-The Profiles utility lets you switch between locations and communication networks. Then perform any of utilities that makes it easy to control communication devices and network connections. Getting Started This section contains information about the ConfigFree® main screen, and how to analyze network connections and fix networking problems with your computer. Starting ConfigFree® To start...
... wireless connection. For more information on using ConfigFree, see "Profile Settings" on page 157. ❖ Profile Settings-The Profiles utility lets you switch between locations and communication networks. Then perform any of utilities that makes it easy to control communication devices and network connections. Getting Started This section contains information about the ConfigFree® main screen, and how to analyze network connections and fix networking problems with your computer. Starting ConfigFree® To start...
User Manual
Page 164
... the INPUT specifications on , this indicates a power mismatch. Unless a hardware device has failed, problems usually occur when you are familiar with your computer model. If the battery light is blinking when the computer is on the bottom of these problems, use the AC adapter that required by the computer. If the specifications do not match, locate and use the options in the Startup menu to start. ❖ The operating system responds...
... the INPUT specifications on , this indicates a power mismatch. Unless a hardware device has failed, problems usually occur when you are familiar with your computer model. If the battery light is blinking when the computer is on the bottom of these problems, use the AC adapter that required by the computer. If the specifications do not match, locate and use the options in the Startup menu to start. ❖ The operating system responds...
User Manual
Page 171
... through the display options. You can change the display settings by the computer's internal display. Click Display and then Change display settings to its previous setting. Reduce the size of the color palette to one that the cable connecting the external monitor to the computer is firmly attached. ❖ Try adjusting the contrast and brightness controls on the external monitor. ❖ Press Fn and F5 simultaneously to make sure the display priority is...
... through the display options. You can change the display settings by the computer's internal display. Click Display and then Change display settings to its previous setting. Reduce the size of the color palette to one that the cable connecting the external monitor to the computer is firmly attached. ❖ Try adjusting the contrast and brightness controls on the external monitor. ❖ Press Fn and F5 simultaneously to make sure the display priority is...
User Manual
Page 176
... at pcsupport.toshiba.com. Connect a telephone handset to the line to someone else. If you could create and attempt to the computer's modem port and the telephone line jack. See if your work exactly as it . Make sure the cable from the way they print it will print. The other system may be in the communications program. Disable Sleep mode, turn off...
... at pcsupport.toshiba.com. Connect a telephone handset to the line to someone else. If you could create and attempt to the computer's modem port and the telephone line jack. See if your work exactly as it . Make sure the cable from the way they print it will print. The other system may be in the communications program. Disable Sleep mode, turn off...
User Manual
Page 182
...; Create a restore point (refer to "Saving system configuration with restore points" on page 180). Follow the on-screen instructions to back up your computer or files to optical discs, or a storage drive: NOTE You cannot back up the computer while running on its internal storage drive. For more help ensure safe and easy installation of new hardware (printers, pointing devices, external hard drives, DVD writers, scanners, etc.) and software (applications...
...; Create a restore point (refer to "Saving system configuration with restore points" on page 180). Follow the on-screen instructions to back up your computer or files to optical discs, or a storage drive: NOTE You cannot back up the computer while running on its internal storage drive. For more help ensure safe and easy installation of new hardware (printers, pointing devices, external hard drives, DVD writers, scanners, etc.) and software (applications...
User Manual
Page 211
A feature of your work , including all open files and programs, when you turn on the network. See also Sleep, Suspend. A small image displayed on the motherboard to create a complete screen image. Interlaced monitors take two passes to help improve processing speed. Memory cache installed on the screen that saves to the internal storage drive the current state of many Toshiba computers that represents a function, file, or program. See...
A feature of your work , including all open files and programs, when you turn on the network. See also Sleep, Suspend. A small image displayed on the motherboard to create a complete screen image. Interlaced monitors take two passes to help improve processing speed. Memory cache installed on the screen that saves to the internal storage drive the current state of many Toshiba computers that represents a function, file, or program. See...

User Manual
Page 217
... changing 118 charge indicator light 48, 112 charge not lasting 169 charging 48, 111 conserving power 115 disposal 123 installing 118, 120 low charge 114 maintaining 122 monitoring power 48, 112 not charging 169 notifications 114 power plan 193 power plan hot key 117 real-time clock (RTC) 109, 111 remaining power 113 removing 118 safety precautions 121 BIOS Setup see TOSHIBA Hardware Setup button power 50 start 127 buttons eject, optical drive 103 C Call2Recycle™ battery 124 changing main battery...
... changing 118 charge indicator light 48, 112 charge not lasting 169 charging 48, 111 conserving power 115 disposal 123 installing 118, 120 low charge 114 maintaining 122 monitoring power 48, 112 not charging 169 notifications 114 power plan 193 power plan hot key 117 real-time clock (RTC) 109, 111 remaining power 113 removing 118 safety precautions 121 BIOS Setup see TOSHIBA Hardware Setup button power 50 start 127 buttons eject, optical drive 103 C Call2Recycle™ battery 124 changing main battery...
User Manual
Page 218
.../trouble accessing a drive 172 running slow 173 diskette drive cannot insert a diskette 173 cannot read a diskette 174 display does not look normal/flickers 171 external monitor not working 172 display device connecting 77 external 76 display output settings 78 display panel opening 49 display problems screen is blank 170 display, external adjusting 79 disposal information 29 disposing of used batteries 123 DVD using 102 DVD player general problems 178 E eject button optical drive 103 eject, optical drive 103 ENERGY STAR® 37 error...
.../trouble accessing a drive 172 running slow 173 diskette drive cannot insert a diskette 173 cannot read a diskette 174 display does not look normal/flickers 171 external monitor not working 172 display device connecting 77 external 76 display output settings 78 display panel opening 49 display problems screen is blank 170 display, external adjusting 79 disposal information 29 disposing of used batteries 123 DVD using 102 DVD player general problems 178 E eject button optical drive 103 eject, optical drive 103 ENERGY STAR® 37 error...
User Manual
Page 219
... keys 94 function keys 94 H HDMI™ Out Port 76 headphones using 134 Help and Support Windows® operating system 166 Hibernation mode 81 configuring 85 hot key 195 starting again from 87 hot key disabling or enabling TouchPad™ 199 disabling or enabling wireless devices 198 display brightness 197 Hibernation mode 195 keyboard overlays 201 Lock (Instant security) 192 Output (Display switch) 196 power plan 193 Sleep mode 194 volume mute 191 Zoom (Display resolution) 200 zooming in 201 zooming out 201 Hot Key Cards 187 Hot key functions 191 hot key power...
... keys 94 function keys 94 H HDMI™ Out Port 76 headphones using 134 Help and Support Windows® operating system 166 Hibernation mode 81 configuring 85 hot key 195 starting again from 87 hot key disabling or enabling TouchPad™ 199 disabling or enabling wireless devices 198 display brightness 197 Hibernation mode 195 keyboard overlays 201 Lock (Instant security) 192 Output (Display switch) 196 power plan 193 Sleep mode 194 volume mute 191 Zoom (Display resolution) 200 zooming in 201 zooming out 201 Hot Key Cards 187 Hot key functions 191 hot key power...
User Manual
Page 221
... features 108 problem solving 168 turning on 50 power button 50 power plan hot key 117 power plans 116 power source connecting 47 powering down using Hibernate 85 using Sleep 87 precautions 43 printer connecting 79 problem solving 175, 176 printing a file 100 problem solving AC power 169 accessing disk drives 162 battery charge does not last 169 battery not charging 169 cannot insert diskette in drive 173 cannot read a diskette 174 changing display properties 171 checking device properties...
... features 108 problem solving 168 turning on 50 power button 50 power plan hot key 117 power plans 116 power source connecting 47 powering down using Hibernate 85 using Sleep 87 precautions 43 printer connecting 79 problem solving 175, 176 printing a file 100 problem solving AC power 169 accessing disk drives 162 battery charge does not last 169 battery not charging 169 cannot insert diskette in drive 173 cannot read a diskette 174 changing display properties 171 checking device properties...
User Manual
Page 222
... television adjusting display 79 connecting 77 Toshiba registering computer 51 worldwide offices 185 TOSHIBA Accessibility 155 Toshiba accessories memory 52 TOSHIBA Application Installer 144 TOSHIBA Assist 139 TOSHIBA Face Recognition Utility 149 TOSHIBA Hardware Setup 152 Toshiba online resources 107 TOSHIBA PC Diagnostic Tool Utility 150 TOSHIBA Service Station 156 TOSHIBA Zooming Utility 154 TouchPad™ adjusting settings 75 disabling 76 enabling 76 using 73 traveling tips 124 troubleshooting DVD player general problems 178 external keyboard 170 keyboard 170 optical drive 174 turning on...
... television adjusting display 79 connecting 77 Toshiba registering computer 51 worldwide offices 185 TOSHIBA Accessibility 155 Toshiba accessories memory 52 TOSHIBA Application Installer 144 TOSHIBA Assist 139 TOSHIBA Face Recognition Utility 149 TOSHIBA Hardware Setup 152 Toshiba online resources 107 TOSHIBA PC Diagnostic Tool Utility 150 TOSHIBA Service Station 156 TOSHIBA Zooming Utility 154 TouchPad™ adjusting settings 75 disabling 76 enabling 76 using 73 traveling tips 124 troubleshooting DVD player general problems 178 external keyboard 170 keyboard 170 optical drive 174 turning on...


