
User Guide
Page 10
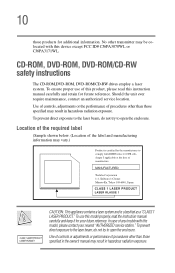
.../CD-RW safety instructions The CD-ROM,DVD-ROM, DVD-ROM/CD-RW drives employ a laser system. To prevent direct exposure to the laser beam, do not try to open the enclosure. Use of controls, adjustments or the performance ...
.../CD-RW safety instructions The CD-ROM,DVD-ROM, DVD-ROM/CD-RW drives employ a laser system. To prevent direct exposure to the laser beam, do not try to open the enclosure. Use of controls, adjustments or the performance ...

User Guide
Page 15
... Using diskettes 76 Inserting and removing diskettes 76 Caring for diskettes 77 Backing up your files 78 Copying to a diskette 78 Playing a CD or DVD 79 Drive components and control buttons 79 CD/DVD control buttons 81 CD/DVD control and digital audio control ........ 82 Inserting a disc 83 Playing an audio CD 86 Playing...
... Using diskettes 76 Inserting and removing diskettes 76 Caring for diskettes 77 Backing up your files 78 Copying to a diskette 78 Playing a CD or DVD 79 Drive components and control buttons 79 CD/DVD control buttons 81 CD/DVD control and digital audio control ........ 82 Inserting a disc 83 Playing an audio CD 86 Playing...
User Guide
Page 16
16 Contents Using the DVD-ROM or DVD-ROM/CD-RW multifunction drive 88 Setting up for communications 89 Connecting the modem 89 Connecting your computer to a network .......... 90 Using the i.LINK® port 90 Powering down the ... more quickly 94 Starting again after Turn Off 96 Using Hibernation 96 Using Standby 98 Going into Standby mode more quickly 99 Toshiba's online resources 100 Chapter 4: Mobile Computing 101 Toshiba's energy-saver design 101 Running the computer on battery power 101 Battery Notice 102 Using additional batteries 102 Charging batteries 103...
16 Contents Using the DVD-ROM or DVD-ROM/CD-RW multifunction drive 88 Setting up for communications 89 Connecting the modem 89 Connecting your computer to a network .......... 90 Using the i.LINK® port 90 Powering down the ... more quickly 94 Starting again after Turn Off 96 Using Hibernation 96 Using Standby 98 Going into Standby mode more quickly 99 Toshiba's online resources 100 Chapter 4: Mobile Computing 101 Toshiba's energy-saver design 101 Running the computer on battery power 101 Battery Notice 102 Using additional batteries 102 Charging batteries 103...
User Guide
Page 21
21 Contents DVD-ROM or DVD-ROM/CD-RW drive problems 215 Secondary IDE Channel DMA setting 218 Sound system problems 224 PC Card problems 225 Printer problems 228 Modem problems 229 Develop good computing habits 229 If you need further assistance 231 Before you call 231 Contacting Toshiba 231 Other Toshiba Internet Web sites 233...
21 Contents DVD-ROM or DVD-ROM/CD-RW drive problems 215 Secondary IDE Channel DMA setting 218 Sound system problems 224 PC Card problems 225 Printer problems 228 Modem problems 229 Develop good computing habits 229 If you need further assistance 231 Before you call 231 Contacting Toshiba 231 Other Toshiba Internet Web sites 233...

User Guide
Page 30
... of up to 30 frames per second (Mbps). Instead, use either high-density or double-density 3.5-inch diskettes. The eject button opens the drive tray. CAUTION: Never use it . On those systems with Wi-FiTM, the wireless antenna on-off switch turns the computer's wireless antenna on...also use a pencil to this port. You can break off switch Diskette drive DVD-ROM or DVD-ROM/CD-RW drive Manual eject button Eject button The diskette drive allows you to play audio CDs. The DVD-ROM or DVD-ROM/CD-RW drive enables you to use a slim object such as a straightened paper clip...
... of up to 30 frames per second (Mbps). Instead, use either high-density or double-density 3.5-inch diskettes. The eject button opens the drive tray. CAUTION: Never use it . On those systems with Wi-FiTM, the wireless antenna on-off switch turns the computer's wireless antenna on...also use a pencil to this port. You can break off switch Diskette drive DVD-ROM or DVD-ROM/CD-RW drive Manual eject button Eject button The diskette drive allows you to play audio CDs. The DVD-ROM or DVD-ROM/CD-RW drive enables you to use a slim object such as a straightened paper clip...

User Guide
Page 36
... damage the media in loss of data. Press and hold the mode button for playing CDs and DVDs. You can play audio CDs while the computer is turned off the computer while any drive is being accessed. Mode button Next track Previous track CD mode indictor Play/pause Stop/eject CD.../DVD control buttons with the display open The disc/disk activity light flashes green when the diskette drive, the DVD-ROM or the DVD-ROM/CD-RW drive is in use and result in use . CD/DVD control buttons The control buttons near the display latch...
... damage the media in loss of data. Press and hold the mode button for playing CDs and DVDs. You can play audio CDs while the computer is turned off the computer while any drive is being accessed. Mode button Next track Previous track CD mode indictor Play/pause Stop/eject CD.../DVD control buttons with the display open The disc/disk activity light flashes green when the diskette drive, the DVD-ROM or the DVD-ROM/CD-RW drive is in use and result in use . CD/DVD control buttons The control buttons near the display latch...
User Guide
Page 37
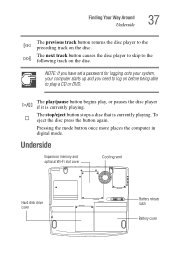
... disc press the button again. Underside Expansion memory and optional Wi-Fi slot cover Cooling vent Hard disk drive cover Battery release latch Battery cover The play/pause button begins play a CD or DVD. Pressing the mode button once more places the computer in digital mode. NOTE: If you have set a password...
... disc press the button again. Underside Expansion memory and optional Wi-Fi slot cover Cooling vent Hard disk drive cover Battery release latch Battery cover The play/pause button begins play a CD or DVD. Pressing the mode button once more places the computer in digital mode. NOTE: If you have set a password...
User Guide
Page 66
...an antitheft lock. Ask your computer clean, gently wipe the display panel and exterior case with a lightly dampened cloth. Cleaning the computer To keep your Toshiba dealer for suggestions for appropriate cleaning products. For information about taking care of the computer's keyboard, speaker grille, and other openings. CAUTION: Keep liquid,... how to clean the computer. For more information, see "Running the computer on battery power" on cleaning and moving your computer hard disk, diskette drive, DVD-ROM or DVD-ROM/CDRW drive. Never spray cleaner directly onto the computer.
...an antitheft lock. Ask your computer clean, gently wipe the display panel and exterior case with a lightly dampened cloth. Cleaning the computer To keep your Toshiba dealer for suggestions for appropriate cleaning products. For information about taking care of the computer's keyboard, speaker grille, and other openings. CAUTION: Keep liquid,... how to clean the computer. For more information, see "Running the computer on battery power" on cleaning and moving your computer hard disk, diskette drive, DVD-ROM or DVD-ROM/CDRW drive. Never spray cleaner directly onto the computer.
User Guide
Page 79
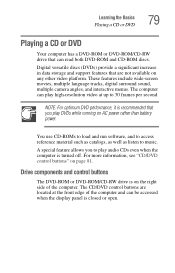
... Basics Playing a CD or DVD 79 Playing a CD or DVD Your computer has a DVD-ROM or DVD-ROM/CD-RW drive that are located at up to 30 frames per second. The computer can read both DVD-ROM and CD-ROM discs. Drive components and control buttons The DVD-ROM or DVD-ROM/CD-RW drive is on any other... video platform. The CD/DVD control buttons are not available on the right side of the computer and can...
... Basics Playing a CD or DVD 79 Playing a CD or DVD Your computer has a DVD-ROM or DVD-ROM/CD-RW drive that are located at up to 30 frames per second. The computer can read both DVD-ROM and CD-ROM discs. Drive components and control buttons The DVD-ROM or DVD-ROM/CD-RW drive is on any other... video platform. The CD/DVD control buttons are not available on the right side of the computer and can...

User Guide
Page 80
...the computer while the activity light is off. HINT: When the computer is off and the DVD-ROM or DVD-ROM/ CD-RW drive is on, press the stop/eject control button to the computer and the drive is glowing. The manual eject button allows you to manually open the disc tray when power... power to work properly. Instead, use a pencil to release the disc tray. 80 Learning the Basics Playing a CD or DVD Components DVD-ROM or DVD-ROM/CD-RW drive DVD-ROM or DVD-ROM/CD-RW drive Manual eject button Eject button Use the eject button to press the manual eject button. Doing so could damage the...
...the computer while the activity light is off. HINT: When the computer is off and the DVD-ROM or DVD-ROM/ CD-RW drive is on, press the stop/eject control button to the computer and the drive is glowing. The manual eject button allows you to manually open the disc tray when power... power to work properly. Instead, use a pencil to release the disc tray. 80 Learning the Basics Playing a CD or DVD Components DVD-ROM or DVD-ROM/CD-RW drive DVD-ROM or DVD-ROM/CD-RW drive Manual eject button Eject button Use the eject button to press the manual eject button. Doing so could damage the...

User Guide
Page 82
... Digital Audio Mode Power is off mode button Operating system is If a CD is in CD/DVD DVD-ROM drive mode, you press the power turns off and you drive, the Media press Play/Pause Player starts and the digital audio file begins to play . While in the running and you If a CD is... and operates as digital audio file a stand-alone CD begins to play . CD/DVD control and digital audio control The following chart describes CD/DVD control and digital audio mode. player. If a DVD is in the drive, WinDVD starts and the DVD begins to eject a disc when the computer is turned off and the sound...
... Digital Audio Mode Power is off mode button Operating system is If a CD is in CD/DVD DVD-ROM drive mode, you press the power turns off and you drive, the Media press Play/Pause Player starts and the digital audio file begins to play . While in the running and you If a CD is... and operates as digital audio file a stand-alone CD begins to play . CD/DVD control and digital audio control The following chart describes CD/DVD control and digital audio mode. player. If a DVD is in the drive, WinDVD starts and the DVD begins to eject a disc when the computer is turned off and the sound...
User Guide
Page 83
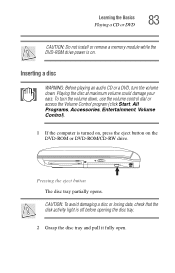
... CAUTION: Do not install or remove a memory module while the DVD-ROM drive power is off before opening the disc tray. 2 Grasp the disc tray and pull it fully open. Pressing the eject button The disc tray partially ... maximum volume could damage your ears. CAUTION: To avoid damaging a disc or losing data, check that the disk activity light is on the DVD-ROM or DVD-ROM/CD-RW drive. To turn the volume down , use the volume control dial or access the Volume Control program (click Start, All Programs, Accessories, Entertainment...
... CAUTION: Do not install or remove a memory module while the DVD-ROM drive power is off before opening the disc tray. 2 Grasp the disc tray and pull it fully open. Pressing the eject button The disc tray partially ... maximum volume could damage your ears. CAUTION: To avoid damaging a disc or losing data, check that the disk activity light is on the DVD-ROM or DVD-ROM/CD-RW drive. To turn the volume down , use the volume control dial or access the Volume Control program (click Start, All Programs, Accessories, Entertainment...

User Guide
Page 84
Doing so could lose data. 4 Carefully place the disc in the empty tray with its center hole and edge. If you handle the disc incorrectly, you could cause the drive to touch the drive's lens (located underneath the drive's spindle) or the area around it is clean and free of the disc. Avoid touching the surface of dust. Grasp it by its edges and check that it . Inserting a disc CAUTION: Be careful not to malfunction. CAUTION: Handle discs carefully. 84 Learning the Basics Playing a CD or DVD 3 Hold the disc by its label facing up.
Doing so could lose data. 4 Carefully place the disc in the empty tray with its center hole and edge. If you handle the disc incorrectly, you could cause the drive to touch the drive's lens (located underneath the drive's spindle) or the area around it is clean and free of the disc. Avoid touching the surface of dust. Grasp it by its edges and check that it . Inserting a disc CAUTION: Be careful not to malfunction. CAUTION: Handle discs carefully. 84 Learning the Basics Playing a CD or DVD 3 Hold the disc by its label facing up.

User Guide
Page 85
...2 Pull the tray until it is glowing. Doing so could damage the disc or the drive. CAUTION: Do not press the eject button while the in-use indicator light is fully open...can jam the disc tray. 6 Close the disc tray by pressing gently on the drive. Removing compact discs To remove a compact disc (CD or DVD) with the computer turned on: 1 Press the eject button on the center of... the disc onto the spindle until it locks into place. Learning the Basics Playing a CD or DVD 85 5 Gently press the center of the tray until it clicks, indicating that it is properly positioned on the...
...2 Pull the tray until it is glowing. Doing so could damage the disc or the drive. CAUTION: Do not press the eject button while the in-use indicator light is fully open...can jam the disc tray. 6 Close the disc tray by pressing gently on the drive. Removing compact discs To remove a compact disc (CD or DVD) with the computer turned on: 1 Press the eject button on the center of... the disc onto the spindle until it locks into place. Learning the Basics Playing a CD or DVD 85 5 Gently press the center of the tray until it clicks, indicating that it is properly positioned on the...

User Guide
Page 88
... it from the center outwards (not in the drive. Doing so could damage the CD, DVD or drive. If necessary, moisten the cloth with a DVD-ROM or DVD-ROM/ CD-RW multifunction drive that allows you use the DVD-ROM or DVD-ROM/CD-RW drive. Fingerprints on top of a compact disc can ...prevent the drive from reading the data properly. ❖ Avoid exposing discs ...
... it from the center outwards (not in the drive. Doing so could damage the CD, DVD or drive. If necessary, moisten the cloth with a DVD-ROM or DVD-ROM/ CD-RW multifunction drive that allows you use the DVD-ROM or DVD-ROM/CD-RW drive. Fingerprints on top of a compact disc can ...prevent the drive from reading the data properly. ❖ Avoid exposing discs ...

User Guide
Page 163
Exploring audio features You can play .wav sound files or audio CDs using the built-in the DVD-ROM or DVD-ROM/CD-RW drive. 3 Launch WinDVDTM and press the Play button. You can use your computer to record sounds using WinDVD, see "WinDVD" on page 175. Recording sounds You ... Web Eject Expanded view Properties Next chapter Fast forward For more information about using an external microphone. 163 Exploring Your Options Exploring audio features Playing DVDs 1 Open the DVD-ROM or DVD-ROM/CD-RW tray. 2 Place the DVD in speakers, headphones or external speakers.
Exploring audio features You can play .wav sound files or audio CDs using the built-in the DVD-ROM or DVD-ROM/CD-RW drive. 3 Launch WinDVDTM and press the Play button. You can use your computer to record sounds using WinDVD, see "WinDVD" on page 175. Recording sounds You ... Web Eject Expanded view Properties Next chapter Fast forward For more information about using an external microphone. 163 Exploring Your Options Exploring audio features Playing DVDs 1 Open the DVD-ROM or DVD-ROM/CD-RW tray. 2 Place the DVD in speakers, headphones or external speakers.

User Guide
Page 175
... your computer using WinDVD, Toshiba highly recommends that helps you get the most out of the exciting world of DVD technology. When you can use InterVideo WinDVD™ to use , full-featured multimedia control center that your computer comes with a DVD-ROM or DVD-ROM/CD-RW multifunction drive, you watch DVD movies on your computer...
... your computer using WinDVD, Toshiba highly recommends that helps you get the most out of the exciting world of DVD technology. When you can use InterVideo WinDVD™ to use , full-featured multimedia control center that your computer comes with a DVD-ROM or DVD-ROM/CD-RW multifunction drive, you watch DVD movies on your computer...

User Guide
Page 176
... Sample WinDVD video window with the control panel Fit the DVD-ROM or DVD-ROM/CD-RW drive into the drive, following the instructions in the drive and opens WinDVD. Insert a DVD into the Modular Bay. 176 WinDVD Playing DVDs WARNING: Before playing a DVD, turn down the volume. The computer automatically detects the ...on page 185 for information on page 179 to locate the volume control buttons. If the autoplay feature is enabled, the DVD automatically begins to InterVideo WinDVD, then click InterVideo WinDVD. See "Using the control panel playback buttons" on enabling autoplay).
... Sample WinDVD video window with the control panel Fit the DVD-ROM or DVD-ROM/CD-RW drive into the drive, following the instructions in the drive and opens WinDVD. Insert a DVD into the Modular Bay. 176 WinDVD Playing DVDs WARNING: Before playing a DVD, turn down the volume. The computer automatically detects the ...on page 185 for information on page 179 to locate the volume control buttons. If the autoplay feature is enabled, the DVD automatically begins to InterVideo WinDVD, then click InterVideo WinDVD. See "Using the control panel playback buttons" on enabling autoplay).

User Guide
Page 180
...appears to repeat until you click this button the DVD moves forward one frame at a time. Each time you click the repeat button again, and the repeat symbol no longer displays on the control panel counter. open the DVD- E ROM drive disc tray. Pause - Spacebar Step - Otherwise ...this Or use keyboard shortcut Repeat - 180 WinDVD Playing DVDs Click this To do this button repeats the DVD from the beginning. repeat the current None chapter, if the...
...appears to repeat until you click this button the DVD moves forward one frame at a time. Each time you click the repeat button again, and the repeat symbol no longer displays on the control panel counter. open the DVD- E ROM drive disc tray. Pause - Spacebar Step - Otherwise ...this Or use keyboard shortcut Repeat - 180 WinDVD Playing DVDs Click this To do this button repeats the DVD from the beginning. repeat the current None chapter, if the...
User Guide
Page 185
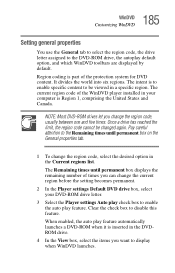
... on the General properties tab. 1 To change the region code, usually between one and five times. Clear the check box to the DVD-ROM drive, the autoplay default option, and which WinDVD toolbars are displayed by default. It divides the world into six regions. The current region code...select the desired option in the DVDROM drive. 4 In the View box, select the items you can change the current region before the setting becomes permanent. 2 In the Player settings Default DVD drive box, select your computer is part of the protection system for DVD content. Region coding is Region 1, ...
... on the General properties tab. 1 To change the region code, usually between one and five times. Clear the check box to the DVD-ROM drive, the autoplay default option, and which WinDVD toolbars are displayed by default. It divides the world into six regions. The current region code...select the desired option in the DVDROM drive. 4 In the View box, select the items you can change the current region before the setting becomes permanent. 2 In the Player settings Default DVD drive box, select your computer is part of the protection system for DVD content. Region coding is Region 1, ...


