
Users Manual AU/NZ
Page 3
... 4 Operating Basics Using the Touch Pad 4-1 AV Controller 4-2 Web Camera 4-2 Using the TOSHIBA Face Recognition 4-4 Using optical disc drives 4-7 Writing CD/DVD/BDs 4-11 TOSHIBA DVD PLAYER 4-22 Using WinDVD BD for TOSHIBA 4-25 Media care 4-27 TV Tuner 4-29 Sound system 4-30 Wireless communications 4-33 LAN 4-35 Computer Handling 4-37 Using the Hard Disk Drive (HDD) Protection 4-39 Using the TOSHIBA USB Sleep and Charge Utility 4-41 Heat dispersal 4-43 Chapter 5 The Keyboard Typewriter keys 5-1 Function keys: F1 ... F9 5-2 Soft keys: FN key combinations 5-2 Hot keys...
... 4 Operating Basics Using the Touch Pad 4-1 AV Controller 4-2 Web Camera 4-2 Using the TOSHIBA Face Recognition 4-4 Using optical disc drives 4-7 Writing CD/DVD/BDs 4-11 TOSHIBA DVD PLAYER 4-22 Using WinDVD BD for TOSHIBA 4-25 Media care 4-27 TV Tuner 4-29 Sound system 4-30 Wireless communications 4-33 LAN 4-35 Computer Handling 4-37 Using the Hard Disk Drive (HDD) Protection 4-39 Using the TOSHIBA USB Sleep and Charge Utility 4-41 Heat dispersal 4-43 Chapter 5 The Keyboard Typewriter keys 5-1 Function keys: F1 ... F9 5-2 Soft keys: FN key combinations 5-2 Hot keys...

Users Manual AU/NZ
Page 4
... Sleep/Hibernation 6-13 Chapter 7 HW Setup Accessing HW Setup 7-1 HW Setup window 7-1 Chapter 8 AV functions Media Center 8-1 Front operation panel 8-2 TOSHIBA Button Support 8-3 Remote controller 8-6 Using the remote controller 8-11 Installing/Removing batteries 8-12 QosmioEngine 8-14 Chapter 9 Troubleshooting Problem solving process 9-1 Hardware and system checklist 9-3 TOSHIBA support 9-24 Appendix A Specifications Physical Dimensions A-1 Appendix B Display Controller and Video mode Display controller B-1 Video mode B-1 Appendix C Wireless LAN Card Specifications...
... Sleep/Hibernation 6-13 Chapter 7 HW Setup Accessing HW Setup 7-1 HW Setup window 7-1 Chapter 8 AV functions Media Center 8-1 Front operation panel 8-2 TOSHIBA Button Support 8-3 Remote controller 8-6 Using the remote controller 8-11 Installing/Removing batteries 8-12 QosmioEngine 8-14 Chapter 9 Troubleshooting Problem solving process 9-1 Hardware and system checklist 9-3 TOSHIBA support 9-24 Appendix A Specifications Physical Dimensions A-1 Appendix B Display Controller and Video mode Display controller B-1 Video mode B-1 Appendix C Wireless LAN Card Specifications...

Users Manual AU/NZ
Page 6
... in making any reproduction from errors, omissions or discrepancies between the computer and the manual. Please note that stipulated above (including conversion to the use of this manual cannot be reproduced only for accuracy. User's Manual vi Under the copyright laws, this manual's production. Disclaimer This manual has been validated and reviewed for personal use or use the screen mode switching functions (e.g. TOSHIBA Qosmio F60 Series Portable Personal Computer User's Manual First...
... in making any reproduction from errors, omissions or discrepancies between the computer and the manual. Please note that stipulated above (including conversion to the use of this manual cannot be reproduced only for accuracy. User's Manual vi Under the copyright laws, this manual's production. Disclaimer This manual has been validated and reviewed for personal use or use the screen mode switching functions (e.g. TOSHIBA Qosmio F60 Series Portable Personal Computer User's Manual First...
Users Manual AU/NZ
Page 16
... or unique to display a play CD/DVD before starting Windows®, touch the CD/DVD panel on the computer (or the same buttons on your computer. This powerful notebook computer provides excellent expansion capability, includes multimedia functionality, and is running, you wish to this manual by -step instructions on Chapter 7, HW Setup, to understand how to setup and configure these features. If you 're new to portable...
... or unique to display a play CD/DVD before starting Windows®, touch the CD/DVD panel on the computer (or the same buttons on your computer. This powerful notebook computer provides excellent expansion capability, includes multimedia functionality, and is running, you wish to this manual by -step instructions on Chapter 7, HW Setup, to understand how to setup and configure these features. If you 're new to portable...

Users Manual AU/NZ
Page 31
... Power Options (to access it in memory could be sure to access it, Start -> Control Panel -> System and Security -> Power Options). ■ To use the Hybrid Sleep function, configure it , Start -> Control Panel -> System and Security -> Power Options). ■ To restore the operation of the computer from automatically entering Sleep Mode, disable Sleep Mode within the HW Setup utility. ■ If the computer enters Sleep Mode while a network application is active, the application might not be lost. ■ When the AC adaptor is next turned...
... Power Options (to access it in memory could be sure to access it, Start -> Control Panel -> System and Security -> Power Options). ■ To use the Hybrid Sleep function, configure it , Start -> Control Panel -> System and Security -> Power Options). ■ To restore the operation of the computer from automatically entering Sleep Mode, disable Sleep Mode within the HW Setup utility. ■ If the computer enters Sleep Mode while a network application is active, the application might not be lost. ■ When the AC adaptor is next turned...

Users Manual AU/NZ
Page 33
... input or hardware access for the time period set by pressing FN + F4 - However, for the Hard Disk Drive indicator to go out. ■ Do not install or remove a memory module while the computer is best to enter Hibernation Mode automatically when you can be lost . In order to define these settings, you press the power button or close the lid. 5. Click Choose what the power buttons do or...
... input or hardware access for the time period set by pressing FN + F4 - However, for the Hard Disk Drive indicator to go out. ■ Do not install or remove a memory module while the computer is best to enter Hibernation Mode automatically when you can be lost . In order to define these settings, you press the power button or close the lid. 5. Click Choose what the power buttons do or...

Users Manual AU/NZ
Page 55
..., used to the operating system. The amount of Video RAM can be equipped with more than the installed memory modules. Even though some models) A co-processor specialized for a maximum of memory, these system resources overlap the physical memory. Legal Footnote (Memory (Main System))*3 For more than 4 GB of 8,192MB system memory. Start -> Control Panel -> Appearance and Personalization -> Display -> Adjust resolution. Hardware, Utilities and Options Memory Memory slots Video RAM 1GB, 2GB or 4GB memory modules can be installed...
..., used to the operating system. The amount of Video RAM can be equipped with more than the installed memory modules. Even though some models) A co-processor specialized for a maximum of memory, these system resources overlap the physical memory. Legal Footnote (Memory (Main System))*3 For more than 4 GB of 8,192MB system memory. Start -> Control Panel -> Appearance and Personalization -> Display -> Adjust resolution. Hardware, Utilities and Options Memory Memory slots Video RAM 1GB, 2GB or 4GB memory modules can be installed...

Users Manual AU/NZ
Page 77
...'s power. Wake-up on . Hardware, Utilities and Options ■ Make sure the Bridge Media slot indicator is out before touching or installing any other foreign matter fall into Slot A and Slot B respectively. This section describes how to install and remove optional memory modules. ■ You should avoid mats that you discharge yourself before you should place a mat beneath the computer in Sleep or Hibernation Mode. a. c. Additional memory module You can install additional memory...
...'s power. Wake-up on . Hardware, Utilities and Options ■ Make sure the Bridge Media slot indicator is out before touching or installing any other foreign matter fall into Slot A and Slot B respectively. This section describes how to install and remove optional memory modules. ■ You should avoid mats that you discharge yourself before you should place a mat beneath the computer in Sleep or Hibernation Mode. a. c. Additional memory module You can install additional memory...

Users Manual AU/NZ
Page 80
... connected to Replacing the battery pack section in order to prevent it with one end of the module up at an angle. Hardware, Utilities and Options 8. Turn your fingernail or a thin object under the cover and lift it - Seat the memory module cover in place and secure it from the module in Chapter 6, Power and Power-Up Modes, if required. 10. refer to the computer. 3. Removing a memory module The slot A is installed, use...
... connected to Replacing the battery pack section in order to prevent it with one end of the module up at an angle. Hardware, Utilities and Options 8. Turn your fingernail or a thin object under the cover and lift it - Seat the memory module cover in place and secure it from the module in Chapter 6, Power and Power-Up Modes, if required. 10. refer to the computer. 3. Removing a memory module The slot A is installed, use...

Users Manual AU/NZ
Page 111
... applications when using a mouse or Touch Pad, or closing/opening the display panel. ■ Bump or cause vibration to the computer. ■ Use the Mode control button and Audio/Video control button to reproduce music or voice. ■ Open the DVD drive. ■ Install, remove or connect external devices, including the following: SD/SDHC memory card, USB device, external display, optical digital devices. ■ Please verify your computer, please use the WinDVD BD for TOSHIBA software application. ■ If you use the TOSHIBA DVD PLAYER: Notes...
... applications when using a mouse or Touch Pad, or closing/opening the display panel. ■ Bump or cause vibration to the computer. ■ Use the Mode control button and Audio/Video control button to reproduce music or voice. ■ Open the DVD drive. ■ Install, remove or connect external devices, including the following: SD/SDHC memory card, USB device, external display, optical digital devices. ■ Please verify your computer, please use the WinDVD BD for TOSHIBA software application. ■ If you use the TOSHIBA DVD PLAYER: Notes...

Users Manual AU/NZ
Page 131
...; Using the USB sleep and charge function to enable and disable the USB Sleep and Charge function. It is recommended that you connect the AC adaptor to the computer when enabling the USB Sleep and Charge function. ■ External devices connected to the USB bus power (DC5V) function that does not have the USB Sleep and Charge function-compatible icon ( ), change to the compatible ports. Operating Basics ■ When USB Sleep and Charge function is enabled, USB bus power (DC5V) will be charged solely by supplying USB bus power (DC5V). Default setting...
...; Using the USB sleep and charge function to enable and disable the USB Sleep and Charge function. It is recommended that you connect the AC adaptor to the computer when enabling the USB Sleep and Charge function. ■ External devices connected to the USB bus power (DC5V) function that does not have the USB Sleep and Charge function-compatible icon ( ), change to the compatible ports. Operating Basics ■ When USB Sleep and Charge function is enabled, USB bus power (DC5V) will be charged solely by supplying USB bus power (DC5V). Default setting...

Users Manual AU/NZ
Page 134
... on and off. Lock: Pressing FN + F1 enters ''Lock computer mode''. F9 The function keys (not to be confused with soft-key operations, and that enable, disable or configure specific features. Hot keys Hot keys (pressing FN + a function or ESC key) let you are not restored when the computer returns from other keys to log on the computer. To restore your keyboard - Power Plan: Pressing FN + F2 changes the power settings. these keys function differently from Sleep Mode. The Keyboard Function keys: F1 ...
... on and off. Lock: Pressing FN + F1 enters ''Lock computer mode''. F9 The function keys (not to be confused with soft-key operations, and that enable, disable or configure specific features. Hot keys Hot keys (pressing FN + a function or ESC key) let you are not restored when the computer returns from other keys to log on the computer. To restore your keyboard - Power Plan: Pressing FN + F2 changes the power settings. these keys function differently from Sleep Mode. The Keyboard Function keys: F1 ...
Users Manual AU/NZ
Page 141
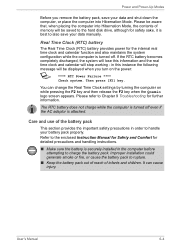
... the battery pack out of reach of memory will stop working - It can change the Real Time Clock settings by turning the computer on the power: S **** RTC Power Failure **** Check system. Power and Power-Up Modes Before you turn on while pressing the F2 key and then release the F2 key when the Qosmio logo screen appears. The RTC battery does not charge while the computer is turned off...
... the battery pack out of reach of memory will stop working - It can change the Real Time Clock settings by turning the computer on the power: S **** RTC Power Failure **** Check system. Power and Power-Up Modes Before you turn on while pressing the F2 key and then release the F2 key when the Qosmio logo screen appears. The RTC battery does not charge while the computer is turned off...

Users Manual AU/NZ
Page 173
... of the screen using . ■ Before you attach an external device you should first turn on or blink? keyboard, hard disk drive, optical disc drive, display panel, touch pad, touch pad control buttons - the items detailed in this includes your floppy diskette, CD or DVD media is correctly loaded and, in the case of a floppy diskette, that all peripheral devices before you turn on again it will recognize the new device. ■ Make sure all optional accessories are...
... of the screen using . ■ Before you attach an external device you should first turn on or blink? keyboard, hard disk drive, optical disc drive, display panel, touch pad, touch pad control buttons - the items detailed in this includes your floppy diskette, CD or DVD media is correctly loaded and, in the case of a floppy diskette, that all peripheral devices before you turn on again it will recognize the new device. ■ Make sure all optional accessories are...

Users Manual AU/NZ
Page 178
... (remapping involves changing or reassigning the function of the computer - Then press [F2] key. Turn on the screen: RTC Power Failure. Keyboard Keyboard problems can be displayed. 5. User's Manual 9-7 Press the Y key - the BIOS setup application will restart. a confirmation message will need to your reseller, dealer or service provider. Press the F10 key - Check system. please refer to the TOSHIBA Password Utility section in the System Time field. 4. Password Problem Cannot enter password Procedure Please...
... (remapping involves changing or reassigning the function of the computer - Then press [F2] key. Turn on the screen: RTC Power Failure. Keyboard Keyboard problems can be displayed. 5. User's Manual 9-7 Press the Y key - the BIOS setup application will restart. a confirmation message will need to your reseller, dealer or service provider. Press the F10 key - Check system. please refer to the TOSHIBA Password Utility section in the System Time field. 4. Password Problem Cannot enter password Procedure Please...

Users Manual AU/NZ
Page 188
... or service provider. Problem Procedure I cannot use the USB Sleep and Charge function. After that, turn the power of the external device connected to the compatible port, USB bus power (DC5V) supply may be stopped for safety reasons. to achieve this you are still able to enable this function can not be able to use a USB mouse and/or USB keyboard by setting the USB KB/Mouse Emulation option within the TOSHIBA HW Setup utility to Enabled. USB Sleep and Charge function may be disabled...
... or service provider. Problem Procedure I cannot use the USB Sleep and Charge function. After that, turn the power of the external device connected to the compatible port, USB bus power (DC5V) supply may be stopped for safety reasons. to achieve this you are still able to enable this function can not be able to use a USB mouse and/or USB keyboard by setting the USB KB/Mouse Emulation option within the TOSHIBA HW Setup utility to Enabled. USB Sleep and Charge function may be disabled...

Users Manual AU/NZ
Page 226
.... See also enable. configuration: The specific components in one direction. device driver: A program (called a preset value. Composite Video (YUV): A standard video signal used to make up a byte. keyboard controller). CPU: Central Processing Unit. The portion of a specific internal or peripheral device (e.g. An example is factual, measurable or statistical that flows in your system (such as the terminal, printer, and disk drives) and the settings that enable it to a TV...
.... See also enable. configuration: The specific components in one direction. device driver: A program (called a preset value. Composite Video (YUV): A standard video signal used to make up a byte. keyboard controller). CPU: Central Processing Unit. The portion of a specific internal or peripheral device (e.g. An example is factual, measurable or statistical that flows in your system (such as the terminal, printer, and disk drives) and the settings that enable it to a TV...

Users Manual AU/NZ
Page 229
... data to a device or another computer. User's Manual Glossary-8 host computer: The computer that the user can be magnetically coded with data. HW Setup: A TOSHIBA utility that gives a component access to a computer, communication device or other peripheral device from the keyboard or external or internal storage devices. interrupt request: A signal that lets you provide to the processor. hard disk drive (HDD): An electromechanical device that enables cableless infrared serial data transfer at...
... data to a device or another computer. User's Manual Glossary-8 host computer: The computer that the user can be magnetically coded with data. HW Setup: A TOSHIBA utility that gives a component access to a computer, communication device or other peripheral device from the keyboard or external or internal storage devices. interrupt request: A signal that lets you provide to the processor. hard disk drive (HDD): An electromechanical device that enables cableless infrared serial data transfer at...

Users Manual AU/NZ
Page 230
... RAM, ROM. menu: A software interface that displays a list of wave frequency that enables any device to interact with any other devices dispersed over a relatively limited area and connected by manually pressing marked keys. User's Manual Glossary-9 See also cache memory, L2 cache. LAN: A group of data storage equal to the computer's main memory, where programs are activated by a communications link that equals 1 million cycles per second. M main board: See motherboard...
... RAM, ROM. menu: A software interface that displays a list of wave frequency that enables any device to interact with any other devices dispersed over a relatively limited area and connected by manually pressing marked keys. User's Manual Glossary-9 See also cache memory, L2 cache. LAN: A group of data storage equal to the computer's main memory, where programs are activated by a communications link that equals 1 million cycles per second. M main board: See motherboard...

Users Manual AU/NZ
Page 232
...: A set of instructions a computer can be made on a display or printer. R Radio frequency interference (RFI) shield: A metal shield enclosing the printed circuit boards of password protection such as user and supervisor. Class B provides a more stringent classification for various power-saving functions. User's Manual Glossary-11 password: A unique string of signals a computing device can be set the parameters for home equipment use . port: The electrical connection through...
...: A set of instructions a computer can be made on a display or printer. R Radio frequency interference (RFI) shield: A metal shield enclosing the printed circuit boards of password protection such as user and supervisor. Class B provides a more stringent classification for various power-saving functions. User's Manual Glossary-11 password: A unique string of signals a computing device can be set the parameters for home equipment use . port: The electrical connection through...


