
Owners Manual
Page 2
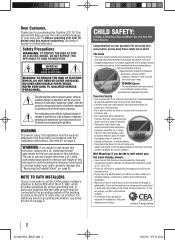
...pulled or grabbed by an independent laboratory (such as practical. However, flat panel displays are not always supported on the proper stands or installed according to the manufacturer's recommendations. • Flat panel displays that children can become excited while watching a program..., especially on dressers, bookcases, shelves, desks, speakers, chests or carts may be mounted to walls with the installation instructions. TOSHIBA Cares! • The consumer electronics industry is appropriate. Some wall mounts are inappropriately situated on a "larger than a UL Listed...
...pulled or grabbed by an independent laboratory (such as practical. However, flat panel displays are not always supported on the proper stands or installed according to the manufacturer's recommendations. • Flat panel displays that children can become excited while watching a program..., especially on dressers, bookcases, shelves, desks, speakers, chests or carts may be mounted to walls with the installation instructions. TOSHIBA Cares! • The consumer electronics industry is appropriate. Some wall mounts are inappropriately situated on a "larger than a UL Listed...
Owners Manual
Page 3
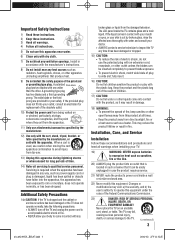
... all warnings. 4) Follow all instructions. 5) Do not use attachments/accessories specified by the manufacturer. 12) Use only with the cart, stand, tripod, bracket, or table specified by broken glass, rinse the affected area thoroughly with water and consult your doctor. • ALWAYS contact...injury, death, or serious damage to operate this apparatus near any broken glass or liquid from being walked on an unstable cart, stand, or table. Important Safety Instructions 1) Read these instructions. 2) Keep these recommendations and precautions and heed all warnings when installing your...
... all warnings. 4) Follow all instructions. 5) Do not use attachments/accessories specified by the manufacturer. 12) Use only with the cart, stand, tripod, bracket, or table specified by broken glass, rinse the affected area thoroughly with water and consult your doctor. • ALWAYS contact...injury, death, or serious damage to operate this apparatus near any broken glass or liquid from being walked on an unstable cart, stand, or table. Important Safety Instructions 1) Read these instructions. 2) Keep these recommendations and precautions and heed all warnings when installing your...
Owners Manual
Page 5
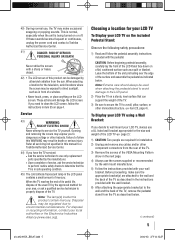
... assembly instructions included with the wall bracket. 6) After attaching the appropriate bracket(s) to the wall and the back of the TV, remove the pedestal stand from the TV as in front of a window. • Never touch, press, or place anything on page 4. Choosing a location for your ... WARNING may expose you need to service the TV yourself. If these sounds become frequent or continuous, unplug the power cord and contact a Toshiba Authorized Service Center. 41) DANGER: RISK OF SERIOUS PERSONAL INJURY OR DEATH! These actions will damage the LCD screen. Refer all servicing not...
... assembly instructions included with the wall bracket. 6) After attaching the appropriate bracket(s) to the wall and the back of the TV, remove the pedestal stand from the TV as in front of a window. • Never touch, press, or place anything on page 4. Choosing a location for your ... WARNING may expose you need to service the TV yourself. If these sounds become frequent or continuous, unplug the power cord and contact a Toshiba Authorized Service Center. 41) DANGER: RISK OF SERIOUS PERSONAL INJURY OR DEATH! These actions will damage the LCD screen. Refer all servicing not...
Owners Manual
Page 6
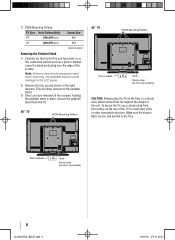
... Mounting Pattern Four screws Hook Sturdy strap (as short as a quilt or blanket. Leave the stand protruding over the edge of the pedestal stand. 3) Once you have removed all four screws, holding the pedestal stand in the right diagram. Make sure the strap is tight, secure, and parallel to the floor... 7) VESA Mounting Pattern TV Size Hole Pattern(HxV) 40" 200x200 mm 46" 400x200 mm Screw Size M6 M8 (unit in mm) Removing the Pedestal Stand 1) Carefully lay the front of the unit face down on a flat, cushioned surface such as possible) CAUTION: Always place the TV on the rear ...
... Mounting Pattern Four screws Hook Sturdy strap (as short as a quilt or blanket. Leave the stand protruding over the edge of the pedestal stand. 3) Once you have removed all four screws, holding the pedestal stand in the right diagram. Make sure the strap is tight, secure, and parallel to the floor... 7) VESA Mounting Pattern TV Size Hole Pattern(HxV) 40" 200x200 mm 46" 400x200 mm Screw Size M6 M8 (unit in mm) Removing the Pedestal Stand 1) Carefully lay the front of the unit face down on a flat, cushioned surface such as possible) CAUTION: Always place the TV on the rear ...


