
Brochure
Page 1
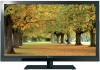
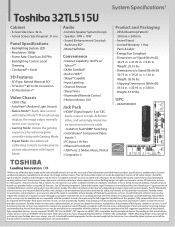
... accurate dimming control for enhanced picture quality and fast-motion AN 240Hz CLEAR SCAN 480Hz QUANTUM BUILT-IN BLACK DVD PDLyAnYaEmRic 3BDUCILLTE-AINR DSCVNADaNtPuL2raA4l0Y3HEDRz CCLLEEAARRSSCCAANN244800HHzzvideoCQL.UEAARNSTCUAMN 4B8L0AHCzK Dynamic 3D QUANTUM BLACK NatuDryanl 3amD ic 3D 4 HDMI®-CEC Internet TV Apps IR Pass-Through EasilyNcatoivne nMeodcet™to take Key Features: Native Mode™ PixelPure 5G Internet TV Apps Resolution +™...
... accurate dimming control for enhanced picture quality and fast-motion AN 240Hz CLEAR SCAN 480Hz QUANTUM BUILT-IN BLACK DVD PDLyAnYaEmRic 3BDUCILLTE-AINR DSCVNADaNtPuL2raA4l0Y3HEDRz CCLLEEAARRSSCCAANN244800HHzzvideoCQL.UEAARNSTCUAMN 4B8L0AHCzK Dynamic 3D QUANTUM BLACK NatuDryanl 3amD ic 3D 4 HDMI®-CEC Internet TV Apps IR Pass-Through EasilyNcatoivne nMeodcet™to take Key Features: Native Mode™ PixelPure 5G Internet TV Apps Resolution +™...
Brochure
Page 2
... work even if your display/peripheral device is HDMI®-CEC compatible. 7VESA® Mounting Pattern If you decide to wall mount your Toshiba television, always use a UL Listed wall bracket appropriate for the size and weight of the television. Care should contact a health care provider before using the 3D function. Use of the information provided herein, product specifications, configurations, system/ component/options availability are not provided by reducing game controller delay with Gaming Mode...
... work even if your display/peripheral device is HDMI®-CEC compatible. 7VESA® Mounting Pattern If you decide to wall mount your Toshiba television, always use a UL Listed wall bracket appropriate for the size and weight of the television. Care should contact a health care provider before using the 3D function. Use of the information provided herein, product specifications, configurations, system/ component/options availability are not provided by reducing game controller delay with Gaming Mode...

Owners Manual
Page 2
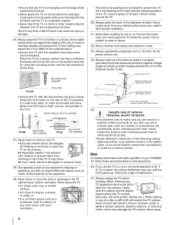
... OF ELECTRIC SHOCK_ DO NOT REMOVE COVER (OR BACK), NO USER=SERVICEABLE PARTS iNSIDE, REFER SERVICING TO QUALIFIED SERVICE PERSONNEL, The lightning flash with the installation instructions. Flatpanel displays can becomeexcited while watching a program, especiallyon a "larger than a UL Listed wall bracket appropriate for the size and weight of two people are not always supportedon the proper stands or installed accordingto the manufacturer'srecommendations. =Flat paneldisplays that has been recommendedby...
... OF ELECTRIC SHOCK_ DO NOT REMOVE COVER (OR BACK), NO USER=SERVICEABLE PARTS iNSIDE, REFER SERVICING TO QUALIFIED SERVICE PERSONNEL, The lightning flash with the installation instructions. Flatpanel displays can becomeexcited while watching a program, especiallyon a "larger than a UL Listed wall bracket appropriate for the size and weight of two people are not always supportedon the proper stands or installed accordingto the manufacturer'srecommendations. =Flat paneldisplays that has been recommendedby...
Owners Manual
Page 4
... cloths, which may vary until the LCD warms up static charges (see Section 810 of the TV. Harsh rubbing or use the TV in cabinet, or any other electrical circuits. * Never attempt to install any home theater component connected to help maintain reliable operation *NeveprlacteheTVontalflurnitu(rfeoer xample, of the television at least 4 (four) inches cupboarodrbsookcasweisth) oaunt choribnogththe around the...
... cloths, which may vary until the LCD warms up static charges (see Section 810 of the TV. Harsh rubbing or use the TV in cabinet, or any other electrical circuits. * Never attempt to install any home theater component connected to help maintain reliable operation *NeveprlacteheTVontalflurnitu(rfeoer xample, of the television at least 4 (four) inches cupboarodrbsookcasweisth) oaunt choribnogththe around the...
Owners Manual
Page 5
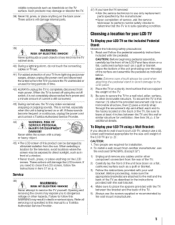
... blanket. 3) Follow the instructions provided with the TV between the TV and the wall or similar structure for installation. 2. Two people are attached to the LCD panel. 2) Place the TV on the back of the TV. To install a wall-mount from main power. When selecting a location for the television, avoid locations where the screen may make sure the appropriate bracket(s) are required for ventilation...
... blanket. 3) Follow the instructions provided with the TV between the TV and the wall or similar structure for installation. 2. Two people are attached to the LCD panel. 2) Place the TV on the back of the TV. To install a wall-mount from main power. When selecting a location for the television, avoid locations where the screen may make sure the appropriate bracket(s) are required for ventilation...

Owners Manual
Page 10
... input to view 41 Using closed captions 42 Analog CC mode 42 Digital CC settings 42 Setting the PIN code 43 Entering a new PIN code 43 Changing or deleting your PIN code 43 Forgotten PIN code 43 Using parental controls 43 Blocking TV programs and movies by rating (V-Chip 43 Downloading an additional rating system ........ 44 Displaying ratings 45 Unlocking programs 45 Locking specific channels 45 Locking video input 45 Setting a time limit for games 46 Locking the control panel 46 Using HDMF '_CEC Control 46 Controlling HDMI...
... input to view 41 Using closed captions 42 Analog CC mode 42 Digital CC settings 42 Setting the PIN code 43 Entering a new PIN code 43 Changing or deleting your PIN code 43 Forgotten PIN code 43 Using parental controls 43 Blocking TV programs and movies by rating (V-Chip 43 Downloading an additional rating system ........ 44 Displaying ratings 45 Unlocking programs 45 Locking specific channels 45 Locking video input 45 Setting a time limit for games 46 Locking the control panel 46 Using HDMF '_CEC Control 46 Controlling HDMI...

Owners Manual
Page 12
... watching to a whole new dimension, and let yourself be blown away with 1080p input support (_#r' p. 17). • HDMI capabilities ARC (Audio Return Channel) enables the audio signal of the buttons on the remote control, installing the batteries, and preparing to operate your other device(s). 6 AFTER connecting all cables and devices, plug in WLAN Allows the television to access your home wireless network without an external Dual Band WLAN Adapter. • Yahoo! ®TV...
... watching to a whole new dimension, and let yourself be blown away with 1080p input support (_#r' p. 17). • HDMI capabilities ARC (Audio Return Channel) enables the audio signal of the buttons on the remote control, installing the batteries, and preparing to operate your other device(s). 6 AFTER connecting all cables and devices, plug in WLAN Allows the television to access your home wireless network without an external Dual Band WLAN Adapter. • Yahoo! ®TV...

Owners Manual
Page 16
... to channel 3 or 4 (the channel the cable box output is prohibited under the Copyright Laws of television programs, videotapes, DVDs, and other countries, and may subject you to change channels. Use the satellite receiver's controls to civil and criminal liability. 16 The unauthorized recording, use, distribution, or revision of the United States and other materials is set to select ColorStream HD1. To view the antenna or cable signal: Press...
... to channel 3 or 4 (the channel the cable box output is prohibited under the Copyright Laws of television programs, videotapes, DVDs, and other countries, and may subject you to change channels. Use the satellite receiver's controls to civil and criminal liability. 16 The unauthorized recording, use, distribution, or revision of the United States and other materials is set to select ColorStream HD1. To view the antenna or cable signal: Press...
Owners Manual
Page 25
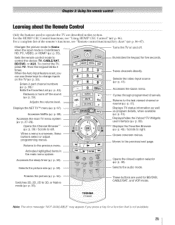
... Control" (_#r' p. 46). When a menu is ColorStream HD, PC, VIDEO, or HDMI Ce(_ p. 55). Accesses the Quick menu. -- Sets the remote control mode to change inputs on and off the sound (_ p. 59). When the Auto Input feature is set, you can use these -buttons select or adjust programming menus. Opens the Channel Browser ''_ (_ p. 39) / Scrolls to the last viewed channel or source (_ p. 41). Cycles through programmed channels. Adjusts the volume level. Accesses Netfiix (_ p. 68). as well -- To control the TV, press TV. Displays...
... Control" (_#r' p. 46). When a menu is ColorStream HD, PC, VIDEO, or HDMI Ce(_ p. 55). Accesses the Quick menu. -- Sets the remote control mode to change inputs on and off the sound (_ p. 59). When the Auto Input feature is set, you can use these -buttons select or adjust programming menus. Opens the Channel Browser ''_ (_ p. 39) / Scrolls to the last viewed channel or source (_ p. 41). Cycles through programmed channels. Adjusts the volume level. Accesses Netfiix (_ p. 68). as well -- To control the TV, press TV. Displays...
Owners Manual
Page 29
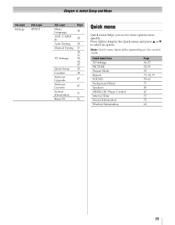
... mode. 3D Settings PICTURE Picture Mode Repeat SOUND Background Music Speakers HDMI-CEC Player Control Interval Time Device Information Wireless Information 36-37 52-59 55 73, 74, 75 59-61 75 48 47 75 72 64 29 Press _ to display the Quick menu and press • or • to select an option. Settings SETUP Menu 30 Language ANT/CABLE 30 In Auto Tuning 30 Manual Tuning 31 30, 31, TV Settings...
... mode. 3D Settings PICTURE Picture Mode Repeat SOUND Background Music Speakers HDMI-CEC Player Control Interval Time Device Information Wireless Information 36-37 52-59 55 73, 74, 75 59-61 75 48 47 75 72 64 29 Press _ to display the Quick menu and press • or • to select an option. Settings SETUP Menu 30 Language ANT/CABLE 30 In Auto Tuning 30 Manual Tuning 31 30, 31, TV Settings...
Owners Manual
Page 30
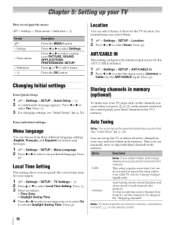
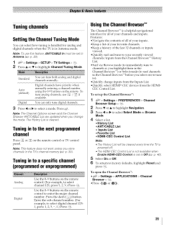
... button Location You can set up the TV to select the input source (Antenna or Cable) for the TV location. Storingchannelsin memory (optional) To make sure your cable TV service's lineup changes significantly. AutoTuning Note: You must set up the antenna/cable input source first. Auto tuning retains stored channels and stores newly found channels into 1YlelYlory. Press ggi_ ANT/CABLEIN This setting configures the antenna input source for the ANT/CABLE terminal. 1 _.0 > Settings > SETUP > ANT/CABLE...
... button Location You can set up the TV to select the input source (Antenna or Cable) for the TV location. Storingchannelsin memory (optional) To make sure your cable TV service's lineup changes significantly. AutoTuning Note: You must set up the antenna/cable input source first. Auto tuning retains stored channels and stores newly found channels into 1YlelYlory. Press ggi_ ANT/CABLEIN This setting configures the antenna input source for the ANT/CABLE terminal. 1 _.0 > Settings > SETUP > ANT/CABLE...
Owners Manual
Page 31
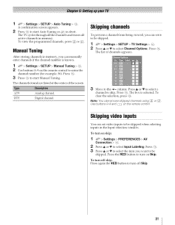
... to turn on the remote control Skipping video inputs You can set it to enter the channel number (for example, 56). The list of the screen. To tum off skip: Press again the RED button to the _ column. Use buttons 0-9 and [_ on Skip. ATV DTV Analog channel. The box is known. 1 ;_a0> Settings > SETUP > Manual Tuning > @. 2 Use buttons 0-9 on skip: 1 44. To view the programmed channels, press _ or _,". To turn on the remote control to be skipped. 1 4;.0> Settings A confirmation > SETUP > Auto...
... to turn on the remote control Skipping video inputs You can set it to enter the channel number (for example, 56). The list of the screen. To tum off skip: Press again the RED button to the _ column. Use buttons 0-9 and [_ on Skip. ATV DTV Analog channel. The box is known. 1 ;_a0> Settings > SETUP > Manual Tuning > @. 2 Use buttons 0-9 on skip: 1 44. To view the programmed channels, press _ or _,". To turn on the remote control to be skipped. 1 4;.0> Settings A confirmation > SETUP > Auto...
Owners Manual
Page 39
... digital channel 1251, press 1, 2, 5, -, 1.) Press (o_. Press the dash ( FTq) button. Enter the sub-channel number. (For example, to factory defaults, highlight Reset and press _. Digital channels have priority when manually entering a chmmel number using the 0-9 buttons on the remote control. (For example, to select a mode. Note: The Channel Options screen and the Channel Browser ANT/CABLE List are updated when you change inputs from the Inputs List. ° Quickly select HDMI¢_ CEC devices from the Channel Browser _MHistory List...
... digital channel 1251, press 1, 2, 5, -, 1.) Press (o_. Press the dash ( FTq) button. Enter the sub-channel number. (For example, to factory defaults, highlight Reset and press _. Digital channels have priority when manually entering a chmmel number using the 0-9 buttons on the remote control. (For example, to select a mode. Note: The Channel Options screen and the Channel Browser ANT/CABLE List are updated when you change inputs from the Inputs List. ° Quickly select HDMI¢_ CEC devices from the Channel Browser _MHistory List...
Owners Manual
Page 43
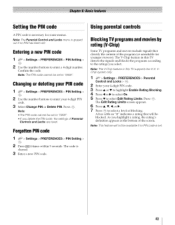
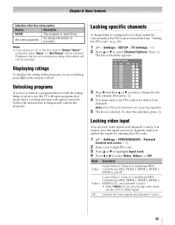
... TV programs and movies include signals that will not be set . Setting the PIN code A PIN code is necessary for younger viewers). The code is cleared. 3 Enter a new PIN code. Confirm the code. The Edit Rating Limits screen appears. 6 Press or •. 7 Press '_) to enter a 4-digit number. Entering a new PIN code 1 ¢€_u> Settings > PREFERENCES > PIN Setting > _o_. 2 Use the number buttons to select a level of Parental Controls and Locks...
... TV programs and movies include signals that will not be set . Setting the PIN code A PIN code is necessary for younger viewers). The code is cleared. 3 Enter a new PIN code. Confirm the code. The Edit Rating Limits screen appears. 6 Press or •. 7 Press '_) to enter a 4-digit number. Entering a new PIN code 1 ¢€_u> Settings > PREFERENCES > PIN Setting > _o_. 2 Use the number buttons to select a level of Parental Controls and Locks...
Owners Manual
Page 45
... box is selected. You cannot view the input sources or channels until you unlock the inputs by entering the PIN code. 1 _.o > Settings > PREFERENCES Control and Locks > _o_. 2 Enter you," 4-digit PIN code. > Parental 3 Press • or • to highlight Input Lock. 4 Press _ or • to a program that exceeds the rating limits you are playing video tapes via the ANT/CABLE input. Note: If no PIN code has been set , the TV will enter program lock mode...
... box is selected. You cannot view the input sources or channels until you unlock the inputs by entering the PIN code. 1 _.o > Settings > PREFERENCES Control and Locks > _o_. 2 Enter you," 4-digit PIN code. > Parental 3 Press • or • to highlight Input Lock. 4 Press _ or • to a program that exceeds the rating limits you are playing video tapes via the ANT/CABLE input. Note: If no PIN code has been set , the TV will enter program lock mode...
Owners Manual
Page 48
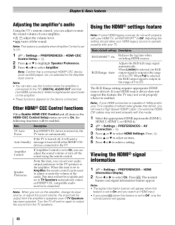
... switching HDMI sources. TV Auto Power Auto Standby AComnptrlioflier Speaker Preference If an HDMI ¢*CEC device is selected for the Ampfifier input source. If your TV. Select a digital audio input mode on the amplifier. • These functions depend on the amplifier, change its input source, or adjust the sound volume, the sound will need a High Speed HDMI ® cable. Turn the TV off the sound using the remote control. Note: Confirm that a connected HDMI ® CEC device (such as DVD player, etc.) is turned...
... switching HDMI sources. TV Auto Power Auto Standby AComnptrlioflier Speaker Preference If an HDMI ¢*CEC device is selected for the Ampfifier input source. If your TV. Select a digital audio input mode on the amplifier. • These functions depend on the amplifier, change its input source, or adjust the sound volume, the sound will need a High Speed HDMI ® cable. Turn the TV off the sound using the remote control. Note: Confirm that a connected HDMI ® CEC device (such as DVD player, etc.) is turned...
Owners Manual
Page 51
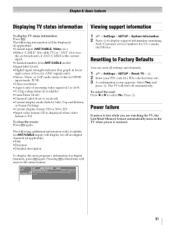
... 1 _,o > Settings > SETUP > System Information. 2 Press _o_to display support information containing Web/Customer service numbers for digital channels, press _ again. for off automatically. Resetting to Factory Defaults You can reset all settings and channels. 1 _.o > Settings > SETUP > Reset W > (L_. 2 Enter your PIN code (if a PIN code has been set or received) • Current display mode (Side by Side, Top and Bottom, or Frame Packing) • Current display format (3D or 3D to select No. Pressing _ a third time will turn...
... 1 _,o > Settings > SETUP > System Information. 2 Press _o_to display support information containing Web/Customer service numbers for digital channels, press _ again. for off automatically. Resetting to Factory Defaults You can reset all settings and channels. 1 _.o > Settings > SETUP > Reset W > (L_. 2 Enter your PIN code (if a PIN code has been set or received) • Current display mode (Side by Side, Top and Bottom, or Frame Packing) • Current display format (3D or 3D to select No. Pressing _ a third time will turn...

Owners Manual
Page 78
... using a wired network connection, check to ensure the LAN cables are connected properly (_-_ p. 23). * Ensure the modem and router power cords are used . * When the connected HDMI® CECdevice does not work properlywiththe latestHDMITVproductsdueto newstandardsT. Rating blocking (V-Chip) problems * If you must manually set up correctly. After 1 minute, plug the power cord in and the devices are on enabling DHCP. Network Setup fails (Auto) * Check to ensure proper operation of the connected HDMI...
... using a wired network connection, check to ensure the LAN cables are connected properly (_-_ p. 23). * Ensure the modem and router power cords are used . * When the connected HDMI® CECdevice does not work properlywiththe latestHDMITVproductsdueto newstandardsT. Rating blocking (V-Chip) problems * If you must manually set up correctly. After 1 minute, plug the power cord in and the devices are on enabling DHCP. Network Setup fails (Auto) * Check to ensure proper operation of the connected HDMI...
Owners Manual
Page 97
... normal service is not covered under this LCD Television and connected equipment; This includes wall mounts, custom cabinets and other proof of purchase including the serial number for set installation, setup, adjustment of customer controls, and installation or repair of this limited warranty. or to units that is refurbished and resold is not covered under the U.S. LimitedOne (1}Year Warranty on our Customer Support Web site at www.support.toshiba.com...
... normal service is not covered under this LCD Television and connected equipment; This includes wall mounts, custom cabinets and other proof of purchase including the serial number for set installation, setup, adjustment of customer controls, and installation or repair of this limited warranty. or to units that is refurbished and resold is not covered under the U.S. LimitedOne (1}Year Warranty on our Customer Support Web site at www.support.toshiba.com...
Owners Manual
Page 101
... 67 Network Setup 63 O On Timer 49 P Panel Lock 46 PC Audio 49 PC connection 22 PC settings 49 Picture mode 55 Picture Position 54 Picture quality 55 Picture size 52 PIN code 43 R Remote control Battery installation 24 Buttons 25 Device codes table 91 Functional key chart 86 Programming 88 Reset TV 51 RGB Filter 58 RGB Range 48 S SAP 59 Shared inputs 32 Sleep Timer 50 Software keyboard 66 Static Gamma 56 Stereo sound 59 Support information...
... 67 Network Setup 63 O On Timer 49 P Panel Lock 46 PC Audio 49 PC connection 22 PC settings 49 Picture mode 55 Picture Position 54 Picture quality 55 Picture size 52 PIN code 43 R Remote control Battery installation 24 Buttons 25 Device codes table 91 Functional key chart 86 Programming 88 Reset TV 51 RGB Filter 58 RGB Range 48 S SAP 59 Shared inputs 32 Sleep Timer 50 Software keyboard 66 Static Gamma 56 Stereo sound 59 Support information...


