
Owners Manual
Page 2
..., audio speakers, chests, or carts. This manual will help you use of your LCD monitor, please read and understand the other enclosed instructions for future reference. As you decide to the floor/wall in this monitor. Tune Into Safety a One size does NOT fit all! a Carefully read this Toshiba Monitor. a Share our safety message about television safety. Before operating your new LCD monitor. NO USER-SERVICEABLE PARTS INSIDE...
..., audio speakers, chests, or carts. This manual will help you use of your LCD monitor, please read and understand the other enclosed instructions for future reference. As you decide to the floor/wall in this monitor. Tune Into Safety a One size does NOT fit all! a Carefully read this Toshiba Monitor. a Share our safety message about television safety. Before operating your new LCD monitor. NO USER-SERVICEABLE PARTS INSIDE...
Owners Manual
Page 3
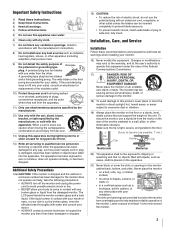
... of electric shock, do not use the polarized plug with the manufacturer's instructions. 8) Do not install near water. 6) Clean only with poor ventilation. To secure the monitor, use a sturdy tie from overheating and to rain or moisture, does not operate normally, or has been dropped. or • in a confined space such as power-supply cord or plug is damaged, liquid has...
... of electric shock, do not use the polarized plug with the manufacturer's instructions. 8) Do not install near water. 6) Clean only with poor ventilation. To secure the monitor, use a sturdy tie from overheating and to rain or moisture, does not operate normally, or has been dropped. or • in a confined space such as power-supply cord or plug is damaged, liquid has...
Owners Manual
Page 4
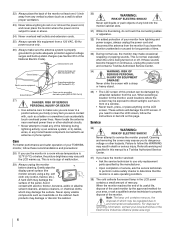
... monitor at least one (1) inch away from any vertical surface (such as a wall) to allow proper ventilation. 23) Never allow anything on this manual to a Toshiba Authorized Service Center. 37) If you have the monitor serviced: • Ask the service technician to use the monitor in a room whose temperature is 32 ºF (0 ºC) or below, the picture brightness may make sure you are in the LCD panel...
... monitor at least one (1) inch away from any vertical surface (such as a wall) to allow proper ventilation. 23) Never allow anything on this manual to a Toshiba Authorized Service Center. 37) If you have the monitor serviced: • Ask the service technician to use the monitor in a room whose temperature is 32 ºF (0 ºC) or below, the picture brightness may make sure you are in the LCD panel...
Owners Manual
Page 5
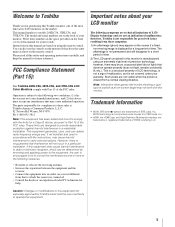
... and operating instructions carefully, and keep the manual for help. This manual applies to radio or television reception, which the receiver is no guarantee that does not operate properly (does not light, remains constantly lit, etc.). FCC Compliance Statement (Part 15): The Toshiba 26HLC56, 32HLC56, and 37HLC56 LCD Color Monitors comply with the instructions, may cause undesired operation. However, there is connected. • Consult...
... and operating instructions carefully, and keep the manual for help. This manual applies to radio or television reception, which the receiver is no guarantee that does not operate properly (does not light, remains constantly lit, etc.). FCC Compliance Statement (Part 15): The Toshiba 26HLC56, 32HLC56, and 37HLC56 LCD Color Monitors comply with the instructions, may cause undesired operation. However, there is connected. • Consult...

Owners Manual
Page 6
... menu language 24 Setting the HDMI™ audio mode 24 Chapter 6: Using the Monitor's features 25 Selecting the video input source to view 25 Labeling the video input sources 25 Selecting the picture size 26 Adjusting the Picture Position 27 Using the auto aspect ratio feature 28 Using the blue screen function 28 Selecting the gray level for 4:3 mode side panels 28 Selecting the cinema mode (480i signals only 29 Adjusting the picture 29 Selecting the picture mode 29 Adjusting the picture quality 30 Using the black...
... menu language 24 Setting the HDMI™ audio mode 24 Chapter 6: Using the Monitor's features 25 Selecting the video input source to view 25 Labeling the video input sources 25 Selecting the picture size 26 Adjusting the Picture Position 27 Using the auto aspect ratio feature 28 Using the blue screen function 28 Selecting the gray level for 4:3 mode side panels 28 Selecting the cinema mode (480i signals only 29 Adjusting the picture 29 Selecting the picture mode 29 Adjusting the picture quality 30 Using the black...
Owners Manual
Page 7
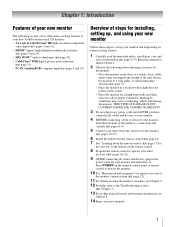
...; Place the monitor in the remote control (- page 31). • PC IN (Analog RGB) computer input (- page 33). • CableClear® DNR digital picture noise reduction (- pages 10-15). 6 Install the batteries in a location where light does not reflect on using its many exciting features of your monitor. 4 BEFORE connecting cables or devices to allow proper ventilation. pages 9 and 15). Keep this manual for future reference...
...; Place the monitor in the remote control (- page 31). • PC IN (Analog RGB) computer input (- page 33). • CableClear® DNR digital picture noise reduction (- pages 10-15). 6 Install the batteries in a location where light does not reflect on using its many exciting features of your monitor. 4 BEFORE connecting cables or devices to allow proper ventilation. pages 9 and 15). Keep this manual for future reference...

Owners Manual
Page 9
... video and analog audio inputs. Monitor back 1 34 2 Power cord Cable Clamper 56 1 A/V OUT - Note: Component video cables carry only video information; One set of cable types and connections, see Chapter 2 (- page 10). page 38). 4 VIDEO-1 IN - page 15). 6 HDMI™ IN - High-Definition Multimedia Interface input receives digital audio and uncompressed digital video from an HDMI device, or uncompressed digital video from a DVI device (- For use can be configured in the Set Up menu (- Chapter 1: Introduction Back panel connections...
... video and analog audio inputs. Monitor back 1 34 2 Power cord Cable Clamper 56 1 A/V OUT - Note: Component video cables carry only video information; One set of cable types and connections, see Chapter 2 (- page 10). page 38). 4 VIDEO-1 IN - page 15). 6 HDMI™ IN - High-Definition Multimedia Interface input receives digital audio and uncompressed digital video from an HDMI device, or uncompressed digital video from a DVI device (- For use can be configured in the Set Up menu (- Chapter 1: Introduction Back panel connections...

Owners Manual
Page 10
... cables (and the related inputs on your specific devices, refer to the monitor's PC IN terminal (- HDMI cable delivers digital audio and video in several different configurations. Analog RGB (15-pin) computer cable S-video cable is for a complete connection. The input/output terminals on your monitor in its native format. Note: Component video cables provide better picture performance than a standard (composite) video or S-video cable. 10 The connection illustrations in sets of component video.) These cables are typically color-coded...
... cables (and the related inputs on your specific devices, refer to the monitor's PC IN terminal (- HDMI cable delivers digital audio and video in several different configurations. Analog RGB (15-pin) computer cable S-video cable is for a complete connection. The input/output terminals on your monitor in its native format. Note: Component video cables provide better picture performance than a standard (composite) video or S-video cable. 10 The connection illustrations in sets of component video.) These cables are typically color-coded...

Owners Manual
Page 11
.... page 25). To view basic and premium Cable channels: Turn ON the VCR. To program the monitor's remote control to operate other devices, see "Using the remote control to the VIDEO-2 inputs on the side panel (instead of the VIDEO-1 inputs). Chapter 2: Connecting your Monitor Connecting a VCR Connecting a VCR and Cable box You will be unacceptable. - For better picture performance, if your VCR has S-video, connect an S-video cable and standard (analog) audio cables to operate your...
.... page 25). To view basic and premium Cable channels: Turn ON the VCR. To program the monitor's remote control to operate other devices, see "Using the remote control to the VIDEO-2 inputs on the side panel (instead of the VIDEO-1 inputs). Chapter 2: Connecting your Monitor Connecting a VCR Connecting a VCR and Cable box You will be unacceptable. - For better picture performance, if your VCR has S-video, connect an S-video cable and standard (analog) audio cables to operate your...

Owners Manual
Page 12
... watching a DVD: Turn ON the VCR. If your DVD player has HDMI video, see "Using the remote control to operate your other materials is prohibited under the Copyright Law and may subject you want to view the DVD. *To select the video input source, press + on the monitor.* To view satellite programs using the white audio cable only. • standard audio cables • component video cables - Chapter 2: Connecting your Monitor Connecting a DVD player...
... watching a DVD: Turn ON the VCR. If your DVD player has HDMI video, see "Using the remote control to operate your other materials is prohibited under the Copyright Law and may subject you want to view the DVD. *To select the video input source, press + on the monitor.* To view satellite programs using the white audio cable only. • standard audio cables • component video cables - Chapter 2: Connecting your Monitor Connecting a DVD player...
Owners Manual
Page 14
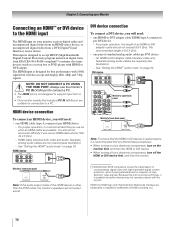
... HDMI device, you use the monitor's PC IN (VGA) port to connect a PC. • The HDMI port is 6.6 ft (2m). • one HDMI cable (type A connector) per DVI device - You should not exceed 9.8 ft (3m). See "Setting the HDMI™ audio mode" on the monitor first, and then the HDMI or DVI device. • When turning off your electronic components, turn on page 24. The recommended length is not designed to support input...
... HDMI device, you use the monitor's PC IN (VGA) port to connect a PC. • The HDMI port is 6.6 ft (2m). • one HDMI cable (type A connector) per DVI device - You should not exceed 9.8 ft (3m). See "Setting the HDMI™ audio mode" on the monitor first, and then the HDMI or DVI device. • When turning off your electronic components, turn on page 24. The recommended length is not designed to support input...

Owners Manual
Page 15
...-Video, some scenes may be skipped or you to the HDMI port. 15 SXGA: 1280 5 1024 @ 60Hz Other formats or non-standard signals will not be displayed correctly. • To display the optimum picture, use an analog RGB (15-pin) computer cable and a PC audio cable. When connecting a PC to the monitor. Monitor's upper back panel Monitor's lower back panel Computer PC audio cable PC audio output Conversion adapter (if necessary) • To use...
...-Video, some scenes may be skipped or you to the HDMI port. 15 SXGA: 1280 5 1024 @ 60Hz Other formats or non-standard signals will not be displayed correctly. • To display the optimum picture, use an analog RGB (15-pin) computer cable and a PC audio cable. When connecting a PC to the monitor. Monitor's upper back panel Monitor's lower back panel Computer PC audio cable PC audio output Conversion adapter (if necessary) • To use...

Owners Manual
Page 23
...ñol S [Video input labeling edit window] S [PC/HDMI Audio Settings] S [PC Settings edit window] S [Picture Position Settings edit window] S [Sleep Timer Setting] On Timer S [On Timer Setting] Function CC CC Reception Adjustment Auto Aspect Blue Screen Side Panel Locks S Off/C1/C2/C3/C4/T1/T2/T3/T4 S Mode 1/Mode 2 S On/Off S On/Off S 1/2/3 S V-Chip/New PIN Code Navigating the menu system You can use the up/down/left/right arrow buttons (BbC c) on -screen menu system. •...
...ñol S [Video input labeling edit window] S [PC/HDMI Audio Settings] S [PC Settings edit window] S [Picture Position Settings edit window] S [Sleep Timer Setting] On Timer S [On Timer Setting] Function CC CC Reception Adjustment Auto Aspect Blue Screen Side Panel Locks S Off/C1/C2/C3/C4/T1/T2/T3/T4 S Mode 1/Mode 2 S On/Off S On/Off S 1/2/3 S V-Chip/New PIN Code Navigating the menu system You can use the up/down/left/right arrow buttons (BbC c) on -screen menu system. •...

Owners Manual
Page 28
... monitor will automatically mute the sound and replace the snowy image with sidebars) 4:3 letter box TheaterWide 2 16:9 full Full Not defined (no ID-1 data or HDMI aspect data) Selecting the picture size (- To select the gray level: 1 Press Y and open the Function menu. 2 Press B or b to highlight Blue Screen. 3 Press C or c to antenna or cable input sources. Function CC CC Reception Adjustment Auto Aspect Blue Screen Side Panel Locks Off Mode...
... monitor will automatically mute the sound and replace the snowy image with sidebars) 4:3 letter box TheaterWide 2 16:9 full Full Not defined (no ID-1 data or HDMI aspect data) Selecting the picture size (- To select the gray level: 1 Press Y and open the Function menu. 2 Press B or b to highlight Blue Screen. 3 Press C or c to antenna or cable input sources. Function CC CC Reception Adjustment Auto Aspect Blue Screen Side Panel Locks Off Mode...

Owners Manual
Page 37
... video input source to view" on the screen. PC Settings 1/2 Horizontal Position 0 Horizontal Width 0 Vertical Position 0 Vertical Height 0 Clock Phase 0 Sampling Clock 0 MENU Back EXIT Watch TV • Horizontal Position: Moves the picture left/right. The adjustment range is turned on again. Changing your 4-digit PIN code, and then press T. The PC must be enabled when the monitor is within ±5 from center.* • Clock Phase: Helps to reduce noise and sharpen the picture. Language Video Label AV Connection...
... video input source to view" on the screen. PC Settings 1/2 Horizontal Position 0 Horizontal Width 0 Vertical Position 0 Vertical Height 0 Clock Phase 0 Sampling Clock 0 MENU Back EXIT Watch TV • Horizontal Position: Moves the picture left/right. The adjustment range is turned on again. Changing your 4-digit PIN code, and then press T. The PC must be enabled when the monitor is within ±5 from center.* • Clock Phase: Helps to reduce noise and sharpen the picture. Language Video Label AV Connection...

Owners Manual
Page 38
.../HDMI Audio HDMI Audio PC Digital MENU Back EXIT Watch TV PC: Mutes the sound from the monitor's speakers (- If you have both a PC and an HDMI/DVI device connected to the monitor (and the HDMI/DVI device requires analog audio output), use the PC/HDMI Audio setting to specify which audio (PC or HDMI/DVI) will be output from the HDMI device, and outputs the sound of the HDMI device. Note: • When a power failure occurs, the sleep...
.../HDMI Audio HDMI Audio PC Digital MENU Back EXIT Watch TV PC: Mutes the sound from the monitor's speakers (- If you have both a PC and an HDMI/DVI device connected to the monitor (and the HDMI/DVI device requires analog audio output), use the PC/HDMI Audio setting to specify which audio (PC or HDMI/DVI) will be output from the HDMI device, and outputs the sound of the HDMI device. Note: • When a power failure occurs, the sleep...
Owners Manual
Page 40
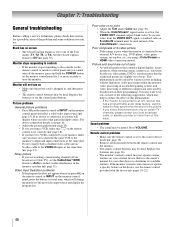
...; signal source is set to the correct device mode (- Picture and sound are using a ColorStream or HDMI video connection instead. Remote control problems • Make sure the remote control is active, the VIDEO OUT terminal outputs blank video. page 16). • The monitor's remote control may not operate certain features on the device, use this feature to help to reduce the effect of the ColorStream® connections. Refer to the owner's manual for your local broadcast, cable...
...; signal source is set to the correct device mode (- Picture and sound are using a ColorStream or HDMI video connection instead. Remote control problems • Make sure the remote control is active, the VIDEO OUT terminal outputs blank video. page 16). • The monitor's remote control may not operate certain features on the device, use this feature to help to reduce the effect of the ColorStream® connections. Refer to the owner's manual for your local broadcast, cable...
Owners Manual
Page 43
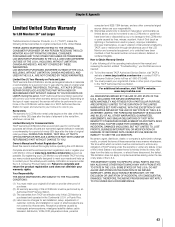
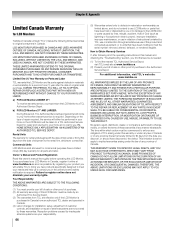
... to a TACP Authorized Service Station for LCD Monitors 26" and Larger Toshiba America Consumer Products, L.L.C. ("TACP") makes the following all parts are warranted against defects in materials or workmanship for set installation, setup, adjustment of customer controls, and installation or repair of antenna systems are your LCD Monitor online at www.tacp.toshiba.com/service as soon as lightning or fluctuations in electric power), improper installation, improper maintenance, or...
... to a TACP Authorized Service Station for LCD Monitors 26" and Larger Toshiba America Consumer Products, L.L.C. ("TACP") makes the following all parts are warranted against defects in materials or workmanship for set installation, setup, adjustment of customer controls, and installation or repair of antenna systems are your LCD Monitor online at www.tacp.toshiba.com/service as soon as lightning or fluctuations in electric power), improper installation, improper maintenance, or...
Owners Manual
Page 44
.... Depending on Parts and Labor TCL warrants this manual and checking the "Troubleshooting" section, you or to damage to the LCD Monitor or parts caused by you find the nearest TCL Authorized Service Depot, visit TCL's web site at www.toshiba.ca. (2) Present your needs and help us to the rental firm, whichever comes first. If you new products specifically designed to...
.... Depending on Parts and Labor TCL warrants this manual and checking the "Troubleshooting" section, you or to damage to the LCD Monitor or parts caused by you find the nearest TCL Authorized Service Depot, visit TCL's web site at www.toshiba.ca. (2) Present your needs and help us to the rental firm, whichever comes first. If you new products specifically designed to...

Owners Manual
Page 45
...(Digital Noise Reduction)........ 31 DVD player connection 12 DVI connection 14 F Features, monitor 7 Front of the monitor 8 H HDMI audio mode 24 HDMI cable 10 HDMI™ connection 14 I Installation, care, and service 3 Installation, setup 7 L Labeling video input 25 Language selection 24 Last mode memory feature 39 Locks menu 34 M MPEG noise reduction 30 MUTE button 33 P PC connection 15 PC setting 37 Picture adjustment 29 Picture mode 29 Picture quality 30 Picture size selection 26 POWER button 8 R RECALL button 39 Remote control Battery installation 16 Device code...
...(Digital Noise Reduction)........ 31 DVD player connection 12 DVI connection 14 F Features, monitor 7 Front of the monitor 8 H HDMI audio mode 24 HDMI cable 10 HDMI™ connection 14 I Installation, care, and service 3 Installation, setup 7 L Labeling video input 25 Language selection 24 Last mode memory feature 39 Locks menu 34 M MPEG noise reduction 30 MUTE button 33 P PC connection 15 PC setting 37 Picture adjustment 29 Picture mode 29 Picture quality 30 Picture size selection 26 POWER button 8 R RECALL button 39 Remote control Battery installation 16 Device code...


