User Guide
Page 3
... to be situated away from the wall outlet before installation and use can result in a risk of the type described in the instruction and service manuals. 1. Do not use attachments not recommended by the product manufacturer as marked on or pinched by qualified service personnel when: A. Object and Liquid Entry - Attachments...
... to be situated away from the wall outlet before installation and use can result in a risk of the type described in the instruction and service manuals. 1. Do not use attachments not recommended by the product manufacturer as marked on or pinched by qualified service personnel when: A. Object and Liquid Entry - Attachments...

Operation Manual
Page 3
... operating instructions carefully before cleaning. The unit should be used near a bathtub, washbowl, kitchen sink, laundry tub, swimming pool or in the instruction and service manuals. 1. Use a damp cloth for future reference. For added protection for this plug will prevent damage to the product due to lightning and power-line surges...
... operating instructions carefully before cleaning. The unit should be used near a bathtub, washbowl, kitchen sink, laundry tub, swimming pool or in the instruction and service manuals. 1. Use a damp cloth for future reference. For added protection for this plug will prevent damage to the product due to lightning and power-line surges...
Operation Manual
Page 7
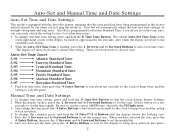
... seven zones to select your time setting, press and hold the J Time Set Button so that the time and date have set the month/day. 6. Manual Time and Date Settings 1. Be sure to set when you have selected the year, press the 4 Enter Button, then use the 1 Reverse and 6 Forward... Standard Time Z-06 Alaskan Standard Time Z-07 Hawaiian Standard Time 3. To change the calendar, press and hold the 8 Time Zone Button. Auto-Set and Manual Time and Date Settings Auto-Set Time and Date Settings This model is equipped with the Auto-Set feature, meaning that the clock display begins...
... seven zones to select your time setting, press and hold the J Time Set Button so that the time and date have set the month/day. 6. Manual Time and Date Settings 1. Be sure to set when you have selected the year, press the 4 Enter Button, then use the 1 Reverse and 6 Forward... Standard Time Z-06 Alaskan Standard Time Z-07 Hawaiian Standard Time 3. To change the calendar, press and hold the 8 Time Zone Button. Auto-Set and Manual Time and Date Settings Auto-Set Time and Date Settings This model is equipped with the Auto-Set feature, meaning that the clock display begins...
Operation Manual
Page 8
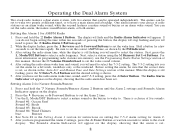
...or 6 Forward Button to set the wake sound volume. 4. After you have a main alarm and a backup. One alarm features your choice of this manual. Hold a button for AM/FM Radio 1. Be sure to select a radio frequency. The Radio Alarm Indicator will need to select the 7-5-2 setting. ...See Note #4 in the "Auto-Set" and Manual Time and Date Settings section of pressing the button, the display will appear. Press and hold the 2 Radio Alarm 1 Button. Operating the Dual...
...or 6 Forward Button to set the wake sound volume. 4. After you have a main alarm and a backup. One alarm features your choice of this manual. Hold a button for AM/FM Radio 1. Be sure to select a radio frequency. The Radio Alarm Indicator will need to select the 7-5-2 setting. ...See Note #4 in the "Auto-Set" and Manual Time and Date Settings section of pressing the button, the display will appear. Press and hold the 2 Radio Alarm 1 Button. Operating the Dual...
Operation Manual
Page 9
... appears, the alarm will not work while the clock is operating on the display. Daylight-Saving Time (DST) and Leap Year Adjustments If you to manually set time and days. 2. The LCD display will be repeated several times during the one-hour snooze cycle. 5. To activate the nature sounds/buzzer alarm...
... appears, the alarm will not work while the clock is operating on the display. Daylight-Saving Time (DST) and Leap Year Adjustments If you to manually set time and days. 2. The LCD display will be repeated several times during the one-hour snooze cycle. 5. To activate the nature sounds/buzzer alarm...
Operation Manual
Page 11
.... 11 Turning the O Volume Thumbwheel will appear, showing that the radio timer has been activated. 3. The Sleep Volume Indicator on the right side of this manual. 1. Continue pressing the N Power/Sleep Button to enter the sleep mode. The sleep timer setting remains active for approximately ten seconds before the sleep time...
.... 11 Turning the O Volume Thumbwheel will appear, showing that the radio timer has been activated. 3. The Sleep Volume Indicator on the right side of this manual. 1. Continue pressing the N Power/Sleep Button to enter the sleep mode. The sleep timer setting remains active for approximately ten seconds before the sleep time...


