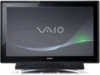
Care and Handling of Your VAIO® Computer
Page 3
...Connect the AC adapter to your computer for a long period of heat. § Keep the battery pack dry. § Do not open or try to disassemble the battery pack. § Do not expose the battery pack to any mechanical shock, such as in a car parked in the sun or under direct ...using the computer again. § There is in a well ventilated area with the VAIO PC and/or AC adaptor. This is properly connected to genuine Sony battery packs designed for a considerable amount of 5 If an unauthorized battery pack is installed the results could be connected to the AC adapter; This is...
Safety Information
Page 3
...only. Financial services may require prior arrangements with the interoperability specifications established by WFA (Wi-Fi Alliance). Reverse engineering or disassembly is incorporated into selected models only, has passed Wi-Fi certification and complies with participating financial institutions. End User / ... PRODUCT ACTIVATION PROCEDURES. Subscriptions to software may require a fee and credit card information. Sony, VAIO, and the VAIO logo are trademarks or registered trademarks of Sony Corporation. Use of the computer, and may be detailed during initial launch of the ...
User Guide
Page 134
... at the red light from the bottom of the battery. Doing so could cause injury. ❑ Do not look directly at high volume. Never heat, disassemble, modify, charge, nor get battery wet. ❑ Be sure to follow the instructions below. Headphones Preventing hearing damage - Precautions > Safety Information n 134 N Battery Cell If...
User Guide
Page 142
... or metallic objects. ❑ Use only the adhesive label supplied with "Memory Stick". ❑ Do not bend, drop, or expose "Memory Stick". ❑ Do not disassemble or modify "Memory Stick". ❑ Keep "Memory Stick" dry. ❑ Do not use or store "Memory Stick" in a location subject to: ❑ Static electricity ❑...
VPCL2 Series Hard Disk Drive Replacement Instructions
Page 2
Remove the four (4) screws which secure the Bracket to the New Hard Dive later in place. Step 9. Hard Drive Disassembly (Steps 8-12) Old Hard Drive Step 7. Grasp the Door stand and rotate up to remove. Put the screws aside to secure the Bracket to the ...
VPCL2 Series Optical Disk Drive Replacement Instructions
Page 2
... Screws aside to secure the Bracket to the Left. Using the enclosed magnetic screwdriver, remove the two (2) screws securing the Optical Drive Assembly. Optical Drive Disassembly (Steps 8-10) Step 8. FOR TECHNICAL SUPPORT IN THE US CALL TOLL FREE 1-866-651-7669 FROM 9:00 AM TO 11:00 PM EST P/N 989202624 Rev...
VPCL1 Series Hard Disk Drive Replacement Instructions
Page 2
... is completely removed, identify the (4) side screws that mount the HDD bracket to the computer. Identify the (4) screws securing first) to completely remove HDD HDD DISASSEMBLY 10-15 STEPS Step 10. Using the included magnetic screwdriver, loosen the (4) screws securing Step 8. Remove connectors before to remove the HDD access cover. Holding...