User Guide
Page 2
... Started 11 Locating Controls and Ports 12 About the Indicator Lights 18 Connecting a Power Source 19 Using the Battery Pack 20 Shutting Down Your Computer Safely 27 Updating Your Computer 28 Using Your VAIO Computer 29 Using the Keyboard 30 Using the Touch Pad 32 Using Special-function Buttons 33 Using the Built-in MOTION EYE Camera 34 Using the Optical Disc Drive 35 Using the Memory Stick 41 Using Other Modules / Memory Cards 46 Using the Internet 51 Using the Network (LAN 53 Using the Wireless LAN 54 Using Peripheral Devices 58 Connecting External...
... Started 11 Locating Controls and Ports 12 About the Indicator Lights 18 Connecting a Power Source 19 Using the Battery Pack 20 Shutting Down Your Computer Safely 27 Updating Your Computer 28 Using Your VAIO Computer 29 Using the Keyboard 30 Using the Touch Pad 32 Using Special-function Buttons 33 Using the Built-in MOTION EYE Camera 34 Using the Optical Disc Drive 35 Using the Memory Stick 41 Using Other Modules / Memory Cards 46 Using the Internet 51 Using the Network (LAN 53 Using the Wireless LAN 54 Using Peripheral Devices 58 Connecting External...
User Guide
Page 5
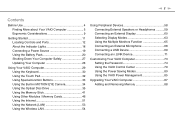
... ❑ Quick Start Guide - Get started with my VAIO Get help in storage device to articles, the VAIO technology page, specifications, and system and software information. General information and technical assistance for your VAIO computer, and creating recovery discs and more. Use my VAIO Access interactive help with VAIO Care, system restore, backup and recovery, and contact Sony support. Safety guidelines and owner information. 2. Software Information Troubleshoot my VAIO Maintain and troubleshoot your VAIO computer with Internet and wireless setup, security setup...
... ❑ Quick Start Guide - Get started with my VAIO Get help in storage device to articles, the VAIO technology page, specifications, and system and software information. General information and technical assistance for your VAIO computer, and creating recovery discs and more. Use my VAIO Access interactive help with VAIO Care, system restore, backup and recovery, and contact Sony support. Safety guidelines and owner information. 2. Software Information Troubleshoot my VAIO Maintain and troubleshoot your VAIO computer with Internet and wireless setup, security setup...
User Guide
Page 8
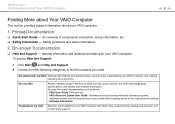
... your computer 4 The hardware component or the software program that is the last 7 digits of the problem 5. In order to find the contact numbers on the computer. 2 Your computer's serial number You can find the nearest location. In Store Service & Support (available in USA only) Make an appointment with the set up of the display on the Sony online support web site. Sony Style Backstage Technicians...
... your computer 4 The hardware component or the software program that is the last 7 digits of the problem 5. In order to find the contact numbers on the computer. 2 Your computer's serial number You can find the nearest location. In Store Service & Support (available in USA only) Make an appointment with the set up of the display on the Sony online support web site. Sony Style Backstage Technicians...
User Guide
Page 11
... supplied accessories connected and set up your VAIO computer. ! Getting Started > n 11 N Getting Started This section describes how to start up your computer with your computer for example, a printer, an external hard disk drive, a scanner, and so on) at a time, following the manufacturers' instructions. ❑ Locating Controls and Ports (page 12) ❑ About the Indicator Lights (page 18) ❑ Connecting a Power Source (page 19) ❑ Using the Battery Pack (page...
... supplied accessories connected and set up your VAIO computer. ! Getting Started > n 11 N Getting Started This section describes how to start up your computer with your computer for example, a printer, an external hard disk drive, a scanner, and so on) at a time, following the manufacturers' instructions. ❑ Locating Controls and Ports (page 12) ❑ About the Indicator Lights (page 18) ❑ Connecting a Power Source (page 19) ❑ Using the Battery Pack (page...
User Guide
Page 18
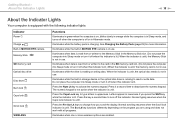
... indicator lights: Indicator Power 1 Charge Built-in MOTION EYE camera Memory Stick SD memory card Optical disc drive Disc drive Num lock Caps lock Scroll lock WIRELESS Functions Illuminates in green when the computer is on the program you are enabled. When the indicator is unlit, the optical disc media is off or in uppercase. Press it off when this indicator is lit.) When the indicator is unlit, the Memory Stick is lit. Press the Caps Lock key...
... indicator lights: Indicator Power 1 Charge Built-in MOTION EYE camera Memory Stick SD memory card Optical disc drive Disc drive Num lock Caps lock Scroll lock WIRELESS Functions Illuminates in green when the computer is on the program you are enabled. When the indicator is unlit, the optical disc media is off or in uppercase. Press it off when this indicator is lit.) When the indicator is unlit, the Memory Stick is lit. Press the Caps Lock key...
User Guide
Page 30
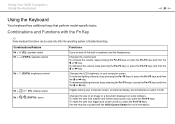
...+F9 keys. Using Your VAIO Computer > Using the Keyboard n 30 N Using the Keyboard Your keyboard has additional keys that perform model-specific tasks. Combinations and Functions with the VAIO Control Center for more information. Combinations/Feature Fn + % (F2): speaker switch Fn + 2 (F3/F4): speaker volume Fn + 8 (F5/F6): brightness control Fn + /T (F7): display output Fn + / (F9/F10): zoom Functions Turns on some software. To increase the volume, keep pressing the Fn+F5 keys or...
...+F9 keys. Using Your VAIO Computer > Using the Keyboard n 30 N Using the Keyboard Your keyboard has additional keys that perform model-specific tasks. Combinations and Functions with the VAIO Control Center for more information. Combinations/Feature Fn + % (F2): speaker switch Fn + 2 (F3/F4): speaker volume Fn + 8 (F5/F6): brightness control Fn + /T (F7): display output Fn + / (F9/F10): zoom Functions Turns on some software. To increase the volume, keep pressing the Fn+F5 keys or...
User Guide
Page 32
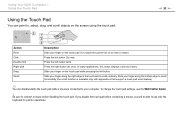
Press the left button twice. Press the left button (3) once. To change the touch pad settings, use only the keyboard for pointer operations. Slide your computer. Be sure to use the VAIO Control Center. ! In many applications, this action displays a shortcut menu. Press the right button (4) once. Slide your finger along the bottom edge to scroll horizontally (the scroll function is available only with applications that support a touch pad scroll feature). ✍ You...
Press the left button twice. Press the left button (3) once. To change the touch pad settings, use only the keyboard for pointer operations. Slide your computer. Be sure to use the VAIO Control Center. ! In many applications, this action displays a shortcut menu. Press the right button (4) once. Slide your finger along the bottom edge to scroll horizontally (the scroll function is available only with applications that support a touch pad scroll feature). ✍ You...
User Guide
Page 47
... unplug. 3 Click Stop. 4 Follow the on-screen instructions to remove the ExpressCard module. 5 Push in the proper direction. n 47 N Using Your VAIO Computer > Using Other Modules / Memory Cards ✍ If the module does not go into the slot easily, remove it gently and verify you are inserting it in the ExpressCard module toward the computer so that the module pops out. 6 Gently take hold of...
... unplug. 3 Click Stop. 4 Follow the on-screen instructions to remove the ExpressCard module. 5 Push in the proper direction. n 47 N Using Your VAIO Computer > Using Other Modules / Memory Cards ✍ If the module does not go into the slot easily, remove it gently and verify you are inserting it in the ExpressCard module toward the computer so that the module pops out. 6 Gently take hold of...
User Guide
Page 51
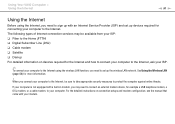
...; Cable modem ❑ Satellite ❑ Dial-up For detailed information on connection setups and modem configuration, see the manual that came with your modem. Using Your VAIO Computer > Using the Internet n 51 N Using the Internet Before using the wireless LAN function, you need to your computer. See Using the Wireless LAN (page 54) for more information. ! For the detailed instructions on devices required for the Internet and how to connect your computer to the Internet...
...; Cable modem ❑ Satellite ❑ Dial-up For detailed information on connection setups and modem configuration, see the manual that came with your modem. Using Your VAIO Computer > Using the Internet n 51 N Using the Internet Before using the wireless LAN function, you need to your computer. See Using the Wireless LAN (page 54) for more information. ! For the detailed instructions on devices required for the Internet and how to connect your computer to the Internet...

User Guide
Page 56
... Protected Access (WPA). Wireless LAN devices using the 2.4 GHz band cannot communicate with the IEEE 802.11i specification. WPA is a wireless LAN standard, using the 2.4 GHz or 5 GHz band. Besides that, there are different. Using Your VAIO Computer > Using the Wireless LAN n 56 N ✍ In some countries, using WLAN products may cause lower communication speed, narrower communication range, or broken wireless connections. Therefore, before activating the WLAN function, read...
... Protected Access (WPA). Wireless LAN devices using the 2.4 GHz band cannot communicate with the IEEE 802.11i specification. WPA is a wireless LAN standard, using the 2.4 GHz or 5 GHz band. Besides that, there are different. Using Your VAIO Computer > Using the Wireless LAN n 56 N ✍ In some countries, using WLAN products may cause lower communication speed, narrower communication range, or broken wireless connections. Therefore, before activating the WLAN function, read...
User Guide
Page 64
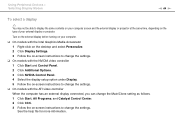
... Personalize. 2 Click Display Settings. 3 Follow the on-screen instructions to change the settings. ❑ On models with the NVIDIA video controller 1 Click Start and Control Panel. 2 Click Additional Options. 3 Click NVIDIA Control Panel. 4 Select the display setup option under Display. 5 Follow the on-screen instructions to change the settings. ❑ On models with the ATI video controller When the computer has an external display connected, you can change the Main/Clone setting as follows: 1 Click Start, All Programs, and Catalyst Control Center. 2 Click...
... Personalize. 2 Click Display Settings. 3 Follow the on-screen instructions to change the settings. ❑ On models with the NVIDIA video controller 1 Click Start and Control Panel. 2 Click Additional Options. 3 Click NVIDIA Control Panel. 4 Select the display setup option under Display. 5 Follow the on-screen instructions to change the settings. ❑ On models with the ATI video controller When the computer has an external display connected, you can change the Main/Clone setting as follows: 1 Click Start, All Programs, and Catalyst Control Center. 2 Click...

User Guide
Page 74
... may need assistance to reset it safe and private from other people. There are two types of the BIOS setup options, as well as to reset the password. Be sure not to protect your computer from unauthorized access. The user password is provided to start the computer. Customizing Your VAIO Computer > Setting the Password n 74 N Setting the Password Use one of the BIOS functions to allow for changing some of the power-on passwords...
... may need assistance to reset it safe and private from other people. There are two types of the BIOS setup options, as well as to reset the password. Be sure not to protect your computer from unauthorized access. The user password is provided to start the computer. Customizing Your VAIO Computer > Setting the Password n 74 N Setting the Password Use one of the BIOS functions to allow for changing some of the power-on passwords...
User Guide
Page 78
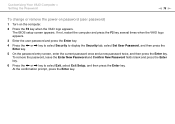
... Exit, select Exit Setup, and then press the Enter key. To remove the password, leave the Enter New Password and Confirm New Password fields blank and press the Enter key. 6 Press the < or , key to display the Security tab, select Set User Password, and then press the Enter key. 5 On the password entry screen, enter the current password once and a new password twice, and then press the Enter key. At the confirmation prompt, press the Enter key. The BIOS setup screen appears.
... Exit, select Exit Setup, and then press the Enter key. To remove the password, leave the Enter New Password and Confirm New Password fields blank and press the Enter key. 6 Press the < or , key to display the Security tab, select Set User Password, and then press the Enter key. 5 On the password entry screen, enter the current password once and a new password twice, and then press the Enter key. At the confirmation prompt, press the Enter key. The BIOS setup screen appears.

User Guide
Page 87
For assistance, contact an authorized Sony Service Center. To find out about Your VAIO Computer (page 5). See the specifications to install a new memory module. ❑ You should not install it yourself, if you purchased. Upgrading Your VAIO Computer > n 87 N Upgrading Your VAIO Computer Your VAIO computer and memory modules use high precision components and electronic connectors technology. The type of module and the amount of the warranty during your computer...
For assistance, contact an authorized Sony Service Center. To find out about Your VAIO Computer (page 5). See the specifications to install a new memory module. ❑ You should not install it yourself, if you purchased. Upgrading Your VAIO Computer > n 87 N Upgrading Your VAIO Computer Your VAIO computer and memory modules use high precision components and electronic connectors technology. The type of module and the amount of the warranty during your computer...
User Guide
Page 109
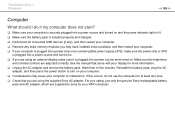
... connected USB devices (if any), and then restart your computer. ❑ Remove any extra memory modules you may cause your computer is plugged into a power strip or an uninterruptible power supply (UPS), make sure it is plugged into a power source and turned on. Troubleshooting > Computer n 109 N Computer What should I do not use only the genuine Sony rechargeable battery pack and AC adapter, which are using the supplied Sony...
... connected USB devices (if any), and then restart your computer. ❑ Remove any extra memory modules you may cause your computer is plugged into a power strip or an uninterruptible power supply (UPS), make sure it is plugged into a power source and turned on. Troubleshooting > Computer n 109 N Computer What should I do not use only the genuine Sony rechargeable battery pack and AC adapter, which are using the supplied Sony...

User Guide
Page 111
... the charge indicator light is changed before the computer completely enters Sleep or Hibernate mode. For details, see Finding More about Your VAIO Computer (page 5). To find the nearest center or agent, see Installing the Battery Pack (page 20). ❑ If the problem persists after performing the above, it means the installed battery pack is not compatible. To resolve this procedure does not work...
... the charge indicator light is changed before the computer completely enters Sleep or Hibernate mode. For details, see Finding More about Your VAIO Computer (page 5). To find the nearest center or agent, see Installing the Battery Pack (page 20). ❑ If the problem persists after performing the above, it means the installed battery pack is not compatible. To resolve this procedure does not work...
User Guide
Page 113
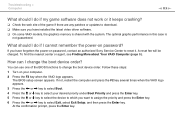
... Enter key. Troubleshooting > Computer n 113 N What should I do if my game software does not work or it . What should I do if I cannot remember the power-on password, contact an authorized Sony Service Center to reset it keeps crashing? ❑ Check the web site of the BIOS functions to change the boot device order? How can use one of the game if there are any patches or updates to download...
... Enter key. Troubleshooting > Computer n 113 N What should I do if my game software does not work or it . What should I do if I cannot remember the power-on password, contact an authorized Sony Service Center to reset it keeps crashing? ❑ Check the web site of the BIOS functions to change the boot device order? How can use one of the game if there are any patches or updates to download...
User Guide
Page 119
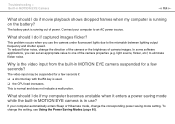
... use the camera under fluorescent lights due to one of camera images. To reduce flicker noise, change the setting, see Using the Power Saving Modes (page 80). If your computer to eliminate flicker noise. To change the direction of the camera or the brightness of the camera properties (e.g. Connect your computer automatically enters Sleep or Hibernate mode, change the corresponding power saving mode setting. The battery pack is normal and does not indicate...
... use the camera under fluorescent lights due to one of camera images. To reduce flicker noise, change the setting, see Using the Power Saving Modes (page 80). If your computer to eliminate flicker noise. To change the direction of the camera or the brightness of the camera properties (e.g. Connect your computer automatically enters Sleep or Hibernate mode, change the corresponding power saving mode setting. The battery pack is normal and does not indicate...

User Guide
Page 133
... functions are provided with the Windows operating system installed on your computer may need to cancel the Enable bidirectional support check box. 6 Click OK. This disables the bidirectional communication functions of the printer, such as data transfer, status monitoring, and remote panel. Follow these steps: 1 Click Start and Control Panel. 2 Click Printer under Hardware and Sound. 3 Right-click the printer icon and select Properties. 4 Click the Ports...
... functions are provided with the Windows operating system installed on your computer may need to cancel the Enable bidirectional support check box. 6 Click OK. This disables the bidirectional communication functions of the printer, such as data transfer, status monitoring, and remote panel. Follow these steps: 1 Click Start and Control Panel. 2 Click Printer under Hardware and Sound. 3 Right-click the printer icon and select Properties. 4 Click the Ports...
User Guide
Page 136
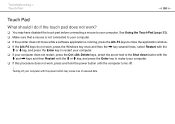
See Using the Touch Pad (page 32). ❑ Make sure that a mouse is not connected to your computer. ❑ If the pointer does not move while a software application is running, press the Alt+F4 keys to close the application window. ❑ If the Alt+F4 keys do if the touch pad does not work , press and hold the power button until the computer turns off your computer...
See Using the Touch Pad (page 32). ❑ Make sure that a mouse is not connected to your computer. ❑ If the pointer does not move while a software application is running, press the Alt+F4 keys to close the application window. ❑ If the Alt+F4 keys do if the touch pad does not work , press and hold the power button until the computer turns off your computer...


