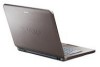

User Guide
Page 3
...Devices...61 Connecting External Speakers ...62 Connecting an External Display ...63 Selecting Display Modes...66 Using the Multiple Monitors Function ...67 Connecting an External Microphone ...69 Connecting a Universal Serial Bus (USB) Device...70 Connecting a Printer ...73 Connecting an i.LINK Device ...74 Connecting to a Network (LAN) ...76 Customizing Your VAIO Computer ...77 Setting the Password ...78 Setting Up Your Computer with VAIO Control Center 83 Using the Power Saving Modes ...84 Managing Power with VAIO Power Management ...89 Upgrading Your VAIO Computer...90 Adding and Removing...
...Devices...61 Connecting External Speakers ...62 Connecting an External Display ...63 Selecting Display Modes...66 Using the Multiple Monitors Function ...67 Connecting an External Microphone ...69 Connecting a Universal Serial Bus (USB) Device...70 Connecting a Printer ...73 Connecting an i.LINK Device ...74 Connecting to a Network (LAN) ...76 Customizing Your VAIO Computer ...77 Setting the Password ...78 Setting Up Your Computer with VAIO Control Center 83 Using the Power Saving Modes ...84 Managing Power with VAIO Power Management ...89 Upgrading Your VAIO Computer...90 Adding and Removing...
User Guide
Page 7
Contains safety guidelines and owner information. Contains an overview of your VAIO computer. The online specifications describe the hardware and software configurations of components connection, set-up information, etc. ❑ Safety Information - Printed Documentation ❑ Welcome mat - Non-printed Documentation ❑ User Guide (this manual by clicking their respective URLs beginning with your computer, as well as information on your VAIO computer. It...
Contains safety guidelines and owner information. Contains an overview of your VAIO computer. The online specifications describe the hardware and software configurations of components connection, set-up information, etc. ❑ Safety Information - Printed Documentation ❑ Welcome mat - Non-printed Documentation ❑ User Guide (this manual by clicking their respective URLs beginning with your computer, as well as information on your VAIO computer. It...

User Guide
Page 8
To access this on-screen guide: 1 Click Start and Help and Support. 2 Click Manuals & Specifications. 3 Click VAIO Recovery Center User Guide. n8 N Before Use ❑ VAIO Recovery Center User Guide - Provides information about restoring individual software programs, software drivers, and drive partition(s) or your entire hard disk drive to the original factory installed settings.
To access this on-screen guide: 1 Click Start and Help and Support. 2 Click Manuals & Specifications. 3 Click VAIO Recovery Center User Guide. n8 N Before Use ❑ VAIO Recovery Center User Guide - Provides information about restoring individual software programs, software drivers, and drive partition(s) or your entire hard disk drive to the original factory installed settings.
User Guide
Page 9
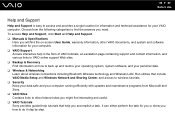
... links to VAIO online support Web sites. ❑ Backup & Recovery Find information on -screen User Guide, warranty information, other Internet sites you might find interesting and useful. ❑ VAIO Tutorials Sony provides guided help tutorials that include VAIO Media Setup and Windows Network and Sharing Center, and access to wireless tutorials. ❑ Security Keep your data safe and your VAIO computer. To access Help and Support, click Start and Help and Support. ❑ Manuals & Specifications Here you...
... links to VAIO online support Web sites. ❑ Backup & Recovery Find information on -screen User Guide, warranty information, other Internet sites you might find interesting and useful. ❑ VAIO Tutorials Sony provides guided help tutorials that include VAIO Media Setup and Windows Network and Sharing Center, and access to wireless tutorials. ❑ Security Keep your data safe and your VAIO computer. To access Help and Support, click Start and Help and Support. ❑ Manuals & Specifications Here you...

User Guide
Page 19
... active when the indicator is in uppercase. n 19 N Getting Started About the Indicator Lights Your computer is not being used . Indicator Power 1 Battery e Media Access Optical disc drive Hard disk drive Num lock Caps lock Scroll lock Wireless LAN Functions Illuminates when the power of the computer is on the program you are using battery power, blinks when the battery pack is running out of power, and double-blinks when the battery pack is off . Press the Num Lk key to turn off , the memory card...
... active when the indicator is in uppercase. n 19 N Getting Started About the Indicator Lights Your computer is not being used . Indicator Power 1 Battery e Media Access Optical disc drive Hard disk drive Num lock Caps lock Scroll lock Wireless LAN Functions Illuminates when the power of the computer is on the program you are using battery power, blinks when the battery pack is running out of power, and double-blinks when the battery pack is off . Press the Num Lk key to turn off , the memory card...

User Guide
Page 27
... decrease the volume, press Fn+F3 and then m or Combinations/Feature Fn + % (F2): speaker switch Fn + 2 (F3/F4): speaker volume Fn + 8 (F5/F6): brightness control Fn + /T (F7): display output Fn + (F10): zoom Functions Turns on and off the built-in speaker volume. n 27 N Using Your VAIO Computer Using the Keyboard Your keyboard is very similar to a desktop computer keyboard, but has additional keys that perform model-specific tasks.
... decrease the volume, press Fn+F3 and then m or Combinations/Feature Fn + % (F2): speaker switch Fn + 2 (F3/F4): speaker volume Fn + 8 (F5/F6): brightness control Fn + /T (F7): display output Fn + (F10): zoom Functions Turns on and off the built-in speaker volume. n 27 N Using Your VAIO Computer Using the Keyboard Your keyboard is very similar to a desktop computer keyboard, but has additional keys that perform model-specific tasks.

User Guide
Page 29
... for the detailed instructions. ! If you disable the touch pad without connecting a mouse, you will be able to connect a mouse before disabling the touch pad. Slide your finger along the bottom edge to scroll horizontally (the scroll function is available only with VAIO Control Center (page 83) to launch VAIO Control Center. Be sure to use only the keyboard for pointer operations. See Setting Up Your Computer with applications that support a touch pad scroll feature). ✍...
... for the detailed instructions. ! If you disable the touch pad without connecting a mouse, you will be able to connect a mouse before disabling the touch pad. Slide your finger along the bottom edge to scroll horizontally (the scroll function is available only with VAIO Control Center (page 83) to launch VAIO Control Center. Be sure to use only the keyboard for pointer operations. See Setting Up Your Computer with applications that support a touch pad scroll feature). ✍...

User Guide
Page 33
n 33 N Using Your VAIO Computer Reading and Writing Optical Discs Your computer plays and records CDs, DVDs, and Blu-ray Disc™ media, depending on your optical disc drive supports. Use the table below to see which types of optical disc drive installed on the model you purchased. Check your specifications for the type of media your model.
n 33 N Using Your VAIO Computer Reading and Writing Optical Discs Your computer plays and records CDs, DVDs, and Blu-ray Disc™ media, depending on your optical disc drive supports. Use the table below to see which types of optical disc drive installed on the model you purchased. Check your specifications for the type of media your model.

User Guide
Page 42
... slot. n 42 N Using Your VAIO Computer Removing an ExpressCard Module Follow the steps below to remove the ExpressCard module while your computer is not removed properly, your computer is off, skip steps 1 to 4. 1 Double-click the Safely Remove Hardware icon on -screen instructions to remove the ExpressCard module. 5 Push in the ExpressCard module toward the computer to unplug. 3 Click Stop. 4 Follow the on the taskbar. The Safely Remove Hardware window...
... slot. n 42 N Using Your VAIO Computer Removing an ExpressCard Module Follow the steps below to remove the ExpressCard module while your computer is not removed properly, your computer is off, skip steps 1 to 4. 1 Double-click the Safely Remove Hardware icon on -screen instructions to remove the ExpressCard module. 5 Push in the ExpressCard module toward the computer to unplug. 3 Click Stop. 4 Follow the on the taskbar. The Safely Remove Hardware window...

User Guide
Page 57
... 5 GHz bandwidth, which is not available on ad-hoc networks. 1 Turn on -screen instructions. ✍ See the online specifications to see whether your desired wireless option(s) in the VAIO Smart Network window. 3 Click Start and Control Panel. 4 Click View network status and tasks under Network and Internet. 5 Click Set up . 2 Click the button next to specify the ad-hoc network settings and click Next. 7 Follow the on the WIRELESS or WIRELESS LAN switch. The Wireless LAN indicator lights up a connection...
... 5 GHz bandwidth, which is not available on ad-hoc networks. 1 Turn on -screen instructions. ✍ See the online specifications to see whether your desired wireless option(s) in the VAIO Smart Network window. 3 Click Start and Control Panel. 4 Click View network status and tasks under Network and Internet. 5 Click Set up . 2 Click the button next to specify the ad-hoc network settings and click Next. 7 Follow the on the WIRELESS or WIRELESS LAN switch. The Wireless LAN indicator lights up a connection...

User Guide
Page 61
... functionality to your VAIO computer by using the various ports on the computer. ❑ Connecting External Speakers (page 62) ❑ Connecting an External Display (page 63) ❑ Selecting Display Modes (page 66) ❑ Using the Multiple Monitors Function (page 67) ❑ Connecting an External Microphone (page 69) ❑ Connecting a Universal Serial Bus (USB) Device (page 70) ❑ Connecting a Printer (page 73) ❑ Connecting an i.LINK Device (page 74) ❑ Connecting to a Network (LAN) (page 76) n 61 N Using Peripheral Devices
... functionality to your VAIO computer by using the various ports on the computer. ❑ Connecting External Speakers (page 62) ❑ Connecting an External Display (page 63) ❑ Selecting Display Modes (page 66) ❑ Using the Multiple Monitors Function (page 67) ❑ Connecting an External Microphone (page 69) ❑ Connecting a Universal Serial Bus (USB) Device (page 70) ❑ Connecting a Printer (page 73) ❑ Connecting an i.LINK Device (page 74) ❑ Connecting to a Network (LAN) (page 76) n 61 N Using Peripheral Devices

User Guide
Page 70
... online specifications to find out whether the USB mouse is supplied with selected models only. You can now use . 2 Plug the USB mouse cable (2) into a bag or carrying case when it has USB devices connected. Connecting a USB Mouse A USB mouse is supplied with your model. n 70 N Using Peripheral Devices Connecting a Universal Serial Bus (USB) Device To prevent your computer and/or USB devices from damage, observe the following: ❑ When moving the computer with USB devices connected, avoid...
... online specifications to find out whether the USB mouse is supplied with selected models only. You can now use . 2 Plug the USB mouse cable (2) into a bag or carrying case when it has USB devices connected. Connecting a USB Mouse A USB mouse is supplied with your model. n 70 N Using Peripheral Devices Connecting a Universal Serial Bus (USB) Device To prevent your computer and/or USB devices from damage, observe the following: ❑ When moving the computer with USB devices connected, avoid...

User Guide
Page 78
... computer without entering the password. The power-on password: machine password and user password. Make sure not to allow for the standard users to forget the password. The user password is provided for changing some of the BIOS setup options, as well as to start the computer. To set the user password, you have set the power-on password is provided for password reset. Write down your computer. There are two types of the power-on password allows...
... computer without entering the password. The power-on password: machine password and user password. Make sure not to allow for the standard users to forget the password. The user password is provided for changing some of the BIOS setup options, as well as to start the computer. To set the user password, you have set the power-on password is provided for password reset. Write down your computer. There are two types of the power-on password allows...

User Guide
Page 82
... computer and press the F2 key several times when the VAIO logo appears. 3 Enter the user password and press the Enter key. 4 Press the < or , key to select Security to select Exit, select Exit Setup, and then press the Enter key. n 82 N Customizing Your VAIO Computer To change or remove the power-on password (user password) 1 Turn on the computer. 2 Press the F2 key when the VAIO logo appears. The BIOS setup screen appears.
... computer and press the F2 key several times when the VAIO logo appears. 3 Enter the user password and press the Enter key. 4 Press the < or , key to select Security to select Exit, select Exit Setup, and then press the Enter key. n 82 N Customizing Your VAIO Computer To change or remove the power-on password (user password) 1 Turn on the computer. 2 Press the F2 key when the VAIO logo appears. The BIOS setup screen appears.
User Guide
Page 117
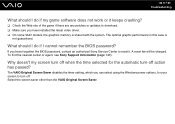
... Sony Support Information (page 147). n 117 N Troubleshooting What should I do if I do if my game software does not work or it keeps crashing? ❑ Check the Web site of the game if there are any patches or updates to download. ❑ Make sure you have installed the latest video driver. ❑ On some VAIO models, the graphics memory is not guaranteed. A reset fee will be charged...
... Sony Support Information (page 147). n 117 N Troubleshooting What should I do if I do if my game software does not work or it keeps crashing? ❑ Check the Web site of the game if there are any patches or updates to download. ❑ Make sure you have installed the latest video driver. ❑ On some VAIO models, the graphics memory is not guaranteed. A reset fee will be charged...

User Guide
Page 124
... list both for Wireless Adapter Settings in the Power Options window. You may be using. ❑ Make sure the WIRELESS or WIRELESS LAN switch is on and the Wireless LAN indicator is lit on your computer. ❑ Make sure power to the access point is on the taskbar and select Power Options. 2 Click Change plan settings under Network and Internet. 3 Click Connect to a network to move your access point is selected. ❑ Make sure the encryption key is correct. ❑ Make...
... list both for Wireless Adapter Settings in the Power Options window. You may be using. ❑ Make sure the WIRELESS or WIRELESS LAN switch is on and the Wireless LAN indicator is lit on your computer. ❑ Make sure power to the access point is on the taskbar and select Power Options. 2 Click Change plan settings under Network and Internet. 3 Click Connect to a network to move your access point is selected. ❑ Make sure the encryption key is correct. ❑ Make...

User Guide
Page 136
...; You may need to install the printer driver software before you use your computer may enable printing. Follow these steps: 1 Click Start and Control Panel. 2 Click Printer under Hardware and Sound. 3 Right-click the printer icon and select Properties. 4 Click the Ports tab. 5 Click to the settings disables the bidirectional communication functions of the printer, such as data transfer, status monitoring, and remote panel. n 136 N Troubleshooting Printing What...
...; You may need to install the printer driver software before you use your computer may enable printing. Follow these steps: 1 Click Start and Control Panel. 2 Click Printer under Hardware and Sound. 3 Right-click the printer icon and select Properties. 4 Click the Ports tab. 5 Click to the settings disables the bidirectional communication functions of the printer, such as data transfer, status monitoring, and remote panel. n 136 N Troubleshooting Printing What...

User Guide
Page 140
... window appears, click Restart. ❑ If this procedure does not work, press and hold the power button until the computer turns off your computer with the power button may have disabled the touch pad without connecting a mouse to your computer does not restart, press the Ctrl+Alt+Delete keys and click the arrow next to restart your computer. ❑ If your computer. See Using...
... window appears, click Restart. ❑ If this procedure does not work, press and hold the power button until the computer turns off your computer with the power button may have disabled the touch pad without connecting a mouse to your computer does not restart, press the Ctrl+Alt+Delete keys and click the arrow next to restart your computer. ❑ If your computer. See Using...
User Guide
Page 147
... critical software and security information is connected to open the VAIO Support Web site and view the information. You can visit Microsoft customer support at the following sources for answers in Brazil 5 VAIO Update When your computer may be supplied with a Microsoft Windows operating system. These guides are stored on the hard disk drive as on your computer is posted on commonly encountered problems. Type a description...
... critical software and security information is connected to open the VAIO Support Web site and view the information. You can visit Microsoft customer support at the following sources for answers in Brazil 5 VAIO Update When your computer may be supplied with a Microsoft Windows operating system. These guides are stored on the hard disk drive as on your computer is posted on commonly encountered problems. Type a description...
User Guide
Page 156
VAIO Control Center provides a centralized location that came with your computer's configuration and specifications. n 156 N Support Options Roxio® Easy Media Creator® 10 Suite Sonic Solutions ❑ For customers in WAV format. Use SonicStage Mastering Studio software to record songs from analog records or cassette tapes into your computer and output them to configure your VAIO computer and view your computer. For contacts...
VAIO Control Center provides a centralized location that came with your computer's configuration and specifications. n 156 N Support Options Roxio® Easy Media Creator® 10 Suite Sonic Solutions ❑ For customers in WAV format. Use SonicStage Mastering Studio software to record songs from analog records or cassette tapes into your computer and output them to configure your VAIO computer and view your computer. For contacts...


