User Guide
Page 3
n3 N Using Peripheral Devices...56 Connecting External Speakers ...57 Connecting a Universal Serial Bus (USB) Device...59 Connecting a Printer ...61 Connecting an i.LINK Device ...62 Connecting to a Network (LAN) ...64 Customizing Your VAIO Computer ...65 Setting the Password ...66 Setting Up Your Computer with VAIO Control Center 71 Using the Power Saving Mode...72 Upgrading Your VAIO Computer...74 Adding and Removing Memory...75 Precautions ...81 Handling the LCD Screen ...82 Using the Power Source ...83 Handling Your Computer ...84 Handling the Built-in MOTION EYE Camera...86 Handling...
n3 N Using Peripheral Devices...56 Connecting External Speakers ...57 Connecting a Universal Serial Bus (USB) Device...59 Connecting a Printer ...61 Connecting an i.LINK Device ...62 Connecting to a Network (LAN) ...64 Customizing Your VAIO Computer ...65 Setting the Password ...66 Setting Up Your Computer with VAIO Control Center 71 Using the Power Saving Mode...72 Upgrading Your VAIO Computer...74 Adding and Removing Memory...75 Precautions ...81 Handling the LCD Screen ...82 Using the Power Source ...83 Handling Your Computer ...84 Handling the Built-in MOTION EYE Camera...86 Handling...
User Guide
Page 7
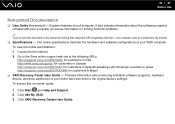
... to the original factory settings. The online specifications describe the hardware and software configurations of your entire hard disk drive to web sites described in Brazil ❑ VAIO Recovery Center User Guide - It also includes information about restoring individual software programs, hardware drivers, and drive partition(s) or your computer. To view the online specifications: 1 Connect to the Internet. 2 Go to the Internet. ❑ Specifications - Explains features of your computer must be connected to the Sony online support web site at...
... to the original factory settings. The online specifications describe the hardware and software configurations of your entire hard disk drive to web sites described in Brazil ❑ VAIO Recovery Center User Guide - It also includes information about restoring individual software programs, hardware drivers, and drive partition(s) or your computer. To view the online specifications: 1 Connect to the Internet. 2 Go to the Internet. ❑ Specifications - Explains features of your computer must be connected to the Sony online support web site at...
User Guide
Page 8
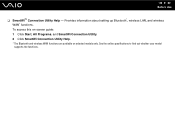
See the online specifications to find out whether your model supports the functions. n8 N Before Use ❑ SmartWi™ Connection Utility Help - To access this on-screen guide: 1 Click Start, All Programs, and SmartWi Connection Utility. 2 Click SmartWi Connection Utility Help. * The Bluetooth and wireless WAN functions are available on selected models only. Provides information about setting up Bluetooth*, wireless LAN, and wireless WAN* functions.
See the online specifications to find out whether your model supports the functions. n8 N Before Use ❑ SmartWi™ Connection Utility Help - To access this on-screen guide: 1 Click Start, All Programs, and SmartWi Connection Utility. 2 Click SmartWi Connection Utility Help. * The Bluetooth and wireless WAN functions are available on selected models only. Provides information about setting up Bluetooth*, wireless LAN, and wireless WAN* functions.
User Guide
Page 16
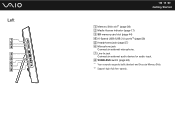
H WIRELESS switch (page 48) *1 Your computer supports both standard- and Duo-size Memory Stick. *2 Support high-/full-/low- speeds. G Line In jack Connect an external audio device for audio input. Left n 16 N Getting Started A Memory Stick slot*1 (page 38) B Media Access indicator (page 17) C SD memory card slot (page 44) D Hi-Speed USB (USB 2.0) ports*2 (page 59) E Headphones jack (page 57) F Microphone jack Connect an external microphone.
H WIRELESS switch (page 48) *1 Your computer supports both standard- and Duo-size Memory Stick. *2 Support high-/full-/low- speeds. G Line In jack Connect an external audio device for audio input. Left n 16 N Getting Started A Memory Stick slot*1 (page 38) B Media Access indicator (page 17) C SD memory card slot (page 44) D Hi-Speed USB (USB 2.0) ports*2 (page 59) E Headphones jack (page 57) F Microphone jack Connect an external microphone.

User Guide
Page 31
Use the table below to see which types of optical disc drive installed on the model you purchased. Check your specifications for the type of media your model. n 31 N Using Your VAIO Computer Reading and Writing Optical Discs Your computer plays and records CDs, DVDs, and Blu-ray Disc™ media, depending on your optical disc drive supports.
Use the table below to see which types of optical disc drive installed on the model you purchased. Check your specifications for the type of media your model. n 31 N Using Your VAIO Computer Reading and Writing Optical Discs Your computer plays and records CDs, DVDs, and Blu-ray Disc™ media, depending on your optical disc drive supports.
User Guide
Page 37
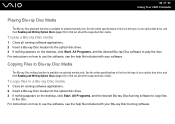
... Disc media 1 Close all running software applications. 2 Insert a Blu-ray Disc media into the optical disc drive. 3 If nothing appears on the desktop, click Start, All Programs, and the desired Blu-ray Disc burning software to copy files to find out about the supported disc media. See the online specifications to find out the type of your software. To play the disc. n 37 N Using Your VAIO Computer Playing Blu-ray Disc Media ! See the online specifications...
... Disc media 1 Close all running software applications. 2 Insert a Blu-ray Disc media into the optical disc drive. 3 If nothing appears on the desktop, click Start, All Programs, and the desired Blu-ray Disc burning software to copy files to find out about the supported disc media. See the online specifications to find out the type of your software. To play the disc. n 37 N Using Your VAIO Computer Playing Blu-ray Disc Media ! See the online specifications...
User Guide
Page 51
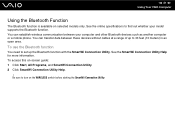
... open area. To access this on the WIRELESS switch before starting the SmartWi Connection Utility. Be sure to find out whether your computer and other Bluetooth devices such as another computer or a mobile phone. See the online specifications to turn on -screen guide: 1 Click Start, All Programs, and SmartWi Connection Utility. 2 Click SmartWi Connection Utility Help. ! See the SmartWi Connection Utility Help for more information. You can transfer data between your model supports...
... open area. To access this on the WIRELESS switch before starting the SmartWi Connection Utility. Be sure to find out whether your computer and other Bluetooth devices such as another computer or a mobile phone. See the online specifications to turn on -screen guide: 1 Click Start, All Programs, and SmartWi Connection Utility. 2 Click SmartWi Connection Utility Help. ! See the SmartWi Connection Utility Help for more information. You can transfer data between your model supports...
User Guide
Page 57
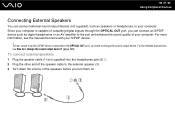
To connect external speakers 1 Plug the speaker cable (1) (not supplied) into the headphones jack (2) i. 2 Plug the other end of the speaker cable to the external speaker (3). 3 Turn down the volume of your computer. For the detailed instructions, see the manual that came with your S/PDIF device. ! To hear sound from the S/PDIF device connected to the OPTICAL OUT port, you turn them on. n 57 N Using Peripheral Devices Connecting External Speakers You can connect an S/PDIF device such as speakers or headphones, to...
To connect external speakers 1 Plug the speaker cable (1) (not supplied) into the headphones jack (2) i. 2 Plug the other end of the speaker cable to the external speaker (3). 3 Turn down the volume of your computer. For the detailed instructions, see the manual that came with your S/PDIF device. ! To hear sound from the S/PDIF device connected to the OPTICAL OUT port, you turn them on. n 57 N Using Peripheral Devices Connecting External Speakers You can connect an S/PDIF device such as speakers or headphones, to...
User Guide
Page 61
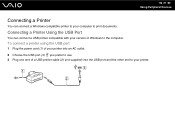
To connect a printer using the USB port 1 Plug the power cord (1) of your printer into the USB port and the other end to print documents. n 61 N Using Peripheral Devices Connecting a Printer You can connect a USB printer compatible with your version of a USB printer cable (2) (not supplied) into an AC outlet. 2 Choose the USB port (3) you prefer to use. 3 Plug one end of Windows to the computer. Connecting a Printer Using the USB Port You can connect a Windows-compatible printer to your computer to your printer.
To connect a printer using the USB port 1 Plug the power cord (1) of your printer into the USB port and the other end to print documents. n 61 N Using Peripheral Devices Connecting a Printer You can connect a USB printer compatible with your version of a USB printer cable (2) (not supplied) into an AC outlet. 2 Choose the USB port (3) you prefer to use. 3 Plug one end of Windows to the computer. Connecting a Printer Using the USB Port You can connect a Windows-compatible printer to your computer to your printer.
User Guide
Page 64
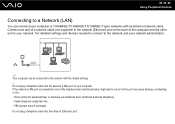
... network (LAN) port is connected to one end of a network cable (not supplied) to the network (Ethernet) port on your network. Do not plug a telephone cable into the network (Ethernet) port. PBX (private branch exchange) Do not plug a telephone cable into the network (LAN) port on the back of the telephone lines mentioned below, high electric current to the port may cause damage, overheating, or fire. - Public telephone subscriber line - n 64 N Using Peripheral Devices Connecting to a Network (LAN...
... network (LAN) port is connected to one end of a network cable (not supplied) to the network (Ethernet) port on your network. Do not plug a telephone cable into the network (Ethernet) port. PBX (private branch exchange) Do not plug a telephone cable into the network (LAN) port on the back of the telephone lines mentioned below, high electric current to the port may cause damage, overheating, or fire. - Public telephone subscriber line - n 64 N Using Peripheral Devices Connecting to a Network (LAN...
User Guide
Page 98
... press the Enter key. 6 Press the < or , key to download. ❑ Make sure you have installed the latest video driver. ❑ On some VAIO models, the graphics memory is not guaranteed. The BIOS setup screen appears. You can I change the boot device order. What should I do if I cannot remember the power-on password? A reset fee will be charged. If you have forgotten the power-on password, contact an authorized Sony Service Center to change the boot device order? At...
... press the Enter key. 6 Press the < or , key to download. ❑ Make sure you have installed the latest video driver. ❑ On some VAIO models, the graphics memory is not guaranteed. The BIOS setup screen appears. You can I change the boot device order. What should I do if I cannot remember the power-on password? A reset fee will be charged. If you have forgotten the power-on password, contact an authorized Sony Service Center to change the boot device order? At...
User Guide
Page 100
... on-screen instructions to download updates. Your computer must be connected to the Internet before you can receive updates. 1 Click Start, All Programs, and Windows Live OneCare. 2 Click Check for Updates in the Protection Plus section. 3 The Windows Live OneCare Updates balloon appears on the taskbar. 4 Follow the on-screen instructions to set up automatic or scheduled updates. The Microsoft Windows operating system is to protect your computer. To download and install...
... on-screen instructions to download updates. Your computer must be connected to the Internet before you can receive updates. 1 Click Start, All Programs, and Windows Live OneCare. 2 Click Check for Updates in the Protection Plus section. 3 The Windows Live OneCare Updates balloon appears on the taskbar. 4 Follow the on-screen instructions to set up automatic or scheduled updates. The Microsoft Windows operating system is to protect your computer. To download and install...
User Guide
Page 103
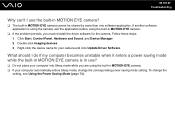
... the driver software for your computer automatically enters Sleep mode, change the setting, see Using the Power Saving Mode (page 72). To change the corresponding power saving mode setting. Follow these steps: 1 Click Start, Control Panel, Hardware and Sound, and Device Manager. 2 Double-click Imaging devices. 3 Right-click the device name for the camera. If another software application is in use the built-in MOTION EYE camera? ❑ The built-in MOTION EYE camera. ❑ If the problem...
... the driver software for your computer automatically enters Sleep mode, change the setting, see Using the Power Saving Mode (page 72). To change the corresponding power saving mode setting. Follow these steps: 1 Click Start, Control Panel, Hardware and Sound, and Device Manager. 2 Double-click Imaging devices. 3 Right-click the device name for the camera. If another software application is in use the built-in MOTION EYE camera? ❑ The built-in MOTION EYE camera. ❑ If the problem...
User Guide
Page 112
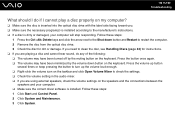
... down button on the taskbar and click Open Volume Mixer to check the settings. ❑ Check the volume setting in the audio mixer. ❑ If you . ❑ Make sure the necessary program(s) is installed according to restart the computer. 2 Remove the disc from the optical disc drive. 3 Check the disc for instructions. ❑ If you are using external speakers, check the volume settings on the speakers and the connections between the speakers...
... down button on the taskbar and click Open Volume Mixer to check the settings. ❑ Check the volume setting in the audio mixer. ❑ If you . ❑ Make sure the necessary program(s) is installed according to restart the computer. 2 Remove the disc from the optical disc drive. 3 Check the disc for instructions. ❑ If you are using external speakers, check the volume settings on the speakers and the connections between the speakers...
User Guide
Page 114
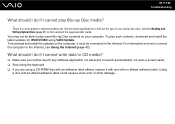
... label could cause a write error or other damage. Using a disc with no affixed adhesive label. n 114 N Troubleshooting What should I do if I cannot write data to CD media? ❑ Make sure you are using VAIO Update. To download and install the updates on how to connect the computer to selected models only. See the online specifications to the Internet. You may not be connected to find out about the supported disc media.
... label could cause a write error or other damage. Using a disc with no affixed adhesive label. n 114 N Troubleshooting What should I do if I cannot write data to CD media? ❑ Make sure you are using VAIO Update. To download and install the updates on how to connect the computer to selected models only. See the online specifications to the Internet. You may not be connected to find out about the supported disc media.
User Guide
Page 115
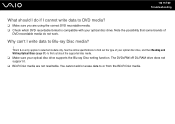
... out about the supported disc media. ❑ Make sure your optical disc drive supports the Blu-ray Disc writing function. You cannot add or erase data to selected models only. See the online specifications to Blu-ray Disc media? ! This Q & A entry applies to or from the BD-R Disc media. The DVD±RW/±R DL/RAM drive does not support it. ❑ BD-R Disc media are using the correct DVD recordable media. ❑ Check which...
... out about the supported disc media. ❑ Make sure your optical disc drive supports the Blu-ray Disc writing function. You cannot add or erase data to selected models only. See the online specifications to Blu-ray Disc media? ! This Q & A entry applies to or from the BD-R Disc media. The DVD±RW/±R DL/RAM drive does not support it. ❑ BD-R Disc media are using the correct DVD recordable media. ❑ Check which...
User Guide
Page 117
... the Windows operating system installed on your printer. This disables the bidirectional communication functions of the printer, such as data transfer, status monitoring, and remote panel. See the manual that came with your printer for more information. ❑ If your printer is compatible with your printer, disabling the functions on your computer. ❑ You may need to cancel the Enable bidirectional support check...
... the Windows operating system installed on your printer. This disables the bidirectional communication functions of the printer, such as data transfer, status monitoring, and remote panel. See the manual that came with your printer for more information. ❑ If your printer is compatible with your printer, disabling the functions on your computer. ❑ You may need to cancel the Enable bidirectional support check...
Safety Information
Page 2
... form without prior written approval. This product contains software owned by Sony and licensed by the terms of a separate user license agreement. Software specifications are located on the bottom or back panel of your Sony Service Center. Reproduction in whole or in part without written permission is governed by third parties. Record the model and serial numbers in the space provided here, and keep...
... form without prior written approval. This product contains software owned by Sony and licensed by the terms of a separate user license agreement. Software specifications are located on the bottom or back panel of your Sony Service Center. Reproduction in whole or in part without written permission is governed by third parties. Record the model and serial numbers in the space provided here, and keep...
Marketing Specifications (VGC-JS110J/B)
Page 1
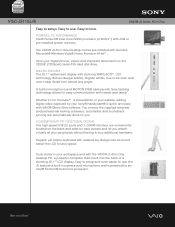
...-in-One desktop PC, a powerful computer that's built into the back of pre-installed system memory. CONTEMPORARY YET FUNCTIONAL DESIGN Five high-speed USB 2.0 ports and 1 i.LINK® interface are automatically done for YouTube™ , a presentation or your website, editing digital video captured by an Intel® Pentium® Dual-Core processor. Easy to setup and even easier to setup. VGC-JS110J/B VAIO® JS Series All-in-One...
...-in-One desktop PC, a powerful computer that's built into the back of pre-installed system memory. CONTEMPORARY YET FUNCTIONAL DESIGN Five high-speed USB 2.0 ports and 1 i.LINK® interface are automatically done for YouTube™ , a presentation or your website, editing digital video captured by an Intel® Pentium® Dual-Core processor. Easy to setup and even easier to setup. VGC-JS110J/B VAIO® JS Series All-in-One...
Marketing Specifications (VGC-JS110J/B)
Page 2
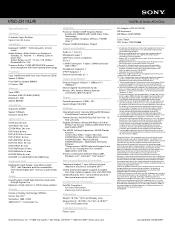
... Outputs Audio In: 1 (Line In) Microphone Input: 1 USB Port(s): 5 (2.0 compliant) DC-In: 1 i.LINK® Connection: 1 (4pin) i.LINK® connector (IEEE 1394)10 Headphone Output(s): 1 S/PDIF Output(s): 1 Ethernet Connection (s): 1 Networking/Modem Ethernet Protocol: 10Base-T / 100Base-TX / 1000Base-T Ethernet Speed: Fast Ethernet (RJ-45) Wireless LAN: Atheros Wireless Network Connection (802.11b/g/n)3 Power Power Requirements: 150W + 10% Input Voltage: 100-240V Software Operating System: Genuine Microsoft® Windows Vista® Home Premium 64-bit17 Internet Services: AOL...
... Outputs Audio In: 1 (Line In) Microphone Input: 1 USB Port(s): 5 (2.0 compliant) DC-In: 1 i.LINK® Connection: 1 (4pin) i.LINK® connector (IEEE 1394)10 Headphone Output(s): 1 S/PDIF Output(s): 1 Ethernet Connection (s): 1 Networking/Modem Ethernet Protocol: 10Base-T / 100Base-TX / 1000Base-T Ethernet Speed: Fast Ethernet (RJ-45) Wireless LAN: Atheros Wireless Network Connection (802.11b/g/n)3 Power Power Requirements: 150W + 10% Input Voltage: 100-240V Software Operating System: Genuine Microsoft® Windows Vista® Home Premium 64-bit17 Internet Services: AOL...


