Operating Instructions
Page 2
...PREVENT ELECTRIC SHOCK, MATCH WIDE BLADE OF PLUG TO WIDE SLOT, FULLY INSERT. For more information regarding recycling of rechargeable batteries, call : Sony Customer Information Center 1-800-222SONY (7669) The number below is for years to use of the FCC Rules. If you...picture and sound quality. This symbol is subject to the presence of Conformity Trade Name: SONY Model No.: DSR-PDX10 Responsible Party: Sony Electronics Inc. RECYCLING LITHIUM-ION BATTERIES Lithium-Ion batteries are recyclable. With your Digital camcorder, you . WARNING To prevent fire or shock hazard...
...PREVENT ELECTRIC SHOCK, MATCH WIDE BLADE OF PLUG TO WIDE SLOT, FULLY INSERT. For more information regarding recycling of rechargeable batteries, call : Sony Customer Information Center 1-800-222SONY (7669) The number below is for years to use of the FCC Rules. If you...picture and sound quality. This symbol is subject to the presence of Conformity Trade Name: SONY Model No.: DSR-PDX10 Responsible Party: Sony Electronics Inc. RECYCLING LITHIUM-ION BATTERIES Lithium-Ion batteries are recyclable. With your Digital camcorder, you . WARNING To prevent fire or shock hazard...

Operating Instructions
Page 6
... - Recording on a "Memory Stick" ...... 10 Getting Started Using this manual 12 Checking supplied accessories 14 Step 1 Preparing the power supply ... 15 Installing the battery pack 15 Charging the battery pack 16 Connecting to a wall outlet 19 Step 2 Setting the date and time ........ 20 Step 3 Inserting a cassette 22 Step 4 Using the touch panel...
... - Recording on a "Memory Stick" ...... 10 Getting Started Using this manual 12 Checking supplied accessories 14 Step 1 Preparing the power supply ... 15 Installing the battery pack 15 Charging the battery pack 16 Connecting to a wall outlet 19 Step 2 Setting the date and time ........ 20 Step 3 Inserting a cassette 22 Step 4 Using the touch panel...

Operating Instructions
Page 7
... on a "Memory Stick" to correct trouble 224 Self-diagnosis display 231 Warning indicators and messages .... 232 Additional Information Compatibility of DVCAM and DV formats 234 Usable cassettes 236 About the "InfoLITHIUM" battery pack 239 About i.LINK 241 Using your computer using the USB cable - PRINT MARK 187 Using the optional printer 188...
... on a "Memory Stick" to correct trouble 224 Self-diagnosis display 231 Warning indicators and messages .... 232 Additional Information Compatibility of DVCAM and DV formats 234 Usable cassettes 236 About the "InfoLITHIUM" battery pack 239 About i.LINK 241 Using your computer using the USB cable - PRINT MARK 187 Using the optional printer 188...

Operating Instructions
Page 8
... completely, close the lid until it clicks. See the page in the direction of your camcorder outdoors (p. 15). Connecting the power cord (p. 19) Use the battery pack when using your camcorder. Write-protect tab 3 Close the cassette compartment by pressing on tapes of the arrow to open the lid. 2 Insert the...
... completely, close the lid until it clicks. See the page in the direction of your camcorder outdoors (p. 15). Connecting the power cord (p. 19) Use the battery pack when using your camcorder. Write-protect tab 3 Close the cassette compartment by pressing on tapes of the arrow to open the lid. 2 Insert the...

Operating Instructions
Page 9
... CAMERA 3 Press N to CAMERA while pressing the small green button. Adjust the viewfinder lens to your camcorder by holding the viewfinder, the LCD panel, the battery pack or the microphone. 9 PLAY Quick Start Guide NOTE Do not pick up your eyesight (p. 29). Monitoring the playback picture on the screen. 4 PressSTART/STOP...
... CAMERA 3 Press N to CAMERA while pressing the small green button. Adjust the viewfinder lens to your camcorder by holding the viewfinder, the LCD panel, the battery pack or the microphone. 9 PLAY Quick Start Guide NOTE Do not pick up your eyesight (p. 29). Monitoring the playback picture on the screen. 4 PressSTART/STOP...

Operating Instructions
Page 10
..." slot. 2 Insert a "Memory Stick" in parentheses "( )" for more information. Quick Start Guide - Open the DC IN jack cover. Connecting the power cord (p. 19) Use the battery pack when using your camcorder. "Memory Stick" slot 10 MEMORY EJECT Press the MEMORY EJECT once lightly to eject it can go with itsv mark...
..." slot. 2 Insert a "Memory Stick" in parentheses "( )" for more information. Quick Start Guide - Open the DC IN jack cover. Connecting the power cord (p. 19) Use the battery pack when using your camcorder. "Memory Stick" slot 10 MEMORY EJECT Press the MEMORY EJECT once lightly to eject it can go with itsv mark...

Operating Instructions
Page 11
The picture appears on the screen. 1 Remove the lens cap. 2 Set the POWER switch to your camcorder by holding the viewfinder, the LCD panel, the battery pack or the microphone. 2 Press PLAY or PB. You can start The image while recording when the pressing the small green button button deeply is ...
The picture appears on the screen. 1 Remove the lens cap. 2 Set the POWER switch to your camcorder by holding the viewfinder, the LCD panel, the battery pack or the microphone. 2 Press PLAY or PB. You can start The image while recording when the pressing the small green button button deeply is ...

Operating Instructions
Page 14
... media, etc. 14 qa qs qd qf 1 AC-L10A/L10B/L10C AC power adaptor (1), power cord (1) (p. 16) 2 NP-FM50 battery pack (1) (p. 15, 16) 3 A/V connecting cable (1) (p. 47) 4 Wireless Remote Commander (1) (p. 258) 5 Size AA (R6) battery for Remote Commander (2) (p. 259) 6 Shoulder strap (1) 7 Lens cap (1) (p. 25) 8 "Memory Stick" (1) (p. 135) 9 USB cable (1) (p. 190) 0 CD-ROM (SPVD...
... media, etc. 14 qa qs qd qf 1 AC-L10A/L10B/L10C AC power adaptor (1), power cord (1) (p. 16) 2 NP-FM50 battery pack (1) (p. 15, 16) 3 A/V connecting cable (1) (p. 47) 4 Wireless Remote Commander (1) (p. 258) 5 Size AA (R6) battery for Remote Commander (2) (p. 259) 6 Shoulder strap (1) 7 Lens cap (1) (p. 25) 8 "Memory Stick" (1) (p. 135) 9 USB cable (1) (p. 190) 0 CD-ROM (SPVD...

Operating Instructions
Page 15
Getting Started Step 1 Preparing the power supply Installing the battery pack (1) Lift up the viewfinder. (2) Slide the battery pack down until it clicks. 1 2 To remove the battery pack (1) Lift up the viewfinder. (2) Slide the battery pack out in the direction of the arrow while pressing BATT down. 1 2 2 BATT release button If you use the large capacity battery pack If you install the NP-FM70/QM71/FM90/FM91/QM91 battery pack on your camcorder, extend its viewfinder. 15
Getting Started Step 1 Preparing the power supply Installing the battery pack (1) Lift up the viewfinder. (2) Slide the battery pack down until it clicks. 1 2 To remove the battery pack (1) Lift up the viewfinder. (2) Slide the battery pack out in the direction of the arrow while pressing BATT down. 1 2 2 BATT release button If you use the large capacity battery pack If you install the NP-FM70/QM71/FM90/FM91/QM91 battery pack on your camcorder, extend its viewfinder. 15

Operating Instructions
Page 16
.... (1) Open the DC IN jack cover and connect the AC power adaptor supplied with your camcorder to the DC IN jack with the "InfoLITHIUM" battery pack (M series). Your camcorder operates only with the plug's v mark facing up. (2) Connect the power cord to the AC power adaptor. (3) Connect the... power cord to the wall outlet. (4) Set the POWER switch to use the battery longer than usual. 2 14 POWER VCR OFF (CHG) MEMORY CAMERA After charging the battery pack Disconnect the AC power adaptor from the DC IN jack on the display window. Step 1 Preparing the...
.... (1) Open the DC IN jack cover and connect the AC power adaptor supplied with your camcorder to the DC IN jack with the "InfoLITHIUM" battery pack (M series). Your camcorder operates only with the plug's v mark facing up. (2) Connect the power cord to the AC power adaptor. (3) Connect the... power cord to the wall outlet. (4) Set the POWER switch to use the battery longer than usual. 2 14 POWER VCR OFF (CHG) MEMORY CAMERA After charging the battery pack Disconnect the AC power adaptor from the DC IN jack on the display window. Step 1 Preparing the...

Operating Instructions
Page 17
... with the LCD screen Continuous Typical* 70 40 155 90 180 105 235 140 275 165 Approximate minutes when you use a fully charged battery and the XLR adaptor is extremely high or low because of the AC power adaptor. When you use the AC power adaptor Place the ...AC power adaptor near a wall outlet. If any trouble occurs with the viewfinder. Remaining battery time indicator The remaining battery time indicator in the display window. Charging time Battery pack NP-FM50 (supplied) NP-FM70 NP-QM71 NP-FM90 NP-FM91/QM91 Full charge (Normal charge) 150 ...
... with the LCD screen Continuous Typical* 70 40 155 90 180 105 235 140 275 165 Approximate minutes when you use a fully charged battery and the XLR adaptor is extremely high or low because of the AC power adaptor. When you use the AC power adaptor Place the ...AC power adaptor near a wall outlet. If any trouble occurs with the viewfinder. Remaining battery time indicator The remaining battery time indicator in the display window. Charging time Battery pack NP-FM50 (supplied) NP-FM70 NP-QM71 NP-FM90 NP-FM91/QM91 Full charge (Normal charge) 150 ...

Operating Instructions
Page 18
... exchange data such as battery consumption with compatible electronic equipment. The "InfoLITHIUM" is a lithium ion battery pack that the indication on the battery remaining indicator is compatible with the "InfoLITHIUM" battery. "InfoLITHIUM" M series battery packs have the mark. Your camcorder operates only with the "InfoLITHIUM" battery pack (M series). Step...605 Playing time on LCD screen 110 230 270 355 410 Approximate minutes when you use a fully charged battery Note Approximate recording time and playing time at 25 shorter if you use your camcorder in an ambient temperature of...
... exchange data such as battery consumption with compatible electronic equipment. The "InfoLITHIUM" is a lithium ion battery pack that the indication on the battery remaining indicator is compatible with the "InfoLITHIUM" battery. "InfoLITHIUM" M series battery packs have the mark. Your camcorder operates only with the "InfoLITHIUM" battery pack (M series). Step...605 Playing time on LCD screen 110 230 270 355 410 Approximate minutes when you use a fully charged battery Note Approximate recording time and playing time at 25 shorter if you use your camcorder in an ambient temperature of...

Operating Instructions
Page 19
Refer to the operating instructions of the Car Battery Adaptor for a long time, we recommend that you use your camcorder with your camcorder to the wall outlet, even if the set itself has been ... DC IN jack, even when the power cord is connected to the DC IN jack on your camcorder for further information. 19 Using a car battery Use Sony Car Battery Adaptor (optional). Connect the AC power adaptor supplied with the plug's v mark facing up. (2) Connect the power cord to the AC power adaptor. (3) Connect...
Refer to the operating instructions of the Car Battery Adaptor for a long time, we recommend that you use your camcorder with your camcorder to the wall outlet, even if the set itself has been ... DC IN jack, even when the power cord is connected to the DC IN jack on your camcorder for further information. 19 Using a car battery Use Sony Car Battery Adaptor (optional). Connect the AC power adaptor supplied with the plug's v mark facing up. (2) Connect the power cord to the AC power adaptor. (3) Connect...

Operating Instructions
Page 20
... discharged (p. 247). If you do not use your camcorder for about four month,sthedateandtimemaybe cleared from memory (bars may appear) because the built-in rechargeable battery installed in that you set the POWER switch to CAMERA or MEMORY unless you set to CAMERA or MEMORY. (2) Turn the SEL/PUSH EXEC dial...
... discharged (p. 247). If you do not use your camcorder for about four month,sthedateandtimemaybe cleared from memory (bars may appear) because the built-in rechargeable battery installed in that you set the POWER switch to CAMERA or MEMORY unless you set to CAMERA or MEMORY. (2) Turn the SEL/PUSH EXEC dial...
Operating Instructions
Page 26
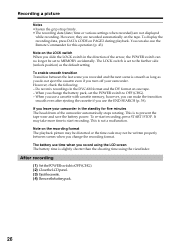
... during playback. This is slightly shorter than the shooting time using the LCD screen The battery time is to MEMORY accidentally. When you use time when you slide the LOCK switch in the DVCAM format and the DV format on one tape. - To re-start recording. You can... setting. Note on the LOCK switch When you record using the viewfinder. It may not be set to prevent the tape wear and save the battery power. The LOCK switch is not a malfunction. This is set the POWER switch to start recording, press START/STOP. After recording (1) SetthePOWERswitchtoOFF(CHG). ...
... during playback. This is slightly shorter than the shooting time using the LCD screen The battery time is to MEMORY accidentally. When you use time when you slide the LOCK switch in the DVCAM format and the DV format on one tape. - To re-start recording. You can... setting. Note on the LOCK switch When you record using the viewfinder. It may not be set to prevent the tape wear and save the battery power. The LOCK switch is not a malfunction. This is set the POWER switch to start recording, press START/STOP. After recording (1) SetthePOWERswitchtoOFF(CHG). ...

Operating Instructions
Page 29
... closed, check the picture with the viewfinder. Adjust the viewfinder lens to your eyesight so that the images in the menu settings when using the battery pack (p. 216). Select VF B.L.
... closed, check the picture with the viewfinder. Adjust the viewfinder lens to your eyesight so that the images in the menu settings when using the battery pack (p. 216). Select VF B.L.

Operating Instructions
Page 35
...05:56PM FN Remaining tape This appears after you close the LCD panel and open it again, it takes about one minute for a while. DVCAM format/DV format in SP mode Audio mode FN button Press this operation (p. 43). Date The date is displayed about five seconds after the...be displayed accurately depending on tapes. When you are not recorded on the tape. The indicator may not be reset during recording The remaining battery time indicator roughly indicates the continuous recording time. Time The time is displayed about five seconds after the power is turned on the LCD ...
...05:56PM FN Remaining tape This appears after you close the LCD panel and open it again, it takes about one minute for a while. DVCAM format/DV format in SP mode Audio mode FN button Press this operation (p. 43). Date The date is displayed about five seconds after the...be displayed accurately depending on tapes. When you are not recorded on the tape. The indicator may not be reset during recording The remaining battery time indicator roughly indicates the continuous recording time. Time The time is displayed about five seconds after the power is turned on the LCD ...

Operating Instructions
Page 44
... camcorder's information when you close the LCD panel and open it again, it takes about one minute for the correct remaining battery time to DATE in the playback. Remaining battery time indicator during playback The indicator indicates the approximate continuous playback time. The display changes as follows when you use the data...
... camcorder's information when you close the LCD panel and open it again, it takes about one minute for the correct remaining battery time to DATE in the playback. Remaining battery time indicator during playback The indicator indicates the approximate continuous playback time. The display changes as follows when you use the data...

Operating Instructions
Page 72
... selector to one -push white balance) mode. White balance cannot be set the white balance to AUTO LOCK or press WHT BAL. You detach the battery for replacement. - You can achieve recording with manual adjustment If you have changed Readjust the white balance while the camcorder is locked and maintained even...
... selector to one -push white balance) mode. White balance cannot be set the white balance to AUTO LOCK or press WHT BAL. You detach the battery for replacement. - You can achieve recording with manual adjustment If you have changed Readjust the white balance while the camcorder is locked and maintained even...

Operating Instructions
Page 216
... To output analog images and sound in digital format using your camcorder (p. 211) VCR To adjust the color on VF B.L. • When you select BRIGHT, battery life is reduced by about 10 percent during recording. • When you adjust LCD COLOR and/or VF B.L. To get lowintensity To get highintensity z BRT... audios are mixed. Displays the guide frame (p. 63). The recorded picture will not be affected. 216 Even if you use power supplies other than the battery pack, BRIGHT is automatically selected.
... To output analog images and sound in digital format using your camcorder (p. 211) VCR To adjust the color on VF B.L. • When you select BRIGHT, battery life is reduced by about 10 percent during recording. • When you adjust LCD COLOR and/or VF B.L. To get lowintensity To get highintensity z BRT... audios are mixed. Displays the guide frame (p. 63). The recorded picture will not be affected. 216 Even if you use power supplies other than the battery pack, BRIGHT is automatically selected.


