MHCGX9900 Instructions (main component system)
Page 2
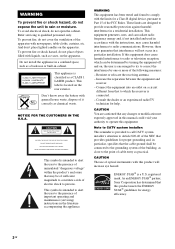
.... If this equipment. As an ENERGY STAR® partner, Sony Corporation has determined that provides guidelines for help. To prevent fire or shock hazard, do not open the cabinet. Note to CATV system installer: This reminder is encouraged to try to Article 820-40...are designed to provide reasonable protection against harmful interference in particular, specifies that any changes or modification not expressly approved in this manual could void your authority to operate this equipment does cause harmful interference to persons. These limits are cautioned that the cable ...
.... If this equipment. As an ENERGY STAR® partner, Sony Corporation has determined that provides guidelines for help. To prevent fire or shock hazard, do not open the cabinet. Note to CATV system installer: This reminder is encouraged to try to Article 820-40...are designed to provide reasonable protection against harmful interference in particular, specifies that any changes or modification not expressly approved in this manual could void your authority to operate this equipment does cause harmful interference to persons. These limits are cautioned that the cable ...
MHCGX9900 Instructions (main component system)
Page 3
... the surround effect .......... 27 Selecting the MP3 Booster effect ......... 28 Selecting the sound system 28 (MHC-GNX88/GNX80/GNX77/ GNX70/GX9900 only) Using the subwoofer 29 (MHC-GNX100/GNX88/GNX80 only) Flashing sound effect 29 - Manual Tuning Tape - Sleep Timer Waking up the system 8 Positioning the speakers 12 Setting the clock 13 Disc - Table of Contents...
... the surround effect .......... 27 Selecting the MP3 Booster effect ......... 28 Selecting the sound system 28 (MHC-GNX88/GNX80/GNX77/ GNX70/GX9900 only) Using the subwoofer 29 (MHC-GNX100/GNX88/GNX80 only) Flashing sound effect 29 - Manual Tuning Tape - Sleep Timer Waking up the system 8 Positioning the speakers 12 Setting the clock 13 Disc - Table of Contents...
MHCGX9900 Instructions (main component system)
Page 5
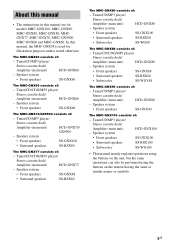
...; The instructions in this manual, the MHC-GNX88 is used for models MHC-GNX100, MHC-GNX90, MHC-GNX88, MHC-GNX80, MHCGNX77, MHC-GNX70, MHC-GX9900, MHC-GNX66 and MHC-GNX60. Tuner/CD/MP3 player/ Stereo cassette deck/ Amplifier (main unit) HCD-GNX60 - Speaker system • Front speakers SS-GNX60 The MHC-GNX66 consists of : - Speaker system • Front speakers SS-GNX88 • Surround speakers...
...; The instructions in this manual, the MHC-GNX88 is used for models MHC-GNX100, MHC-GNX90, MHC-GNX88, MHC-GNX80, MHCGNX77, MHC-GNX70, MHC-GX9900, MHC-GNX66 and MHC-GNX60. Tuner/CD/MP3 player/ Stereo cassette deck/ Amplifier (main unit) HCD-GNX60 - Speaker system • Front speakers SS-GNX60 The MHC-GNX66 consists of : - Speaker system • Front speakers SS-GNX88 • Surround speakers...
MHCGX9900 Instructions (main component system)
Page 19
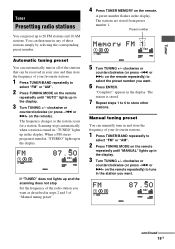
... station is tuned in, "STEREO" lights up in the display. Tuner Tuner Presetting radio stations You can then tune in the display. Manual tuning preset You can be received in your area and then store the frequency of those stations simply by selecting the corresponding preset number. continued...does not lights up and the scanning does not stop Set the frequency of "Manual tuning preset". 4 Press TUNER MEMORY on the remote repeatedly until "AUTO" lights up to select the preset number you want as the system scans for a station. or >+ on the remote repeatedly) to 20 FM ...
... station is tuned in, "STEREO" lights up in the display. Tuner Tuner Presetting radio stations You can then tune in the display. Manual tuning preset You can be received in your area and then store the frequency of those stations simply by selecting the corresponding preset number. continued...does not lights up and the scanning does not stop Set the frequency of "Manual tuning preset". 4 Press TUNER MEMORY on the remote repeatedly until "AUTO" lights up to select the preset number you want as the system scans for a station. or >+ on the remote repeatedly) to 20 FM ...
MHCGX9900 Instructions (main component system)
Page 20
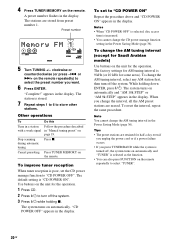
...The factory settings for AM tuning interval is stored. 7 Repeat steps 1 to 6 to turn off the system. Note You cannot change the interval, all the AM preset stations are stored from preset number 1. To ...>+ on automatically and "TUNER" is poor, set to select the preset number you want. 6 Press ENTER. The system turns on the remote. "Complete!" The station is 9 kHz (or 10 kHz for half a day even if ...POWER OFF" appears in the display. A preset number flashes in "Manual tuning preset" on the remote repeatedly to "CD POWER OFF". When you press TUNER/BAND while the...
...The factory settings for AM tuning interval is stored. 7 Repeat steps 1 to 6 to turn off the system. Note You cannot change the interval, all the AM preset stations are stored from preset number 1. To ...>+ on automatically and "TUNER" is poor, set to select the preset number you want. 6 Press ENTER. The system turns on the remote. "Complete!" The station is 9 kHz (or 10 kHz for half a day even if ...POWER OFF" appears in the display. A preset number flashes in "Manual tuning preset" on the remote repeatedly to "CD POWER OFF". When you press TUNER/BAND while the...
MHCGX9900 Instructions (main component system)
Page 21
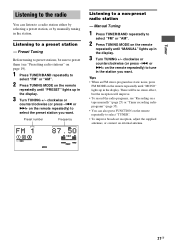
..." or "AM". 2 Press TUNING MODE on the remote repeatedly) to select the preset station you want . or >+ on the remote repeatedly until "MANUAL" lights up in the display. 3 Turn TUNING +/- clockwise or counterclockwise (or press -. Listening to a non-preset radio station - There will be ...sure to preset them (see "Recording on a tape manually" (page 25) or "Timer recording radio programs" (page 35). • You can listen to a radio station either by selecting a preset station, or...
..." or "AM". 2 Press TUNING MODE on the remote repeatedly) to select the preset station you want . or >+ on the remote repeatedly until "MANUAL" lights up in the display. 3 Turn TUNING +/- clockwise or counterclockwise (or press -. Listening to a non-preset radio station - There will be ...sure to preset them (see "Recording on a tape manually" (page 25) or "Timer recording radio programs" (page 35). • You can listen to a radio station either by selecting a preset station, or...
MHCGX9900 Instructions (main component system)
Page 25
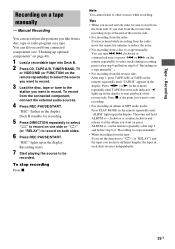
...also record from the tape: If you set the direction to "j" (or "RELAY") and the tapes you want to a tape manually". • When recording from connected components (see "Hooking up in the display. Deck B standby for recording. 5 Press DIRECTION repeatedly to select "g" to record on one... the reverse side. Press x at the point you like from the connected component, connect the external audio sources. 4 Press REC PAUSE/START. Tape - To stop recording Press x. or >+ on the remote repeatedly) to a tape manually: You can turn and hold ALBUM +/- Then turn . > clockwise or ...
...also record from the tape: If you set the direction to "j" (or "RELAY") and the tapes you want to a tape manually". • When recording from connected components (see "Hooking up in the display. Deck B standby for recording. 5 Press DIRECTION repeatedly to select "g" to record on one... the reverse side. Press x at the point you like from the connected component, connect the external audio sources. 4 Press REC PAUSE/START. Tape - To stop recording Press x. or >+ on the remote repeatedly) to a tape manually: You can turn and hold ALBUM +/- Then turn . > clockwise or ...
MHCGX9900 Instructions (main component system)
Page 30
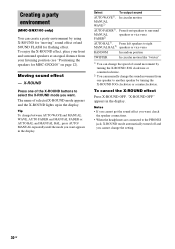
... sound AUTO WAVE1), In circular motion MANUAL WAVE2) AUTO FADER1), From front speakers to surround MANUAL FADER2) speakers or vice versa AUTO BAL1), From left speakers to another speaker by using X-ROUND for "moving" sound effect or/and SOUND FLASH for MHC-GNX100" on page 12). To cancel... the X-ROUND effect Press X-ROUND OFF. X-ROUND Press one speaker to right MANUAL BAL2) speakers or vice versa RANDOM In random position TWISTER In circular motion like ...
... sound AUTO WAVE1), In circular motion MANUAL WAVE2) AUTO FADER1), From front speakers to surround MANUAL FADER2) speakers or vice versa AUTO BAL1), From left speakers to another speaker by using X-ROUND for "moving" sound effect or/and SOUND FLASH for MHC-GNX100" on page 12). To cancel... the X-ROUND effect Press X-ROUND OFF. X-ROUND Press one speaker to right MANUAL BAL2) speakers or vice versa RANDOM In random position TWISTER In circular motion like ...

MHCGX9900 Instructions (main component system)
Page 32
...connect an optional microphone. 1 Turn MIC LEVEL to "MIN" to turn ECHO LEVEL to "MIN". * MHC-GNX88/GNX77/GNX66 only. To record the sound, see "Recording on a tape manually" on your voice through the microphone only, you can mix and record sound from microphone after step 2. ...Singing along You can sing along with the music and adjust the microphone volume by selecting the "CD" function and not playing a disc. • When high level sound signals are input, the system...
...connect an optional microphone. 1 Turn MIC LEVEL to "MIN" to turn ECHO LEVEL to "MIN". * MHC-GNX88/GNX77/GNX66 only. To record the sound, see "Recording on a tape manually" on your voice through the microphone only, you can mix and record sound from microphone after step 2. ...Singing along You can sing along with the music and adjust the microphone volume by selecting the "CD" function and not playing a disc. • When high level sound signals are input, the system...

