
Operating Instructions
Page 6
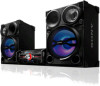
qg - Front view 1 23 4 5 4 6 7 qj 8 9 9 qh q; Guide to parts and controls This manual mainly explains operations using the unit, but the same operations can also be performed using the buttons on the remote control having the same or similar names. Top view 4 qf qd 4 qs qa qk ql 6US Unit -
qg - Front view 1 23 4 5 4 6 7 qj 8 9 9 qh q; Guide to parts and controls This manual mainly explains operations using the unit, but the same operations can also be performed using the buttons on the remote control having the same or similar names. Top view 4 qf qd 4 qs qa qk ql 6US Unit -
Operating Instructions
Page 7
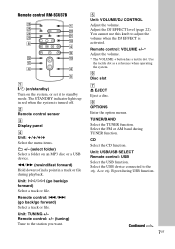
... (on/standby) Turn on an MP3 disc or a USB device. E Unit: VOLUME/DJ CONTROL Adjust the volume. Adjust the DJ EFFECT level (page 22). Remote control: VOLUME +/-* Adjust the volume. * The VOLUME + button has a tactile dot. H OPTIONS Enter the option menus. Unit: USB/USB SELECT...Select a track or file. Select the FM or AM band during USB function. Unit: TUNING +/- Select the USB device connected to standby mode. Remote control RM-SCU37B wh 1 wg w; B Remote control sensor C Display panel D Unit: / / / Select the menu items. +/- (select folder) Select a folder on the system, or set...
... (on/standby) Turn on an MP3 disc or a USB device. E Unit: VOLUME/DJ CONTROL Adjust the volume. Adjust the DJ EFFECT level (page 22). Remote control: VOLUME +/-* Adjust the volume. * The VOLUME + button has a tactile dot. H OPTIONS Enter the option menus. Unit: USB/USB SELECT...Select a track or file. Select the FM or AM band during USB function. Unit: TUNING +/- Select the USB device connected to standby mode. Remote control RM-SCU37B wh 1 wg w; B Remote control sensor C Display panel D Unit: / / / Select the menu items. +/- (select folder) Select a folder on the system, or set...
Operating Instructions
Page 8
...of a TV. T CLOCK/TIMER SELECT (page 23) CLOCK/TIMER SET (page 12, 23) Set the clock and the timers. I Unit: NX (play/pause) Remote control: N (play of the USB device. The TV sound is output through this system. The audio is connected to the B port. Q Unit: SEARCH Enter .... Unit: DVD/SAT Select the DVD/SAT function. A indicator O MIC IN jack Connect a microphone. Unit: GROOVE Reinforce the bass. Unit: PRESET EQ Remote control: EQ Select the sound effect (page 21). S ENTER Enter the settings. REC TO USB B Transfer onto the optional USB device which is output through...
...of a TV. T CLOCK/TIMER SELECT (page 23) CLOCK/TIMER SET (page 12, 23) Set the clock and the timers. I Unit: NX (play/pause) Remote control: N (play of the USB device. The TV sound is output through this system. The audio is connected to the B port. Q Unit: SEARCH Enter .... Unit: DVD/SAT Select the DVD/SAT function. A indicator O MIC IN jack Connect a microphone. Unit: GROOVE Reinforce the bass. Unit: PRESET EQ Remote control: EQ Select the sound effect (page 21). S ENTER Enter the settings. REC TO USB B Transfer onto the optional USB device which is output through...
Operating Instructions
Page 11
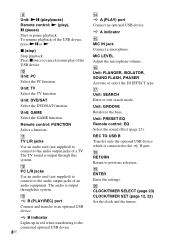
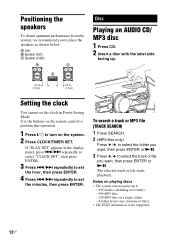
... at each corner on the system and the demonstration automatically ends. The demonstration appears in the display panel. Notes • Be sure to use the remote for models equipped with a new one or mix different types of batteries. • If you do not use only the supplied speakers. • When connecting...
... at each corner on the system and the demonstration automatically ends. The demonstration appears in the display panel. Notes • Be sure to use the remote for models equipped with a new one or mix different types of batteries. • If you do not use only the supplied speakers. • When connecting...
Operating Instructions
Page 12
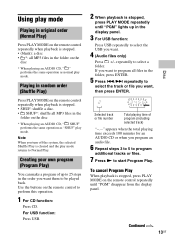
... or MP3 file (TRACK SEARCH) 1 Press SEARCH. 2 (MP3 files only) Press / to select the folder you want , then press ENTER or NX. Notes on the remote control to perform this operation. 1 Press "/1 to set the clock in Power Saving Mode. Use the buttons on playing discs • The system can recognize...
... or MP3 file (TRACK SEARCH) 1 Press SEARCH. 2 (MP3 files only) Press / to select the folder you want , then press ENTER or NX. Notes on the remote control to perform this operation. 1 Press "/1 to set the clock in Power Saving Mode. Use the buttons on playing discs • The system can recognize...
Operating Instructions
Page 13
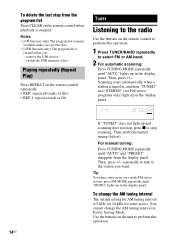
... For USB function: Press USB repeatedly to Normal Play. For USB function: Press USB. 2 When playback is stopped, press PLAY MODE on the remote control repeatedly until "PGM" lights up to 25 steps in the order you want , then press ENTER. Playing in random order (Shuffle Play) Press... ./> repeatedly to perform this operation. 1 For CD function: Press CD. Using play mode Playing in original order (Normal Play) Press PLAY MODE on the remote control repeatedly when playback is stopped. • SHUF: shuffle a disc. • SHUF*: shuffle all MP3 files in the folder on the disc * When...
... For USB function: Press USB repeatedly to Normal Play. For USB function: Press USB. 2 When playback is stopped, press PLAY MODE on the remote control repeatedly until "PGM" lights up to 25 steps in the order you want , then press ENTER. Playing in random order (Shuffle Play) Press... ./> repeatedly to perform this operation. 1 For CD function: Press CD. Using play mode Playing in original order (Normal Play) Press PLAY MODE on the remote control repeatedly when playback is stopped. • SHUF: shuffle a disc. • SHUF*: shuffle all MP3 files in the folder on the disc * When...
Operating Instructions
Page 14
.... 14US remove the USB device. - Tip To reduce static noise on the remote control when playback is cleared when you want. Use the buttons on the remote control to the station you : - Playing repeatedly (Repeat Play) Press REPEAT on the remote control repeatedly. • REP: repeat all tracks or files • REP 1: repeat...
.... 14US remove the USB device. - Tip To reduce static noise on the remote control when playback is cleared when you want. Use the buttons on the remote control to the station you : - Playing repeatedly (Repeat Play) Press REPEAT on the remote control repeatedly. • REP: repeat all tracks or files • REP 1: repeat...
Operating Instructions
Page 15
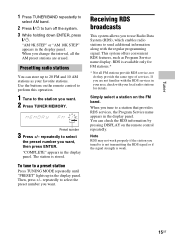
Presetting radio stations You can check the RDS information by pressing DISPLAY on the remote control repeatedly. Then, press +/- This system offers convenient RDS features, such as your local radio stations for FM stations.* * Not all the AM preset stations ... 10K STEP" appears in the display panel. Preset number 3 Press +/- The station is available only for details. RDS is stored. Simply select a station on the remote control to perform this operation. 1 Tune to a preset station Press TUNING MODE repeatedly until "PRESET" lights up to select the preset number you want.
Presetting radio stations You can check the RDS information by pressing DISPLAY on the remote control repeatedly. Then, press +/- This system offers convenient RDS features, such as your local radio stations for FM stations.* * Not all the AM preset stations ... 10K STEP" appears in the display panel. Preset number 3 Press +/- The station is available only for details. RDS is stored. Simply select a station on the remote control to perform this operation. 1 Tune to a preset station Press TUNING MODE repeatedly until "PRESET" lights up to select the preset number you want.
Operating Instructions
Page 17
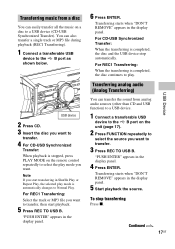
... play. Transferring music from analog audio sources (other than CD and USB function) to a USB device. 1 Connect a transferable USB device to the B port on the remote control repeatedly to select the play mode you want to transfer. 3 Press REC TO USB B.
... play. Transferring music from analog audio sources (other than CD and USB function) to a USB device. 1 Connect a transferable USB device to the B port on the remote control repeatedly to select the play mode you want to transfer. 3 Press REC TO USB B.
Operating Instructions
Page 18
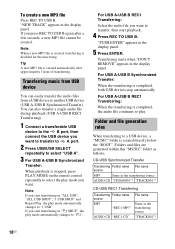
Tip A new MP3 file is stopped, press PLAY MODE on the remote control repeatedly to select the play mode automatically changes to "1 USB". If you start transferring in "ALL USB", "ALL USB SHUF", "1 USB SHUF" and Repeat ...
Tip A new MP3 file is stopped, press PLAY MODE on the remote control repeatedly to select the play mode automatically changes to "1 USB". If you start transferring in "ALL USB", "ALL USB SHUF", "1 USB SHUF" and Repeat ...
Operating Instructions
Page 20
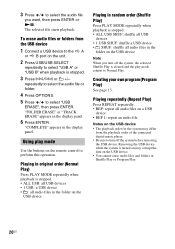
... USB device Playing in random order (Shuffle Play) Press PLAY MODE repeatedly when playback is cleared and the play mode Use the buttons on the remote control to perform this operation. The selected file starts playback. Creating your own program (Program Play) See page 13. Removing the USB device while the...
... USB device Playing in random order (Shuffle Play) Press PLAY MODE repeatedly when playback is cleared and the play mode Use the buttons on the remote control to perform this operation. The selected file starts playback. Creating your own program (Program Play) See page 13. Removing the USB device while the...
Operating Instructions
Page 21
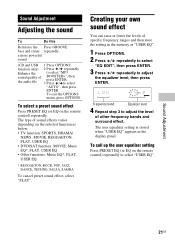
To call up the user equalizer setting Press PRESET EQ (or EQ on the remote control) repeatedly to adjust the level of specific frequency ranges and then store the setting in the display panel. function only) 2 Press / repeatedly Enhance ...the to select "MP3 sound quality of sound effects varies depending on the remote control) repeatedly. The type of the audio file BOOSTER+", then press ENTER. 3 Press / to adjust the equalizer level, then press ENTER. Sound Adjustment 21US...
To call up the user equalizer setting Press PRESET EQ (or EQ on the remote control) repeatedly to adjust the level of specific frequency ranges and then store the setting in the display panel. function only) 2 Press / repeatedly Enhance ...the to select "MP3 sound quality of sound effects varies depending on the remote control) repeatedly. The type of the audio file BOOSTER+", then press ENTER. 3 Press / to adjust the equalizer level, then press ENTER. Sound Adjustment 21US...
Operating Instructions
Page 22
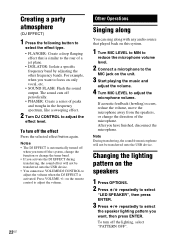
... and adjust the volume. 4 Turn MIC LEVEL to adjust the microphone volume. To turn off the effect Press the selected effect button again. on the remote control to adjust the volume. 22US Other Operations Singing along You can sing along with any audio source that is activated. Changing the lighting pattern...
... and adjust the volume. 4 Turn MIC LEVEL to adjust the microphone volume. To turn off the effect Press the selected effect button again. on the remote control to adjust the volume. 22US Other Operations Singing along You can sing along with any audio source that is activated. Changing the lighting pattern...

Operating Instructions
Page 23
...and then press VOLUME +/- Tip To check the remaining time before the preset time. Play Timer: You can fall asleep to the B port on the remote control. For Recording Timer: Connect a transferable USB device to music. To cancel the timer Press CLOCK/TIMER SELECT, press ./> repeatedly to disc, tuner or... USB device at the same time. Notes • The system turns on the remote control to select the sound source you use either with the Sleep Timer, the Sleep Timer has priority. Play Timer/Recording Timer Make sure you...
...and then press VOLUME +/- Tip To check the remaining time before the preset time. Play Timer: You can fall asleep to the B port on the remote control. For Recording Timer: Connect a transferable USB device to music. To cancel the timer Press CLOCK/TIMER SELECT, press ./> repeatedly to disc, tuner or... USB device at the same time. Notes • The system turns on the remote control to select the sound source you use either with the Sleep Timer, the Sleep Timer has priority. Play Timer/Recording Timer Make sure you...
Operating Instructions
Page 24
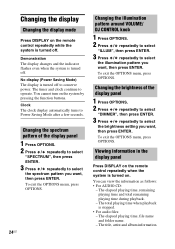
... repeatedly when the system is turned off. Changing the display Changing the display mode Press DISPLAY on the remote control repeatedly while the system is turned on. You cannot turn on the system by pressing the function buttons. To exit the OPTIONS menu, press ...
... repeatedly when the system is turned off. Changing the display Changing the display mode Press DISPLAY on the remote control repeatedly while the system is turned on. You cannot turn on the system by pressing the function buttons. To exit the OPTIONS menu, press ...
Operating Instructions
Page 25
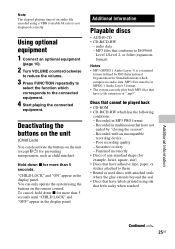
... that cannot be in the display panel. Scratches or dirty - Note The elapsed playing time of an audio file encoded using the buttons on the remote control. MP3 files must be played back • CD-ROM • CD-R/CD-RW which compresses audio data. Recorded with attached seals where the glue...
... that cannot be in the display panel. Scratches or dirty - Note The elapsed playing time of an audio file encoded using the buttons on the remote control. MP3 files must be played back • CD-ROM • CD-R/CD-RW which compresses audio data. Recorded with attached seals where the glue...
Operating Instructions
Page 27
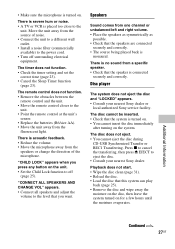
...noise. • Connect the unit to a different wall outlet. • Install a noise filter (commercially available) to the unit. • Point the remote control at the unit's sensor. • Replace the batteries (R6/size AA). • Move the unit away from the source of the microphone. "...does not eject the disc and "LOCKED" appears. • Consult your nearest Sony dealer. Press x to cancel the transferring, then press Z EJECT to eject the disc. • Consult your nearest Sony dealer or local authorized Sony service facility. • Make sure the microphone is turned on the unit. ...
...noise. • Connect the unit to a different wall outlet. • Install a noise filter (commercially available) to the unit. • Point the remote control at the unit's sensor. • Replace the batteries (R6/size AA). • Move the unit away from the source of the microphone. "...does not eject the disc and "LOCKED" appears. • Consult your nearest Sony dealer. Press x to cancel the transferring, then press Z EJECT to eject the disc. • Consult your nearest Sony dealer or local authorized Sony service facility. • Make sure the microphone is turned on the unit. ...
Operating Instructions
Page 33
Additional Information 33US speakers) (Approx.) 10.0 kg (22 lb 1 oz) Supplied accessories Remote control (1) R6 (Size AA) batteries (2) FM lead/AM loop antenna (1) Speaker foot (8) Design and specifications are subject to -noise ratio More than 90 dB Dynamic ...
Additional Information 33US speakers) (Approx.) 10.0 kg (22 lb 1 oz) Supplied accessories Remote control (1) R6 (Size AA) batteries (2) FM lead/AM loop antenna (1) Speaker foot (8) Design and specifications are subject to -noise ratio More than 90 dB Dynamic ...


