
Operating Instructions
Page 1
Customers in the continental United States contact the Direct Response Center at : (416) 499-SONY (7669) LCD Projection TV HD-Monitor Operating Instructions KF-42WE610 KF-50WE610 KF-60WE610 2003 Sony Corporation If, after reading this instruction manual, you have additional questions related to the use of your Sony projection TV, please call one of the following numbers (English only). 4-097-546-13 (2) LCD Projection TV KF-42WE610/50WE610/60WE610 Printed in Canada contact the Customer Relations Center at : 1-800-222-SONY (7669) Customers in U.S.A.
Customers in the continental United States contact the Direct Response Center at : (416) 499-SONY (7669) LCD Projection TV HD-Monitor Operating Instructions KF-42WE610 KF-50WE610 KF-60WE610 2003 Sony Corporation If, after reading this instruction manual, you have additional questions related to the use of your Sony projection TV, please call one of the following numbers (English only). 4-097-546-13 (2) LCD Projection TV KF-42WE610/50WE610/60WE610 Printed in Canada contact the Customer Relations Center at : 1-800-222-SONY (7669) Customers in U.S.A.
Operating Instructions
Page 2
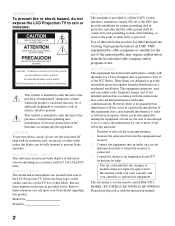
...Sony dealer regarding this equipment does cause harmful interference to radio or television reception, which the receiver is connected. ❑ Consult the dealer or an experienced radio/TV technician for proper grounding and, in the literature accompanying the appliance. These limits are located at the rear of the LCD Projection TV...and found to persons. You are cautioned that to Part 15 of programs broadcast on the TV box (white label). MODEL: KF-42WE610, KF-50WE610, KF-60WE610 Please keep this television receiver for a Class B digital device pursuant to which can radiate ...
...Sony dealer regarding this equipment does cause harmful interference to radio or television reception, which the receiver is connected. ❑ Consult the dealer or an experienced radio/TV technician for proper grounding and, in the literature accompanying the appliance. These limits are located at the rear of the LCD Projection TV...and found to persons. You are cautioned that to Part 15 of programs broadcast on the TV box (white label). MODEL: KF-42WE610, KF-50WE610, KF-60WE610 Please keep this television receiver for a Class B digital device pursuant to which can radiate ...

Operating Instructions
Page 3
... or direct sunlight. As an ENERGY STAR® Partner, Sony Corporation has determined that face the screen with opaque drapery. TruSurround, SRS and the ( )® symbol are licensed by qualified service personnel before turning on the LCD Projection TV. ❑ To obtain the best picture, do not block...desirable to fit into the outlet, contact your dealer. ❑ If any liquid or solid object should fall inside the cabinet, unplug the LCD Projection TV immediately and have it checked by BBE Sound, Inc. Patent No. 4,638,258 and 4,482,866. 3 Installing ❑ To prevent internal heat...
... or direct sunlight. As an ENERGY STAR® Partner, Sony Corporation has determined that face the screen with opaque drapery. TruSurround, SRS and the ( )® symbol are licensed by qualified service personnel before turning on the LCD Projection TV. ❑ To obtain the best picture, do not block...desirable to fit into the outlet, contact your dealer. ❑ If any liquid or solid object should fall inside the cabinet, unplug the LCD Projection TV immediately and have it checked by BBE Sound, Inc. Patent No. 4,638,258 and 4,482,866. 3 Installing ❑ To prevent internal heat...
Operating Instructions
Page 5
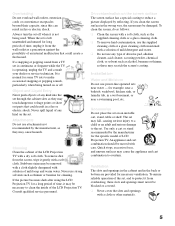
...solvents such as these slots and openings must never be blocked or covered. ❑ Never cover the slots and openings with solution of LCD Projection TV. To remove dust from overheating, these may be moved with a dry soft cloth. If you clean the screen surface in fire or electric... or solvent such as alcohol, benzene or thinner, as thinner or benzine for a long period of time, it gently with a solution of the LCD Projection TV with care. Ventilation The slots and openings in the cabinet and in a wet basement, or near a bathtub, washbowl, kitchen sink, or laundry tub,...
...solvents such as these slots and openings must never be blocked or covered. ❑ Never cover the slots and openings with solution of LCD Projection TV. To remove dust from overheating, these may be moved with a dry soft cloth. If you clean the screen surface in fire or electric... or solvent such as alcohol, benzene or thinner, as thinner or benzine for a long period of time, it gently with a solution of the LCD Projection TV with care. Ventilation The slots and openings in the cabinet and in a wet basement, or near a bathtub, washbowl, kitchen sink, or laundry tub,...
Operating Instructions
Page 7
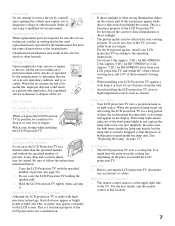
... expose the screen to reflections from eye fatigue. If you install the LCD projection TV. When the projection lamp wears out after using the LCD projection TV for KF-60WE610 away from your LCD projection TV, and within 60° of the vertical viewing area, and 130° of the horizontal ...viewing area. ❑ When installing your footing while installing the LCD Projection TV. If the lamp replacement indicator...
... expose the screen to reflections from eye fatigue. If you install the LCD projection TV. When the projection lamp wears out after using the LCD projection TV for KF-60WE610 away from your LCD projection TV, and within 60° of the vertical viewing area, and 130° of the horizontal ...viewing area. ❑ When installing your footing while installing the LCD Projection TV. If the lamp replacement indicator...
Operating Instructions
Page 8
Contents Introducing the Sony LCD Projection TV Presenting the Sony LCD Projection TV 9 Using This Manual 10 Enjoying Your LCD Projection TV 11 Replacing the Lamp 13 Installing and Connecting the LCD Projection TV Contents 17 Inserting Batteries into the Remote Control ..........17 Carrying Your LCD Projection TV 18 To Prevent the LCD Projection TV from Falling Down 19 When Installing Your LCD Projection TV Against a Wall...
Contents Introducing the Sony LCD Projection TV Presenting the Sony LCD Projection TV 9 Using This Manual 10 Enjoying Your LCD Projection TV 11 Replacing the Lamp 13 Installing and Connecting the LCD Projection TV Contents 17 Inserting Batteries into the Remote Control ..........17 Carrying Your LCD Projection TV 18 To Prevent the LCD Projection TV from Falling Down 19 When Installing Your LCD Projection TV Against a Wall...
Operating Instructions
Page 9
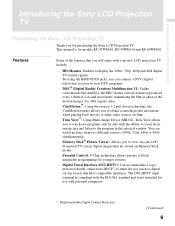
Introducing the Sony LCD Projection TV Introducing the Sony LCD Projection TV Presenting the Sony LCD Projection TV Thank you will enjoy with your LCD Projection TV screen digital images that are stored on one picture and listen to the program in the selected window. Features Some ... or other devices (such as digital set-top boxes) that you for models KF-42WE610, KF-50WE610 and KF-60WE610. The DVI-HDTV input terminal is compliant with the EIA-861 standard and is for purchasing the Sony LCD Projection TV. You can connect a DTV (digital television) receiver to view DTV programs. ...
Introducing the Sony LCD Projection TV Introducing the Sony LCD Projection TV Presenting the Sony LCD Projection TV Thank you will enjoy with your LCD Projection TV screen digital images that are stored on one picture and listen to the program in the selected window. Features Some ... or other devices (such as digital set-top boxes) that you for models KF-42WE610, KF-50WE610 and KF-60WE610. The DVI-HDTV input terminal is compliant with the EIA-861 standard and is for purchasing the Sony LCD Projection TV. You can connect a DTV (digital television) receiver to view DTV programs. ...
Operating Instructions
Page 10
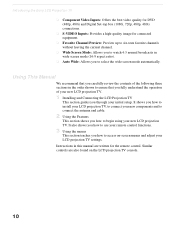
... the menus This section teaches you how to ensure that you fully understand the operation of your new LCD projection TV. 1 Installing and Connecting the LCD Projection TV This section guides you carefully review the contents of the following three sections in the order shown to access ...Instructions in wide screen mode (16:9 aspect ratio). ❑ Auto Wide: Allows you how to select the wide screen mode automatically. Introducing the Sony LCD Projection TV ❑ Component Video Inputs: Offers the best video quality for DVD (480p, 480i) and Digital Set-top box (1080i, 720p, 480p, 480i...
... the menus This section teaches you how to ensure that you fully understand the operation of your new LCD projection TV. 1 Installing and Connecting the LCD Projection TV This section guides you carefully review the contents of the following three sections in the order shown to access ...Instructions in wide screen mode (16:9 aspect ratio). ❑ Auto Wide: Allows you how to select the wide screen mode automatically. Introducing the Sony LCD Projection TV ❑ Component Video Inputs: Offers the best video quality for DVD (480p, 480i) and Digital Set-top box (1080i, 720p, 480p, 480i...
Operating Instructions
Page 11
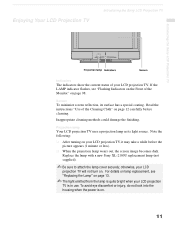
..., see "Flashing Indicators on the Front of the Cleaning Cloth" on page 98. Enjoying Your LCD Projection TV Introducing the Sony LCD Projection TV Introducing the Sony LCD Projection TV Projection lamp Indicators Screen Indicators The indicators show the current status of your LCD projection TV, it may take a while before cleaning. If the LAMP indicator flashes, see "Replacing the Lamp...
..., see "Flashing Indicators on the Front of the Cleaning Cloth" on page 98. Enjoying Your LCD Projection TV Introducing the Sony LCD Projection TV Introducing the Sony LCD Projection TV Projection lamp Indicators Screen Indicators The indicators show the current status of your LCD projection TV, it may take a while before cleaning. If the LAMP indicator flashes, see "Replacing the Lamp...
Operating Instructions
Page 12
... the picture may be used for a long period of time ❑ Turn off the main power on the front of your LCD projection TV before using your LCD projection TV is placed in a damaged screen. ✍ To clean the screen, please use any type of the Cleaning Cloth" below). When ... (see "Use of abrasive pad, alkaline cleaner, scouring powder, window cleaners or solvent such as alcohol or benzene. Introducing the Sony LCD Projection TV Notes on the LCD Projection TV To enjoy clear pictures ❑ Be sure not to allow sunlight or light from a lamp to wait for several minutes after ...
... the picture may be used for a long period of time ❑ Turn off the main power on the front of your LCD projection TV before using your LCD projection TV is placed in a damaged screen. ✍ To clean the screen, please use any type of the Cleaning Cloth" below). When ... (see "Use of abrasive pad, alkaline cleaner, scouring powder, window cleaners or solvent such as alcohol or benzene. Introducing the Sony LCD Projection TV Notes on the LCD Projection TV To enjoy clear pictures ❑ Be sure not to allow sunlight or light from a lamp to wait for several minutes after ...
Operating Instructions
Page 13
..., or the LAMP indicator on the new lamp. This may cause fire or electrical shock. Introducing the Sony LCD Projection TV Introducing the Sony LCD Projection TV Replacing the Lamp The projection lamp has a limited life which illuminates the picture. Be sure to replace the lamp with your fingers ...on the front of the LCD projection TV flashes, it cool down completely, as the surface of the lamp ...
..., or the LAMP indicator on the new lamp. This may cause fire or electrical shock. Introducing the Sony LCD Projection TV Introducing the Sony LCD Projection TV Replacing the Lamp The projection lamp has a limited life which illuminates the picture. Be sure to replace the lamp with your fingers ...on the front of the LCD projection TV flashes, it cool down completely, as the surface of the lamp ...
Operating Instructions
Page 14
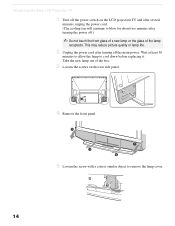
... the power off.) ✍ Do not touch the front glass of a new lamp or the glass of the box. 3 Loosen the screws on the LCD projection TV and after several minutes, unplug the power cord. (The cooling fan will continue to blow for about two minutes after turning off the main power.... Introducing the Sony LCD Projection TV 1 Turn off the power switch on the rear side panel. 4 Remove the front panel. 5 Loosen the screw with a coin or similar object to remove the lamp cover. 14...
... the power off.) ✍ Do not touch the front glass of a new lamp or the glass of the box. 3 Loosen the screws on the LCD projection TV and after several minutes, unplug the power cord. (The cooling fan will continue to blow for about two minutes after turning off the main power.... Introducing the Sony LCD Projection TV 1 Turn off the power switch on the rear side panel. 4 Remove the front panel. 5 Loosen the screw with a coin or similar object to remove the lamp cover. 14...
Operating Instructions
Page 15
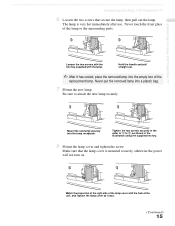
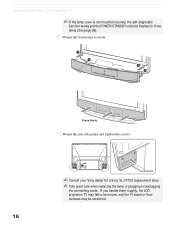
.... Tighten the two screws securely in the illustration using the supplied hex key. 8 Mount the lamp cover and tighten the screw. Match the projection of the right side of the replacement lamp. Make sure that secure the lamp, then pull out the lamp. Hold the handle and pull ... of the unit, and replace the lamp cover as shown in the order of the lamp or the surrounding parts. Introducing the Sony LCD Projection TV Introducing the Sony LCD Projection TV 6 Loosen the two screws that the lamp cover is very hot immediately after use. The lamp is mounted securely, otherwise the ...
.... Tighten the two screws securely in the illustration using the supplied hex key. 8 Mount the lamp cover and tighten the screw. Match the projection of the right side of the replacement lamp. Make sure that secure the lamp, then pull out the lamp. Hold the handle and pull ... of the unit, and replace the lamp cover as shown in the order of the lamp or the surrounding parts. Introducing the Sony LCD Projection TV Introducing the Sony LCD Projection TV 6 Loosen the two screws that the lamp cover is very hot immediately after use. The lamp is mounted securely, otherwise the ...
Operating Instructions
Page 16
Introducing the Sony LCD Projection TV ✍ If the lamp cover is not mounted securely, the self-diagnostic function works and the POWER/STANDBY indicator flashes for a Sony XL-2100U replacement lamp. ✍ Take great care when replacing the lamp or plugging in/unplugging the connecting cords. If you handle them roughly, the LCD projection TV may fall or be moved, and the TV stand or floor surfaces may be scratched. 16 Press firmly. 10 Mount the rear side panel and tighten the screws. ✍ Consult your Sony dealer for three times (See page 98). 9 Mount the front panel securely.
Introducing the Sony LCD Projection TV ✍ If the lamp cover is not mounted securely, the self-diagnostic function works and the POWER/STANDBY indicator flashes for a Sony XL-2100U replacement lamp. ✍ Take great care when replacing the lamp or plugging in/unplugging the connecting cords. If you handle them roughly, the LCD projection TV may fall or be moved, and the TV stand or floor surfaces may be scratched. 16 Press firmly. 10 Mount the rear side panel and tighten the screws. ✍ Consult your Sony dealer for three times (See page 98). 9 Mount the front panel securely.
Operating Instructions
Page 17
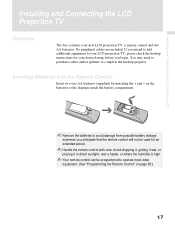
... your desired setup before you intend to add additional equipment to complete the hookup properly. Installing and Connecting the LCD Projection TV Installing and Connecting the LCD Projection TV Contents The box contains your LCD projection TV, please check the hookup instructions for an extended period. ✍ Handle the remote control with care. You may need...
... your desired setup before you intend to add additional equipment to complete the hookup properly. Installing and Connecting the LCD Projection TV Installing and Connecting the LCD Projection TV Contents The box contains your LCD projection TV, please check the hookup instructions for an extended period. ✍ Handle the remote control with care. You may need...
Operating Instructions
Page 18
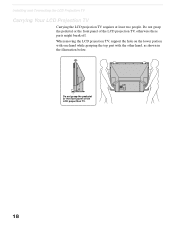
Do not grasp the pedestal or the front panel of the LCD projection TV, otherwise these parts might break off. Do not grasp the pedestal or the front panel of the LCD projecttion TV. 18 When moving the LCD projection TV, support the hole on the lower portion with one hand while grasping the top part with the other hand, as shown in the illustration below. Installing and Connecting the LCD Projection TV Carrying Your LCD Projection TV Carrying the LCD projection TV requires at least two people.
Do not grasp the pedestal or the front panel of the LCD projection TV, otherwise these parts might break off. Do not grasp the pedestal or the front panel of the LCD projecttion TV. 18 When moving the LCD projection TV, support the hole on the lower portion with one hand while grasping the top part with the other hand, as shown in the illustration below. Installing and Connecting the LCD Projection TV Carrying Your LCD Projection TV Carrying the LCD projection TV requires at least two people.
Operating Instructions
Page 19
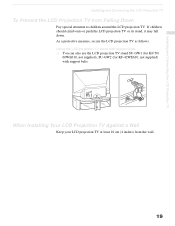
... cm (4 inches) from Falling Down Pay special attention to children around the LCD projection TV. Using the LCD projection TV stand with support belts ❑ You can also use the LCD projection TV stand SU-GW1 (for KF-50/ 60WE610, not supplied), SU-GW2 (for KF-42WE610, not supplied) with support belts. If children should climb onto or push...
... cm (4 inches) from Falling Down Pay special attention to children around the LCD projection TV. Using the LCD projection TV stand with support belts ❑ You can also use the LCD projection TV stand SU-GW1 (for KF-50/ 60WE610, not supplied), SU-GW2 (for KF-42WE610, not supplied) with support belts. If children should climb onto or push...
Operating Instructions
Page 20
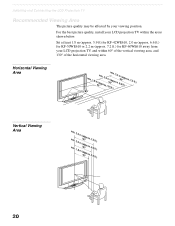
Sit at least 1.8 m (approx. 5.9 ft) for KF-42WE610, 2.0 m (approx. 6.6 ft.) for KF-50WE610 or 2.2 m (approx. 7.2 ft.) for KF-60WE610 away from your LCD projection TV, and within the areas shown below. Horizontal Viewing Area min. 1.8 min. 2.0 m402(a"pprox. min. 2.2 2.0 1.8 m m m (6a0p"prox. (5a0p"prox....the best picture quality, install your viewing position. min. Installing and Connecting the LCD Projection TV Recommended Viewing Area The picture quality may be affected by your LCD projection TV within 60° of the vertical viewing area, and 130° of the horizontal viewing area...
Sit at least 1.8 m (approx. 5.9 ft) for KF-42WE610, 2.0 m (approx. 6.6 ft.) for KF-50WE610 or 2.2 m (approx. 7.2 ft.) for KF-60WE610 away from your LCD projection TV, and within the areas shown below. Horizontal Viewing Area min. 1.8 min. 2.0 m402(a"pprox. min. 2.2 2.0 1.8 m m m (6a0p"prox. (5a0p"prox....the best picture quality, install your viewing position. min. Installing and Connecting the LCD Projection TV Recommended Viewing Area The picture quality may be affected by your LCD projection TV within 60° of the vertical viewing area, and 130° of the horizontal viewing area...

Operating Instructions
Page 21
When lit, indicates that the Memory Stick is being read. (Do not remove the Memory Stick when the indicator is lit.) (Continued) 21 Item 1 MEMORY STICK 2 MEMORY STICK ACCESS LED Description Memory Stick insertion slot. For details, see "Inserting and Removing a Memory Stick" on page 57. Installing and Connecting the LCD Projection TV Installing and Connecting the LCD Projection TV LCD Projection TV Connectors LCD Projection TV Front and Rear Side Connectors How to open the front panel To open OPEN OPEN Push up.
When lit, indicates that the Memory Stick is being read. (Do not remove the Memory Stick when the indicator is lit.) (Continued) 21 Item 1 MEMORY STICK 2 MEMORY STICK ACCESS LED Description Memory Stick insertion slot. For details, see "Inserting and Removing a Memory Stick" on page 57. Installing and Connecting the LCD Projection TV Installing and Connecting the LCD Projection TV LCD Projection TV Connectors LCD Projection TV Front and Rear Side Connectors How to open the front panel To open OPEN OPEN Push up.

Operating Instructions
Page 22
Installing and Connecting the LCD Projection TV Rear of LCD projection TV Front left side of LCD projection TV VIDEO 2 INPUT S VIDEO VIDEO L(MONO)-AUDIO-R 22
Installing and Connecting the LCD Projection TV Rear of LCD projection TV Front left side of LCD projection TV VIDEO 2 INPUT S VIDEO VIDEO L(MONO)-AUDIO-R 22


