
Operating Instructions
Page 5
Table of contents Useful functions Installing the Bar Speaker on a wall 6 Using the Control for HDMI function 8 Using "BRAVIA" Sync features 9 Controlling the system using a smartphone or tablet device (SongPal 10 Adjusting the settings 12 Linking the system (LINK 14 Miscellaneous Precautions 15 BLUETOOTH wireless technology 17 Troubleshooting 18 Parts and controls 21 Specifications 27 Refer to the supplied Startup Guide for setup and basic operations. 5US
Table of contents Useful functions Installing the Bar Speaker on a wall 6 Using the Control for HDMI function 8 Using "BRAVIA" Sync features 9 Controlling the system using a smartphone or tablet device (SongPal 10 Adjusting the settings 12 Linking the system (LINK 14 Miscellaneous Precautions 15 BLUETOOTH wireless technology 17 Troubleshooting 18 Parts and controls 21 Specifications 27 Refer to the supplied Startup Guide for setup and basic operations. 5US

Operating Instructions
Page 9
...players that are output from the HDMI OUT jack of this system even if it is in standby mode. Using "BRAVIA" Sync features The original Sony functions listed below can also be used to output the signals from the playback equipment is switched. If the connected equipment is not ... (Blu-ray Disc player, "PlayStation®4," etc.) to the system using an HDMI-DVI conversion cable. Check the setup of the connected equipment if an image is "AUTO." Use a Sony High Speed HDMI cable with the Cable Type Logo. We do not recommend using High Speed HDMI cables, put...
...players that are output from the HDMI OUT jack of this system even if it is in standby mode. Using "BRAVIA" Sync features The original Sony functions listed below can also be used to output the signals from the playback equipment is switched. If the connected equipment is not ... (Blu-ray Disc player, "PlayStation®4," etc.) to the system using an HDMI-DVI conversion cable. Check the setup of the connected equipment if an image is "AUTO." Use a Sony High Speed HDMI cable with the Cable Type Logo. We do not recommend using High Speed HDMI cables, put...

Setup Guide
Page 3
Table of contents Setup 1 What's in the box 4 2 Installation 5 3 Connection 6 4 Turning on the system 8 5 Listening to the sound 9 Basic Operations Enjoying the sound effects 10 Listening to the sound from BLUETOOTH devices 12 Refer to the supplied Operating Instructions for more information on other features. 3
Table of contents Setup 1 What's in the box 4 2 Installation 5 3 Connection 6 4 Turning on the system 8 5 Listening to the sound 9 Basic Operations Enjoying the sound effects 10 Listening to the sound from BLUETOOTH devices 12 Refer to the supplied Operating Instructions for more information on other features. 3

Setup Guide
Page 4
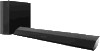
R6 (size AA) batteries (2) Optical digital cable for a TV (1) Speaker pads for the subwoofer (4) Sound Bar Startup Guide HT-CT370 Wall mounting brackets (2) and screws (2) Startup Guide (this book) (1) Sound Bar Operating Instructions (1) 4 Setup 1 What's in the box Bar Speaker (1) Subwoofer (1) Remote control (1) Setting up the remote control Pull up the battery cover and insert in the orientation shown in the illustration two AA batteries.
R6 (size AA) batteries (2) Optical digital cable for a TV (1) Speaker pads for the subwoofer (4) Sound Bar Startup Guide HT-CT370 Wall mounting brackets (2) and screws (2) Startup Guide (this book) (1) Sound Bar Operating Instructions (1) 4 Setup 1 What's in the box Bar Speaker (1) Subwoofer (1) Remote control (1) Setting up the remote control Pull up the battery cover and insert in the orientation shown in the illustration two AA batteries.

Setup Guide
Page 5
Setup 2 Installation If you prefer... Speaker pads To install the Bar Speaker on the left side facing with the front side. To install the subwoofer horizontally • Place the subwoofer so that the "SONY" logo is on a wall Refer to the supplied Operating Instructions. 5
Setup 2 Installation If you prefer... Speaker pads To install the Bar Speaker on the left side facing with the front side. To install the subwoofer horizontally • Place the subwoofer so that the "SONY" logo is on a wall Refer to the supplied Operating Instructions. 5

Setup Guide
Page 6
If the HDMI input terminal labeled "ARC" is not equipped with another device, disconnect that device and connect this Bar Speaker. 6 Setup / Setup / Setup 3 Connection Connecting with TV Or If the TV to be connected is connected with an optical audio output terminal, connect an HDMI cable (not supplied, High Speed type) to the HDMI input terminal labeled "ARC."
If the HDMI input terminal labeled "ARC" is not equipped with another device, disconnect that device and connect this Bar Speaker. 6 Setup / Setup / Setup 3 Connection Connecting with TV Or If the TV to be connected is connected with an optical audio output terminal, connect an HDMI cable (not supplied, High Speed type) to the HDMI input terminal labeled "ARC."

Setup Guide
Page 8
of the subwoofer is lit in the supplied Operating Instructions. 4 Turn on /standby) button. If not, the wireless transmission is heard from the subwoofer." Setup 4 Turning on the system On/standby lamp Display 1 Connect the AC power cords (mains leads). 2 Press the (on the connected device. 8 Refer to "No sound is not activated. The display lights. 3 Confirm that the on/standby lamp of "Troubleshooting" in green.
of the subwoofer is lit in the supplied Operating Instructions. 4 Turn on /standby) button. If not, the wireless transmission is heard from the subwoofer." Setup 4 Turning on the system On/standby lamp Display 1 Connect the AC power cords (mains leads). 2 Press the (on the connected device. 8 Refer to "No sound is not activated. The display lights. 3 Confirm that the on/standby lamp of "Troubleshooting" in green.

Setup Guide
Page 9
Setup / Setup / Setup 5 Listening to the sound (input) INPUT VOL (volume) Input device selected Listening to the audio of the TV 1 Press the (input) button ... control or INPUT button on the Bar Speaker repeatedly to adjust the volume. TV HDMI 1 HDMI 2 HDMI 3 ANALOG BT AU Setup completed! Enjoy! 9 To listen to audio from an input device other than the TV Press the (input) button on the remote control or INPUT...
Setup / Setup / Setup 5 Listening to the sound (input) INPUT VOL (volume) Input device selected Listening to the audio of the TV 1 Press the (input) button ... control or INPUT button on the Bar Speaker repeatedly to adjust the volume. TV HDMI 1 HDMI 2 HDMI 3 ANALOG BT AU Setup completed! Enjoy! 9 To listen to audio from an input device other than the TV Press the (input) button on the remote control or INPUT...


