
Operating Instructions
Page 3
...the equipment in fluence the picture and sound of the same rating as the supplied one and approved by returning your nearest Sony service station. OPERATION IS SUBJECT TO THE FOLLOWING TWO CONDITIONS: (1) THIS DEVICE MAY NOT CAUSE HARMFUL INTERFERENCE, AND (2) THIS ... with BS 1363 is connected. - THIS CLASS B DIGITAL APPARATUS COMPLIES WITH CANADIAN ICES-003. 3 - and Canada RECYCLING LITHIUM-ION BATTERIES Lithium-Ion batteries are recyclable. Never use the plug without the fuse cover. Attention The electromagnetic fields at the specific frequencies may in order...
...the equipment in fluence the picture and sound of the same rating as the supplied one and approved by returning your nearest Sony service station. OPERATION IS SUBJECT TO THE FOLLOWING TWO CONDITIONS: (1) THIS DEVICE MAY NOT CAUSE HARMFUL INTERFERENCE, AND (2) THIS ... with BS 1363 is connected. - THIS CLASS B DIGITAL APPARATUS COMPLIES WITH CANADIAN ICES-003. 3 - and Canada RECYCLING LITHIUM-ION BATTERIES Lithium-Ion batteries are recyclable. Never use the plug without the fuse cover. Attention The electromagnetic fields at the specific frequencies may in order...

Operating Instructions
Page 6
...when it in a dry, cool place to charge the supplied NP-FT1 battery pack (page 14). Memory Stick Duo Adaptor "Memory Stick" • For details on "InfoLITHIUM" battery pack, see page 130. 6 In addition, the battery pack can be saved using this camera is the "Memory Stick Duo". Extending... the battery pack life When not using the battery pack for a long time, turn off the camera, remove the battery pack and store it has not been completely discharged. On "InfoLITHIUM" battery pack When using the camera for the first ...
...when it in a dry, cool place to charge the supplied NP-FT1 battery pack (page 14). Memory Stick Duo Adaptor "Memory Stick" • For details on "InfoLITHIUM" battery pack, see page 130. 6 In addition, the battery pack can be saved using this camera is the "Memory Stick Duo". Extending... the battery pack life When not using the battery pack for a long time, turn off the camera, remove the battery pack and store it has not been completely discharged. On "InfoLITHIUM" battery pack When using the camera for the first ...

Operating Instructions
Page 8
Table of contents Read this first 4 Before using your camera 6 Identifying the parts 10 Camera 10 Cyber-shot Station 12 Getting started Charging the battery pack 14 Using the AC adaptor 19 Using your camera abroad 19 Turning on/off your camera 20 How to use the control button 20 ...
Table of contents Read this first 4 Before using your camera 6 Identifying the parts 10 Camera 10 Cyber-shot Station 12 Getting started Charging the battery pack 14 Using the AC adaptor 19 Using your camera abroad 19 Turning on/off your camera 20 How to use the control button 20 ...

Operating Instructions
Page 9
... a portion of images that can be saved or shooting time 119 Menu items 120 Setup items 124 Precautions 127 On "Memory Stick 128 On "InfoLITHIUM" battery pack......... 130 On marine pack 131 Specifications 131 The LCD screen 133 Index Index 138 9
... a portion of images that can be saved or shooting time 119 Menu items 120 Setup items 124 Precautions 127 On "Memory Stick 128 On "InfoLITHIUM" battery pack......... 130 On marine pack 131 Specifications 131 The LCD screen 133 Index Index 138 9

Operating Instructions
Page 10
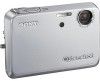
Identifying the parts See the pages in parentheses for details of operation. Camera 1 2 9 0 qa qs 3 4 10 qd 5 6 7 8 POWER button (20) POWER lamp (20) Battery insertion slot (14) "Memory Stick Duo" insertion slot (24) Battery/"Memory Stick Duo" cover Battery drop prevention lever (14) Multi connector (16, 19) Battery eject lever (14) Shutter button (29) Microphone (84) Flash (37) Lens Self-timer lamp (36)/ AF illuminator (38, 124)
Identifying the parts See the pages in parentheses for details of operation. Camera 1 2 9 0 qa qs 3 4 10 qd 5 6 7 8 POWER button (20) POWER lamp (20) Battery insertion slot (14) "Memory Stick Duo" insertion slot (24) Battery/"Memory Stick Duo" cover Battery drop prevention lever (14) Multi connector (16, 19) Battery eject lever (14) Shutter button (29) Microphone (84) Flash (37) Lens Self-timer lamp (36)/ AF illuminator (38, 124)

Operating Instructions
Page 12
...; DC IN jack (15) A/V OUT (MONO) jack (46) Tripod receptacle (bottom surface) 12 • Make sure the camera is used when charging the battery pack or connecting the camera to a TV or a computer, etc. 1 How to the Cyber-shot Station beforehand using the supplied camera holder for tripod. •...
...; DC IN jack (15) A/V OUT (MONO) jack (46) Tripod receptacle (bottom surface) 12 • Make sure the camera is used when charging the battery pack or connecting the camera to a TV or a computer, etc. 1 How to the Cyber-shot Station beforehand using the supplied camera holder for tripod. •...

Operating Instructions
Page 14
...). • Your camera operates with the "InfoLITHIUM" NP-FT1 battery pack (T type) (supplied). Make sure the battery pack is firmly inserted all the way, then close the battery/"Memory Stick Duo" cover. Charging the battery pack Battery drop prevention lever Battery eject lever 1 Open the battery/"Memory Stick Duo" cover. Slide the cover in the...
...). • Your camera operates with the "InfoLITHIUM" NP-FT1 battery pack (T type) (supplied). Make sure the battery pack is firmly inserted all the way, then close the battery/"Memory Stick Duo" cover. Charging the battery pack Battery drop prevention lever Battery eject lever 1 Open the battery/"Memory Stick Duo" cover. Slide the cover in the...

Operating Instructions
Page 15
Connect the camera as this may not properly charge the battery pack. The /CHG lamp lights up . • Do not short the DC plug of the AC Adaptor with a dry cotton bud. Do not use the ...
Connect the camera as this may not properly charge the battery pack. The /CHG lamp lights up . • Do not short the DC plug of the AC Adaptor with a dry cotton bud. Do not use the ...

Operating Instructions
Page 16
... plug Power cord (mains lead) • Be sure to turn off when charging is completed. • When charging is facing up. • After charging the battery pack, disconnect the AC Adaptor both from the multi connector of the AC Adaptor to the camera with mark facing as during your camera... when charging the battery pack (page 20). • When placing the camera, make sure the LCD screen is completed, remove the camera from the Cyber-shot Station. To ...
... plug Power cord (mains lead) • Be sure to turn off when charging is completed. • When charging is facing up. • After charging the battery pack, disconnect the AC Adaptor both from the multi connector of the AC Adaptor to the camera with mark facing as during your camera... when charging the battery pack (page 20). • When placing the camera, make sure the LCD screen is completed, remove the camera from the Cyber-shot Station. To ...

Operating Instructions
Page 17
...Approx. 150 • The charging time may not be correct under certain circumstances or conditions. To remove the battery pack Open the battery/"Memory Stick Duo" cover and battery drop prevention lever, then hold the camera so that it . 17 Remaining indicator 60min Remaining time • ...longer under certain circumstances or conditions. Charging time Approximate time to drop the battery pack when removing it faces downward and remove the battery pack. • Be careful not to charge a completely discharged battery pack using the AC Adaptor at a temperature of 25°C (77&#...
...Approx. 150 • The charging time may not be correct under certain circumstances or conditions. To remove the battery pack Open the battery/"Memory Stick Duo" cover and battery drop prevention lever, then hold the camera so that it . 17 Remaining indicator 60min Remaining time • ...longer under certain circumstances or conditions. Charging time Approximate time to drop the battery pack when removing it faces downward and remove the battery pack. • Be careful not to charge a completely discharged battery pack using the AC Adaptor at a temperature of 25°C (77&#...

Operating Instructions
Page 18
... CIPA standard. (CIPA: Camera & Imaging Products Association) 18 Viewing still images2) Image size 5M VGA (E-Mail) NP-FT1 (supplied) No. The battery power is set to [Monitor] on the Setup screen - Approx. 180 90 Off Approx. Shooting one time every 30 seconds - The camera has... Backlight] is set to [Bright] on the Setup screen - [AF Mode] is low Approx. 210 105 1) Shooting in the following conditions: - of images Battery life (min.) Approx. 3800 Approx. 180 Approx. 3800 Approx. 180 2) Viewing single images in order at a temperature of 25°C (77°F). The...
... CIPA standard. (CIPA: Camera & Imaging Products Association) 18 Viewing still images2) Image size 5M VGA (E-Mail) NP-FT1 (supplied) No. The battery power is set to [Monitor] on the Setup screen - Approx. 180 90 Off Approx. Shooting one time every 30 seconds - The camera has... Backlight] is set to [Bright] on the Setup screen - [AF Mode] is low Approx. 210 105 1) Shooting in the following conditions: - of images Battery life (min.) Approx. 3800 Approx. 180 Approx. 3800 Approx. 180 2) Viewing single images in order at a temperature of 25°C (77°F). The...

Operating Instructions
Page 20
... on the control button to select the desired item and setting, then press to prevent wearing down the battery. Turning on/off function only operates when the camera is operating using a battery pack. Turning off function also will not operate in the following circumstances. • When viewing movies • When playing...
... on the control button to select the desired item and setting, then press to prevent wearing down the battery. Turning on/off function only operates when the camera is operating using a battery pack. Turning off function also will not operate in the following circumstances. • When viewing movies • When playing...

Operating Instructions
Page 21
... out this happens, reset the date and time, by starting from [Y/M/D] (year/month/day), [M/D/Y] (month/day/year) or [D/M/Y] (day/month/year). • If the rechargeable battery (page 128), which provides the power for saving the time data, ever becomes low, the Clock Set screen will appear again. The POWER lamp (green...
... out this happens, reset the date and time, by starting from [Y/M/D] (year/month/day), [M/D/Y] (month/day/year) or [D/M/Y] (day/month/year). • If the rechargeable battery (page 128), which provides the power for saving the time data, ever becomes low, the Clock Set screen will appear again. The POWER lamp (green...

Operating Instructions
Page 24
...Memory Stick Duo", see page 128. 2 Insert the "Memory Stick Duo". Inserting and removing a "Memory Stick Duo" Terminal side Access lamp 1 Open the battery/"Memory Stick Duo" cover. Slide the cover in until it clicks as illustrated. • When inserting a "Memory Stick Duo", make sure of the direction and... you may be able to pop it all the way in the direction of both the camera and "Memory Stick Duo". 3 Close the battery/"Memory Stick Duo" cover. If the "Memory Stick Duo" is recording or reading an image. The data may not be corrupted. 24
...Memory Stick Duo", see page 128. 2 Insert the "Memory Stick Duo". Inserting and removing a "Memory Stick Duo" Terminal side Access lamp 1 Open the battery/"Memory Stick Duo" cover. Slide the cover in until it clicks as illustrated. • When inserting a "Memory Stick Duo", make sure of the direction and... you may be able to pop it all the way in the direction of both the camera and "Memory Stick Duo". 3 Close the battery/"Memory Stick Duo" cover. If the "Memory Stick Duo" is recording or reading an image. The data may not be corrupted. 24

Operating Instructions
Page 30
... when the camera does not beep, but the image is displayed for approximately two seconds (Auto Review, page 124). • When operating the camera using a battery pack, if you do not operate the camera for a split second depending on the Setup screen (page 125). The beep sounds but in the "Memory... will be recorded in this case the focus is not set properly. • No beep sounds when [Beep] is set to prevent wearing down the battery (page 20). 30
... when the camera does not beep, but the image is displayed for approximately two seconds (Auto Review, page 124). • When operating the camera using a battery pack, if you do not operate the camera for a split second depending on the Setup screen (page 125). The beep sounds but in the "Memory... will be recorded in this case the focus is not set properly. • No beep sounds when [Beep] is set to prevent wearing down the battery (page 20). 30

Operating Instructions
Page 32
.... • For a detailed description of the indicators, see page 133. • For a detailed description of the histogram, see page 61. • You can extend the battery remaining time by turning off the LCD backlight. • When shooting/viewing movies, the status of the LCD screen changes as a mirror or a luminous body...
.... • For a detailed description of the indicators, see page 133. • For a detailed description of the histogram, see page 61. • You can extend the battery remaining time by turning off the LCD backlight. • When shooting/viewing movies, the status of the LCD screen changes as a mirror or a luminous body...

Operating Instructions
Page 58
Choosing a focus operation - When the shutter button is pressed and held halfway down and AF lock is complete, the focus is locked. • Battery consumption may be faster than in Single AF mode. When the shutter button is pressed and held halfway down and AF lock is complete, the ...
Choosing a focus operation - When the shutter button is pressed and held halfway down and AF lock is complete, the focus is locked. • Battery consumption may be faster than in Single AF mode. When the shutter button is pressed and held halfway down and AF lock is complete, the ...

Operating Instructions
Page 66
... maxium number of the "Memory Stick Duo" is used for continuous shooting. Adjusting the flash level - Control button MENU Mode switch • When the battery power decreases with use or the capacity of images you press and hold the 66 shutter button. Control button MENU Mode switch Set the...
... maxium number of the "Memory Stick Duo" is used for continuous shooting. Adjusting the flash level - Control button MENU Mode switch • When the battery power decreases with use or the capacity of images you press and hold the 66 shutter button. Control button MENU Mode switch Set the...

Operating Instructions
Page 91
... access indicators turn white. 91 Enjoying images on your computer Connecting the camera to your computer Turn on your computer. • When using the battery pack, copying may be failed or cause data corruption by...
... access indicators turn white. 91 Enjoying images on your computer Connecting the camera to your computer Turn on your computer. • When using the battery pack, copying may be failed or cause data corruption by...

Operating Instructions
Page 105
Troubleshooting If you experience trouble with your Sony dealer or local authorized Sony service facility. • The battery pack is discharged. The battery pack cannot be installed. Consult your camera, try the following solutions. 1 First check the items on the tables below. The /CHG lamp flashes when charging a battery pack. Re-insert the AC Adaptor...
Troubleshooting If you experience trouble with your Sony dealer or local authorized Sony service facility. • The battery pack is discharged. The battery pack cannot be installed. Consult your camera, try the following solutions. 1 First check the items on the tables below. The /CHG lamp flashes when charging a battery pack. Re-insert the AC Adaptor...


