Operating Instructions
Page 5
... Contents Notice for users 4 Before you begin Identifying the parts 7 Preparations Checking the contents of the package 9 Setting the ink ribbon 9 Inserting the print paper 10 Connecting to the AC power source 12 Direct printing LCD screen display 13 An image preview 13 Image list 14 List of icons 15... 21 Adjusting an image 21 Printing an edited image 22 Undoing the operations 22 Exiting the menu 23 Making layout prints 23 Making an ID photo 24 Making Batch Print (Index Print/ DPOF Print/Print All 25 Changing the settings 26 Setting the Date Print 26 Setting the print finish ...
... Contents Notice for users 4 Before you begin Identifying the parts 7 Preparations Checking the contents of the package 9 Setting the ink ribbon 9 Inserting the print paper 10 Connecting to the AC power source 12 Direct printing LCD screen display 13 An image preview 13 Image list 14 List of icons 15... 21 Adjusting an image 21 Printing an edited image 22 Undoing the operations 22 Exiting the menu 23 Making layout prints 23 Making an ID photo 24 Making Batch Print (Index Print/ DPOF Print/Print All 25 Changing the settings 26 Setting the Date Print 26 Setting the print finish ...
Operating Instructions
Page 6
... requirements 34 Installing the printer driver 35 Uninstalling the printer driver ........ 37 Installing the Picture Motion Browser 38 Uninstalling the Picture Motion Browser 39 Printing photos from the Picture Motion Browser 39 Registering a browsing folder ........ 43 Stopping printing 43 Printing from a commercially-available software application 44 Additional information Precautions 60 ... .......63 Specifications 63 Printing range 65 Glossary 66 Index 67 Error messages If an error display appears 45 Troubleshooting If trouble occurs 48 If paper jams 58 Cleaning 59 6 GB
... requirements 34 Installing the printer driver 35 Uninstalling the printer driver ........ 37 Installing the Picture Motion Browser 38 Uninstalling the Picture Motion Browser 39 Printing photos from the Picture Motion Browser 39 Registering a browsing folder ........ 43 Stopping printing 43 Printing from a commercially-available software application 44 Additional information Precautions 60 ... .......63 Specifications 63 Printing range 65 Glossary 66 Index 67 Error messages If an error display appears 45 Troubleshooting If trouble occurs 48 If paper jams 58 Cleaning 59 6 GB
Operating Instructions
Page 39
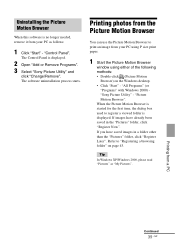
... click "Register Later". Refer to register a viewed folder is displayed. 2 Open "Add or Remove Programs". 3 Select "Sony Picture Utility" and click "Change/Remove". Printing photos from the Picture Motion Browser You can use the Picture Motion Browser to print an image from your PC using P size ...print paper. 1 Start the Picture Motion Browser window using either of the following methods: • Double-click (...
... click "Register Later". Refer to register a viewed folder is displayed. 2 Open "Add or Remove Programs". 3 Select "Sony Picture Utility" and click "Change/Remove". Printing photos from the Picture Motion Browser You can use the Picture Motion Browser to print an image from your PC using P size ...print paper. 1 Start the Picture Motion Browser window using either of the following methods: • Double-click (...

Operating Instructions
Page 40
...in the following two different views. To set the paper orientation or other print options, go to access the "Pictures" folder • In Windows 2000: Click "My Documents" - In this section, "Folders" view windows are using: "Sony DPP-FP65" or "Sony DPP-FP75" To change the size, click "Properties".... 3 Click the folder containing the photos you can switch the display by year, by month, or by hour. The main window of the Picture Motion Browser is displayed. 5 In the "Printer" drop-down list box, select "Sony DPP-FP65" or "Sony DPP-FP75". "Pictures" on each date of the paper.
...in the following two different views. To set the paper orientation or other print options, go to access the "Pictures" folder • In Windows 2000: Click "My Documents" - In this section, "Folders" view windows are using: "Sony DPP-FP65" or "Sony DPP-FP75" To change the size, click "Properties".... 3 Click the folder containing the photos you can switch the display by year, by month, or by hour. The main window of the Picture Motion Browser is displayed. 5 In the "Printer" drop-down list box, select "Sony DPP-FP65" or "Sony DPP-FP75". "Pictures" on each date of the paper.
Operating Instructions
Page 44
...fully within the specified range. On the "Borderless Print" setting in the printer driver dialog box. For example, select "Full page photo print" or a similar option. With the Borders/Borderless setting of the printer driver When the software application you use has Borders/Borderless..."Borderless Print" in "Printer Features" of the "Sony DPP-FP65/75 Advanced Options" dialog box as a printer in the print dialog box, and select the print paper size in "Printer Features" of the "Sony DPP-FP65/75 Advanced Options" dialog box. Select "DPP-FP65" or "DPPFP75" as the printer driver setting. 44...
...fully within the specified range. On the "Borderless Print" setting in the printer driver dialog box. For example, select "Full page photo print" or a similar option. With the Borders/Borderless setting of the printer driver When the software application you use has Borders/Borderless..."Borderless Print" in "Printer Features" of the "Sony DPP-FP65/75 Advanced Options" dialog box as a printer in the print dialog box, and select the print paper size in "Printer Features" of the "Sony DPP-FP65/75 Advanced Options" dialog box. Select "DPP-FP65" or "DPPFP75" as the printer driver setting. 44...

Operating Instructions
Page 64
Image file name DCF format, 8.3 format, less than the above depth. 64 GB Mass DPP-FP65: Approx. 1.0 kg (2 lb 4 oz) DPP-FP75: Approx. 1.1 kg (2 lb 7 oz) (excluding the paper tray, ink ribbon, AC adaptor) Supplied accessories See page 9 of "Operating Instructions" (this booklet) x AC adaptor ...Paper See the supplied "About the Print Packs". For the total number of sheets printed, please check "Printer information display" of the "Print setup" menu, by pressing the MENU button (page 29). *1: Print Settings: Borderless, No date print *2: When printing a photo (4.4 MB file size) taken by a Sony...
Image file name DCF format, 8.3 format, less than the above depth. 64 GB Mass DPP-FP65: Approx. 1.0 kg (2 lb 4 oz) DPP-FP75: Approx. 1.1 kg (2 lb 7 oz) (excluding the paper tray, ink ribbon, AC adaptor) Supplied accessories See page 9 of "Operating Instructions" (this booklet) x AC adaptor ...Paper See the supplied "About the Print Packs". For the total number of sheets printed, please check "Printer information display" of the "Print setup" menu, by pressing the MENU button (page 29). *1: Print Settings: Borderless, No date print *2: When printing a photo (4.4 MB file size) taken by a Sony...
Operating Instructions
Page 67
... display 13 Image preview 13 Index Print 25 Index View 14 Input indications 13 Inserting a memory card 16 Inserting an ink ribbon 9 Inserting the print paper 10 Installing Picture Motion Browser 38 Printer driver 35 L Layout print 23 LCD screen 8 LCD screen display 13 M Memory Stick Notes on use 62 ... 17 From a Bluetooth device 32 From a commercially available application 44 From a PC 34 From a PictBridge camera 31, 32 From an external device 33 ID photo 24 Layout print 23 Multiple images at one time 25 Using the Picture Motion Browser 39 Printing range 65 R Rear panel 8 Red-eye correction 20...
... display 13 Image preview 13 Index Print 25 Index View 14 Input indications 13 Inserting a memory card 16 Inserting an ink ribbon 9 Inserting the print paper 10 Installing Picture Motion Browser 38 Printer driver 35 L Layout print 23 LCD screen 8 LCD screen display 13 M Memory Stick Notes on use 62 ... 17 From a Bluetooth device 32 From a commercially available application 44 From a PC 34 From a PictBridge camera 31, 32 From an external device 33 ID photo 24 Layout print 23 Multiple images at one time 25 Using the Picture Motion Browser 39 Printing range 65 R Rear panel 8 Red-eye correction 20...

