Operating Instructions
Page 1
Record the serial number in the space provided below. Model No Serial No CMT-HP7 ©2003 Sony Corporation Refer to them whenever you call upon your Sony dealer regarding this product. 4-246-667-12(1) Micro Hi-Fi Component System Operating Instructions Owner's Record The model and serial numbers are located on the rear of the unit.
Record the serial number in the space provided below. Model No Serial No CMT-HP7 ©2003 Sony Corporation Refer to them whenever you call upon your Sony dealer regarding this product. 4-246-667-12(1) Micro Hi-Fi Component System Operating Instructions Owner's Record The model and serial numbers are located on the rear of the unit.
Operating Instructions
Page 2
...To prevent fire or shock hazard, do not place objects filled with general house waste, dispose of important operating and maintenance (servicing) instructions in the literature accompanying the appliance. Don't throw away the battery with liquids, such as a bookcase or built-in a particular installation...a U.S. And don't place lighted candles on , the user is classified as practical. registered mark. As an ENERGY STAR® partner, Sony Corporation has determined that the cable ground shall be determined by one or more of cable entry as a CLASS 1 LASER product. Reorient or...
...To prevent fire or shock hazard, do not place objects filled with general house waste, dispose of important operating and maintenance (servicing) instructions in the literature accompanying the appliance. Don't throw away the battery with liquids, such as a bookcase or built-in a particular installation...a U.S. And don't place lighted candles on , the user is classified as practical. registered mark. As an ENERGY STAR® partner, Sony Corporation has determined that the cable ground shall be determined by one or more of cable entry as a CLASS 1 LASER product. Reorient or...
Operating Instructions
Page 25
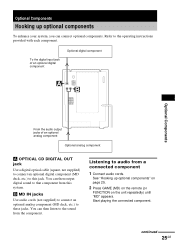
... (or FUNCTION on the unit repeatedly) until "MD" appears. See "Hooking up optional components To enhance your system, you can then listen to the operating instructions provided with each component. Start playing the connected component. You can then output digital sound to audio from a connected component 1 Connect audio cords. Listening to...
... (or FUNCTION on the unit repeatedly) until "MD" appears. See "Hooking up optional components To enhance your system, you can then listen to the operating instructions provided with each component. Start playing the connected component. You can then output digital sound to audio from a connected component 1 Connect audio cords. Listening to...
Operating Instructions
Page 26
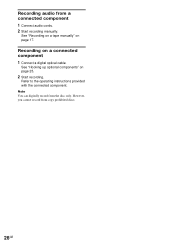
See "Hooking up optional components" on a connected component 1 Connect a digital optical cable. Recording audio from copy prohibited discs. 26GB Refer to the operating instructions provided with the connected component. Recording on page 25. 2 Start recording. However, you cannot record from a connected component 1 Connect audio cords. 2 Start recording manually. Note You can digitally record from the disc only. See "Recording on a tape manually" on page 17.
See "Hooking up optional components" on a connected component 1 Connect a digital optical cable. Recording audio from copy prohibited discs. 26GB Refer to the operating instructions provided with the connected component. Recording on page 25. 2 Start recording. However, you cannot record from a connected component 1 Connect audio cords. 2 Start recording manually. Note You can digitally record from the disc only. See "Recording on a tape manually" on page 17.
Operating Instructions
Page 29
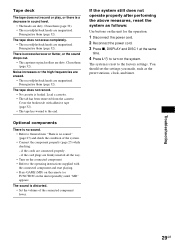
.../playback heads are dirty. Demagnetise them (page 32). Demagnetise them (page 32). The tape does not record. • No cassette is reset to the operating instructions supplied with adhesive tape (page 32). • The tape has wound to General item "There is distorted. • Set the volume of the system. •...
.../playback heads are dirty. Demagnetise them (page 32). Demagnetise them (page 32). The tape does not record. • No cassette is reset to the operating instructions supplied with adhesive tape (page 32). • The tape has wound to General item "There is distorted. • Set the volume of the system. •...
Operating Instructions
Page 32
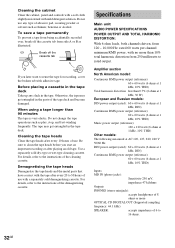
... old tape. Demagnetising the tape heads Demagnetise the tape heads and the metal parts that have contact with the tape after every 20 to the instructions of the demagnetising cassette. For details, refer to 30 hours of use with no more OPTICAL CD DIGITAL OUT (Supported sampling frequency: 44.1 kHz...tape deck Take up any type of 6 to 16 ohms. 32GB Do not change the tape operations such as illustrated. Be sure to the instructions of the tape deck and become damaged. The tape may get entangled in the parts of the cleaning cassette. Otherwise, the tape may get ...
... old tape. Demagnetising the tape heads Demagnetise the tape heads and the metal parts that have contact with the tape after every 20 to the instructions of the demagnetising cassette. For details, refer to 30 hours of use with no more OPTICAL CD DIGITAL OUT (Supported sampling frequency: 44.1 kHz...tape deck Take up any type of 6 to 16 ohms. 32GB Do not change the tape operations such as illustrated. Be sure to the instructions of the tape deck and become damaged. The tape may get entangled in the parts of the cleaning cassette. Otherwise, the tape may get ...
