Operating Instructions
Page 1
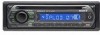
Record the serial number in the space provided below. Para cancelar la pantalla de demostración (DEMO), consulte la página 8. CDX-GT11W Serial No. CDX-GT11W © 2006 Sony Corporation 2-696-856-11 (2) FM/AM Compact Disc Player Operating Instructions US Manual de instrucciones ES Owner's Record The model and serial numbers are located on the bottom of the unit. Refer to these numbers whenever you call upon your Sony dealer regarding this product. Model No. To cancel the demonstration (DEMO) display, see page 8.
Record the serial number in the space provided below. Para cancelar la pantalla de demostración (DEMO), consulte la página 8. CDX-GT11W Serial No. CDX-GT11W © 2006 Sony Corporation 2-696-856-11 (2) FM/AM Compact Disc Player Operating Instructions US Manual de instrucciones ES Owner's Record The model and serial numbers are located on the bottom of the unit. Refer to these numbers whenever you call upon your Sony dealer regarding this product. Model No. To cancel the demonstration (DEMO) display, see page 8.
Operating Instructions
Page 2
...display disappears each time you turn the ignition off , which can radiate radio frequency energy and, if not installed and used in accordance with this product will not occur in this manual could void your car's ignition has no guarantee that to which the receiver... in a residential installation. Warning if your authority to operate this equipment does cause harmful interference to radio communications. For installation and connections, see the supplied installation/connections manual. Connect the equipment into an outlet on , the user is turned off . 2 If this equipment...
...display disappears each time you turn the ignition off , which can radiate radio frequency energy and, if not installed and used in accordance with this product will not occur in this manual could void your car's ignition has no guarantee that to which the receiver... in a residential installation. Warning if your authority to operate this equipment does cause harmful interference to radio communications. For installation and connections, see the supplied installation/connections manual. Connect the equipment into an outlet on , the user is turned off . 2 If this equipment...
Operating Instructions
Page 3
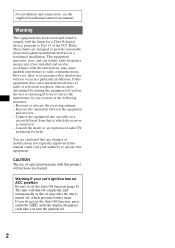
... on discs 10 Maintenance 10 Removing the unit 11 Specifications 11 Troubleshooting 12 Error displays/Messages 13 3 BAL/FAD 8 Customizing the equalizer curve - BTM 7 Storing manually 7 Receiving the stored stations 7 Tuning automatically 7 Other functions Changing the sound settings 8 Adjusting the balance and fader - Table of Contents Welcome 4 Getting Started Setting the...
... on discs 10 Maintenance 10 Removing the unit 11 Specifications 11 Troubleshooting 12 Error displays/Messages 13 3 BAL/FAD 8 Customizing the equalizer curve - BTM 7 Storing manually 7 Receiving the stored stations 7 Tuning automatically 7 Other functions Changing the sound settings 8 Adjusting the balance and fader - Table of Contents Welcome 4 Getting Started Setting the...
Operating Instructions
Page 6
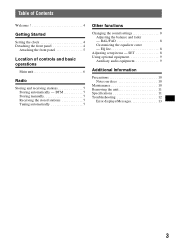
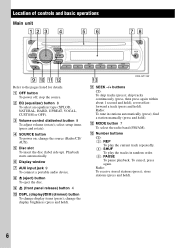
... the disc (label side up). H Z (eject) button To eject the disc. find a station manually (press and hold). C Volume control dial/select button 8 To adjust volume (rotate); Playback starts automatically. qd CDX-GT11W K SEEK -/+ buttons CD: To skip tracks (press); To cancel, press again. Radio: To receive stored stations (press); select setup items (press and rotate...
... the disc (label side up). H Z (eject) button To eject the disc. find a station manually (press and hold). C Volume control dial/select button 8 To adjust volume (rotate); Playback starts automatically. qd CDX-GT11W K SEEK -/+ buttons CD: To skip tracks (press); To cancel, press again. Radio: To receive stored stations (press); select setup items (press and rotate...
Operating Instructions
Page 7
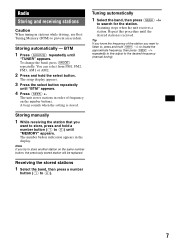
...) repeatedly until "BTM" appears. 4 Press (SEEK) +. The setup display appears. 3 Press the select button repeatedly until "TUNER" appears. Storing manually 1 While receiving the station that you want to listen to, press and hold a number button ((1) to (6)). Note If you want to store,... unit stores stations in order of the station you try to the desired frequency (manual tuning). 7 To change the band, press (MODE) repeatedly. A beep sounds when the setting is received. Radio Storing and receiving stations Caution When tuning in stations while driving, use Best Tuning ...
...) repeatedly until "BTM" appears. 4 Press (SEEK) +. The setup display appears. 3 Press the select button repeatedly until "TUNER" appears. Storing manually 1 While receiving the station that you want to listen to, press and hold a number button ((1) to (6)). Note If you want to store,... unit stores stations in order of the station you try to the desired frequency (manual tuning). 7 To change the band, press (MODE) repeatedly. A beep sounds when the setting is received. Radio Storing and receiving stations Caution When tuning in stations while driving, use Best Tuning ...
Operating Instructions
Page 13
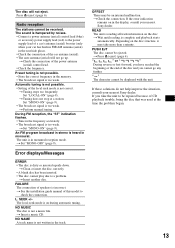
... ERROR • The disc is complete and playback starts automatically. SEEK +/- t Insert a music CD. Radio reception The stations cannot be displayed with the unit. t Tuning does not stop at the time ...the unit to the power supply lead of a car's antenna (aerial) booster (only when your nearest Sony dealer. t Press Z (eject) (page 6). t Tuning stops too frequently: Set "LOCAL-ON" (.... • The disc cannot play due to check the connection. t See the installation guide manual of speakers is not a music file. " " or " " During reverse or fast-forward...
... ERROR • The disc is complete and playback starts automatically. SEEK +/- t Insert a music CD. Radio reception The stations cannot be displayed with the unit. t Tuning does not stop at the time ...the unit to the power supply lead of a car's antenna (aerial) booster (only when your nearest Sony dealer. t Press Z (eject) (page 6). t Tuning stops too frequently: Set "LOCAL-ON" (.... • The disc cannot play due to check the connection. t See the installation guide manual of speakers is not a music file. " " or " " During reverse or fast-forward...


