
Operating Instructions
Page 4
...8226;Viewing still images (p. 163) •Viewing moving pictures (p. 166) Main Features •Viewing pictures recorded on a tape or live from your camcorder using the USB cable (p. 197) •Viewing images recorded on a "Memory Stick" using the USB cable (p. 185) •Converting an analog signal into digital..., camcorder-shape icons are used to capture images onto your computer (p. 208) 4 Capturing images on your camcorder. CCD-TRV118 : CCD-TRV318 : CCD-TRV418 : DCR-TRV150 : DCR-TRV250 : DCR-TRV350 : DCR-TRV351 : Instructions with icons are for the indicated models only.
...8226;Viewing still images (p. 163) •Viewing moving pictures (p. 166) Main Features •Viewing pictures recorded on a tape or live from your camcorder using the USB cable (p. 197) •Viewing images recorded on a "Memory Stick" using the USB cable (p. 185) •Converting an analog signal into digital..., camcorder-shape icons are used to capture images onto your computer (p. 208) 4 Capturing images on your camcorder. CCD-TRV118 : CCD-TRV318 : CCD-TRV418 : DCR-TRV150 : DCR-TRV250 : DCR-TRV350 : DCR-TRV351 : Instructions with icons are for the indicated models only.
Operating Instructions
Page 5
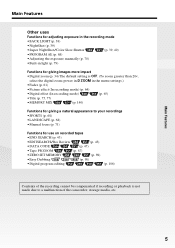
... Functions for giving a natural appearance to your recordings •SPORTS (p. 68) •LANDSCAPE (p. 68) •Manual focus (p. 71) Functions for use on recorded tapes •END SEARCH (p. 43) •EDITSEARCH/Rec Review (p. 43) •DATA CODE (p. 47) •Tape PB ZOOM (p. 87) •ZERO SET ...MEMORY (p. 89) •Easy Dubbing (p. 98) •Digital program editing (p. 106) Contents of the recording cannot be compensated if recording or playback is not made due to a malfunction of ...
... Functions for giving a natural appearance to your recordings •SPORTS (p. 68) •LANDSCAPE (p. 68) •Manual focus (p. 71) Functions for use on recorded tapes •END SEARCH (p. 43) •EDITSEARCH/Rec Review (p. 43) •DATA CODE (p. 47) •Tape PB ZOOM (p. 87) •ZERO SET ...MEMORY (p. 89) •Easy Dubbing (p. 98) •Digital program editing (p. 106) Contents of the recording cannot be compensated if recording or playback is not made due to a malfunction of ...
Operating Instructions
Page 6
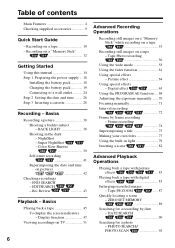
... a scene 82 Advanced Playback Operations Playing back a tape with picture effects .... 83 Playing back a tape with digital effects 85 Enlarging recorded images - Display function 47 Viewing recordings on TV 51 Advanced Recording Operations Recording still images on a "Memory Stick" while recording on a tape 53 Recording still images on pictures 42 Checking recordings - Frame recording 74 Superimposing a title 75 Making your own...
... a scene 82 Advanced Playback Operations Playing back a tape with picture effects .... 83 Playing back a tape with digital effects 85 Enlarging recorded images - Display function 47 Viewing recordings on TV 51 Advanced Recording Operations Recording still images on a "Memory Stick" while recording on a tape 53 Recording still images on pictures 42 Checking recordings - Frame recording 74 Superimposing a title 75 Making your own...
Operating Instructions
Page 7
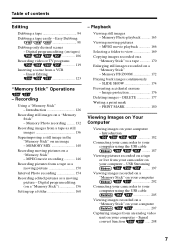
... Playing back images continuously - Introduction 182 Connecting your camcorder to a tape 170 Enlarging still images recorded on a "Memory Stick" - Memory Photo recording ......... 132 Recording images from an analog video unit on your computer - SLIDE SHOW 174 Preventing accidental erasure - Digital program editing (on tapes 106 Recording video or TV programs 119 Inserting a scene from your camcorder on your...
... Playing back images continuously - Introduction 182 Connecting your camcorder to a tape 170 Enlarging still images recorded on a "Memory Stick" - Memory Photo recording ......... 132 Recording images from an analog video unit on your computer - SLIDE SHOW 174 Preventing accidental erasure - Digital program editing (on tapes 106 Recording video or TV programs 119 Inserting a scene from your camcorder on your...

Operating Instructions
Page 10
..., close the lid. Connecting the power cord (p. 24) Use the battery pack when using your camcorder. Quick Start Guide - Recording on a tape This chapter introduces you to the basic features to record on a tape of the cassette back and insert the cassette properly with its v mark facing up . 3 Close the cassette compartment by pressing...
..., close the lid. Connecting the power cord (p. 24) Use the battery pack when using your camcorder. Quick Start Guide - Recording on a tape This chapter introduces you to the basic features to record on a tape of the cassette back and insert the cassette properly with its v mark facing up . 3 Close the cassette compartment by pressing...

Operating Instructions
Page 11
... (p. 32). The picture appears on the LCD screen (p. 45) 2 Press m to CAMERA while pressing the small green button. Monitoring the playback picture on the LCD screen. 2 Set the POWER switch to rewind the tape. PLAY CR 1 Set the POWER switch to record the date and time for a picture, set up your camcorder, the...
... (p. 32). The picture appears on the LCD screen (p. 45) 2 Press m to CAMERA while pressing the small green button. Monitoring the playback picture on the LCD screen. 2 Set the POWER switch to rewind the tape. PLAY CR 1 Set the POWER switch to record the date and time for a picture, set up your camcorder, the...
Operating Instructions
Page 15
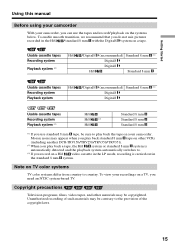
... other VCRs (including another DCR-TRV150/TRV250/TRV350/TRV351). *2) When you play back the tape on TV color systems TV color systems differ from country to . *3) If you record on a Hi8 video cassette in the LP mode, recording is carried out in the Hi8 /standard 8 mm with the Digital8 system on the systems below...
... other VCRs (including another DCR-TRV150/TRV250/TRV350/TRV351). *2) When you play back the tape on TV color systems TV color systems differ from country to . *3) If you record on a Hi8 video cassette in the LP mode, recording is carried out in the Hi8 /standard 8 mm with the Digital8 system on the systems below...
Operating Instructions
Page 24
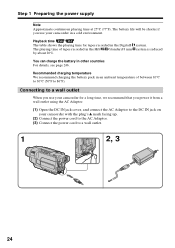
... 25°C (77°F). Playback time The table shows the playing time for a long time, we recommend that you use your camcorder for tapes recorded in the Hi8 /standard 8 mm by about 20%. system. Recommended charging temperature We recommend charging the battery pack in an ambient temperature of... tapes recorded in the Digital8 The playing time of between 10°C to 30°C (50°F to 86°F). system is reduced You can...
... 25°C (77°F). Playback time The table shows the playing time for a long time, we recommend that you use your camcorder for tapes recorded in the Hi8 /standard 8 mm by about 20%. system. Recommended charging temperature We recommend charging the battery pack in an ambient temperature of... tapes recorded in the Digital8 The playing time of between 10°C to 30°C (50°F to 86°F). system is reduced You can...
Operating Instructions
Page 27
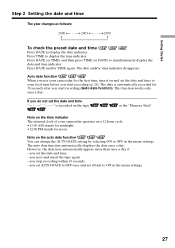
...auto date function automatically displays the date once a day. you eject and insert the tape again. - you set it on the tape . Auto date function When you use your camcorder for 10 seconds after you start recording (p. 26). However, the date may automatically appear more than once a day if:... - The date is recorded on and set the date and time to display ...
...auto date function automatically displays the date once a day. you eject and insert the tape again. - you set it on the tape . Auto date function When you use your camcorder for 10 seconds after you start recording (p. 26). However, the date may automatically appear more than once a day if:... - The date is recorded on and set the date and time to display ...
Operating Instructions
Page 29
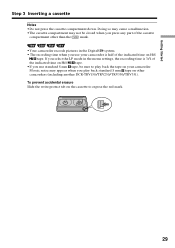
... when you press any part of the cassette compartment other than the mark. •Your camcorder records pictures in the menu settings, the recording time is 3/4 of the indicated time on your camcorder is half of the indicated time on other camcorders (including another DCR-TRV150/...TRV250/TRV350/TRV351). To prevent accidental erasure Slide the write-protect tab on the cassette to play back standard 8 mm tape on Hi8 tape. Doing ...
... when you press any part of the cassette compartment other than the mark. •Your camcorder records pictures in the menu settings, the recording time is 3/4 of the indicated time on your camcorder is half of the indicated time on other camcorders (including another DCR-TRV150/...TRV250/TRV350/TRV351). To prevent accidental erasure Slide the write-protect tab on the cassette to play back standard 8 mm tape on Hi8 tape. Doing ...

Operating Instructions
Page 30
The camera recording lamp located on the screen. The recording lamp lights up . The REC indicator appears on the front of your camcorder to CAMERA while pressing the small green button. To display the data code (date/time), press DATA CODE on the Remote ... the viewfinder. 1 3 V POWER CR OFF(CHG) CAM ME ERMAORY 5 50min SP REC 0:00:01 4 2 Camera recording lamp Microphone Notes •The data code (date/time when recorded) are recorded automatically onto the tape. - See "Step 1" to "Step 3" for more information (p. 18 to 29). (3) Set the POWER switch to the standby...
The camera recording lamp located on the screen. The recording lamp lights up . The REC indicator appears on the front of your camcorder to CAMERA while pressing the small green button. To display the data code (date/time), press DATA CODE on the Remote ... the viewfinder. 1 3 V POWER CR OFF(CHG) CAM ME ERMAORY 5 50min SP REC 0:00:01 4 2 Camera recording lamp Microphone Notes •The data code (date/time when recorded) are recorded automatically onto the tape. - See "Step 1" to "Step 3" for more information (p. 18 to 29). (3) Set the POWER switch to the standby...

Operating Instructions
Page 31
... back the tape on one tape or you turn off automatically while the cassette is smooth as long as the default setting. To set the POWER switch to CAMERA again. In the LP mode, you can no longer be distorted. *1) 1.5 times: Twice: *2) three minutes: five minutes: 31 Recording - If ...you change the battery pack, set the counter to prevent battery and tape wear. However, your camcorder. The LOCK ...
... back the tape on one tape or you turn off automatically while the cassette is smooth as long as the default setting. To set the POWER switch to CAMERA again. In the LP mode, you can no longer be distorted. *1) 1.5 times: Twice: *2) three minutes: five minutes: 31 Recording - If ...you change the battery pack, set the counter to prevent battery and tape wear. However, your camcorder. The LOCK ...
Operating Instructions
Page 36
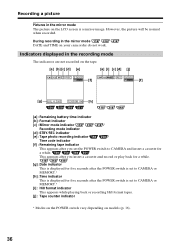
... 4 2003 12:05:56 PM [h] [a] : Remaining battery time indicator [b] :Format indicator [c] : Mirror mode indicator / Recording mode indicator [d] :STBY/REC indicator [e] : Tape photo recording indicator / Time code indicator [f] : Remaining tape indicator This appears after the POWER switch is set to CAMERA or MEMORY.* [h] :Time indicator This is a mirror-image. This appears after you set the POWER...
... 4 2003 12:05:56 PM [h] [a] : Remaining battery time indicator [b] :Format indicator [c] : Mirror mode indicator / Recording mode indicator [d] :STBY/REC indicator [e] : Tape photo recording indicator / Time code indicator [f] : Remaining tape indicator This appears after the POWER switch is set to CAMERA or MEMORY.* [h] :Time indicator This is a mirror-image. This appears after you set the POWER...
Operating Instructions
Page 37
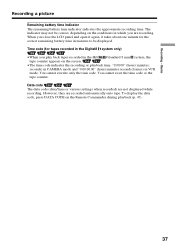
... you close the LCD panel and open it again, it takes about one minute for tapes recorded in the Digital8 system only) •When you are recording. You cannot rewrite only the time code. Recording - The indicator may not be displayed. To display the data code, press DATA CODE ...on the conditions in which you play back tapes recorded in the Hi8 /standard 8 mm system, the tape counter appears on the screen. •The time code indicates the recording or playback time, "0:00:00" (hours:minutes: seconds) in CAMERA mode and "0:00:00:00" (hours:minutes:seconds:frames)...
... you close the LCD panel and open it again, it takes about one minute for tapes recorded in the Digital8 system only) •When you are recording. You cannot rewrite only the time code. Recording - The indicator may not be displayed. To display the data code, press DATA CODE ...on the conditions in which you play back tapes recorded in the Hi8 /standard 8 mm system, the tape counter appears on the screen. •The time code indicates the recording or playback time, "0:00:00" (hours:minutes: seconds) in CAMERA mode and "0:00:00:00" (hours:minutes:seconds:frames)...
Operating Instructions
Page 44
EDITSEARCH - Rec Review Notes •The end search, edit search and Rec Review functions do not work with tapes recorded in the Hi8 /standard 8 mm system. •If you start recording after using the end search function, occasionally, the transition between recorded portions The end search function may not be smooth. •Once you eject the cassette after you recorded and the next scene may not work . Checking recordings - END SEARCH - If a tape has a blank portion between the last scene you have recorded on the tape, the end search function does not work correctly. 44
EDITSEARCH - Rec Review Notes •The end search, edit search and Rec Review functions do not work with tapes recorded in the Hi8 /standard 8 mm system. •If you start recording after using the end search function, occasionally, the transition between recorded portions The end search function may not be smooth. •Once you eject the cassette after you recorded and the next scene may not work . Checking recordings - END SEARCH - If a tape has a blank portion between the last scene you have recorded on the tape, the end search function does not work correctly. 44
Operating Instructions
Page 45
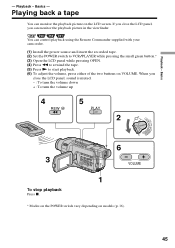
...Press x. * Modes on the POWER switch vary depending on VOLUME. Playing back a tape You can control playback using the Remote Commander supplied with your camcorder. (1) Install the power source and insert the recorded tape. (2) Set the POWER switch to VCR/PLAYER while pressing the small green button.* ...(3) Open the LCD panel while pressing OPEN. (4) Press m to rewind the tape. (5) Press N to start playback. (6) To adjust the volume...
...Press x. * Modes on the POWER switch vary depending on VOLUME. Playing back a tape You can control playback using the Remote Commander supplied with your camcorder. (1) Install the power source and insert the recorded tape. (2) Set the POWER switch to VCR/PLAYER while pressing the small green button.* ...(3) Open the LCD panel while pressing OPEN. (4) Press m to rewind the tape. (5) Press N to start playback. (6) To adjust the volume...
Operating Instructions
Page 46
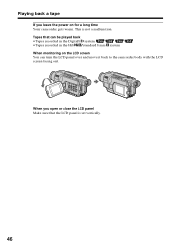
Playing back a tape If you open or close the LCD panel Make sure that can turn the LCD panel over and move it back to the camcorder body with the LCD screen facing out. When you leave the power on the LCD screen You can be played back •Tapes recorded in the Digital8 system •Tapes recorded in the Hi8 /standard 8 mm system When monitoring on for a long time Your camcorder gets warm. This is set vertically. 46 Tapes that the LCD panel is not a malfunction.
Playing back a tape If you open or close the LCD panel Make sure that can turn the LCD panel over and move it back to the camcorder body with the LCD screen facing out. When you leave the power on the LCD screen You can be played back •Tapes recorded in the Digital8 system •Tapes recorded in the Hi8 /standard 8 mm system When monitoring on for a long time Your camcorder gets warm. This is set vertically. 46 Tapes that the LCD panel is not a malfunction.
Operating Instructions
Page 47
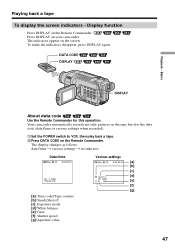
... also the data code (date/time or various settings when recorded). 1 Set the POWER switch to VCR, then play back a tape. 2 Press DATA CODE on your camcorder. To make the indicators disappear, press DISPLAY again. The display changes as follows: ...date/time t various settings t no indicator Date/time 50min 0:00:23:01 JUL 4 2003 12:05:56 PM [a]: Time code/Tape counter [b]: SteadyShot off [c]: Exposure mode [d]: White balance [e]: Gain [f]: Shutter speed [g]: Aperture value Various settings 50min 0:00:23:01 [a] [b] [c] AUTO [d] 60 ...
... also the data code (date/time or various settings when recorded). 1 Set the POWER switch to VCR, then play back a tape. 2 Press DATA CODE on your camcorder. To make the indicators disappear, press DISPLAY again. The display changes as follows: ...date/time t various settings t no indicator Date/time 50min 0:00:23:01 JUL 4 2003 12:05:56 PM [a]: Time code/Tape counter [b]: SteadyShot off [c]: Exposure mode [d]: White balance [e]: Gain [f]: Shutter speed [g]: Aperture value Various settings 50min 0:00:23:01 [a] [b] [c] AUTO [d] 60 ...
Operating Instructions
Page 48
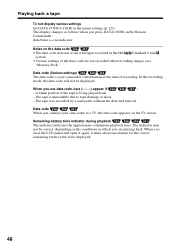
...code •The data code does not work with tapes recorded in the Hi8 /standard 8 mm system. •Various settings of recording. When you connect your camcorder's information at the time of the data code are playing back. The tape was recorded by a camcorder without the date and time set. ...The tape is unreadable due to a TV, the data code appears on a "Memory Stick." Data code When you use data code, bars (-- -- --) ...
...code •The data code does not work with tapes recorded in the Hi8 /standard 8 mm system. •Various settings of recording. When you connect your camcorder's information at the time of the data code are playing back. The tape was recorded by a camcorder without the date and time set. ...The tape is unreadable due to a TV, the data code appears on a "Memory Stick." Data code When you use data code, bars (-- -- --) ...
Operating Instructions
Page 49
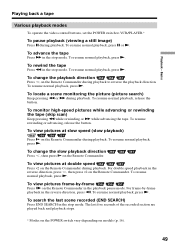
..., release the button. To search the last scene recorded (END SEARCH) Press END SEARCH in the reverse direction, press , then press ×2 on the Remote Commander during playback. Basics Playing back a tape Various playback modes To operate the video control buttons, set the POWER switch to reverse the.... To resume normal playback, press N. To view pictures frame-by -frame playback in the stop mode. The last five seconds of the recorded section are played back and playback stops. * Modes on the POWER switch vary depending on the Remote Commander during playback to VCR/PLAYER.*...
..., release the button. To search the last scene recorded (END SEARCH) Press END SEARCH in the reverse direction, press , then press ×2 on the Remote Commander during playback. Basics Playing back a tape Various playback modes To operate the video control buttons, set the POWER switch to reverse the.... To resume normal playback, press N. To view pictures frame-by -frame playback in the stop mode. The last five seconds of the recorded section are played back and playback stops. * Modes on the POWER switch vary depending on the Remote Commander during playback to VCR/PLAYER.*...


