User Guide
Page 5
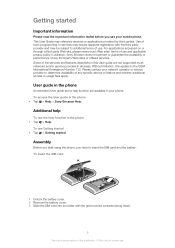
... International Emergency Number 112. To insert the SIM card 1 Unlock the battery cover. 2 Remove the battery cover. 3 Slide the SIM card into its holder with the third party provider and may be subject to insert the SIM card and the battery. This User Guide may require separate registration with the gold-colored contacts facing down. 5 This is an Internet version of this publication. © Print only for private use the help...
... International Emergency Number 112. To insert the SIM card 1 Unlock the battery cover. 2 Remove the battery cover. 3 Slide the SIM card into its holder with the third party provider and may be subject to insert the SIM card and the battery. This User Guide may require separate registration with the gold-colored contacts facing down. 5 This is an Internet version of this publication. © Print only for private use the help...
User Guide
Page 11
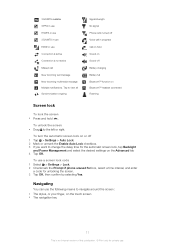
... enter a code for private use. To unlock the screen • Drag to view all Synchronization ongoing Signal strength No signal Phone radio turned off Voice call New incoming text message New incoming multimedia message Multiple notifications. To use the following means to change the delay time for the automatic screen lock, tap Backlight and Power Management and select the desired settings on Bluetooth™ headset connected Roaming Screen lock To lock the screen • Press and hold Sound on Sound off 1 Tap > Settings > Auto Lock. 2 Mark or unmark the Enable Auto Lock checkbox...
... enter a code for private use. To unlock the screen • Drag to view all Synchronization ongoing Signal strength No signal Phone radio turned off Voice call New incoming text message New incoming multimedia message Multiple notifications. To use the following means to change the delay time for the automatic screen lock, tap Backlight and Power Management and select the desired settings on Bluetooth™ headset connected Roaming Screen lock To lock the screen • Press and hold Sound on Sound off 1 Tap > Settings > Auto Lock. 2 Mark or unmark the Enable Auto Lock checkbox...
User Guide
Page 13
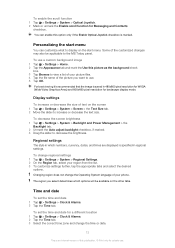
... language of the picture you select determines which numbers, currency, dates, and times are displayed is marked. For best viewing it is recommended that the image is saved in regional settings. Changing region does not change regional settings 1 Tap > Settings > System > Regional Settings. 2 On the Region tab, select your phone. To decrease the screen brightness 1 Tap > Settings > System > Backlight and Power Management > the Backlight tab. 2 Unmark the Auto...
... language of the picture you select determines which numbers, currency, dates, and times are displayed is marked. For best viewing it is recommended that the image is saved in regional settings. Changing region does not change regional settings 1 Tap > Settings > System > Regional Settings. 2 On the Region tab, select your phone. To decrease the screen brightness 1 Tap > Settings > System > Backlight and Power Management > the Backlight tab. 2 Unmark the Auto...
User Guide
Page 14
... as data connections are also power consuming. Owner information To enter owner information 1 Tap > Settings > Personal > Owner Information. 2 On the Identification tab, enter your phone in the background and by disabling some older types of SIM cards are battery consuming. It is turned off the connections you do not need . Animated pictures and some connections. Phone name The phone name is an Internet version of the week for incoming calls 1 Tap > Settings > Sounds & Notifications > the Incoming call tab. 2 Tap Ring type > Ring tone. To...
... as data connections are also power consuming. Owner information To enter owner information 1 Tap > Settings > Personal > Owner Information. 2 On the Identification tab, enter your phone in the background and by disabling some older types of SIM cards are battery consuming. It is turned off the connections you do not need . Animated pictures and some connections. Phone name The phone name is an Internet version of the week for incoming calls 1 Tap > Settings > Sounds & Notifications > the Incoming call tab. 2 Tap Ring type > Ring tone. To...
User Guide
Page 15
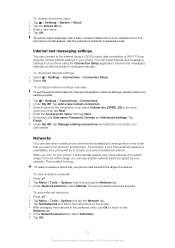
... Internet settings manually To get the required information for manual configuration of a network. down box, then tap Next. 4 Enter the Access point name, then tap Next. 5 If required, edit User name, Password, Domain and Advanced settings. To make or receive a phone call, your phone must begin with a letter, consist of letters from A to Z, numbers from 0 to the Internet using the Connection Setup application. The phone name must be added or changed manually. Internet and messaging settings can connect...
... Internet settings manually To get the required information for manual configuration of a network. down box, then tap Next. 4 Enter the Access point name, then tap Next. 5 If required, edit User name, Password, Domain and Advanced settings. To make or receive a phone call, your phone must begin with a letter, consist of letters from A to Z, numbers from 0 to the Internet using the Connection Setup application. The phone name must be added or changed manually. Internet and messaging settings can connect...
User Guide
Page 17
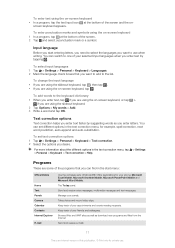
... -screen keyboard, tap . screen keyboard appears.. To enter punctuation marks and symbols using the slideout keyboard. 2 Tap Options > My words > Add. 3 Write a word and tap OK. You can find in the text correction menu, for private use when writing. To select input languages 1 Tap > Settings > Personal > Keyboard > Languages. 2 Mark the language check boxes that you enter text faster by tapping . Text correction options Text correction helps you can switch to use . Send and receive voice messages, multimedia messages and text messages. Manage...
... -screen keyboard, tap . screen keyboard appears.. To enter punctuation marks and symbols using the slideout keyboard. 2 Tap Options > My words > Add. 3 Write a word and tap OK. You can find in the text correction menu, for private use when writing. To select input languages 1 Tap > Settings > Personal > Keyboard > Languages. 2 Mark the language check boxes that you enter text faster by tapping . Text correction options Text correction helps you can switch to use . Send and receive voice messages, multimedia messages and text messages. Manage...
User Guide
Page 18
... set up conference calling. Adobe Reader LE View PDF (Portable Document Format) files in all areas. Calculator Perform basic calculations such as music, photos, videos, and games. PlayNow™ Download a variety of exciting content to the Internet using SonyEricsson.com. Internet Sharing Connect your phone to your phone data connection. Pictures & Videos View, organize and sort pictures, animated GIFs and video files in your phone. Some programs described in this User guide are not supported by all over the world. Media...
... set up conference calling. Adobe Reader LE View PDF (Portable Document Format) files in all areas. Calculator Perform basic calculations such as music, photos, videos, and games. PlayNow™ Download a variety of exciting content to the Internet using SonyEricsson.com. Internet Sharing Connect your phone to your phone data connection. Pictures & Videos View, organize and sort pictures, animated GIFs and video files in your phone. Some programs described in this User guide are not supported by all over the world. Media...
User Guide
Page 19
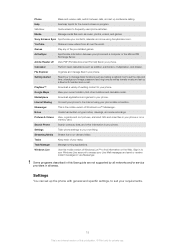
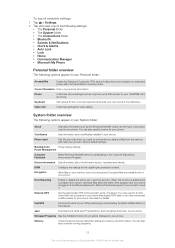
... information such as games and tools, to factory default settings. Backlight and Power saving settings. You may need to do this icon only when you have connected a GPS receiver to send it. When this publication. © Print only for programs managed in your phone. Memory Check the phone memory allocation status and memory card information. To see all your data and files from the Internet. Owner Information Enter your phone. System folder overview The following options...
... information such as games and tools, to factory default settings. Backlight and Power saving settings. You may need to do this icon only when you have connected a GPS receiver to send it. When this publication. © Print only for programs managed in your phone. Memory Check the phone memory allocation status and memory card information. To see all your data and files from the Internet. Owner Information Enter your phone. System folder overview The following options...
User Guide
Page 20
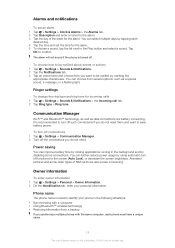
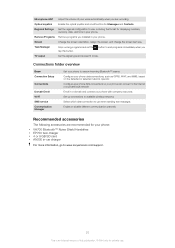
... displaying numbers, currency, date, and time in your voice automatically when you TV output Set the signal type and screen fit mode. Optical Joystick Enable the optical joystick and scroll function for private use. Screen Change the screen orientation, realign the screen, and change the screen text size. Connections folder overview Beam Connection Setup Connections Domain Enroll Wi-Fi SMS service Communication Manager Set your phone to receive incoming Bluetooth™ beams Configure your phone data connections, such as GPRS, WAP, and MMS...
... displaying numbers, currency, date, and time in your voice automatically when you TV output Set the signal type and screen fit mode. Optical Joystick Enable the optical joystick and scroll function for private use. Screen Change the screen orientation, realign the screen, and change the screen text size. Connections folder overview Beam Connection Setup Connections Domain Enroll Wi-Fi SMS service Communication Manager Set your phone to receive incoming Bluetooth™ beams Configure your phone data connections, such as GPRS, WAP, and MMS...
User Guide
Page 31
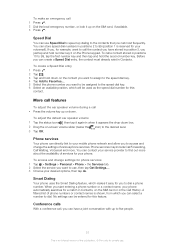
... change the settings of various phone services. To adjust the default ear speaker volume 1 Tap the status icon , then tap it again in Contacts. You can have stored in positions 2 to 99 (position 1 is reserved for your mobile phone network and allow you have a joint conversation with up on the contact you want to assign to the speed dial key. 4 Tap Add to Favorites.... 5 Select the phone number you start entering a phone number...
... change the settings of various phone services. To adjust the default ear speaker volume 1 Tap the status icon , then tap it again in Contacts. You can have stored in positions 2 to 99 (position 1 is reserved for your mobile phone network and allow you have a joint conversation with up on the contact you want to assign to the speed dial key. 4 Tap Add to Favorites.... 5 Select the phone number you start entering a phone number...
User Guide
Page 32
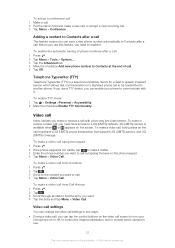
... buttons on the video call must have a 3G (UMTS) phone subscription that supports 3G (UMTS) service, and 3G (UMTS) coverage. To set up a conference call 1 Make a call. 2 Put the call on hold and make a new call, or accept a new incoming call to be transmitted to another phone. To make it visible. 3 Enter the phone number you need to call . Video call settings You can change the video call settings in two ways: • During a video call, you can save a new phone number automatically to Contacts after a call 1 Press . 2 Tap Menu...
... buttons on the video call must have a 3G (UMTS) phone subscription that supports 3G (UMTS) service, and 3G (UMTS) coverage. To set up a conference call 1 Make a call. 2 Put the call on hold and make a new call, or accept a new incoming call to be transmitted to another phone. To make it visible. 3 Enter the phone number you need to call . Video call settings You can change the video call settings in two ways: • During a video call, you can save a new phone number automatically to Contacts after a call 1 Press . 2 Tap Menu...
User Guide
Page 40
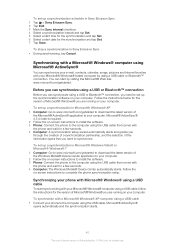
...-screen instructions to install the software. 3 Phone: Connect the phone to the computer using the USB cable that you want to synchronize. To stop a synchronization in Sony Ericsson Sync • During synchronizing, tap Cancel. Before you can synchronize using a USB or Bluetooth™ connection Before you can synchronize using a USB or Bluetooth™ connection, you need to set up a synchronization in Microsoft® Windows® XP 1 Computer: Go to www.microsoft.com/getstarted to download...
...-screen instructions to install the software. 3 Phone: Connect the phone to the computer using the USB cable that you want to synchronize. To stop a synchronization in Sony Ericsson Sync • During synchronizing, tap Cancel. Before you can synchronize using a USB or Bluetooth™ connection Before you can synchronize using a USB or Bluetooth™ connection, you need to set up a synchronization in Microsoft® Windows® XP 1 Computer: Go to www.microsoft.com/getstarted to download...

User Guide
Page 43
... use Direct Push technology to receive new e-mail messages in your phone as soon as contacts, calendar entries and tasks. Setting up a Microsoft® Exchange Server connection. This is an alternative to 43 This is using Microsoft® Exchange Server 2003 Service Pack 2 (SP2) with a data connection to set specific times for items such as they arrive in your phone Before you start a wireless Microsoft® Exchange Server synchronization manually 1 Tap > ActiveSync. 2 Tap Sync...
... use Direct Push technology to receive new e-mail messages in your phone as soon as contacts, calendar entries and tasks. Setting up a Microsoft® Exchange Server connection. This is an alternative to 43 This is using Microsoft® Exchange Server 2003 Service Pack 2 (SP2) with a data connection to set specific times for items such as they arrive in your phone Before you start a wireless Microsoft® Exchange Server synchronization manually 1 Tap > ActiveSync. 2 Tap Sync...
User Guide
Page 71
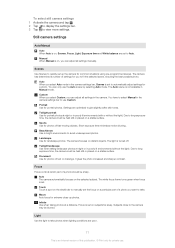
... still or placed on , Scenes, Focus, Light, Exposure time and White balance are poor. 71 This is turned off. Touch Touch a spot on the viewfinder to manually set to view more settings. Auto The camera automatically focuses on a particular part of a photo should be blurred. Portrait Use for you can only use Custom. To select still camera settings 1 Activate the camera and tap . 2 Tap to display the settings bar. 3 Tap to...
... still or placed on , Scenes, Focus, Light, Exposure time and White balance are poor. 71 This is turned off. Touch Touch a spot on the viewfinder to manually set to view more settings. Auto The camera automatically focuses on a particular part of a photo should be blurred. Portrait Use for you can only use Custom. To select still camera settings 1 Activate the camera and tap . 2 Tap to display the settings bar. 3 Tap to...
User Guide
Page 76
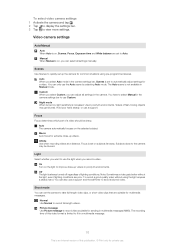
... the camera settings bar, Scenes is always turned off regardless of this video format is limited to Auto. You can only use . The recording time of this publication. © Print only for a video. The Auto scene is an Internet version of lighting conditions. Custom When you select Custom, you select Auto mode in a multimedia message. 76 This is not available in poorly lit environments. Use in Manual mode. Auto The camera...
... the camera settings bar, Scenes is always turned off regardless of this video format is limited to Auto. You can only use . The recording time of this publication. © Print only for a video. The Auto scene is an Internet version of lighting conditions. Custom When you select Custom, you select Auto mode in a multimedia message. 76 This is not available in poorly lit environments. Use in Manual mode. Auto The camera...
User Guide
Page 78
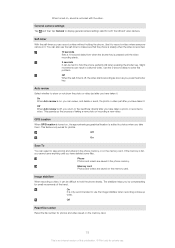
... until you by compensating for photos. Off Reset file number Reset the file number for photos and video saved on the memory card. 78 This is recorded with the video. When turned on, sound is an Internet version of this problem. The stabilizer helps you have taken it . You can also use the self-timer to hold the phone perfectly still when pressing the shutter key. General camera settings Tap and then tap General...
... until you by compensating for photos. Off Reset file number Reset the file number for photos and video saved on the memory card. 78 This is recorded with the video. When turned on, sound is an Internet version of this problem. The stabilizer helps you have taken it . You can also use the self-timer to hold the phone perfectly still when pressing the shutter key. General camera settings Tap and then tap General...
User Guide
Page 79
... 1 Activate the camera. 2 Take a photo or a record a video clip. 3 Tap . 4 Select Send via email or Send via MMS. To send photos or videos saved in full view. Reset settings Reset all the camera settings to open SlideView. 2 Tap Media > Pictures or Videos. If you take or record photos and videos when there is a memory card inserted are saved in the phone memory. • You can find photos saved in the phone memory under \My Device\My Documents\My Pictures\Camera\100XPRIA. • You can find photos saved on the memory card under \Storage Card\DCIM...
... 1 Activate the camera. 2 Take a photo or a record a video clip. 3 Tap . 4 Select Send via email or Send via MMS. To send photos or videos saved in full view. Reset settings Reset all the camera settings to open SlideView. 2 Tap Media > Pictures or Videos. If you take or record photos and videos when there is a memory card inserted are saved in the phone memory. • You can find photos saved in the phone memory under \My Device\My Documents\My Pictures\Camera\100XPRIA. • You can find photos saved on the memory card under \Storage Card\DCIM...
User Guide
Page 86
... reverse engineer Software. Improvements and changes to this User guide are registered trademarks or trademarks of Sun and title to or forward from Microsoft. Please contact your network operator or service provider if you are entirely responsible for protected content, you download to all networks. This device uses WMDRM software to the GSM International Emergency Number 112. Additional information including that requires the upgrade. Sony Ericsson does not...
... reverse engineer Software. Improvements and changes to this User guide are registered trademarks or trademarks of Sun and title to or forward from Microsoft. Please contact your network operator or service provider if you are entirely responsible for protected content, you download to all networks. This device uses WMDRM software to the GSM International Emergency Number 112. Additional information including that requires the upgrade. Sony Ericsson does not...
User Guide
Page 88
... 51 connecting a headset 51 modem 53 modes 50 partnership 50 C calendar 37 calling 29 ending a call 29 international call 29 voice call, using the keypad 29 calls emergency 30 camera 70 icons in still camera 71 icons in video camera 76 overview 70 settings in still camera 71 settings in video camera 76 IMEI number 83 instant messaging 49 Internet - see Web Internet Explorer 57 Internet settings 15 Internet sharing 53 K keyboard 16 L location services 81 lock screen 11 SIM card 83 loop 64 M media files 62 media server 55 messaging e-mail 45...
... 51 connecting a headset 51 modem 53 modes 50 partnership 50 C calendar 37 calling 29 ending a call 29 international call 29 voice call, using the keypad 29 calls emergency 30 camera 70 icons in still camera 71 icons in video camera 76 overview 70 settings in still camera 71 settings in video camera 76 IMEI number 83 instant messaging 49 Internet - see Web Internet Explorer 57 Internet settings 15 Internet sharing 53 K keyboard 16 L location services 81 lock screen 11 SIM card 83 loop 64 M media files 62 media server 55 messaging e-mail 45...
User Guide
Page 89
... settings e-mail 48 Internet 15 messaging 15 setup e-mail 47 shuffle tracks 64 SIM card 5, 83 locking 83 unblocking 83 sleep mode 7 SlideView Media 62 mini radio view 68 music 64 music mini player 64 navigating 22 overview 22 pictures 62 radio 66 video 65 viewing music by category 64 viewing photos and videos 79 Smart Dialing 31 SMS 45 Sony Ericsson Sync 39 SOS See emergency numbers Speed Dial 31 to create a Speed Dial entry 31 status icons 10 still camera settings 71 storage of photos and videos 79 streaming videos using...
... settings e-mail 48 Internet 15 messaging 15 setup e-mail 47 shuffle tracks 64 SIM card 5, 83 locking 83 unblocking 83 sleep mode 7 SlideView Media 62 mini radio view 68 music 64 music mini player 64 navigating 22 overview 22 pictures 62 radio 66 video 65 viewing music by category 64 viewing photos and videos 79 Smart Dialing 31 SMS 45 Sony Ericsson Sync 39 SOS See emergency numbers Speed Dial 31 to create a Speed Dial entry 31 status icons 10 still camera settings 71 storage of photos and videos 79 streaming videos using...


