
CD-G15000 Operation Manual
Page 2
... 5,960,037. REFER SERVICING TO QUALIFIED SERVICE PERSONNEL. use of controls or adjustments or performance of procedures other than those specified herein may cause harmful interference to radio or can be connected to the grounding system of the building, as practical. 2 NOTE This has been tested to Class B digital pursuant to Part the the limits for help. mined turning f the to Consult...
... 5,960,037. REFER SERVICING TO QUALIFIED SERVICE PERSONNEL. use of controls or adjustments or performance of procedures other than those specified herein may cause harmful interference to radio or can be connected to the grounding system of the building, as practical. 2 NOTE This has been tested to Class B digital pursuant to Part the the limits for help. mined turning f the to Consult...

CD-G15000 Operation Manual
Page 3
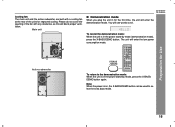
... - All operating and use a mounting accessory recommended by the prod- This is provided or the manufacturer's instructions have been adhered to replace your obsolete outlet. All the safety and operating instructions should still fail to fit, contact your electrician to . 11 Power Sources - All warnings on the product and in a wet basement; IMPORTANT SAFETY INSTRUCTIONS CD-G15000 CP-G15000 General Information 1 Read Instructions -
... - All operating and use a mounting accessory recommended by the prod- This is provided or the manufacturer's instructions have been adhered to replace your obsolete outlet. All the safety and operating instructions should still fail to fit, contact your electrician to . 11 Power Sources - All warnings on the product and in a wet basement; IMPORTANT SAFETY INSTRUCTIONS CD-G15000 CP-G15000 General Information 1 Read Instructions -
CD-G15000 Operation Manual
Page 4
...-21) GROUND CLAMPS P OWER SERVICE GROUNDING ELECTRODE SYSTEM (NEC ART 250, PART H) 16 Lightning - When installing an outside antenna system should be sure the service technician has used replacement parts specified by the manufacturer. 25 Heat - Adjust only those controls that could result in performance - When replacement parts are covered by following conditions: a) When the power-supply cord or plug is grounded so as recommended...
...-21) GROUND CLAMPS P OWER SERVICE GROUNDING ELECTRODE SYSTEM (NEC ART 250, PART H) 16 Lightning - When installing an outside antenna system should be sure the service technician has used replacement parts specified by the manufacturer. 25 Heat - Adjust only those controls that could result in performance - When replacement parts are covered by following conditions: a) When the power-supply cord or plug is grounded so as recommended...
CD-G15000 Operation Manual
Page 5
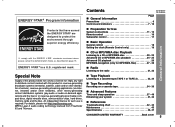
... Layer-3 audio coding technology licensed from Fraunhofer IIS and Thomson. Contents CD-G15000 CP-G15000 Page General Information Precautions 6 Controls and indicators 7 - 10 Preparation for Use System connections 11 - 15 Remote control 16 Subwoofer control 17 Basic Operation General control 18 Setting the clock (Remote Control only 19 General Information CD or MP3/WMA disc Playback Listening to a CD or MP3/WMA disc 20 - 23 Advanced CD or MP3/WMA disc playback 24...
... Layer-3 audio coding technology licensed from Fraunhofer IIS and Thomson. Contents CD-G15000 CP-G15000 Page General Information Precautions 6 Controls and indicators 7 - 10 Preparation for Use System connections 11 - 15 Remote control 16 Subwoofer control 17 Basic Operation General control 18 Setting the clock (Remote Control only 19 General Information CD or MP3/WMA disc Playback Listening to a CD or MP3/WMA disc 20 - 23 Advanced CD or MP3/WMA disc playback 24...
CD-G15000 Operation Manual
Page 6
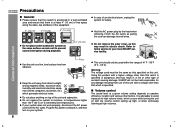
...˚C). Plug the AC power cord back in - Do not remove the outer cover, as pulling the cord can damage internal wires. Do not place anything on with the volume control setting up high, or while continually listening at high volumes. 6 vice facility. FM ANTENNA GND AM 75 OHMS VIDEO OUT REAR SPEAKERS RATED SRPIEGAHKTER IMPEDANCEL:E1F6TOHMS MIN. Refer in , and then turn on this...
...˚C). Plug the AC power cord back in - Do not remove the outer cover, as pulling the cord can damage internal wires. Do not place anything on with the volume control setting up high, or while continually listening at high volumes. 6 vice facility. FM ANTENNA GND AM 75 OHMS VIDEO OUT REAR SPEAKERS RATED SRPIEGAHKTER IMPEDANCEL:E1F6TOHMS MIN. Refer in , and then turn on this...

CD-G15000 Operation Manual
Page 8
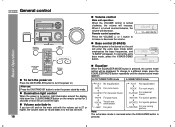
... Folder Indicator 27 3. MP3/WMA Title Indicators 27 4. WMA Indicator 21 6. Disc Repeat Play Indicator 25 18. Disc Play Indicator 21 Rear panel Reference page 1. MP3/WMA Total Indicator 21 11. CD-G15000 Controls and indicators (continued) CP-G15000 General Information 8 ANTENNA FM GND AM 75 OHMS VIDEO OUT REAR SPEAKERS RIGHT LEFT RATED SPEAKER IMPEDANCE : 16 OHMS MIN. Extra Bass Indicator 18 17. MP3 Indicator 21 5. AC Power Cord 14 4.
... Folder Indicator 27 3. MP3/WMA Title Indicators 27 4. WMA Indicator 21 6. Disc Repeat Play Indicator 25 18. Disc Play Indicator 21 Rear panel Reference page 1. MP3/WMA Total Indicator 21 11. CD-G15000 Controls and indicators (continued) CP-G15000 General Information 8 ANTENNA FM GND AM 75 OHMS VIDEO OUT REAR SPEAKERS RIGHT LEFT RATED SPEAKER IMPEDANCE : 16 OHMS MIN. Extra Bass Indicator 18 17. MP3 Indicator 21 5. AC Power Cord 14 4.

CD-G15000 Operation Manual
Page 11
System connections Make sure to unplug the AC power cord before making any connections. CD-G15000 CP-G15000 Preparation for Use Active Subwoofer Antenna connection (see page 12) FM antenna AM loop antenna Surround Front speaker speaker (right) (right) Front speaker Surround (left) speaker (left) Subwoofer connection (see page 14) 11 Speaker connection (see page 12) To AC outlet AC power connection (see page 15) ANTENNA FM GND AM 75 OHMS VIDEO OUT To AC outlet REAR SPEAKERS RIGHT LEFT RATED SPEAKER IMPEDANCE : 16 OHMS MIN.
System connections Make sure to unplug the AC power cord before making any connections. CD-G15000 CP-G15000 Preparation for Use Active Subwoofer Antenna connection (see page 12) FM antenna AM loop antenna Surround Front speaker speaker (right) (right) Front speaker Surround (left) speaker (left) Subwoofer connection (see page 14) 11 Speaker connection (see page 12) To AC outlet AC power connection (see page 15) ANTENNA FM GND AM 75 OHMS VIDEO OUT To AC outlet REAR SPEAKERS RIGHT LEFT RATED SPEAKER IMPEDANCE : 16 OHMS MIN.

CD-G15000 Operation Manual
Page 14
... making any connections. If you plug in to unplug the AC power cord of time. During this unit into the AC outlet. CD-G15000 System connections (continued) CP-G15000 Make sure to the AC outlet. Connecting the subwoofer Use the subwoofer cable to connect the SUBWOOFER PRE-OUT jack on the main unit and the SUBWOOFER IN jack on . To subwoofer output jack Subwoofer cable REAR SPEAKERS RIGHT LEFT RATED SPEAKER IMPEDANCE : 16 OHMS MIN. Unplug the AC power cord from the...
... making any connections. If you plug in to unplug the AC power cord of time. During this unit into the AC outlet. CD-G15000 System connections (continued) CP-G15000 Make sure to the AC outlet. Connecting the subwoofer Use the subwoofer cable to connect the SUBWOOFER PRE-OUT jack on the main unit and the SUBWOOFER IN jack on . To subwoofer output jack Subwoofer cable REAR SPEAKERS RIGHT LEFT RATED SPEAKER IMPEDANCE : 16 OHMS MIN. Unplug the AC power cord from the...
CD-G15000 Operation Manual
Page 15
... the power stand-by mode (demonstration mode), press the X-BASS/DEMO button. The unit will see words scroll. Preparation for Use Active subwoofer To return to select the extra bass mode. 15 REAR SPEAKERS RIGHT LEFT RATED SPEAKER IMPEDANCE : 16 OHMS MIN. You will enter the low power consumption mode. Main unit ANTENNA FM GND AM 75 OHMS VIDEO OUT CD-G15000 CP-G15000 Demonstration mode When you plug the unit in the power stand-by mode, press the X-BASS/ DEMO button...
... the power stand-by mode (demonstration mode), press the X-BASS/DEMO button. The unit will see words scroll. Preparation for Use Active subwoofer To return to select the extra bass mode. 15 REAR SPEAKERS RIGHT LEFT RATED SPEAKER IMPEDANCE : 16 OHMS MIN. You will enter the low power consumption mode. Main unit ANTENNA FM GND AM 75 OHMS VIDEO OUT CD-G15000 CP-G15000 Demonstration mode When you plug the unit in the power stand-by mode, press the X-BASS/ DEMO button...

CD-G15000 Operation Manual
Page 17
... speaker volume on the main unit and turn it counterclockwise to BASS SOUND LEVEL. Unplug the AC power cord when connecting the subwoofer cable. To emphasize the bass, turn ON the Active Subwoofer. Subwoofer control CD-G15000 CP-G15000 Before you switch on/off point. Speaker light up and blink according to decrease the volume. During STANDBY MODE (DEMO MODE): When subwoofer is turned ON, no light will emitted from the subwoofer unit. Volume control Turn the VOLUME control clockwise to increase the volume, and turn the VOLUME control of the subwoofer...
... speaker volume on the main unit and turn it counterclockwise to BASS SOUND LEVEL. Unplug the AC power cord when connecting the subwoofer cable. To emphasize the bass, turn ON the Active Subwoofer. Subwoofer control CD-G15000 CP-G15000 Before you switch on/off point. Speaker light up and blink according to decrease the volume. During STANDBY MODE (DEMO MODE): When subwoofer is turned ON, no light will emitted from the subwoofer unit. Volume control Turn the VOLUME control clockwise to increase the volume, and turn the VOLUME control of the subwoofer...
CD-G15000 Operation Manual
Page 18
... bass frequencies, and "X-BASS" will decrease. To change to turn the power on , light illuminates around the display. FLAT No equalization. To turn the power on In CD/TUNER/TAPE mode In GAME/VIDEO mode Press the ON/STAND-BY button to a different mode, press the EQUALIZER MODE button repeatedly until the desired sound mode appears. Illumination light control When the power is 18 pressed. Note: CLASSIC For classical music. FLAT No equalization. The extra bass mode is canceled when the EQUALIZER button...
... bass frequencies, and "X-BASS" will decrease. To change to turn the power on , light illuminates around the display. FLAT No equalization. To turn the power on In CD/TUNER/TAPE mode In GAME/VIDEO mode Press the ON/STAND-BY button to a different mode, press the EQUALIZER MODE button repeatedly until the desired sound mode appears. Illumination light control When the power is 18 pressed. Note: CLASSIC For classical music. FLAT No equalization. The extra bass mode is canceled when the EQUALIZER button...
CD-G15000 Operation Manual
Page 20
... its actual playback time. CD / button on the remote control: The unit turns on and CD playback starts (regardless of the last function). / button on the main unit: The unit turns on and playback of the following buttons, the unit turns on function: When you press any of the last function starts (CD,TAPE,TUNER,GAME/VIDEO). Auto power on . Some audio CD-R and CD-RW discs may differ from the original audio source with very...
... its actual playback time. CD / button on the remote control: The unit turns on and CD playback starts (regardless of the last function). / button on the main unit: The unit turns on and playback of the following buttons, the unit turns on function: When you press any of the last function starts (CD,TAPE,TUNER,GAME/VIDEO). Auto power on . Some audio CD-R and CD-RW discs may differ from the original audio source with very...

CD-G15000 Operation Manual
Page 32
... flash and the programmed stations will be erased. Store the stations in memory, in order, starting with preset channel 1. 4 Within 30 seconds, press the MEMORY button to store that preset channel number will be tuned in memory, the station previously memorized for more than 0.5 seconds to select the desired station. When a new station is memorized, repeat the operation from step 2. 5 Repeat steps 1 - 4 to set other stations, or to change a preset station. Radio...
... flash and the programmed stations will be erased. Store the stations in memory, in order, starting with preset channel 1. 4 Within 30 seconds, press the MEMORY button to store that preset channel number will be tuned in memory, the station previously memorized for more than 0.5 seconds to select the desired station. When a new station is memorized, repeat the operation from step 2. 5 Repeat steps 1 - 4 to set other stations, or to change a preset station. Radio...

CD-G15000 Operation Manual
Page 33
... low-noise tapes for the best sound. (Metal or CrO tapes are not recommended.) Do not use C-120 tapes or poor-quality tapes, as they may cause malfunctions. Auto power off function: In the stop mode of tape operation, the main unit enters the standby mode after 15 minutes of the following buttons, the unit turns on. TAPE button on the remote control: The unit turns on function: When you . Tape play indicator Auto power on and the "TAPE" function...
... low-noise tapes for the best sound. (Metal or CrO tapes are not recommended.) Do not use C-120 tapes or poor-quality tapes, as they may cause malfunctions. Auto power off function: In the stop mode of tape operation, the main unit enters the standby mode after 15 minutes of the following buttons, the unit turns on. TAPE button on the remote control: The unit turns on function: When you . Tape play indicator Auto power on and the "TAPE" function...
CD-G15000 Operation Manual
Page 37
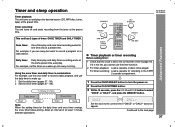
...-BY button to turn the power on and plays the desired source (CD, MP3 disc, tuner, tape) at the same preset time everyday. Daily timer: Daily timer play and once timer recording works for the daily timer and once timer overlap, the once timer takes priority. CD-G15000 CP-G15000 This unit has 2 types of at a preset time. Start Stop Start Stop Note: When the setting times for one time only...
...-BY button to turn the power on and plays the desired source (CD, MP3 disc, tuner, tape) at the same preset time everyday. Daily timer: Daily timer play and once timer recording works for the daily timer and once timer overlap, the once timer takes priority. CD-G15000 CP-G15000 This unit has 2 types of at a preset time. Start Stop Start Stop Note: When the setting times for one time only...

CD-G15000 Operation Manual
Page 38
... select the timer playback source: CD, TUNER, TAPE 1 or TAPE 2. When you select the tuner, select a station by mode. CD-G15000 Timer and sleep operation (continued) CP-G15000 4 Within 10 seconds, press the or button to select "ONCE SET" or "DAILY SET", and press the MEMORY button. 5 Press the or button to finish as in the daily timer mode. 7 Press the or button to adjust the minutes and then press the MEMORY button. 8 Set the time to select "PLAY...
... select the timer playback source: CD, TUNER, TAPE 1 or TAPE 2. When you select the tuner, select a station by mode. CD-G15000 Timer and sleep operation (continued) CP-G15000 4 Within 10 seconds, press the or button to select "ONCE SET" or "DAILY SET", and press the MEMORY button. 5 Press the or button to finish as in the daily timer mode. 7 Press the or button to adjust the minutes and then press the MEMORY button. 8 Set the time to select "PLAY...

CD-G15000 Operation Manual
Page 39
... the preset volume. 13 When the timer end time is canceled. Daily timer: The timer will not turn on or enter the power stand-by mode. 39 It will continue until it is not used. To reuse the same setting, perform the following operations. 1 Turn the power on or off. Note: When performing timer playback or recording using another unit connected to select "ONCE...
... the preset volume. 13 When the timer end time is canceled. Daily timer: The timer will not turn on or enter the power stand-by mode. 39 It will continue until it is not used. To reuse the same setting, perform the following operations. 1 Turn the power on or off. Note: When performing timer playback or recording using another unit connected to select "ONCE...
CD-G15000 Operation Manual
Page 42
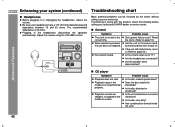
... the disc satisfy the standards? Troubleshooting chart Many potential problems can be resolved by the owner without calling a service technician. When a button is 32 ohms. Plugging in the middle or is not set to "0"? Possible cause Did a power failure occur? Reset the clock. (Refer to page 19.) Set the unit to the correct time. Advanced Features CD player Symptom Playback does not start. Are the speaker wires...
... the disc satisfy the standards? Troubleshooting chart Many potential problems can be resolved by the owner without calling a service technician. When a button is 32 ohms. Plugging in the middle or is not set to "0"? Possible cause Did a power failure occur? Reset the clock. (Refer to page 19.) Set the unit to the correct time. Advanced Features CD player Symptom Playback does not start. Are the speaker wires...
CD-G15000 Operation Manual
Page 46
.... General Power source Power consumption Dimensions Weight AC 120 V, 60 Hz P W Width: 10-1/4" (260 mm) Height: 13" (330 mm) Depth: 12-7/8" (322 mm) P lbs. (P kg) References CD player Type 5-disc multi-play compact disc player Signal readout Non-contact, 3-beam semiconductor laser pickup D/A converter 1-bit D/A converter Frequency response 20 - 20,000 Hz Dynamic range 90 dB (1 kHz) Amplifier Output power Front speakers 150 watts minimum RMS per channel into 8 ohms from...
.... General Power source Power consumption Dimensions Weight AC 120 V, 60 Hz P W Width: 10-1/4" (260 mm) Height: 13" (330 mm) Depth: 12-7/8" (322 mm) P lbs. (P kg) References CD player Type 5-disc multi-play compact disc player Signal readout Non-contact, 3-beam semiconductor laser pickup D/A converter 1-bit D/A converter Frequency response 20 - 20,000 Hz Dynamic range 90 dB (1 kHz) Amplifier Output power Front speakers 150 watts minimum RMS per channel into 8 ohms from...

CD-G15000 Operation Manual
Page 47
... mm) Depth: 9-1/8" (231 mm) 2.9 kg (6.4 lbs.)/each CD-G15000 CP-G15000 References Active subwoofer Power source Power consumption Output power Input terminals Speaker type Impedance Dimensions Weight AC 120 V, 60 Hz 120 W 400 watts minimum RMS into 6 ohms from 50 Hz to 120 Hz, 10% total harmonic distortion Subwoofer input (audio signal): 200mV / 10 k ohms at 70 Hz 10" (25 cm) woofer 6 ohms Width: 18-1/8" (460 mm) Height: 15-3/4" (400 mm...
... mm) Depth: 9-1/8" (231 mm) 2.9 kg (6.4 lbs.)/each CD-G15000 CP-G15000 References Active subwoofer Power source Power consumption Output power Input terminals Speaker type Impedance Dimensions Weight AC 120 V, 60 Hz 120 W 400 watts minimum RMS into 6 ohms from 50 Hz to 120 Hz, 10% total harmonic distortion Subwoofer input (audio signal): 200mV / 10 k ohms at 70 Hz 10" (25 cm) woofer 6 ohms Width: 18-1/8" (460 mm) Height: 15-3/4" (400 mm...


