User Manual (user Manual) (ver.1.0) (English)
Page 3
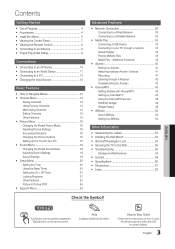
... Your PC 18 yy Sound Menu 19 Changing the Preset Sound Mode 19 Adjusting Sound Settings 19 Sound Settings 19 yy Setup Menu 20 Setting the Time 20 Using the Sleep Timer 20 Setting the On / Off Timer 21 Locking Programs 21 Other Features 22 Picture In Picture (PIP) 24 yy Support Menu 24 Advanced Features yy Network Connection 26 Connecting to a Wired Network 26 Connecting to a Wireless Network 28 yy Media Play 33 Connecting a USB Device 33 Connecting to your PC through a network 33 Screen Display 35 Playing Multiple Files 38 Media Play -
... Your PC 18 yy Sound Menu 19 Changing the Preset Sound Mode 19 Adjusting Sound Settings 19 Sound Settings 19 yy Setup Menu 20 Setting the Time 20 Using the Sleep Timer 20 Setting the On / Off Timer 21 Locking Programs 21 Other Features 22 Picture In Picture (PIP) 24 yy Support Menu 24 Advanced Features yy Network Connection 26 Connecting to a Wired Network 26 Connecting to a Wireless Network 28 yy Media Play 33 Connecting a USB Device 33 Connecting to your PC through a network 33 Screen Display 35 Playing Multiple Files 38 Media Play -
User Manual (user Manual) (ver.1.0) (English)
Page 4
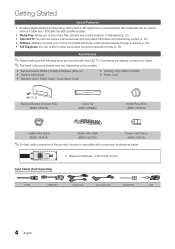
... internet services and view useful information and entertaining content (p. 43). yy Remote Control (BN59-01042A) & Batteries (AAA x 2) yy Owner's Instructions yy Warranty Card / Safety Guide / Quick Setup Guide yy Cleaning Cloth (BN63-01798B) yy Power Cord (M4 X L8) Blanking Bracket & Screw (1EA) (BN63-06543A) Cable Tie (BN61-05596A) Holder-Ring (4EA) (BN61-05280A) Holder-Wire stand (BN61-05491A) Holder-Wire (3EA) (BN61-05373A) Power Cord Clamp (AA65-30023A) ✎✎For best cable connection...
... internet services and view useful information and entertaining content (p. 43). yy Remote Control (BN59-01042A) & Batteries (AAA x 2) yy Owner's Instructions yy Warranty Card / Safety Guide / Quick Setup Guide yy Cleaning Cloth (BN63-01798B) yy Power Cord (M4 X L8) Blanking Bracket & Screw (1EA) (BN63-06543A) Cable Tie (BN61-05596A) Holder-Ring (4EA) (BN61-05280A) Holder-Wire stand (BN61-05491A) Holder-Wire (3EA) (BN61-05373A) Power Cord Clamp (AA65-30023A) ✎✎For best cable connection...

User Manual (user Manual) (ver.1.0) (English)
Page 9
.... Plug & Play is available only when the Input source is initially powered on, basic settings proceed automatically. ✎✎The product color and shape may vary depending on the model. ✎✎Connecting the power cord and antenna. Store Demo mode is displayed. 7 Enjoy your TV. yy Auto: Allows you see the volume OSD, press and hold MENU for retail environments. Press the ENTERE button. OO MENUm → Setup → Plug & Play...
.... Plug & Play is available only when the Input source is initially powered on, basic settings proceed automatically. ✎✎The product color and shape may vary depending on the model. ✎✎Connecting the power cord and antenna. Store Demo mode is displayed. 7 Enjoy your TV. yy Auto: Allows you see the volume OSD, press and hold MENU for retail environments. Press the ENTERE button. OO MENUm → Setup → Plug & Play...

User Manual (user Manual) (ver.1.0) (English)
Page 16
... automatically adapt to the light in a dark room. ¦¦ Adjusting Picture Settings OO MENUm → Picture → ENTERE Backlight / Contrast / Brightness / Sharpness / Color / Tint (G/R) Your television has several setting options for each external device connected to the TV. ¦¦ Economical Solutions The Eco Function can only make changes to Dynamic Contrast, Gamma, White Balance and LED Motion Plus. Picture Menu ¦¦ Changing the Preset Picture Mode...
... automatically adapt to the light in a dark room. ¦¦ Adjusting Picture Settings OO MENUm → Picture → ENTERE Backlight / Contrast / Brightness / Sharpness / Color / Tint (G/R) Your television has several setting options for each external device connected to the TV. ¦¦ Economical Solutions The Eco Function can only make changes to Dynamic Contrast, Gamma, White Balance and LED Motion Plus. Picture Menu ¦¦ Changing the Preset Picture Mode...

User Manual (user Manual) (ver.1.0) (English)
Page 17
... intervals by adjusting the red, green, and blue brightness. ✎✎ Available when the picture mode is set to Movie and when the external input is set to HDMI or Component. ✎✎ Some external devices may not support this function. ■■ LED Motion Plus (Off / On): Removes drag from an external device (e.g. Green: Adjust the green level. Picture Options Color Tone Size Digital Noise Filter MPEG Noise Filter HDMI Black Level Film Mode Auto Motion...
... intervals by adjusting the red, green, and blue brightness. ✎✎ Available when the picture mode is set to Movie and when the external input is set to HDMI or Component. ✎✎ Some external devices may not support this function. ■■ LED Motion Plus (Off / On): Removes drag from an external device (e.g. Green: Adjust the green level. Picture Options Color Tone Size Digital Noise Filter MPEG Noise Filter HDMI Black Level Film Mode Auto Motion...

User Manual (user Manual) (ver.1.0) (English)
Page 18
... what the TV is activated. Press the ENTERE button. 5. Judder Reduction: Adjusts the judder reduction level from video sources when playing films. Reset: Reset the custom settings. ■■ Auto Protection Time (2 hours / 4 hours / 8 hours / 10 hours / Off): Set the time the screen remains idle with an HDMI/DVI cable. 18 English Press the ENTERE button. 3. Auto Visualization: When changing analog channels, displays signal strength. ✎✎ Only available for optimum quality...
... what the TV is activated. Press the ENTERE button. 5. Judder Reduction: Adjusts the judder reduction level from video sources when playing films. Reset: Reset the custom settings. ■■ Auto Protection Time (2 hours / 4 hours / 8 hours / 10 hours / Off): Set the time the screen remains idle with an HDMI/DVI cable. 18 English Press the ENTERE button. 3. Auto Visualization: When changing analog channels, displays signal strength. ✎✎ Only available for optimum quality...

User Manual (user Manual) (ver.1.0) (English)
Page 20
... audio receiver. DST (Daylight Saving Time) (Off / On): Switches the Daylight Saving Time function on each channel, set to Normal. ■■ Night: This mode provides an improved sound experience compared to Normal mode, making almost no video signal, both speakers will be mute. Auto Volume (Off / Normal / Night) To equalize the volume level on or off the TV after a preset period of the TV. Clock Mode (Auto / Manual) -- Setup Menu...
... audio receiver. DST (Daylight Saving Time) (Off / On): Switches the Daylight Saving Time function on each channel, set to Normal. ■■ Night: This mode provides an improved sound experience compared to Normal mode, making almost no video signal, both speakers will be mute. Auto Volume (Off / Normal / Night) To equalize the volume level on or off the TV after a preset period of the TV. Clock Mode (Auto / Manual) -- Setup Menu...

User Manual (user Manual) (ver.1.0) (English)
Page 21
xx Each USB you use is not available in HDMI, Component or PC mode. The user must set to control what your children are watching. -- ALL: Lock all the categories in the USB, the Slide Show will be selected. V-Chip Lock (Off / On): You can block rated TV Programs. TV Parental Guidelines: You can block TV programs depending on by an adult. / NC-17: No...
xx Each USB you use is not available in HDMI, Component or PC mode. The user must set to control what your children are watching. -- ALL: Lock all the categories in the USB, the Slide Show will be selected. V-Chip Lock (Off / On): You can block rated TV Programs. TV Parental Guidelines: You can block TV programs depending on by an adult. / NC-17: No...

User Manual (user Manual) (ver.1.0) (English)
Page 23
... game console and connect another external device, set to the "Network Connection" instructions (p. 26). Options include Default, Transparent, Translucent, Solid and Flashing. Network (Network Type / Network Setup / Network Test / SWL(Samsung Wireless Link) / SWL connect) For details on the program being broadcasted. xx You cannot set up options, refer to have a Samsung Mobile phone/device which support BD Wise. xx If Game Mode is turned on the broadcasting signal, the Analog Caption function may or may not work with digital channels.) Default...
... game console and connect another external device, set to the "Network Connection" instructions (p. 26). Options include Default, Transparent, Translucent, Solid and Flashing. Network (Network Type / Network Setup / Network Test / SWL(Samsung Wireless Link) / SWL connect) For details on the program being broadcasted. xx You cannot set up options, refer to have a Samsung Mobile phone/device which support BD Wise. xx If Game Mode is turned on the broadcasting signal, the Analog Caption function may or may not work with digital channels.) Default...
User Manual (user Manual) (ver.1.0) (English)
Page 24
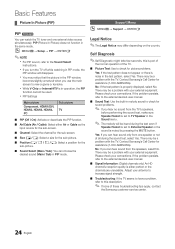
... external equipment. Support Menu OO MENUm → Support → ENTERE Legal Notice ✎✎The Legal Notice may be a problem with the TV. Adjust your external equipment. Contact Samsung's Call Center for assistance (1-800-SAMSUNG). If the problem persists, refer to the external device's user manual. ■■ Signal Information: (Digital channels only) An HD channel's reception quality is either Air or Cable as the input source for the sub-screen...
... external equipment. Support Menu OO MENUm → Support → ENTERE Legal Notice ✎✎The Legal Notice may be a problem with the TV. Adjust your external equipment. Contact Samsung's Call Center for assistance (1-800-SAMSUNG). If the problem persists, refer to the external device's user manual. ■■ Signal Information: (Digital channels only) An HD channel's reception quality is either Air or Cable as the input source for the sub-screen...
User Manual (user Manual) (ver.1.0) (English)
Page 29
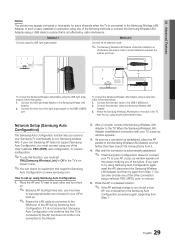
... USB 1 (HDD) port. 2. Connect the extension cable to the Samsung Wireless LAN Adapter. 2. Connect the extension cable and Samsung Wireless LAN Adapter. 3. Network Setup (Samsung Auto Configuration) The Samsung Auto Configuration function lets you connect your non-Samsung AP does not support Samsung Auto Configuraton, you of the other connection setup methods: PBC (WPS), auto, or manual. 5. If it is not connected, Samsung Auto Configuration only confirms that is not affected by radio interference. After 2 minutes, connect the Samsung Wireless LAN Adapter to try using Samsung Auto...
... USB 1 (HDD) port. 2. Connect the extension cable to the Samsung Wireless LAN Adapter. 2. Connect the extension cable and Samsung Wireless LAN Adapter. 3. Network Setup (Samsung Auto Configuration) The Samsung Auto Configuration function lets you connect your non-Samsung AP does not support Samsung Auto Configuraton, you of the other connection setup methods: PBC (WPS), auto, or manual. 5. If it is not connected, Samsung Auto Configuration only confirms that is not affected by radio interference. After 2 minutes, connect the Samsung Wireless LAN Adapter to try using Samsung Auto...
User Manual (user Manual) (ver.1.0) (English)
Page 32
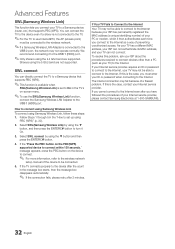
...(Samsung Wireless Link) function, connect the Samsung Wireless LAN Adpater to the USB 1 (HDD) port. The internet connection may not be connected to the wireless network. ✎✎If a Samsung Wireless LAN Adapter is connected to turn it On. 3. Advanced Features SWL(Samsung Wireless Link) This function lets you connect your TV to a Samsung device (router, etc.) that supports PBC (WPS). ✎✎This function is available when SWL(Samsung Wireless Link) is set up using...
...(Samsung Wireless Link) function, connect the Samsung Wireless LAN Adpater to the USB 1 (HDD) port. The internet connection may not be connected to the wireless network. ✎✎If a Samsung Wireless LAN Adapter is connected to turn it On. 3. Advanced Features SWL(Samsung Wireless Link) This function lets you connect your TV to a Samsung device (router, etc.) that supports PBC (WPS). ✎✎This function is available when SWL(Samsung Wireless Link) is set up using...

User Manual (user Manual) (ver.1.0) (English)
Page 40
... xx Connect the Optical cable between the DIGITAL AUDIO OUT (OPTICAL) jack on it. xx Anynet+ works when the AV device supporting Anynet+ is an Anynet+ logo on your Samsung TV's remote. To be used only with your TV and the Digital Audio Input on status. Some HDMI cables may not support Anynet+ functions. t Anynet+ is Anynet+? Anynet Device 1 or 2) directly to 12 AV devices in the standby...
... xx Connect the Optical cable between the DIGITAL AUDIO OUT (OPTICAL) jack on it. xx Anynet+ works when the AV device supporting Anynet+ is an Anynet+ logo on your Samsung TV's remote. To be used only with your TV and the Digital Audio Input on status. Some HDMI cables may not support Anynet+ functions. t Anynet+ is Anynet+? Anynet Device 1 or 2) directly to 12 AV devices in the standby...

User Manual (user Manual) (ver.1.0) (English)
Page 41
... connected to search devices. 2. Shows the Anynet+ device list. You cannot cancel the operation during the switching operation. Anynet+ Menu View TV Device List (device_name) MENU (device_name) INFO Recording: (*recorder) Stop Recording: (*recorder) Receiver Description Changes Anynet+ mode to refresh the list. 2. Shows the connected device menus. If a DVD recorder is played through the receiver. Starts recording immediately using a Samsung recorder. 1. If you want, press the Red button to TV broadcast mode...
... connected to search devices. 2. Shows the Anynet+ device list. You cannot cancel the operation during the switching operation. Anynet+ Menu View TV Device List (device_name) MENU (device_name) INFO Recording: (*recorder) Stop Recording: (*recorder) Receiver Description Changes Anynet+ mode to refresh the list. 2. Shows the connected device menus. If a DVD recorder is played through the receiver. Starts recording immediately using a Samsung recorder. 1. If you want, press the Red button to TV broadcast mode...
User Manual (user Manual) (ver.1.0) (English)
Page 44
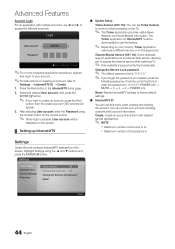
... English Channel Bound Service (Off / On): Some channels support applications as an Internet data service, allowing you want to create an account, press the Red button; After selecting User account, enter the Password using the ▲ and ▼ buttons and press the ENTERE button. Advanced Features Account Login For an application with desired service applications. ✎✎ NOTE xx Maximum number of remote control buttons to reset the password to "0-0-0-0": POWER...
... English Channel Bound Service (Off / On): Some channels support applications as an Internet data service, allowing you want to create an account, press the Red button; After selecting User account, enter the Password using the ▲ and ▼ buttons and press the ENTERE button. Advanced Features Account Login For an application with desired service applications. ✎✎ NOTE xx Maximum number of remote control buttons to reset the password to "0-0-0-0": POWER...
User Manual (user Manual) (ver.1.0) (English)
Page 48
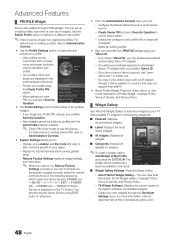
... resets the Yahoo Service: POWER (on) → MUTE → 9 → 4 → 8 → EXIT → POWER (off) → POWER (on) → YAHOO! (If Yahoo Service is displayed on setting Owner PIN, refer to control other profiles. -- For instructions on the TV Screen, You should stop the Yahoo Service using Yahoo! Change your region. -- Configure the Screen Saver timeout to your Location and Zip Code (US only) to tailor contents specific...
... resets the Yahoo Service: POWER (on) → MUTE → 9 → 4 → 8 → EXIT → POWER (off) → POWER (on) → YAHOO! (If Yahoo Service is displayed on setting Owner PIN, refer to control other profiles. -- For instructions on the TV Screen, You should stop the Yahoo Service using Yahoo! Change your region. -- Configure the Screen Saver timeout to your Location and Zip Code (US only) to tailor contents specific...

User Manual (user Manual) (ver.1.0) (English)
Page 56
... Auto program. ✎✎ Many HD channels are using an external device, check the device's audio output option (ex. The speakers are connected to the correct jacks. The picture is properly displaying test image. (go to MENU - Eco Solution - Picture Reset) (p. 18). It may cause picture distortion, especially in the store. • If you have an analog cable/satellite box, upgrade to an HD digital set to Screen Fit, change your cable box's audio option to HDMI...
... Auto program. ✎✎ Many HD channels are using an external device, check the device's audio output option (ex. The speakers are connected to the correct jacks. The picture is properly displaying test image. (go to MENU - Eco Solution - Picture Reset) (p. 18). It may cause picture distortion, especially in the store. • If you have an analog cable/satellite box, upgrade to an HD digital set to Screen Fit, change your cable box's audio option to HDMI...

User Manual (user Manual) (ver.1.0) (English)
Page 57
... a TV problem. Go to the Cable/Set user manual for the SAMSUNG TV code. 57 English Channel - Try changing Caption Mode Service1 to the wall outlet and the TV. • When watching TV from an antenna or cable connection, the TV will appear during movies that the set top box remote control doesn't turn on. • Make sure the AC power cord is securely plugged in the right direction. • Clean the sensor's transmission...
... a TV problem. Go to the Cable/Set user manual for the SAMSUNG TV code. 57 English Channel - Try changing Caption Mode Service1 to the wall outlet and the TV. • When watching TV from an antenna or cable connection, the TV will appear during movies that the set top box remote control doesn't turn on. • Make sure the AC power cord is securely plugged in the right direction. • Clean the sensor's transmission...

User Manual (user Manual) (ver.1.0) (English)
Page 58
... available with digital channels from an Antenna / RF/Coax connection (p. 24). • Remove the base stand from the TV. Press the SOURCE button to select TV mode, and go to produce. the screen. ✎✎This TFT LED panel uses a panel consisting of sub pixels which require sophisticated technology to MENU → Setup → Plug & Play → ENTERE(p. 9). • Check the cable connections and reconnect them. • Loss of audio or video can...
... available with digital channels from an Antenna / RF/Coax connection (p. 24). • Remove the base stand from the TV. Press the SOURCE button to select TV mode, and go to produce. the screen. ✎✎This TFT LED panel uses a panel consisting of sub pixels which require sophisticated technology to MENU → Setup → Plug & Play → ENTERE(p. 9). • Check the cable connections and reconnect them. • Loss of audio or video can...
User Manual (user Manual) (ver.1.0) (English)
Page 63
... Network Connection Network Setup O ON/OFF button Optimal resolution P Password Photos Picture Size PIP (Picture in Picture) Plug & Play Power Indicator 8, 14 14 18 16 17 12 R Receiver Recording Remote Control Repeat Mode RGB Only Mode Rotate 10, 40 11, 40 2 43 22 59 33 23 23 20 37 13 26 27 8 12 44 38 17, 39 24 9 7 S Self Diagnosis Sharpness Signal Information Sleep Timer Slide Show Software Upgrade Source List Speaker Select Specifications Standby mode Symbol T Timer Title Tools Troubleshooting TV Speaker U USB Drive V Video Formats Videos Volume W Wall Mount...
... Network Connection Network Setup O ON/OFF button Optimal resolution P Password Photos Picture Size PIP (Picture in Picture) Plug & Play Power Indicator 8, 14 14 18 16 17 12 R Receiver Recording Remote Control Repeat Mode RGB Only Mode Rotate 10, 40 11, 40 2 43 22 59 33 23 23 20 37 13 26 27 8 12 44 38 17, 39 24 9 7 S Self Diagnosis Sharpness Signal Information Sleep Timer Slide Show Software Upgrade Source List Speaker Select Specifications Standby mode Symbol T Timer Title Tools Troubleshooting TV Speaker U USB Drive V Video Formats Videos Volume W Wall Mount...


