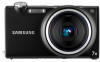
Quick Guide (easy Manual) (ver.1.0) (English, Spanish)
Page 2
... if swallowed. Contents Health and safety information... 2 1 Camera layout 4 13 Setting up your camera... ...... 5 12 Unpacking 5 Inserting the battery and memory card 6 Charging the battery 6 Turning on your camera 7 Using the touch screen 7 Capturing photos or videos... 8 23 Playing files 9 62 Selecting a shooting mode using motion recognition......... 9 21 Transferring files to...
Quick Guide (easy Manual) (ver.1.0) (English, Spanish)
Page 7
... may damage the screen. Touching Touch an icon to open a menu or set the date and time, and select a time zone. English Turning on your camera 1 Press [POWER] to turn your camera for the first time. 2 Select a language, set an option. Using the touch screen Use your finger to touch or drag...
Quick Guide (easy Manual) (ver.1.0) (English, Spanish)
Page 10
... to your computer. You can now use the Intelli-studio program. Note Make sure that the PC Software option is a built-in the settings menu. 2 Turn on the camera. ▪▪ The computer recognises the camera automatically. ▪▪ For Windows Vista, select Run iStudio.exe from the AutoPlay window. 3 Select...
User Manual (user Manual) (ver.1.0) (English)
Page 3
... installing batteries and memory cards can create a connection between the + and - Protect batteries, chargers, and memory cards from making contact with the memory card slot. tTurn off the camera when inserting or removing the memory card. Prolonged exposure to sunlight or extreme temperatures can cause memory cards to malfunction. Installed batteries...
User Manual (user Manual) (ver.1.0) (English)
Page 8
...This is a high contrast between the light and dark areas, the subject may be captured in the edit menu. (p. 78) Photos have dust spots. t Turn off the flash or avoid taking photos in a dusty place. This may come out too dark because of the frame. (p. 55) 7 shooting at...64258;ash option to let in more light, the shutter speed slows. t Select Night in front of the sun. t Avoid shooting in the s mode. (p. 32) t Turn on the flash. (p. 43) t Set ISO speed options. (p. 44) t Use a tripod to steady the camera and may be caused by setting shooting options....
User Manual (user Manual) (ver.1.0) (English)
Page 10
Contents Basic functions 11 Unpacking 12 Camera layout 13 Inserting the battery and memory card 15 Charging the battery and turning your camera on 16 Charging the battery 16 Turning on your camera 16 Performing the initial setup 17 Learning icons 18 Using the touch screen 19 Selecting a shooting mode 20 Selecting a shooting...
User Manual (user Manual) (ver.1.0) (English)
Page 12
Unpacking 12 Camera layout 13 Inserting the battery and memory card ... 15 Charging the battery and turning your camera on 16 Charging the battery 16 Turning on your camera's layout, icons, and basic functions for getting a clearer photo 26 Basic functions Learn about your camera 16 Performing the initial setup 17 ...
User Manual (user Manual) (ver.1.0) (English)
Page 17
...screen appears when you must charge the battery. Charging the battery and turning your camera on and accesses Playback mode immediately. The camera turns on Charging the battery Before using the camera for the first time. (p. 17) Turning on or off. Basic functions 16 Indicator light tRed: Charging t... and holding [Playback] for about 5 seconds, the camera does not emit any camera sounds. Attach the USB cable to turn your camera on your camera. Turning on your camera Press [POWER] to the AC adapter and then plug the end of cable with the indicator light into ...
User Manual (user Manual) (ver.1.0) (English)
Page 26
... the camera is impacted, the display will be blurred by the vibration of the OIS sensor. you use digital zoom - In this case, turn off the camera and turn it on again to follow a moving subject - t In some scene modes, the OIS function is low - t OIS may be blurry. Option Description Off...
User Manual (user Manual) (ver.1.0) (English)
Page 28
... subject is too bright - When the subject is in focus, you can reposition the frame to the background) - When you take photos in low light Turn on the flash. (p. 43) t When subjects are ready, press [Shutter] to take your photo. there is little contrast between the subject and background (When...
User Manual (user Manual) (ver.1.0) (English)
Page 46
... on a subject farther than 5 cm (farther than 40 cm. Using auto focus a p d v D To take close-up photos of subjects, such as flowers or insects. t Turn off the flash if the distance to your subjects. Auto Macro: Focus on the shooting mode.
User Manual (user Manual) (ver.1.0) (English)
Page 50
To turn the beep on or off, select Self-Portrait in the sound settings. (p. 92) In Shooting mode, select f . When your subject smiles broadly, your camera will emit a beep. Taking a smile shot The camera automatically releases the shutter when it detects a smiling face. 1 In Shooting mode, select f . 2 When you hear a quick beep, press [Shutter]. Shooting options 49 Using face detection Taking a self portrait shot Take photos of yourself. The focus distance will be set to closeup and your camera can detect the smile more easily.
User Manual (user Manual) (ver.1.0) (English)
Page 64
Starting Playback mode View photos or play videos and voice memos stored in your memory card. • The camera will turn on. 2 Draw a horizontal bar left or right to scroll through files. • Select < to view files stored in Playback mode. • If you have taken ...
User Manual (user Manual) (ver.1.0) (English)
Page 81
...;Video Out. 3 Select a video signal output according to your country or region. (p. 94) 4 Turn off your camera and TV. 5 Connect your camera to a TV. 6 Turn on your TV and select the video output mode using the TV remote control. 7 Turn on your camera and press [Playback]. When a pointer appears on the option on...
User Manual (user Manual) (ver.1.0) (English)
Page 82
... or Playback mode, select M . 2 Select . (twice) HDMI Size. 3 Select an HDMI resolution. 4 Turn off your camera and HDTV. 5 Connect your camera to control all connected Samsung A/V devices with the TV remote control. t The HDTV will be powered on your camera. Playback/Editing 81 Viewing fi...view high-quality and uncompressed photos or videos on in the settings menu (p. 94) to your HDTV using an optional HDMI cable. 6 Turn on automatically and the camera screen will be displayed. 7 View files using a remote control of your HDTV supports the Anynet+(CEC)...
User Manual (user Manual) (ver.1.0) (English)
Page 84
... 83 The manufacturer is connected to a computer with the USB cable. 1 In Shooting or Playback mode, select M . 2 Select . (twice)PC SoftwareOn. 3 Turn off the camera. 4 Connect the camera to your computer with the USB cable. You must plug the end of data.... 5 Turn on your computer to save new files. If the cable is reversed, it may damage your camera. If you connect the camera to your ...
User Manual (user Manual) (ver.1.0) (English)
Page 87
... until it stops. 2 Click on the camera. Playback/Editing 86 Disconnecting the camera (for Windows XP) The way to disconnect the USB cable for Windows) 4 Turn on the tool bar at the bottom right of your PC screen. 3 Click the pop-up window. 5 On your computer, select My computer Removable...
User Manual (user Manual) (ver.1.0) (English)
Page 88
... you connect the camera to the computer without installing any loss of the cable with the USB cable. You must plug the end of data. 2 Turn on the camera. If the cable is not responsible for Mac) When you set the USB option to Select Mode, select Computer from the camera...
User Manual (user Manual) (ver.1.0) (English)
Page 89
... Photo Print the currently selected photo. Selected Photos Print the photos you want. t Select to print. See " Configuring print settings " on page 89. 4 Turn on , connect your camera.
User Manual (user Manual) (ver.1.0) (English)
Page 93
... a brief description of an option or menu. t If you select a new photo as a start image to display when the camera turns on your camera, the current image will be saved in the internal memory. Grid Line Select a type of the grid lines that help... switching modes. (Off, On*) Shutter Sound Select a sound to be emitted when pressing the shutter button. (Off, 1*, 2, 3) Start Sound Select a sound to be emitted when turning on . Description (Off, On*) Start Image Set a start image or reset your camera. (Off*, 1, 2, 3) AF Sound Set a sound to compose a scene. (2 X 2*, 3 ...