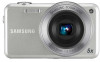
User Manual (user Manual) (ver.1.0) (English)
Page 8
... in a dusty place. • Set ISO sensitivity options. (p. 56) Photos are blurred when shooting at night. This can make it difficult to Red-eye or Red-eye Fix. (p. 54) • If the photo has already been captured, select Red-eye Fix in more light, the shutter speed slows. Basic troubleshooting Learn to ensure the subject is in low light conditions or hold the camera incorrectly. Subjects come out...
User Manual (user Manual) (ver.1.0) (English)
Page 9
... view f 83 • Viewing files as thumbnails f 84 • Deleting files on the memory card f 85 • Viewing files as a slide show f 87 • Viewing files on a TV f 96 • Connecting your camera to a computer f 97 • Adjusting sound and volume f 107 • Adjusting the brightness of the display f 108 • Changing the display language f 109 • Setting the date and time f 109 • Before contacting a service...
User Manual (user Manual) (ver.1.0) (English)
Page 10
... battery and memory card 16 Charging the battery and turning on your camera ...... 17 Charging the battery 17 Turning on your camera 17 Performing the initial setup 18 Learning icons 20 Using the touch screen 21 Setting the touch screen and sound 23 Setting the display type for the touch screen 23 Setting the sound 23 Using the Home screen 24 Accessing the Home screen 24 Icons on the Home screen 24 Rearranging icons 25 Capturing photos 26 Zooming 27 Reducing camera...
User Manual (user Manual) (ver.1.0) (English)
Page 11
... shot 62 Detecting eye blinking 63 Using Smart Face Recognition 63 Registering faces as your favorites (My Star 64 Adjusting brightness and color 66 Adjusting the exposure manually (EV 66 Compensating for backlighting (ACB 67 Changing the metering option 67 Selecting a light source (White balance 68 Using burst modes 70 Applying effects/Adjusting images 71 Applying Smart Filter effects 71 Adjusting your photos 74 Setting zoom sound 75 Available shooting options by shooting mode 76...
User Manual (user Manual) (ver.1.0) (English)
Page 12
... by connecting the camera as a removable disk 100 Disconnecting the camera (for Windows XP 101 Transferring files to your Mac computer 102 Printing photos with a PictBridge photo printer ....... 103 Settings 105 Settings menu 106 Accessing the settings menu 106 Sound 107 Display 107 Connectivity 108 General 109 Appendixes 111 Error messages 112 Camera maintenance 113 Cleaning your camera 113 Using or storing the camera 114 About memory cards 115 About the battery 117 Before contacting a service center 121 Camera speci...
User Manual (user Manual) (ver.1.0) (English)
Page 13
... battery and memory card ... 16 Charging the battery and turning on your camera 17 Charging the battery 17 Turning on the Home screen 24 Rearranging icons 25 Capturing photos 26 Zooming 27 Reducing camera shake (DIS 29 Tips for shooting. Basic functions Learn about your camera 17 Performing the initial setup 18 Learning icons 20 Using the touch screen 21 Setting the touch screen and sound ...... 23 Setting the display type for the touch screen 23 Setting the sound 23 Using...
User Manual (user Manual) (ver.1.0) (English)
Page 31
... shoot in red. The camera adjusts the focus and exposure automatically. Tips for getting a clearer photo Holding your camera correctly Ensure nothing is displayed Half-press [Shutter] and adjust the focus. Reducing camera shake Set the Digital Image Stabilization option to Slow Sync or Off. Camera shake The camera sets the aperture value and shutter speed automatically. Basic functions 30 The aperture remains open longer and it may be harder to hold the camera still. • Use...
User Manual (user Manual) (ver.1.0) (English)
Page 37
... photo. Using the Beauty Shot mode In Beauty Shot mode, you can capture a portrait with options to hide facial imperfections. 1 On the Home screen, touch . 2 Drag the sliders to adjust Face Tone and Face Retouch. • For example, increase the Face Tone setting to make skin appear lighter. Extended functions 36 Using shooting modes Using the Night Shot mode In Night Shot mode, you can use a slow shutter speed to extend the time...
User Manual (user Manual) (ver.1.0) (English)
Page 39
... high-speed videos, use memory cards with slow writing speeds will not support highresolution videos and high-speed videos. Extended functions 38 EV My screen OK Cancel Reset 4 Touch o to the right. Using shooting modes 3 Drag the icon into a desired box on the left. • To remove shortcuts, drag an icon to save. You can record high-definition videos of options, refer to page 49.) 3 Press [Shutter] or touch to start recording. 4 Press [Shutter] again...
User Manual (user Manual) (ver.1.0) (English)
Page 42
... shooting distance is not within the optimum range, you use. 3 Drag the sliders to adjust Blur and Tone. Blur Tone 4 Half-press [Shutter] to focus. • When the camera can capture a photo but the Object Highlight effect will appear. Using effect modes Capture photos or record videos with the Optical zoom at 3X or higher. • Digital zoom is not available in Object Highlight mode. • Use...
User Manual (user Manual) (ver.1.0) (English)
Page 43
... focus. 4 Press [Shutter] to the frame you select. 1 On the Home screen, touch . 2 Select a desired frame. In Magic Frame Shot mode, the resolution is automatically set to your photos. Using the Photo Filter mode In Photo Filter mode, you can apply various frame effects to your photos. Using effect modes Using the Magic Frame Shot mode In Magic Frame Shot mode, you can apply various filter effects to . Extended functions...
User Manual (user Manual) (ver.1.0) (English)
Page 50
... shot 62 Detecting eye blinking 63 Using Smart Face Recognition 63 Registering faces as your favorites (My Star 64 Adjusting brightness and color 66 Adjusting the exposure manually (EV) ...... 66 Compensating for backlighting (ACB) ...... 67 Changing the metering option 67 Selecting a light source (White balance) ... 68 Using burst modes 70 Applying effects/Adjusting images ......... 71 Applying Smart Filter effects 71 Adjusting your photos 74 Setting zoom sound 75 Available shooting options by shooting mode 76...
User Manual (user Manual) (ver.1.0) (English)
Page 56
...;ash will display the shake warning when you are shooting in low light. Fill in your subjects are not available if you set burst options or select SelfPortrait or Blink Detection. • Make sure that your photo. Red-eye Fix: • The flash fires when the subject or background is dark, and the camera corrects red-eyes through its advanced software analysis...
User Manual (user Manual) (ver.1.0) (English)
Page 96
...-compatible printer at home. • Photos with dimensions that are wider than the paper may be displayed. 2 Touch a photo. 3 Touch m Red-eye Fix. • To view the original photo, touch Before. • To view the adjusted photo, touch After. 4 Touch s to a print shop that your changes. Ensure that supports DPOF (Digital Print Order Format) or you select. • You cannot set DPOF options for convenient printing on your memory card for photos...
User Manual (user Manual) (ver.1.0) (English)
Page 109
... or printer with a USB cable. • Computer*: Connect your camera to a computer for printing files. • Select Mode: Manually select the USB mode when you connect your camera to your camera to a device. Set the duration for reviewing a captured image before returning to the Shooting mode. (Off, 0.5 sec*, 1 sec, 3 sec) If you perform no operations for 30 seconds, the camera automatically switches to Power save mode. (Off*, On) • In Power save power. Settings menu Item Display Brightness Quick View Power Save * Default Description Adjust...
User Manual (user Manual) (ver.1.0) (English)
Page 111
... change when you replace the battery. • The camera will not automatically turn on in dark places to help you focus. (Off, On*) Format the internal memory and the memory card (formatting will delete all files, including protected files). (Yes, No) Errors can occur if you are playing a slide show or videos, and when you use a memory card formatted by another brand of the photo. • Some printer models may not print the date and time...
User Manual (user Manual) (ver.1.0) (English)
Page 122
... lose power more quickly in some modes. Keep the battery warm by putting it again. Delete unnecessary files or insert a new card. • Format the memory card. • The memory card is diminishing quickly. This is switched on your camera at a service center, be sure to also leave the other components that may be set to the malfunction, such as the memory card and battery. Get a new memory card. • Make...
User Manual (user Manual) (ver.1.0) (English)
Page 135
... Charging 17 Cleaning camera body 113 lens 113 touch screen 113 Close up shot Close up mode 35 macro 57 Connecting to a computer Mac 102 Windows 97 Contrast Playback mode 93 Shooting mode 74 D Date/Time set 109 Deleting files 85 Digital Image Stabilization (DIS) 29 DIgital Print Order Format (DPOF) 95 Digital zoom 28 Disconnecting the camera 101 Display brightness 108 Display set 23 E Editing photos 91 Editing videos capturing 89 trimming 89 Enlarging 86 Error messages 112 F Face detection 61 Flash Auto...
User Manual (user Manual) (ver.1.0) (English)
Page 136
Index Focus sound 107 Formatting 110 G Guide lines 107 H Half-press shutter 30 Home button 15 Home screen 24 I Icons Home screen 24 Playback mode 81 Shooting mode 20 Image adjustment brightness Playback mode 93 Shooting mode 66 contrast Shooting mode 74 red-eye 95 saturation Playback mode 93 Shooting mode 74 sharpness 74 Image quality 51 Imprint 110 Intelli-studio 99 Intelli zoom 28 ISO sensitivity 56 L Language settings 109 Learning icons 20 M Macro 57 Magic Frame Shot mode 42 Memory card caution 116 Insert 16 Metering Center...
User Manual (user Manual) (ver.1.0) (English)
Page 137
... Recognition 63 Smart Filter Playback mode 93 Shooting mode 71 Smart Movie mode 39 Smile shot 62 Sound settings 23 Start image 91, 107 Status lamp 15 T Thumbnails 82 Timer timer lamp 14 Using the timer 53 Time settings 18, 109 Time zone settings 18, 109 Touch calibration 19, 110 Touch screen 15 Transferring files Mac 102 Windows 97 Tripod mount 14 U Unpacking 13 USB port 14 User buttons 37 Using the touch screen flicking 21...